Welcome to Laser Pointer Forums - discuss green laser pointers, blue laser pointers, and all types of lasers

LPF Donation via Stripe | LPF Donation - Other Methods

Links below open in new window

ArcticMyst Security by Avery

NUBM44 + 4.5A driver on 2 AA's

Joined
Jul 13, 2010
Messages
98
Points
8
This setup won't draw enough to notice, it's minute, by comparison, not even one percent. These batteries have current to spare, they are made to be shorted out. So you also never need protection circuitry, or any of that. They have to be charged like other lithium batteries, but that's where it ends. If I had to put in a regulator without soldering anything, I'd get a 3 wire servo connector, a small one, and just plug the thing into the end. Then you can do the whole thing just by splicing wires. Use an LM78L05 5v regulator if you want more power. If you use a plug you could try both. I love regulators, I have a coffee can full of them. Transistors can be handy, too.


Joined
Jul 13, 2010
Messages
98
Points
8
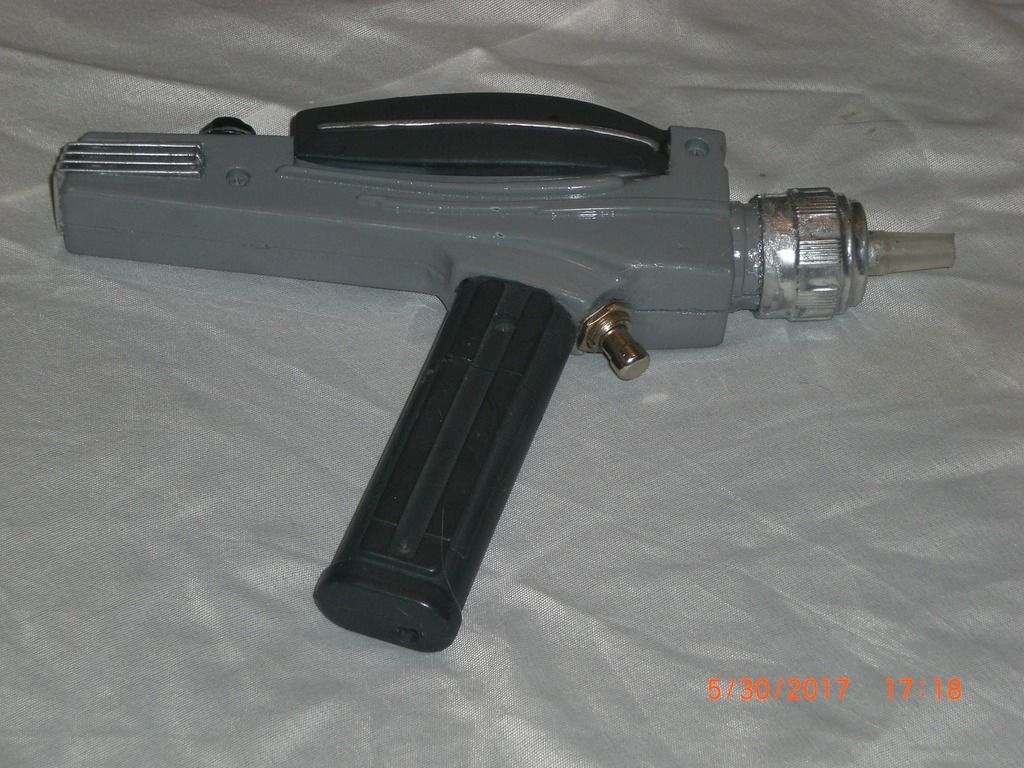
I repainted the phaser, I'll take some pictures of it tomorrow, my neighbor borrowed my tripod, and I've given up on taking a decent picture of anything closeup without it. That's the one thing about the Rubie's model, it has to be painted, and paint doesn't like sticking to plastic very much.
I have considered "the phaser" as an ongoing project, that will probably never stop, until I get bored with it, as technology improves. This is now about the fourth version, but I started over from scratch, on this one, and I managed to keep it under $250, which is a new record low cost. I know who makes the nice, machined, metal parts, but those are a little rich for my tastes, and besides, I kind of like that part of it says "toy", and doesn't jump right out as being otherwise, until you pick it up, anyway. My earlier generations, with the exposed metal fins on the heat sink, although they looked great, they strongly suggested that something more was going on there. I like the surprise factor when I turn it on for someone the first time, and do my best "mad scientist" grin and insane laugh, and get to work burning things, and popping balloons.
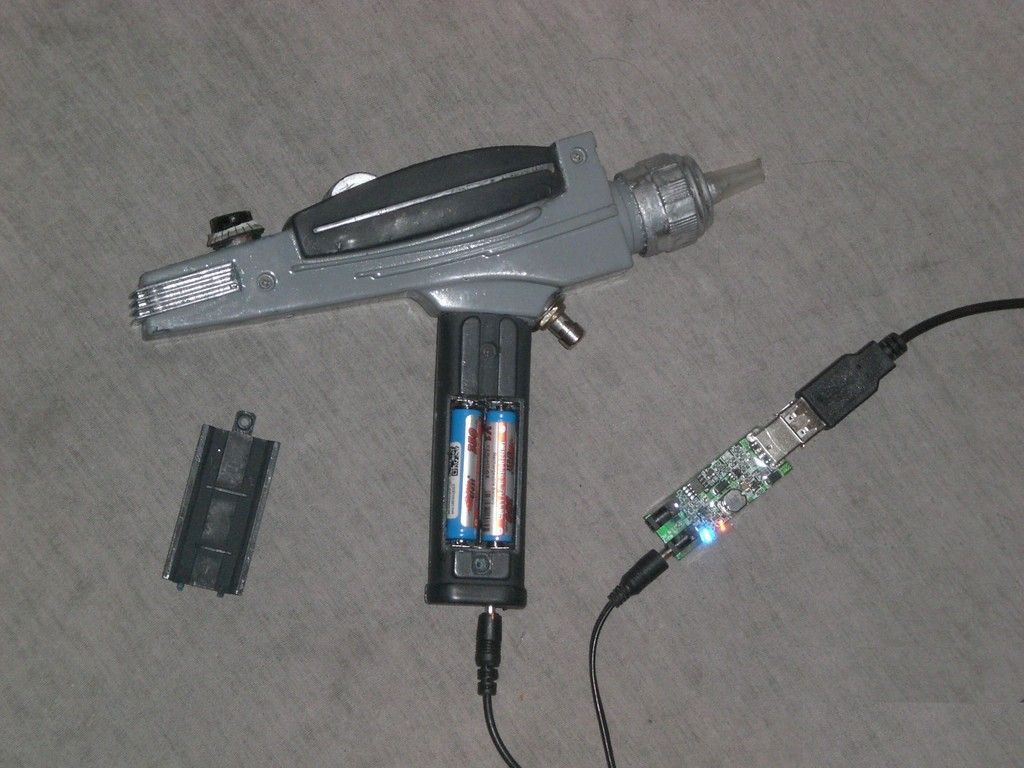
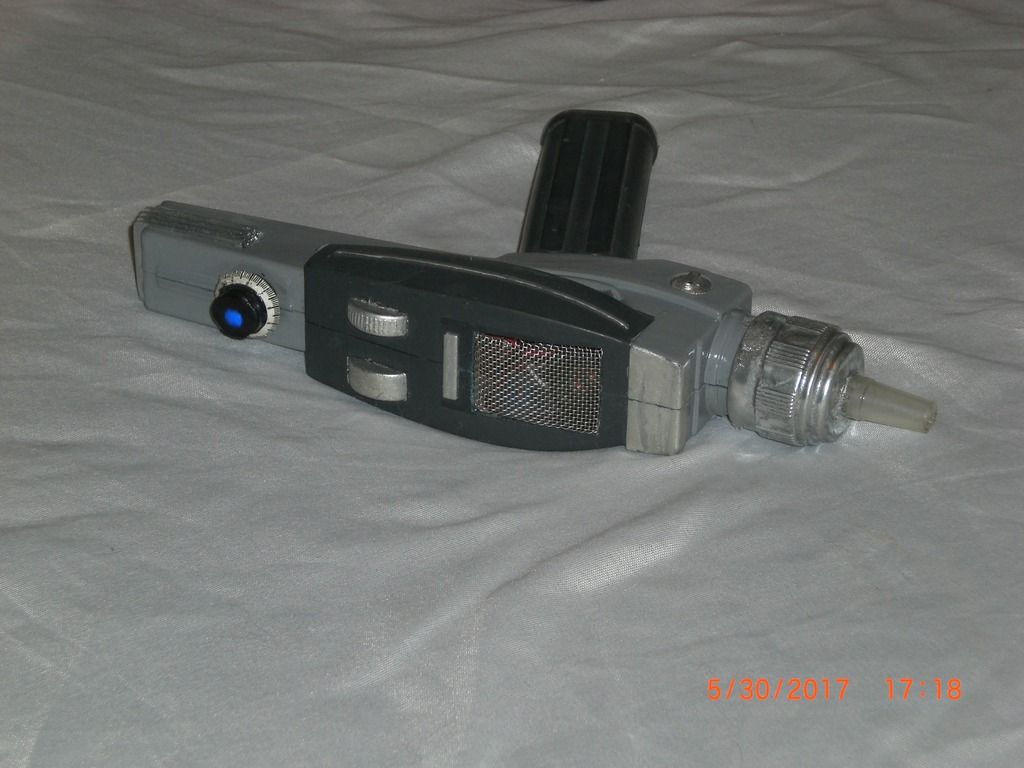
Besides, if I am going to start putting in real, metal parts, the first thing I would do is make the model's fake heat sink on the back of the model (that the Rubies has an extra piece for) out of metal, and use that to heat sink the driver board, rather than the knob on the front. I spent many hours trying to scheme a way to do that with the tools in my shed, somehow, but couldn't come up with anything practical. I thought of soldering it together with the sheet copper I used to make the actual heat sink that I made, and hid inside. But then I'd want to electroplate it, and nothing will stick to the lead solder, which would leave me painting it, which defeats the entire purpose for doing it in the first place. It kind of has to be machined. If I could get around that, then one that looks completely real would be in order. My study of the original model design gave me some insights, I was impressed with it, really, someone put a lot of thought into what they thought (in the '60's) a real energy weapon would have to have, the first thing I noticed was that heat sink on the back of it, and I thought that I would make the handle part a removable battery, and felt so vindicated by pictures of one of the actual prop models that that's exactly what they did. It made sense, and all of those little details become so practical when you are trying to build an actual energy weapon that looks like it. Except their concept that the top part, which would have the really expensive parts, is it's own unit, with the base part being an amplifier, and larger battery adapter, that the palm phaser plugs into, for more power and battery duration, in times when it wouldn't need to be concealed. It's a great idea, but not very practical for an NUBM44 build at all. I suppose the Playmates wasn't really more practical, since it has all kinds of little gizmos going on that won't be there once built, and a larger sound board, with 4 different sounds, which had to be bridged to just one, and that huge speaker that had to be replaced before anything would fit inside it, but only because it had an enlarged handle that would hold AA size batteries. And the crippling factor of the Rubies was it's handle only held AAA size cells. But the state of technology constantly improving, such that it is, presented me with IMR 10440 cells, and changed all that on this build. And that's how I ended up with an NUBM44 in a Rubies phaser model, and the batteries go in the original place in the handle! Oh the miracles of modern technology!

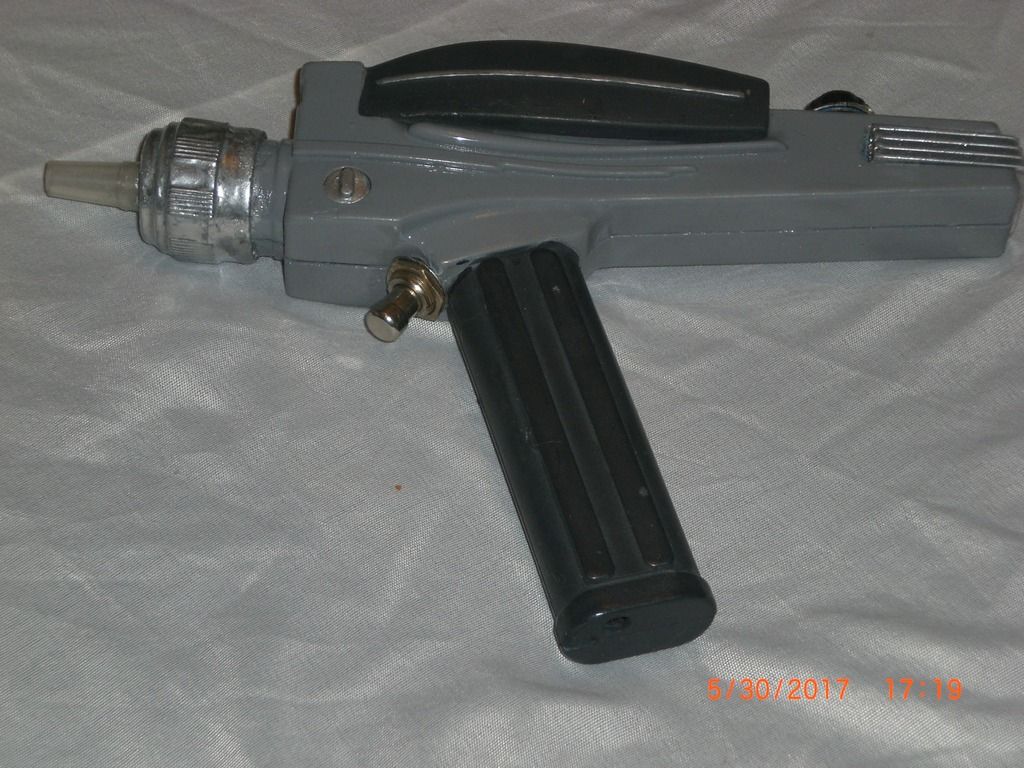
Footnote, what the original prop design seriously overlooked was any provision for sights, to aim the thing, maybe they didn't think you'd ever have to aim a laser. I suppose you don't really, you could point aim it like a laser pointer, except that this one will incinerate everything the dot hits, so bringing it on target would be, well, destructive. You certainly wouldn't be able to use it like a sniper, or anything.
 
Last edited:

GSS

0
Joined
Apr 28, 2015
Messages
5,069
Points
113
The original Star Trek prop department was sure ahead of it's time, thats for sure.
I heard something like only a $7000 budget. The Hero phaser versions aren't to pretty close up and everything is crooked but pretty ingenious anyway's.
Like you I try to use everyday junk draw type of stuff and look closely as the prop dept did the same back then. I'm sure youv'e read that on the communicator the 2 little dials were wheel hubs from I believe Tyco electric track cars.
I found some AL flat stock from the bottom of a long window shade that just might work for the rear fins with some type of stacking..
I think a M140 at 2W+ is just about the needed limit or maby the 9mm 7875 at 3W...
 
Last edited:
Joined
Jul 13, 2010
Messages
98
Points
8
Got a couple of pictures of the Rubie's phaser build. I put an led power indicator in the knob on top, which is also the actual power switch. It's not that authentic, but I like it, it was my own touch.

CIMG0394_zpsacuvbtzr.jpg


CIMG0395_zpsrnfkmizn.jpg
 
Joined
Sep 20, 2013
Messages
17,414
Points
113
Would be better if you added some beam shots with it. It's nice to see the host, but most want to see it working.
 
Joined
Sep 20, 2013
Messages
17,414
Points
113
That was pretty good. I noticed the audio from the sound card. Keeping that was a nice touch. Can't help but notice the terrible divergence of this diode. I'll bet it has maybe two minutes on those batteries fully charged.
 
Joined
Jul 13, 2010
Messages
98
Points
8
Yeah, about 2 minutes, that's right. But that's enough for a laser pointer, and I have 2 sets of batteries for it, anyway. It doesn't run it for long, but it runs it! That's pretty impressive, I thought.
I don't know what to make of the divergence, don't they all do that? I bought the module completely assembled with the G2 lens from DTR, who has an excellent reputation, I take on faith that it was done correctly. Am I mistaken?
 
Last edited:
Joined
Sep 20, 2013
Messages
17,414
Points
113
I liked it. I believe I said so. And no, that is the nature of this diode. The terrible divergence can be tamed to an extent, but not in that small a package, I would think. I don't really know what kind of room is in one of those toys.
 
Joined
Jul 13, 2010
Messages
98
Points
8
Whew, that's a relief. I knew what multimode diodes did before I invested in this one, I was expecting divergence, it is what it is. I know it can be corrected with a bunch of optics, but I don't really have room for that, and I like it well enough like it is. Maybe one of these days, someone will devise a lens that will fix these up, but I'm not going to hold my breath. These diodes aren't exactly meant for us to make over powered laser pointers out of them, so I doubt the powers that be will care to bother developing anything like that.
 

GSS

0
Joined
Apr 28, 2015
Messages
5,069
Points
113
GVLLD, i'll get back to you on your PM shortly and thanks for the offer:)
Nice pic's, and now I see you are running another switch..
Like Paul said its the sound card that makes them so fun...
Is the plastic nozzle easy to slide off or is it pretty much stuck on the finned heatsink. I'm just asking incase it were to get out off focus.
Why don't you try and tame the NUM44 a tiny bit with a 3 element or even a G7..
You still have the option's of the 9mm 3W which is a bit better with divergance..
 
Joined
Jul 13, 2010
Messages
98
Points
8
I'm running 2 switches on it. The first is a sliding dpdt that I first stuck one end of to the inside of the host shell with some ca glue, then filled hot melt around it to help keep it in place. I took the the knob on the top, and drilled a hole through the center of it, and carved out a square notch in the bottom, on one side, that engages the slider switch, so when I turn the knob, it switches the switch. I glued some blue plastic (since all I had was a super bright blue led) cut to fit the hole I drilled through the knob, in the top of it, and fed an led through the hole I drilled in the knob. That switch feeds the led, and the second switch, the trigger, which is one of those old heavy duty metal momentary switches, it looks perfect for the part, and it has the best positive feel you could ask for! If you look, you'll see the nut that holds it in place. It's glued in pretty good, too. That trigger switch, in turn, feeds the driver and the sound board, those are bridged. So with the switch on, the led comes on, then pushing the trigger switch turns on the laser and the sound board. I originally wired it with the first switch actually being a 3 position switch, so center would be "off" and one way would turn on the laser and the sound, the other way would turn on the laser only. But I used too much super glue putting the switch in, so now it's only on or off, the switch won't move to the laser only position, and I didn't care enough to break it all up and start over with the switch again. With the voltage regulator now part of the sound board, there is no way to hurt the thing. I also removed that poppity thingy that passed for the switch on the sound board, and bridged the contacts, so the board is on when it gets power, that's how I have it wired. It's simple, and works exactly the way it should, and I don't need extra batteries (and I assume an extra switch, or a DT switch?) to run it. I wired the led straight to battery power, with a resistor inline to keep it from burning the led, and so far it hasn't. 200 to 1000 ohms, anywhere in there is fine. I looked at all kinds of rotary switches to replace the knob, since the original had one, they call those "hat switches", but they were all too big to use, so I made my own.

I found the guy with the metal parts, several of them, actually. I am highly tempted, I would buy one for this project, if he included the clear nozzle tip. But maybe another shot at the Diamond Select is in order. I'd have to leave the batteries in permanently, but I think 2 AA cells will fit down inside the handle, same as the Rubie's. I actually leave mine in, I put in a charging plug in the bottom of the handle, and even put a protection board on, so I can plug any 5v source in, it has the circuitry to charge the batteries safely. I also have a usb charger that plugs in there, too. I don't actually ever have to take the batteries out, but I have two sets, in case I get laser crazy, I can change them. But I'll probably wait for the next generation of diodes to come out, and see what they are like, mine is fun the way it is.
I don't see it ever having room for optics, but what is this G7 you mentioned, this is the first i have heard of it. I have a G4, now. My nozzle is pretty well glued on, but to the heat sink, and not to the lens itself. I would probably break the nozzle off, anyway, if I wanted to mess with the focus, I don't feel like trying to turn that with a probe down through the nozzle. The nozzle came with a tube of silicone, they are easy enough to find. I'd rather it be less opaque, though.
I bet it wouldn't be hard to make a nozzle out of fiberglass resin, just make a mold, then drill it through once it hardens.
 

GSS

0
Joined
Apr 28, 2015
Messages
5,069
Points
113
Nice safety switches thats for sure:beer:
Tony from Federation phaser's AL nozzles won't fit a 12mm module. The ID is only the width of the clear emitter so its not good for a sink.
Jon Lussier's that you saw has nicely copied the nozzle but its extended and fits a 12mm module as i'm seeing and really not badly priced..
I see plenty room for 2 14500 in the handle with a little work.
The G7 is kinda in between the 3 element and G2 as far as helping to tighten the beam.
It will rob about %10 of power as the 3 element can rob up to %30. At 6W now will it make that much of a difference? to you..
 
Joined
Jul 13, 2010
Messages
98
Points
8
Here is my phaser with the battery cover off, showing off the dinky batteries that I got away with using, and the cute little usb charger that I got for it.

charging_zpsmedofdyo.jpg


Although this is a lithium charger, I'm only using it like this as a boost mode charger, to charge from a 5v usb bus, I have a protection pcb inside the phaser, so I could use any 9v power supply, and it would be just fine. Those are a good idea if you use lithium batteries, no matter how you use them. It was worth the $3 it cost me, and didn't take up any space at all.
 
Last edited:


Top