- Joined
- Dec 27, 2011
- Messages
- 2,062
- Points
- 48
Well, this should have been an easy build - but sometimes everything that can go wrong does and this was one of those times. I burnt a finger with the soldering iron, chopped up a thumb with a Dremel and generally had nothing but trouble putting this thing together.
It is a testament to the robustness of Moh's linear drivers and the LPC-826 (and red diodes in general I suppose) that it works at all.
I tried to over-engineer this thing as much as possible and I like copper. I would make the whole laser out of copper and then plate the outside for looks if it were up to me. Copper has awesome thermal and electrical properties and it is heavy enough to beat someone over the head with it too. It is just good stuff. But it is expensive, hard to work and doesn't look as good as other materials once it starts oxidizing, so I have to use it mostly on the insides.
Now - on to the build...
First, I purchased the Bolly BL-8006 for about $20. I don't even know where I got it from, but it is easy enough to find it in many stores.
One of the reasons I chose this host is that I wanted to make a burning laser and one of the key tricks to burning, is to hold the dot very steady on the object you want to burn. Round hosts roll around. This is a rounded-square host and sits nicely where-ever you put it.
Here is a pic of the host disassembled. It is the black host in the foreground. (I am also excited about the green "hand grenade" flashlight in the background! That will be coming soon.)

Bolly Flashlight Host by tsteele93, on Flickr
Here is a closer view. One crappy thing is the tail clicky. It has the plastic retainer. I did not get around to changing this since I don't plan to run too much current through it. If it is a problem, it will be easy to fix later.

Bolly Host - No Roll Design by tsteele93, on Flickr
Here is where the fun begins, I decided to re-purpose a 478mA Mohgasm linear driver from a 405nm build that I was not happy with the power that the diode was giving me. I am going to rebuild that laser with >500mA and see if I can get it up around 600mW. But I digress...
Getting the mohgasm driver out of the pill proved to be a difficult task, I don't know what Moh is using for solder, but it is some tough stuff!
It is one tough driver though, because I burned, melted, cut and grinded all over this thing and it still ended up working great.
Since I wanted to over-engineer this thing, I replaced the aluminum sink that was on the ic with a larger, finned copper sink. I had to cut this in half with a cutting wheel as the original sink was too big to fit in the pill. It comes with a peel-back sticker that says Sony Chemical and Information Device Company on it, so I assume (hope) that it has a thermal adhesive on it. I pressed the cut sink into place. I'd guess that with the fins and it being copper that it easily has twice the surface area and twice the mass of the original.

New Heat Sink for Mohgasm Driver - side view by tsteele93, on Flickr
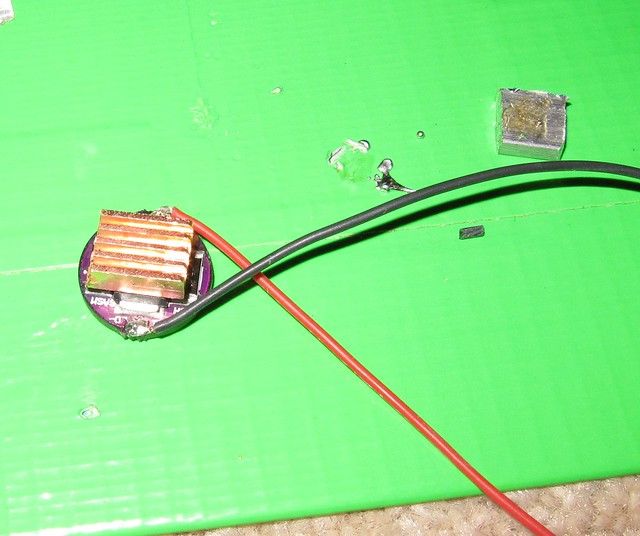
New Heat Sink for Mohgasm Driver by tsteele93, on Flickr
I also added some Xbox 360 Repair RAM Cooling Pads Thermal K Pads of this on top of the copper sink, I didn't have enough room for another copper sink, and I didn't want to bother with having to attach the aluminum to the copper so I just cut one of these into about a third and attached it on the top of the copper sink.
Next I grabbed my iPad and pulled up the pinout info for the LPC-815 (which is the same as the LPC-826 and other red diodes).

I soldered it up. (I had already tinned the wrong leads before pulling up the image above!
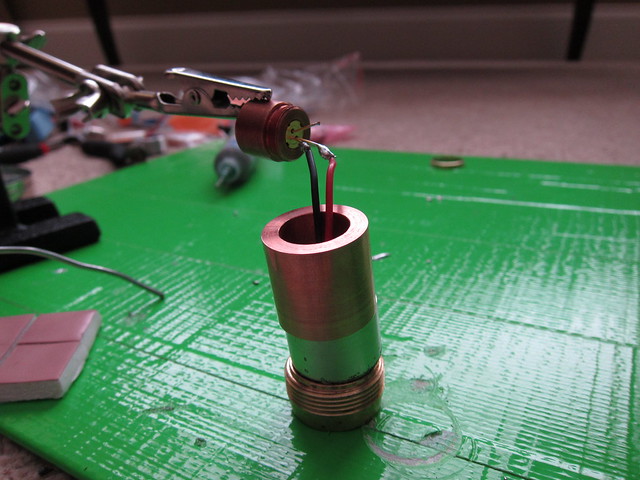
Leads soldered in place by tsteele93, on Flickr
You can see the Xbox thermal pads in the picture above. The brass pill was just there to hold everything up to the right height for the helping hand.
Next up, the heat shrink was applied...

Heat Shrink Applied by tsteele93, on Flickr
Here is a shot of the heat sink and the pill. Nothing special, my machinist just basically made me a 0.7085 inches diameter by 0.665 inches long cylinder of pure copper (C110 I think, might have been C101 - I'll have to check.) with an inner diameter of 0.469 inches.

Heat Sink and Pill by tsteele93, on Flickr
If you want to make this host, (with a copper module, the Aixiz silver colored ones are much smaller in diameter!) I'd suggest going a thousandth or two bigger on the outer diameter and a thousandth bigger on the inner diameter. The copper sink fits into the host well, but it is not a super tight fit. On the other hand, I had to press fit the module into the heat sink itself and I had to even do some sanding on the module to get it into the sink. It turned into a tedious process.
I used the original pill (from the Bolly flashlight, not Moh's) and squeezed the mohgasm driver in it. I had to take a Proxxon tool (Dremel) and open the pill up a little to get the driver to go down in the pill. Of course I did the usual soldering of the outer ring to the pill like in this picture. Except mine was not nearly so neat looking. How do you get the solder to bridge the gap, mine did NOT want to do that!
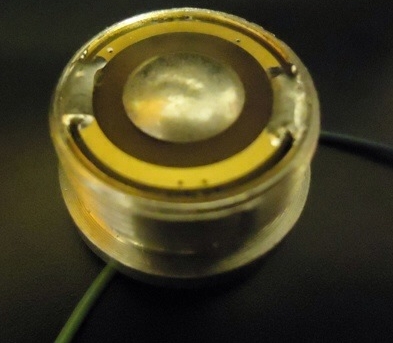
Solder Outer Ring by tsteele93, on Flickr
After pressing the module into the heat sink (using thin plywood on each side of the vise to keep from marring the copper too badly) I put it together and took a photo of the finished product.
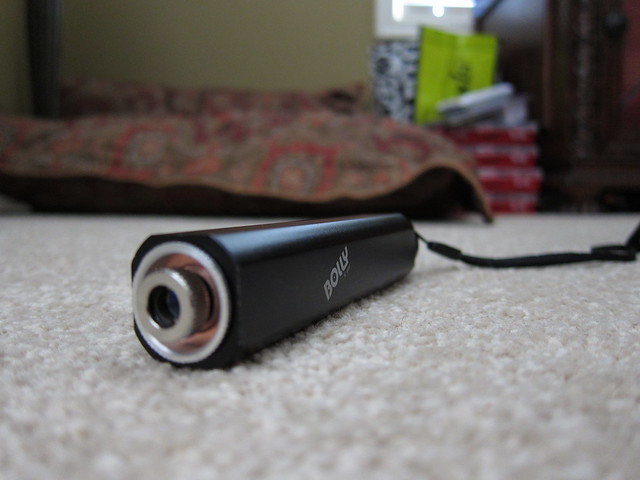
IMG_0155 by tsteele93, on Flickr
Here is a closer shot of the copper module, heat sink and 650-G1 lens from Jayrob.
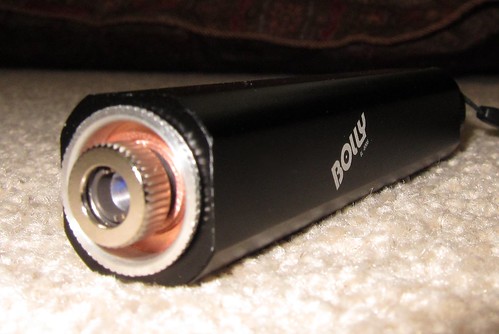
Copper Module and Heat Sink by tsteele93, on Flickr
Finally it was time to turn it on and see if it worked...

Lasing at 650nm by tsteele93, on Flickr
And a quick test on the power meter...
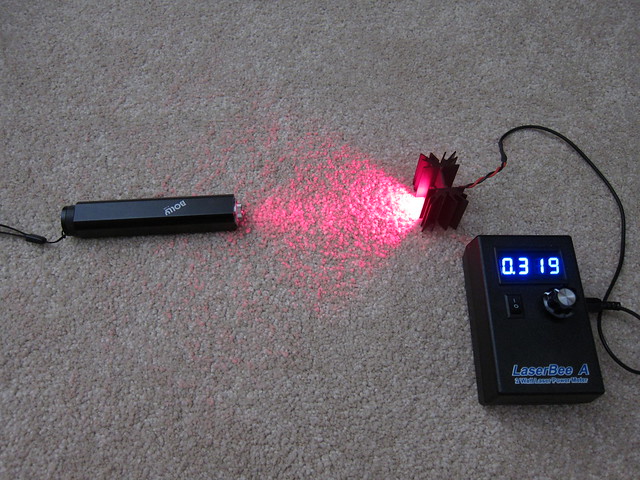
319 mW by tsteele93, on Flickr
Once it got to 319mW it just stayed there, and no matter how much I willed it to go up one more mW, I couldn't get 320. :cryyy:
So, using two 16340's and 478mA with a 650 G-1 lens, I was able to get 319mW out of this LPC-826 red diode.
Thank you for reading, and more importantly - thank all of you for the information you have compiled here to make this possible.
Now I am off to try and get that >600mW 405 build up and running!
It is a testament to the robustness of Moh's linear drivers and the LPC-826 (and red diodes in general I suppose) that it works at all.
I tried to over-engineer this thing as much as possible and I like copper. I would make the whole laser out of copper and then plate the outside for looks if it were up to me. Copper has awesome thermal and electrical properties and it is heavy enough to beat someone over the head with it too.
Now - on to the build...
First, I purchased the Bolly BL-8006 for about $20. I don't even know where I got it from, but it is easy enough to find it in many stores.
One of the reasons I chose this host is that I wanted to make a burning laser and one of the key tricks to burning, is to hold the dot very steady on the object you want to burn. Round hosts roll around. This is a rounded-square host and sits nicely where-ever you put it.
Here is a pic of the host disassembled. It is the black host in the foreground. (I am also excited about the green "hand grenade" flashlight in the background! That will be coming soon.)

Bolly Flashlight Host by tsteele93, on Flickr
Here is a closer view. One crappy thing is the tail clicky. It has the plastic retainer. I did not get around to changing this since I don't plan to run too much current through it. If it is a problem, it will be easy to fix later.

Bolly Host - No Roll Design by tsteele93, on Flickr
Here is where the fun begins, I decided to re-purpose a 478mA Mohgasm linear driver from a 405nm build that I was not happy with the power that the diode was giving me. I am going to rebuild that laser with >500mA and see if I can get it up around 600mW. But I digress...
Getting the mohgasm driver out of the pill proved to be a difficult task, I don't know what Moh is using for solder, but it is some tough stuff!
It is one tough driver though, because I burned, melted, cut and grinded all over this thing and it still ended up working great.
Since I wanted to over-engineer this thing, I replaced the aluminum sink that was on the ic with a larger, finned copper sink. I had to cut this in half with a cutting wheel as the original sink was too big to fit in the pill. It comes with a peel-back sticker that says Sony Chemical and Information Device Company on it, so I assume (hope) that it has a thermal adhesive on it. I pressed the cut sink into place. I'd guess that with the fins and it being copper that it easily has twice the surface area and twice the mass of the original.

New Heat Sink for Mohgasm Driver - side view by tsteele93, on Flickr

New Heat Sink for Mohgasm Driver by tsteele93, on Flickr
I also added some Xbox 360 Repair RAM Cooling Pads Thermal K Pads of this on top of the copper sink, I didn't have enough room for another copper sink, and I didn't want to bother with having to attach the aluminum to the copper so I just cut one of these into about a third and attached it on the top of the copper sink.
Next I grabbed my iPad and pulled up the pinout info for the LPC-815 (which is the same as the LPC-826 and other red diodes).

I soldered it up. (I had already tinned the wrong leads before pulling up the image above!

Leads soldered in place by tsteele93, on Flickr
You can see the Xbox thermal pads in the picture above. The brass pill was just there to hold everything up to the right height for the helping hand.
Next up, the heat shrink was applied...

Heat Shrink Applied by tsteele93, on Flickr
Here is a shot of the heat sink and the pill. Nothing special, my machinist just basically made me a 0.7085 inches diameter by 0.665 inches long cylinder of pure copper (C110 I think, might have been C101 - I'll have to check.) with an inner diameter of 0.469 inches.

Heat Sink and Pill by tsteele93, on Flickr
If you want to make this host, (with a copper module, the Aixiz silver colored ones are much smaller in diameter!) I'd suggest going a thousandth or two bigger on the outer diameter and a thousandth bigger on the inner diameter. The copper sink fits into the host well, but it is not a super tight fit. On the other hand, I had to press fit the module into the heat sink itself and I had to even do some sanding on the module to get it into the sink. It turned into a tedious process.
I used the original pill (from the Bolly flashlight, not Moh's) and squeezed the mohgasm driver in it. I had to take a Proxxon tool (Dremel) and open the pill up a little to get the driver to go down in the pill. Of course I did the usual soldering of the outer ring to the pill like in this picture. Except mine was not nearly so neat looking. How do you get the solder to bridge the gap, mine did NOT want to do that!

Solder Outer Ring by tsteele93, on Flickr
After pressing the module into the heat sink (using thin plywood on each side of the vise to keep from marring the copper too badly) I put it together and took a photo of the finished product.

IMG_0155 by tsteele93, on Flickr
Here is a closer shot of the copper module, heat sink and 650-G1 lens from Jayrob.

Copper Module and Heat Sink by tsteele93, on Flickr
Finally it was time to turn it on and see if it worked...

Lasing at 650nm by tsteele93, on Flickr
And a quick test on the power meter...

319 mW by tsteele93, on Flickr
Once it got to 319mW it just stayed there, and no matter how much I willed it to go up one more mW, I couldn't get 320. :cryyy:
So, using two 16340's and 478mA with a 650 G-1 lens, I was able to get 319mW out of this LPC-826 red diode.
Thank you for reading, and more importantly - thank all of you for the information you have compiled here to make this possible.
Now I am off to try and get that >600mW 405 build up and running!
Last edited:


