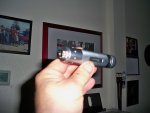
I just finished my first build and all is working fine. I had a idea or two that i used on it and wanted to share which seem to be working out great. First off, for my host i used a Coast brand LED lenser part # 010395 which i found at ACE Hardware, but can also be found by searching Coast Led Lenser on the web.They have a lot of cool possibilities. I like this unit because it has a solid tail cap push button and not the rubber one. Secondly i was able to use part of the design with my heatsinking. I already had the idea for sinking and when i saw this unit it fit into my plans perfectly. My idea was to drill/mill holes through my heatsink going from the outside to the core where the module slides through. My thought was to create small chambers which would draw the heat and an avenue for release instead of dissipating slowly. it seems to be working as i am barely feeling any heat after a lot of use. As you can see by the pic the host also has small holes around the diameter for heat escape. My holes line up right behind the diode. i did this hoping to dissipate heat from the diode and driver. I had considered drilling the holes through the casing as well but am worried about contaminates getting to the driver.
The flux capacitor in this baby consists of a PHR 803 diode and is driven by a rockstar driver set at 130ma and is powered by three AAA 3.6 volt batteries. Even with such a large power plant it still remains cool. Though i have not put a whole bunch of time into testing i am lighting matches at 4 feet. I have not been able to talk my little girl out of her balloon yet.
I will post pics of my heatsink when my lathe is up and running. I built this one using a drill press and a lot of finness.It came out nice but i can do better with the proper tool. Hopefuly my lathe parts will be here this week and i can get working on it in more depth.
Skylight