- Joined
- Jun 2, 2011
- Messages
- 45
- Points
- 0
Well I finally completed my first build. It is as fully a “scratch” build as I could make it. I built the host, driver, battery terminals, and switch, all of it. I do not have a lath so I had to think outside of the box. Here it is.
The host is constructed out of 3/4 inch copper pipe with copper spanners and brass plugs. All purchased from HomeDepot. The driver outputs just under 400mA. The laser diode is housed in a pair of nested brass pipe caps. One for 3/4 inch and the other for 1/2 inch. It works well as a heat sink.
The driver has a home made battery terminal on one end and the negative is ground to the host. The switch end includes a home made battery terminal and is also connected to the host, to complete the circuit when the switch is clicked on. Both caps were drilled and tapped to hold #4 metric Allen screws. This allows the "caps" to be removed for servicing. The bottom to remove the batteries and the top to service the diode.
For future builds I will use pre-made drivers which will result in a shorter overall length. I might also try different batteries to see if a smaller diameter pipe can be used.
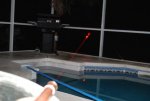
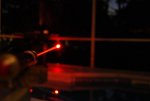
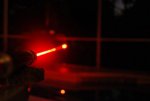
I tried it in the yard last night and you could see the beam into the night sky for a good distance. Up close and focused, you can smoke paper. I like the way the copper host turned out. It polishes up good and it has a nice weight in my hand.
If I must say, I don't think it turned out too bad for my first build.
Attachments
-
 mini-copperhost1.jpg221.2 KB · Views: 245
 -
 mini-copperhost2.jpg239.9 KB · Views: 242
 -
 mini-copperhost3.jpg350.3 KB · Views: 232
 -
 mini-copperhost4.jpg274 KB · Views: 189
 -
 mini-copperhost4a.jpg144.2 KB · Views: 184
 -
 mini-copperhost5.jpg262.8 KB · Views: 183
 -
 mini-copperhost6.jpg245.3 KB · Views: 194
 -
 mini-copperhost7.jpg243.2 KB · Views: 194


