BlackOps
0
- Joined
- May 7, 2016
- Messages
- 139
- Points
- 28
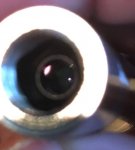
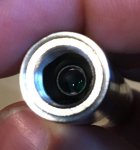
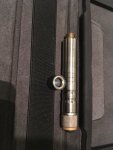
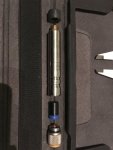
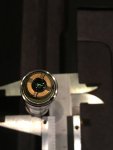
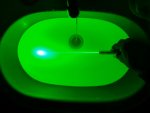
this is my build i made 2 months ago. its the coolest build i have made so far. all exterior components and some interior components are machined by me. including the host, tail button, and Host is made from stainless steel.
this laser is watertight, shockproof, fogproof [like purged nightvision goggles or rifle scopes] and idiot proof.
it runs from a small 10180 battery, for about 35 minutes straight.
output approx 80/100mW
IR filtered and reverse polarity protected.
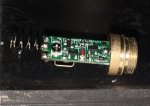
this is the driver. its 11mm wide, it took me a while to find, and extracted this from more then a decade old green laser from Ebay.
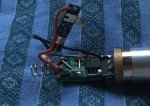
reverse polarity circuit. this side was supposed to be empty but i decided to make it idiot proof and it was hard, because the space is tight and i had to bend the metal in all kind of shapes. it looks cool.
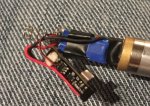
isolation, so the BMS circuit could rest on it

isolation on other side of the board, with a anode spring contact. if the + pin of the diode breakt, this spring will be a backup between driver and diode/module. this happened to me once for some strange reason.
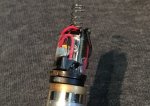
this is the driver completely assembled. i also added 2 metal rings from a camera lens to assist the backup connection, and to prevent the module to be puched any further into the host. it is perfectly level with the host and the inner edge prevents it from going further.

driver assembly completed with the 2 plastic support brackets next to it, to keep the board steady inside and not bending or breaking diode pins. i had to make this from a standard generic green laser support bracket. now lets see the optics.
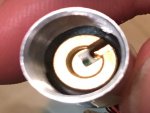
what you are looking at is the KTP crystal. this crystal in not original with this diode. i ripped the old one off which had a chip on it. this is the best KTP crystal i had sitting on the shelf. i cleaned it and aligned it with the diode to get maximum power. it took me 30 minutes to find the right spot without noise and with most power. you got to align and polarize it. i will make a separate thread for this. also, i added a rubber o-ring and dust free foam around the crystal to prevent it from knocking loose.

2 metal retaining plates, and above that a black piece of metal with a cut out square to reduce inner reflections and output noise.
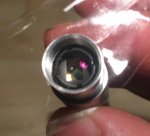
a lens extracted from a camera, this enabled me to switch between flashlight, and infinity beam without large attachments. no attachments is flashlight. exactly what i wanted to get. on top of this is a powerfull spring, and another centering plate which keeps the spring in the middle, so it cant move in the beam path. no photos of that because i had to mount the next component on it quick to prevent any dust. you can also see the chamfered edge on the anuminum bus there the next component, and its o-ring seals at.
other pictures will be in the comment section.
i will also post beamshots and the attachment i made for infinity beam. also the lens cap

this laser is watertight, shockproof, fogproof [like purged nightvision goggles or rifle scopes] and idiot proof.
it runs from a small 10180 battery, for about 35 minutes straight.
output approx 80/100mW
IR filtered and reverse polarity protected.

this is the driver. its 11mm wide, it took me a while to find, and extracted this from more then a decade old green laser from Ebay.

reverse polarity circuit. this side was supposed to be empty but i decided to make it idiot proof and it was hard, because the space is tight and i had to bend the metal in all kind of shapes. it looks cool.

isolation, so the BMS circuit could rest on it

isolation on other side of the board, with a anode spring contact. if the + pin of the diode breakt, this spring will be a backup between driver and diode/module. this happened to me once for some strange reason.

this is the driver completely assembled. i also added 2 metal rings from a camera lens to assist the backup connection, and to prevent the module to be puched any further into the host. it is perfectly level with the host and the inner edge prevents it from going further.

driver assembly completed with the 2 plastic support brackets next to it, to keep the board steady inside and not bending or breaking diode pins. i had to make this from a standard generic green laser support bracket. now lets see the optics.

what you are looking at is the KTP crystal. this crystal in not original with this diode. i ripped the old one off which had a chip on it. this is the best KTP crystal i had sitting on the shelf. i cleaned it and aligned it with the diode to get maximum power. it took me 30 minutes to find the right spot without noise and with most power. you got to align and polarize it. i will make a separate thread for this. also, i added a rubber o-ring and dust free foam around the crystal to prevent it from knocking loose.

2 metal retaining plates, and above that a black piece of metal with a cut out square to reduce inner reflections and output noise.

a lens extracted from a camera, this enabled me to switch between flashlight, and infinity beam without large attachments. no attachments is flashlight. exactly what i wanted to get. on top of this is a powerfull spring, and another centering plate which keeps the spring in the middle, so it cant move in the beam path. no photos of that because i had to mount the next component on it quick to prevent any dust. you can also see the chamfered edge on the anuminum bus there the next component, and its o-ring seals at.
other pictures will be in the comment section.
i will also post beamshots and the attachment i made for infinity beam. also the lens cap
Last edited:


