Welcome to Laser Pointer Forums - discuss green laser pointers, blue laser pointers, and all types of lasers

Buy Site Supporter Role (remove some ads) | LPF Donations

Links below open in new window

FrozenGate by Avery

1W 808nm handheld laser

Joined
Feb 5, 2008
Messages
6,252
Points
83
Hi folks, just wanted to show off with my new creation here,

It is a handheld laser, uses one 18650 battery, draws about 1.45 amps and feeds a 9mm can diode in O-like module.

Some pics first:
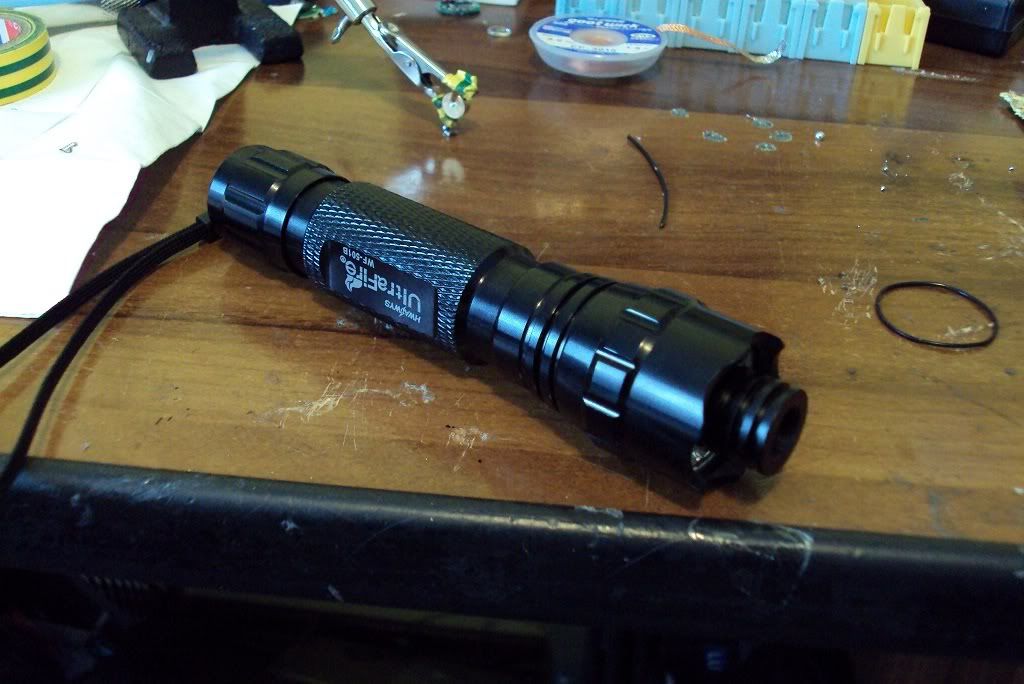
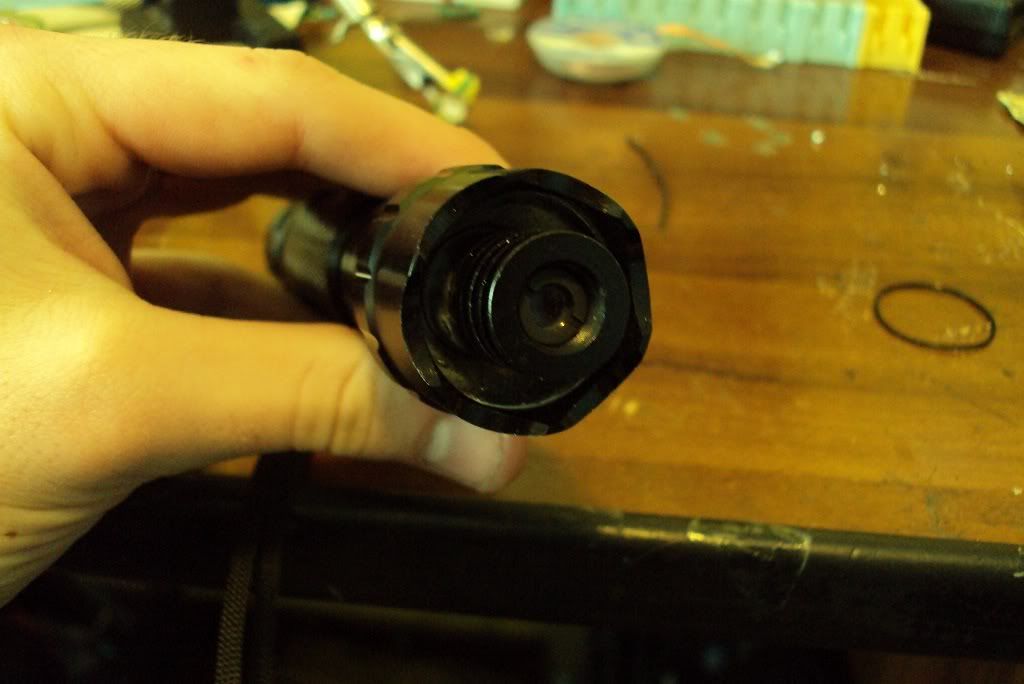
DSC00509.jpg


DSC00510.jpg


You will notice the lack of proper heatsink, well I just put this together until the heatsink is made (my professor is sure taking his time, and since spring break started, I could not wait anymore)

And a video to demonstrate the burning capability.
Enjoy!


If that is a aixiz glass lens coated for 650, you are in for some heavy loss. You would be better off using an uncoated acrylic, but have to cut almost all of the black plastic away and expose the entire lens in the rear. The black plastic gets easily burned landing smoke and subsequent residue on the LD facet.

In order to focus the dot down, the lens has to get some distance from the LD, you end up losing even more power...

You may want to correct the output of the LD, and then pass it through a collimator. This way you end up with a nice beam and way less loss.

A good start though.
 
Great build! I really like how the collimator matches the host so well
 
If that is a aixiz glass lens coated for 650, you are in for some heavy loss. You would be better off using an uncoated acrylic, but have to cut almost all of the black plastic away and expose the entire lens in the rear. The black plastic gets easily burned landing smoke and subsequent residue on the LD facet.

In order to focus the dot down, the lens has to get some distance from the LD, you end up losing even more power...

You may want to correct the output of the LD, and then pass it through a collimator. This way you end up with a nice beam and way less loss.

A good start though.
Everything is O-like actually, and yes the lens appear to be coated for red laser, but uncoated one would melt because of the plastic holder.

If I could maybe remove the plastic lens from their holder and place them in this brass holder, it would be cool.

But this one is not bad either. I will burn though paper with the dot diameter of 3 mm. (sharpied paper ofc).

And you've seen the damage done to electrical tape (that was unsharpied, green part), it burns though next 3 layers.

Mighty!!
I also had the clip with it shining into the green laser crystal assembly and getting some nice green, but it could not be seen well by the camera so I left it out.

Anyhow, who gives a crap about some losses, it still kicks ass.
BTW, I was under the impression that the coating for red laser is better than no coating, the plastic lens should be quite opaque to this wavelenght, correct? :S
 
Very nice looking build! The host and module look great together. It seems to have good burning power. You mention only focusing to a 3mm spot? Usually, you can get a much smaller burning point than this, even with a single aixiz acrylic lens. It looked more like a 1mm spot on your match. I have used the aixiz glass lens in my 2W IR builds, and didn't seem to suffer huge power loss due to the 650nm coating. These lasers start fires with the aixiz 650nm glass lens. They are useable. A lens of larger diameter (maybe 10mm) and very short focal length (maybe 3-4mm) would be great, but aixiz works OK in the meantime.
 
Everything is O-like actually, and yes the lens appear to be coated for red laser, but uncoated one would melt because of the plastic holder.

If I could maybe remove the plastic lens from their holder and place them in this brass holder, it would be cool.

But this one is not bad either. I will burn though paper with the dot diameter of 3 mm. (sharpied paper ofc).

And you've seen the damage done to electrical tape (that was unsharpied, green part), it burns though next 3 layers.

Mighty!!
I also had the clip with it shining into the green laser crystal assembly and getting some nice green, but it could not be seen well by the camera so I left it out.

Anyhow, who gives a crap about some losses, it still kicks ass.
BTW, I was under the impression that the coating for red laser is better than no coating, the plastic lens should be quite opaque to this wavelength, correct? :S


The lenses from olike and aixiz seem to be from the same source, hence the comparison..

While the coating seem similar in appearance, my personal experience showed that the acrylic far out performed the AR glass. The tri elemnt glass lenses also have a higher NA, AND you have reflection working against you and more clipping of the LD's output beam.

It also depends on where the LD came from. Some of the "808nm" LD's floating around are well above 808nm. At close to 1.5A being fed to the LD, the wavelength would be pushed even higher.

If you take apart any cheap greenie module (as it appears you have seeing the crystal set in the helping hands), the FAC lens that sat behind the crystal is the proper coating.

You can remove the black plastic from the rear of an acrylic leaving only the lens exposed.

I shot this video ages ago, using an acrylic lens. The beam is not focused, and was as parallel as I could get it... The dot IIRC was approx 7-8mm

 
Very nice looking build! The host and module look great together. It seems to have good burning power. You mention only focusing to a 3mm spot? Usually, you can get a much smaller burning point than this, even with a single aixiz acrylic lens. It looked more like a 1mm spot on your match. I have used the aixiz glass lens in my 2W IR builds, and didn't seem to suffer huge power loss due to the 650nm coating. These lasers start fires with the aixiz 650nm glass lens. They are useable. A lens of larger diameter (maybe 10mm) and very short focal length (maybe 3-4mm) would be great, but aixiz works OK in the meantime.
I only mentioned 3mm as largest spot that makes a nice burn mark.

I can focus down to tiny line, 1 mm total lenght of the line.

Thanks for +rep :D

The lenses from olike and aixiz seem to be from the same source, hence the comparison..

While the coating seem similar in appearance, my personal experience showed that the acrylic far out performed the AR glass. The tri elemnt glass lenses also have a higher NA, AND you have reflection working against you and more clipping of the LD's output beam.

It also depends on where the LD came from. Some of the "808nm" LD's floating around are well above 808nm. At close to 1.5A being fed to the LD, the wavelength would be pushed even higher.

If you take apart any cheap greenie module (as it appears you have seeing the crystal set in the helping hands), the FAC lens that sat behind the crystal is the proper coating.

You can remove the black plastic from the rear of an acrylic leaving only the lens exposed.

I shot this video ages ago, using an acrylic lens. The beam is not focused, and was as parallel as I could get it... The dot IIRC was approx 7-8mm

I do have the green module, but it is a cheapo one that does not have the lens between crystal and diode.

I will take your advice and see what will the acrylic lens make of it.

Thanks!:beer:
 
Nice build!
So did you measure the power output? And imagine how it would burn if you use the appropriate lens.
 
Nice build!
So did you measure the power output? And imagine how it would burn if you use the appropriate lens.
Didn't measure and I will try to figure something out with the lens.
I still have your unit, I'll work on that, perhaps I can swap out the lens and see what can it do.
 
Nice Build, but find HS before diode dies :D
UF host looks great with 9mm module and size is very impressive.

Where did you put AMC driver?


I have captured video of my IR laser shining to crystal assembly....
Here you can see...

YouTube - 1W 808nm IR portable laser and cheap Nd:YVO4/KTP crystal
AMC driver is where the stock driver in the flashlight was, figures :)
Note that I had two drivers of 1050mA regulation, and I removed two ICs from one ,
Placed one IC on the second PCB and kept one for future projects.

Your advice worked real well, I heateed the PCB from the other side with iron, and removed the IC from the top when the solder begain melting.
Took around 30-40 seconds to heat up the PCB.

ICs unharmed and functioning.

:beer:


Back
Top