Welcome to Laser Pointer Forums - discuss green laser pointers, blue laser pointers, and all types of lasers

Buy Site Supporter Role (remove some ads) | LPF Donations

Links below open in new window

FrozenGate by Avery

The ultimate flashlight mod

Joined
Sep 9, 2007
Messages
162
Points
0
I finally got the time to put together my laser module for my flashlight mod and it looks great (feels solid too).
Here is a basic layout of what went in...

I will be more specific about the casing later when I find out the component's names but for all I can say is that it is brass air compressor parts. They can be found at home depot easily. (I got them from my uncle)

The driver that is inside of the casing is daedal's driver except I could not fit the pot so I removed it.

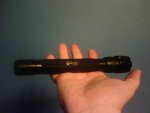
The flashlight is the UltraFire WF-502D CREE P4.

And I am using two TR18650 batteries (2500mAh 3.7V).

Flashlight and Batteries were bought at dealextreme.com

Warning! pictures are crappy, blame my cell phone camera.

_______________________________________________________________________________________________

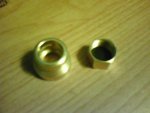
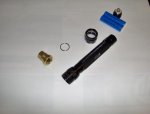
This first picture is of the two parts that make the housing for the laser and the driver.
 

Attachments

  • 1216072108_001.jpg
    1216072108_001.jpg
    30.1 KB · Views: 171


The thing that makes it soooooo awesome and ultimate is the fact that you can pop the laser inser out and put the regular CREE bulb back in. Its as easy as 1 2 3!
Beat that! :) ;D :) ;D :) ;D :o 8-)
 
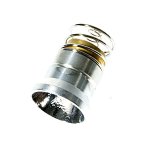
original CREE insert looks like this...
_____________________________________________________
(more pics with better quality are farther down the page.)
_____________________________________________________
 

Attachments

  • sku_6090_1.jpg
    sku_6090_1.jpg
    34.9 KB · Views: 236
That's pretty cool. I just finished a flashlight mod using air parts as well. I resized the pics last night but haven't posted yet.

Post pics of the front.
 
In order for me to get you the propper name for the parts I need to travel to home depot so I can compare to find the right parts. Normally I would be up and out in a second to grab the name for you but christmas is coming and I do not have the time right now. :'( Sorry, but don't worry.

As for the picture of the front, I am such an idiot not to take one. I will try to show you that before christmas.

P.S. The front looks sweet! it is fully contained and behind a glass shield to protect it from stuff (but scratches will hurt performance). Glass can be changed easily if needed.
 
Here comes more pics

This first one is a picture of all of the parts. (The key-ring is a spacer to put in so the lasr lense is not crushed and/or turned while closing.
 

Attachments

  • 1_007.JPG
    1_007.JPG
    33 KB · Views: 330
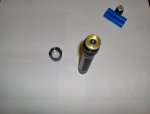
This is the laser fitting nicely into the flashlight.
 

Attachments

  • 2_006.JPG
    2_006.JPG
    27.8 KB · Views: 636
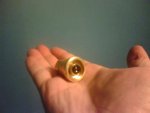
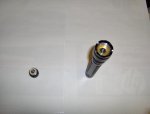
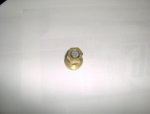
Oh, and here is the bottom of the laser module if you were wondering.
 

Attachments

  • 5_003.JPG
    5_003.JPG
    22.9 KB · Views: 163
Thanks for the new pics. How are you connecting the diode to the flashlight power?  

What kind of diode?

I am still interested in the names/sizes of the brass components used.  ;)
 
The last picture I uploaded (of the bottom) shows the connections to the positive end of the battery via the center and the negative end (the flashlights shell) via the bottom exterior ring.

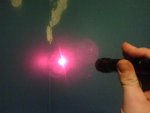
I currently made 2 units with a red laser and one blue! :)

As for the parts: The compression nutt is produced by WWATTS and the part number is A-203 and it is the 1/2 in size
The other piece I still need to go out and look for it. :-[

I was thinking about making a video showing the basics on how it is assembled. ;)
 
I think I got your answer right for the first question... :-/
I don't know what you mean when you say connect the diode to the power. All of the driver (except for the pot) is in there.


Back
Top