

- Joined
- Apr 29, 2008
- Messages
- 1,562
- Points
- 48
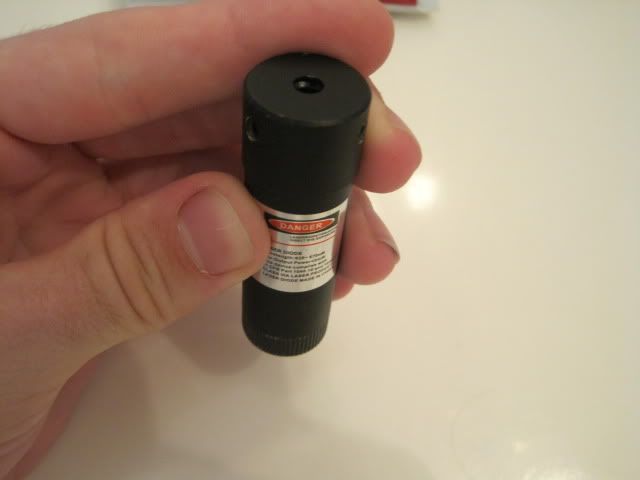
Here we go, off with another ingenious build by me. So before I lose your attention already, here are some pictures:
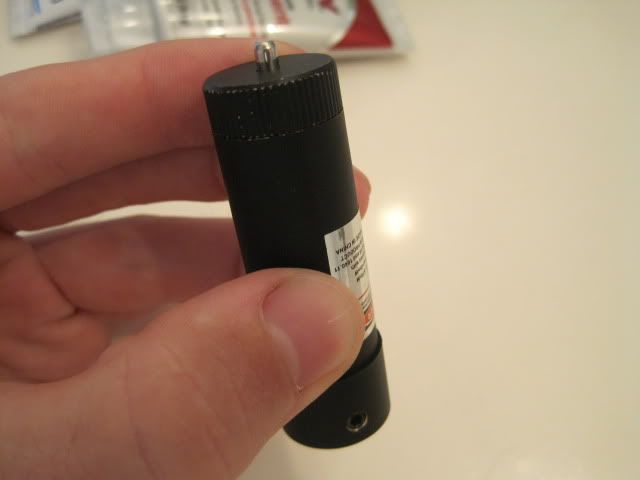
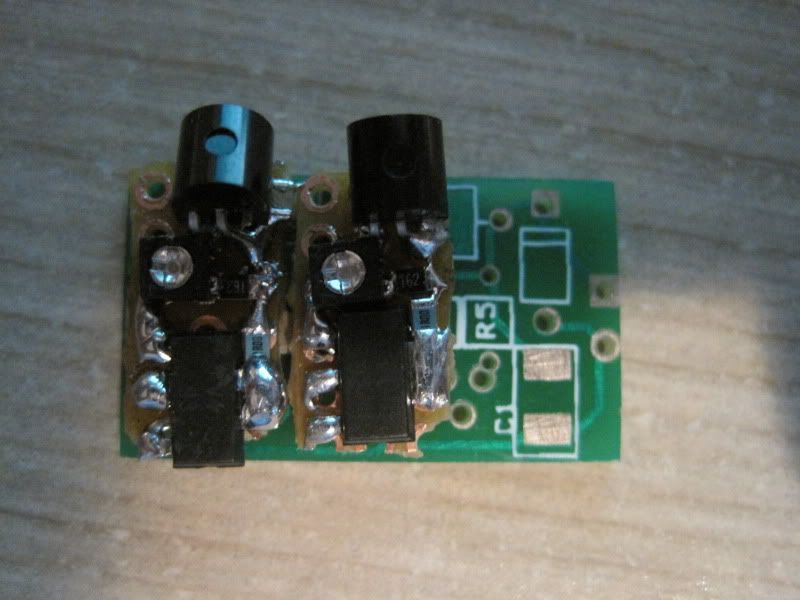
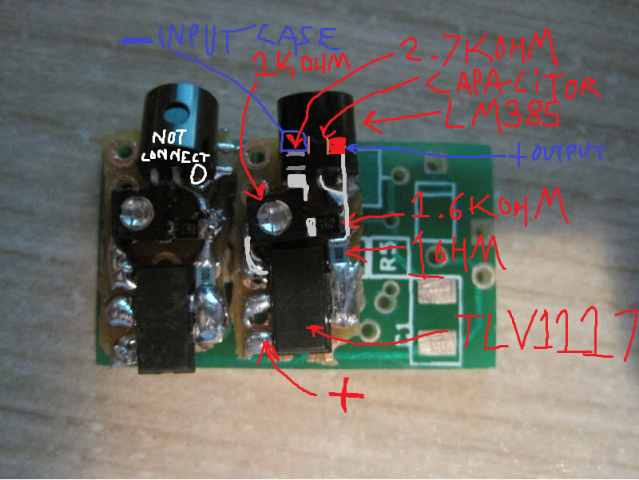
As with my other Micro-Sized build, (which can be found here!) this build uses the same host, however, there are some major differences. We all know that IR Laser Diodes are case positive, and LOC Laser Diodes are case negative. This is the first problem. I'm a firm believer of quality and longevity in my builds, I always put a driver to keep my laser happy for a long time. Since the beginning of the concept of this whole laser, I knew that squeezing any driver in here would be a daunting task. And because I can only fit one lithium battery in here, my only options would be either the Flexdrive or the Groove driver, both of which are way too big, and clash against the whole "DIY" theme of this laser. Needless to say, I had to get creative with this one, and this led to my patented, one and only, Sandwich Driver™.
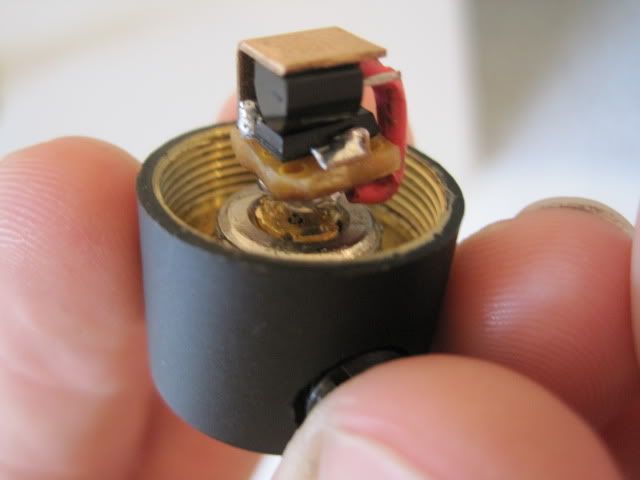
Now you might be asking, what is a sandwich doing in that laser? Well, looks are very deceiving because it is not a sandwich, but it is in fact a Groove Driver, possibly the smallest one you've ever seen. Pumps out a nice 300mA for the laser.
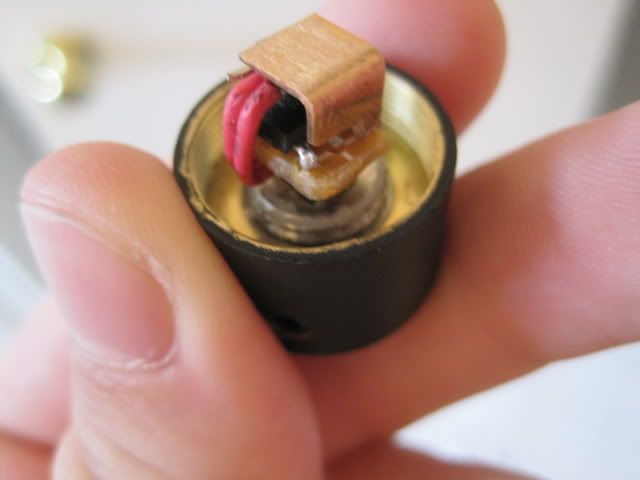
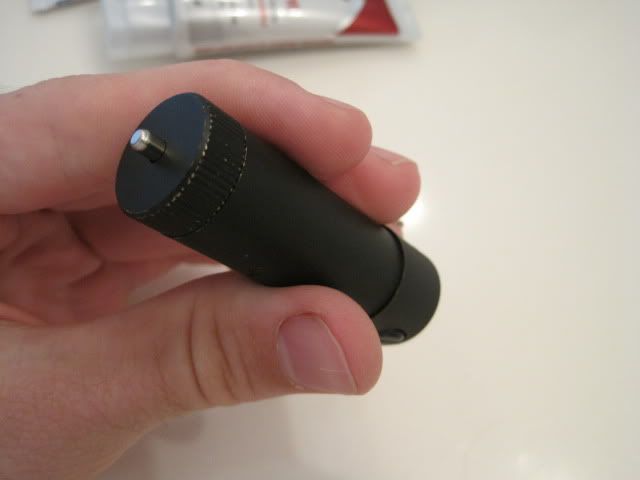
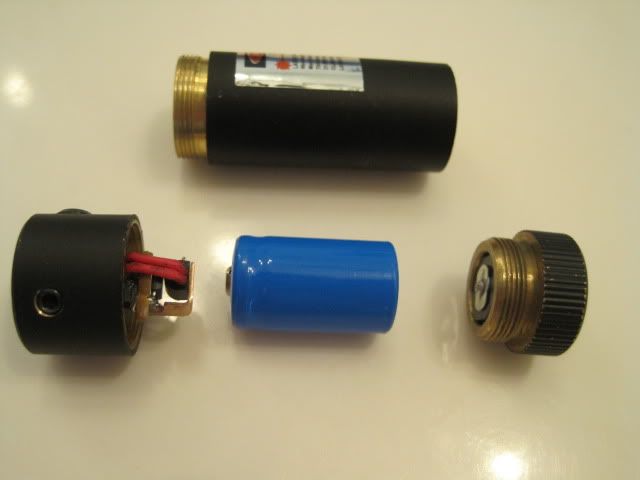
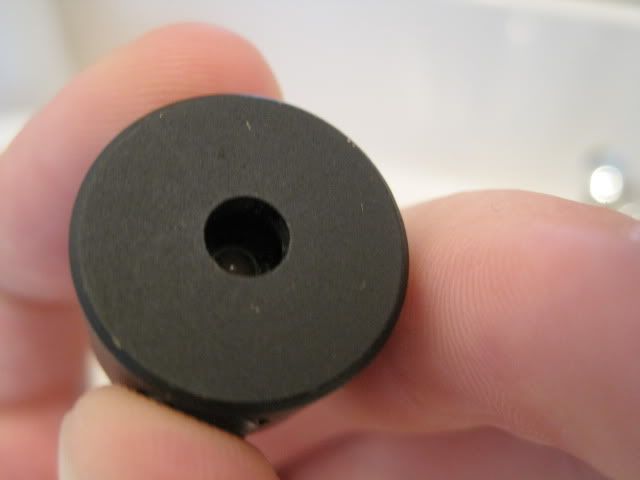
Onto more of the assembly of the laser, the laser was originally an airsoft targeting laser. The beauty of the new modifications is how no holes need to be drilled in order to fit the switch, Aixiz module, lens assembly, etc. So making this laser was actually much easier than the IR twin. The switch mechanism is actually a DX clicky, that fits with a perfect press-fit. The steel cap you see is from the exact same switch, and is found inside the DX clicky. So I used two DX clickies total, and a small spring between the clicky and the steel cap to keep the steel cap from wobbling.


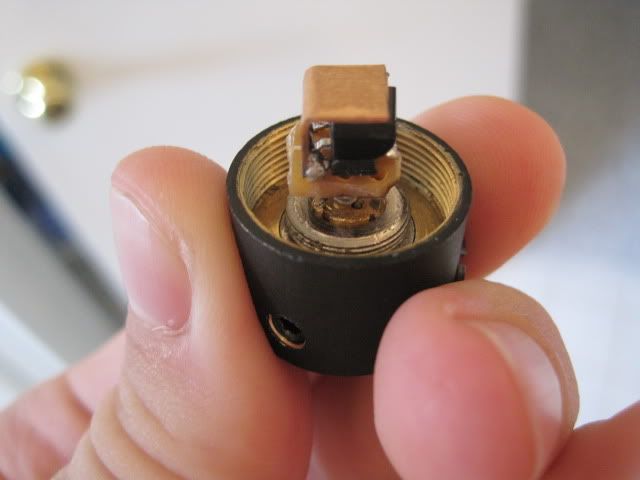
The build fits an AW-brand 14250 battery (300mAh) perfectly, so there is simply no room for a spring. The Aixiz module is an exact press fit, however, if your module is too small, then there are set screws already built in the head to keep your module secure. The set screws give it a less monotonous look, and not to mention, prevent the laser from wandering all over the place.
Did I mention that the laser works?
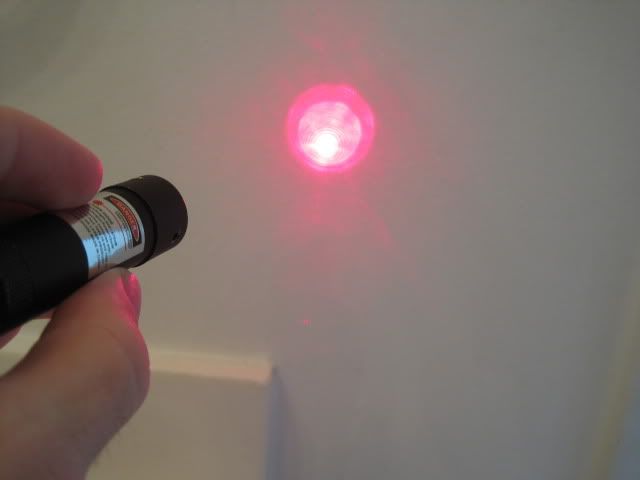
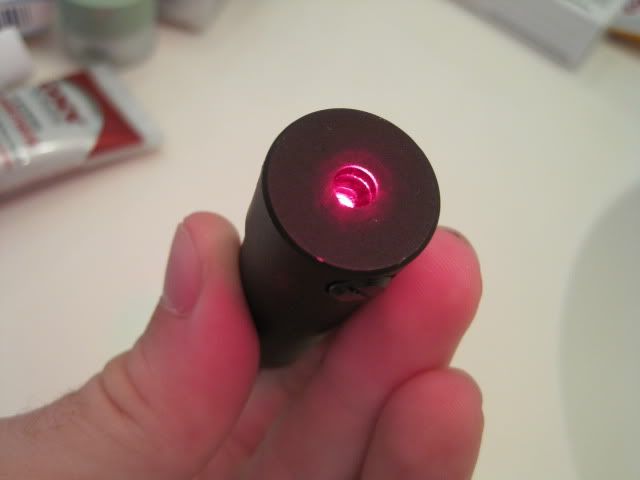
Now, if you're really observant, you might have wondered what kind of lens is in the Aixiz module, or how you focus the laser. Answer? Daily Double. No need to focus, as the laser is set to infinity, and the beam diameter is 1mm. Hungry men (like me) get both their pointing and burning all-in-one. Wait a second, did I just say that the beam diameter is 1mm?
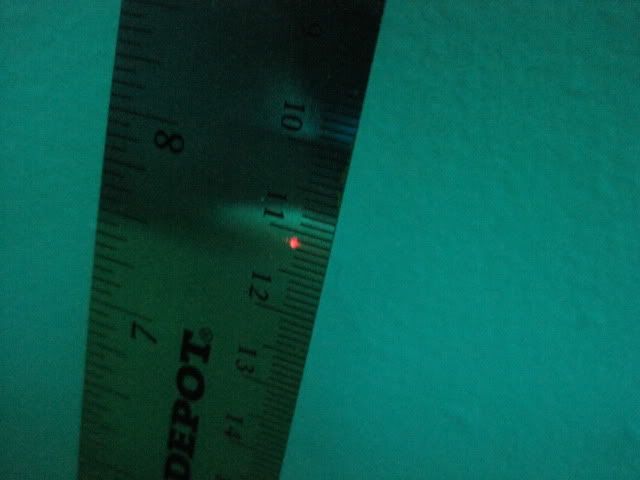
Oh wait. I did.
So Jimmymcjimthejim, how did you do it!? You've created the ultimate burning red laser in a nice pocket sized package!
That, my friend, is a secret.
Pleash tell me!!1!!1 Your soo coool Jimymcjimberson!!1
Ok, I'll tell you. The lens being used is an objective lens from a random sled that I had. The curvature of the lens is so strong that the lens is thicker than it is wide. And the best part is that there are no strange splash patterns in the beam. Unfortunately, getting the lens mounted and flat is not easy, and due to my lack of patience of getting this laser done, the output is a bit distorted from the mounting of the lens. And since the module is a press fit, I can't get the module out of the head of the laser to fix the lens.
So that's all folks! Hope you enjoyed reading the review, and be sure to check out my other Micro-sized build. Any comments, suggestions, questions, statements, opinions, and roundhouse kicks are well appreciated.
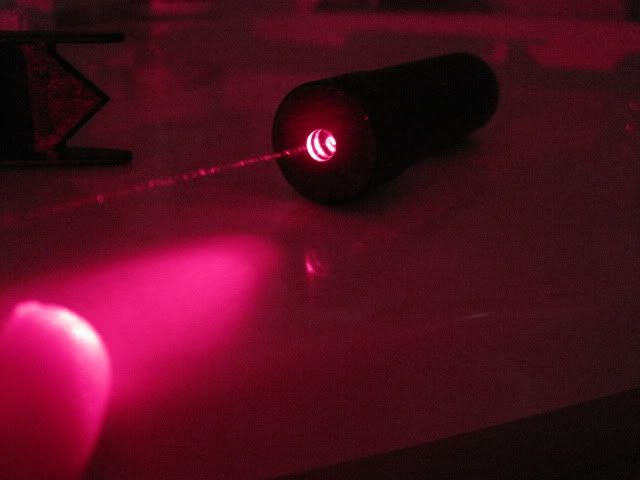
Oh, and some last-minute beamshots:

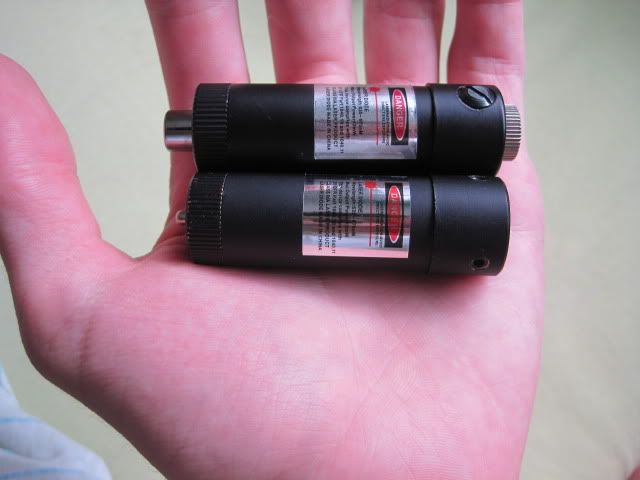
And the two glorious twins together:
Link to buy the host on eBay:
Metal Adjustable Laser Aim Module 650NM 5MW Airsoft Gun - eBay (item 320378687935 end time Aug-25-10 09:42:29 PDT)
As with my other Micro-Sized build, (which can be found here!) this build uses the same host, however, there are some major differences. We all know that IR Laser Diodes are case positive, and LOC Laser Diodes are case negative. This is the first problem. I'm a firm believer of quality and longevity in my builds, I always put a driver to keep my laser happy for a long time. Since the beginning of the concept of this whole laser, I knew that squeezing any driver in here would be a daunting task. And because I can only fit one lithium battery in here, my only options would be either the Flexdrive or the Groove driver, both of which are way too big, and clash against the whole "DIY" theme of this laser. Needless to say, I had to get creative with this one, and this led to my patented, one and only, Sandwich Driver™.
Now you might be asking, what is a sandwich doing in that laser? Well, looks are very deceiving because it is not a sandwich, but it is in fact a Groove Driver, possibly the smallest one you've ever seen. Pumps out a nice 300mA for the laser.
Onto more of the assembly of the laser, the laser was originally an airsoft targeting laser. The beauty of the new modifications is how no holes need to be drilled in order to fit the switch, Aixiz module, lens assembly, etc. So making this laser was actually much easier than the IR twin. The switch mechanism is actually a DX clicky, that fits with a perfect press-fit. The steel cap you see is from the exact same switch, and is found inside the DX clicky. So I used two DX clickies total, and a small spring between the clicky and the steel cap to keep the steel cap from wobbling.
The build fits an AW-brand 14250 battery (300mAh) perfectly, so there is simply no room for a spring. The Aixiz module is an exact press fit, however, if your module is too small, then there are set screws already built in the head to keep your module secure. The set screws give it a less monotonous look, and not to mention, prevent the laser from wandering all over the place.
Did I mention that the laser works?
Now, if you're really observant, you might have wondered what kind of lens is in the Aixiz module, or how you focus the laser. Answer? Daily Double. No need to focus, as the laser is set to infinity, and the beam diameter is 1mm. Hungry men (like me) get both their pointing and burning all-in-one. Wait a second, did I just say that the beam diameter is 1mm?
Oh wait. I did.
So Jimmymcjimthejim, how did you do it!? You've created the ultimate burning red laser in a nice pocket sized package!
That, my friend, is a secret.
Pleash tell me!!1!!1 Your soo coool Jimymcjimberson!!1
Ok, I'll tell you. The lens being used is an objective lens from a random sled that I had. The curvature of the lens is so strong that the lens is thicker than it is wide. And the best part is that there are no strange splash patterns in the beam. Unfortunately, getting the lens mounted and flat is not easy, and due to my lack of patience of getting this laser done, the output is a bit distorted from the mounting of the lens. And since the module is a press fit, I can't get the module out of the head of the laser to fix the lens.
So that's all folks! Hope you enjoyed reading the review, and be sure to check out my other Micro-sized build. Any comments, suggestions, questions, statements, opinions, and roundhouse kicks are well appreciated.
Oh, and some last-minute beamshots:
And the two glorious twins together:
Link to buy the host on eBay:
Metal Adjustable Laser Aim Module 650NM 5MW Airsoft Gun - eBay (item 320378687935 end time Aug-25-10 09:42:29 PDT)


")

")
