Welcome to Laser Pointer Forums - discuss green laser pointers, blue laser pointers, and all types of lasers

Buy Site Supporter Role (remove some ads) | LPF Donations

Links below open in new window

FrozenGate by Avery

Tunnel Effect Attachment

bungy

0
Joined
Mar 27, 2013
Messages
60
Points
0
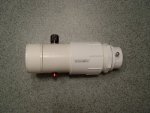
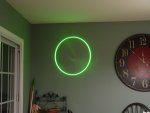
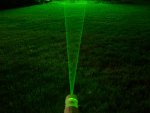
I was inspired to build this attachment after reading FireMyLaser's Tunnel Gun Tutorial. My first pass involved a cardboard tube and lots of tape, but I left it out in the rain and it fell apart. This build is PVC and much more solid.

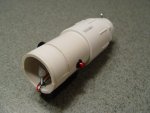
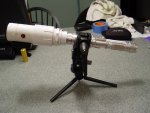
It is designed to fit on my Jetlasers PL-E 532nm. I had to spend some time in the PVC aisle at Home Depot to find the right combination of fittings to fit the laser host and then expand to give me some room for all the components. The end of the attachment is 2" pipe, and the rest is made of various adapters.

For the mirrors, I used hard disk platters from an old drive I had taken apart. They are extremely reflective, but not easy to cut. They are some glass-like material, and one shattered when I tried to break it. I broke up the rest of the bits until I had some pieces that looked useful.

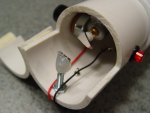
I cut a small half section of the pipe so I could get access deeper into the tube. Then I drilled all the necessary holes.

I mounted the front mirror first, then glued in the motor/mirror. Lots of testing and realignment later, and the tunnel was unobstructed and coming out at a good angle and diameter.

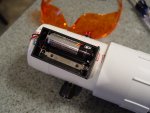
Soldered in the battery holder (2 AA), switch, and rheostat (all from Radio Shack), and it was done. I taped the half pipe piece back on for safety and I put in a screw to secure it to the top of the PL-E laser host.

When the motor speed is turned down, you can see a lot more lag when moving it around. I would like to get the motor to move even slower so I may modify it in the future.

It's a very basic effect, but it's easy do and wows non-laser folk.

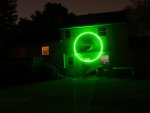
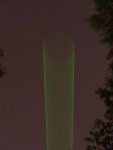
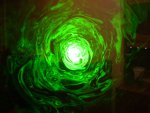
I couldn't get any good shots inside the tunnel as I don't have a fog generator, but some of the outdoor long exposures look nice.
There's also a video of me projecting it on the back of my house.

attachment.php

attachment.php

attachment.php

attachment.php

attachment.php

attachment.php

attachment.php

attachment.php


Attachments

  • DSC06590s.jpg
    DSC06590s.jpg
    222.5 KB · Views: 1,224
  • DSC06591s.jpg
    DSC06591s.jpg
    125.1 KB · Views: 1,242
  • DSC06597s.jpg
    DSC06597s.jpg
    103.9 KB · Views: 1,391
  • DSC06639s.jpg
    DSC06639s.jpg
    197.8 KB · Views: 1,165
  • DSC06647s.jpg
    DSC06647s.jpg
    139.6 KB · Views: 1,212
  • DSC96572s.jpg
    DSC96572s.jpg
    110.5 KB · Views: 1,238
  • DSC96575s.jpg
    DSC96575s.jpg
    187.5 KB · Views: 1,203
  • DSC96577s2.jpg
    DSC96577s2.jpg
    53.9 KB · Views: 1,087
Last edited:


Very nice build. Now how did you stick the mirror to the motor? Glue??? And what about power what are you driving the small motor with? Is the motor speed adjustae?
 
This just in....

A reported shortage of plumbing supplies and small motors has occurred in home-stores around the world...

:crackup:
 
Very nice! I will try building one. I salvaged a motor from an optical drive.
 
I have had this project in my IDEAS notebook for quite some time- they say great minds think alike - but I must admit you found a great solution to keep the tunnel from coming out at a big angle which was one aspect that I had not made much progress on....-

+3 for the OP (Greg)and this super solution-

fine tuning is possible but overall this is a great prototype build. I found an excellent/cheap source of high quality and very small dc motors to be 35mm auto-wind film cameras- an 'almost free' item at many thrift shop- likewise for another bigger dc motor but more importantly good grade FS mirrors are found inside Poliroid one-step plastic cameras- thin and with practice easily cut into workable smaller pieces-

At first this(just looking at the oics) i thought this build was not done w/FS mirrors- which explained the extra fainter rings-

I was mistaken- FSMs would eliminate the extra rings we see from 'regular' mirrors..but that is not what is causing those-this time...
. As we know non FSMs make a second fainter reflection coming from the front surface as the mirror reflection is not coming from the FS--the coating is on the back. So I am not sure why the 'extra rings' looks kinda cool as-is tho...
But hard disc drives are FSMs.so ...

I think you would also see a 'cleaner' circle if the interior was painted with flat black spray paint. I would be painting the whole thing flat black myself-

nice job greg--hk

Kinda wish we cold have seen more inside including the batteries - how can it be replaced when the battery loses power?.
One solution may be to install a single Li-ion in place and put another jack on the side for re-charging without the need to remove it.

*********** @ norby-"Very nice build. Now how did you stick the mirror to the motor? Glue??? And what about power what are you driving the small motor with? Is the motor speed adjustae?"

^^ he tells us al that in the OP

to mount FSMs...

I use tiny plastic gears- I have a BUNCH- plenty are inside every One-step camera where i harvest DC motors and FS mirrors- I glue the FSM to the big end and use simple compression fit to attach to the dc motor shaft-sometimes needing to use a tiny drill bit to make the hole just the right size- of course you want to glue this FSM as flat as possible.

__________________
 
Last edited:
Wow! How hard was the alignment?

Looks very clean.
 
Wow! How hard was the alignment?
Looks very clean.

I'm sure this is a walk in the park for you!

I need to attempt to make me something like this. All I have is a FS mirror double sided tapped to a small fan. Would be neat to have a unit that could somehow fit pen lasers all the way up to my laserglow.
 
FML-- no idea how i missed your old thread on this.. here is just one of FML's epic tunnel shots( btw no 'time' is involved afaik at least not time travel)--lol

+3 for FML's thread
 

Attachments

  • tunnelgun11.jpg
    tunnelgun11.jpg
    51.7 KB · Views: 2,267
Last edited:
^Thank you. I wish not to steal the spotlight, though I think that Bungy should make the effort to leave credit whoever inspired it, as it was on this forum. It is good karma.
 
Was it this or this the one you saw? I'm curious because it looks close to my design.

^Thank you. I wish not to steal the spotlight, though I think that Bungy should make the effort to leave credit whoever inspired it, as it was on this forum. It is good karma.

Yes, it was the first one you linked! When I first saw your pictures from inside the tunnel, I had to build one. I did my first proof of concept build with a cardboard tube and lots of tape and hot glue, based on your design. But then I left it out in the rain after a late night of beaming in the sky. It fell apart so I wanted to make a more durable one. I couldn't find your thread again, glad you chimed in because I definitely took your idea and ran with it. I also updated the original post with a link to your thread. Didn't meant to try and take credit, I just couldn't find the original thread.

On the first build, I didn't have to do any alignment. But when I went to the PVC, I had to learn a lot about angles and projection. I kept getting off cenetered ovals with wildly different diameters. Once I figured out the major angles, fine tuning it was difficult. The mirror on the motor was especially difficult because tiny adjustments had big impacts.

There is a 2AA battery pack mounted to the bottom of the PVC, I can change the batteries at will. The dial on the side does reduce the motor speed, but not as much as I'd like. I'm going to try it with just one battery and see if that slows it down to near stop. The motor did start squealing during my testing, and the vibrations made some neat effects in the projected circle, but I added a drop of 3-in-1 oil to get it running smooth again.

I wanted to build this with black ABS pipe, but for some reason I couldn't find it at Home Depot. Not sure if there's as much variety in the ABS adapters either. Good suggestion on painting the interior, Hak. The mirrors are clean, but I think there are some imperfections that may be contributing to the concentric rings. I didn't even realize the HD platters were FS mirrors, they were just the most reflective thing I had handy.

Thanks for all the compliments, but I wouldn't have even known how to make this effect if it wasn't for FireMyLaser's tutorial.
 
The battery pack (also from Radio Shack) is bolted to the bottom of the attachment. I put in a dummy battery and now the laser is spinning a lot slower. It almost looks like it is being strobed. I think I will increase the diameter - when I was messing with my first build, I had it about 10-12 feet wide and it was very cool slowing down the motor with my finger.

attachment.php


Attachments

  • DSC06683s.jpg
    DSC06683s.jpg
    147.9 KB · Views: 1,072


Back
Top