

LazyBeam
0
- Joined
- Jun 12, 2010
- Messages
- 462
- Points
- 28
So I stumbled across this thread awhile ago advertising $1.39 AA 3W LED flashlights. For the record, while they are not top quality, they are a great buy - get like 5 of them to keep handy. Here's the thread: http://laserpointerforums.com/f46/possible-cheap-host-1-39-ebay-55068.html
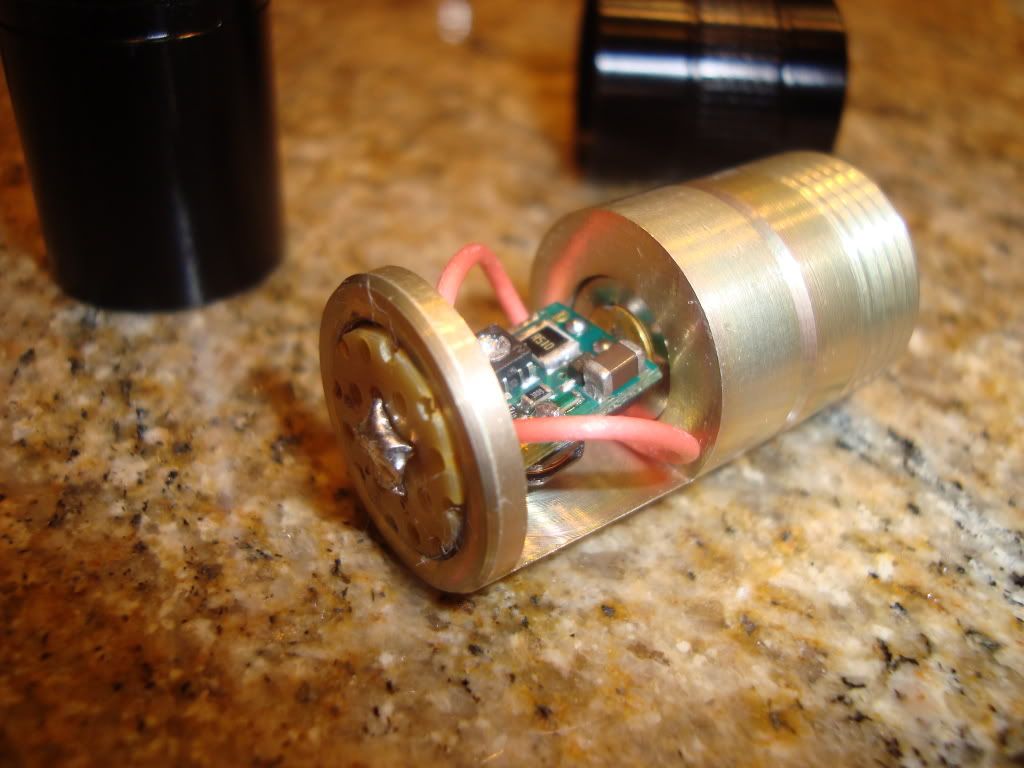
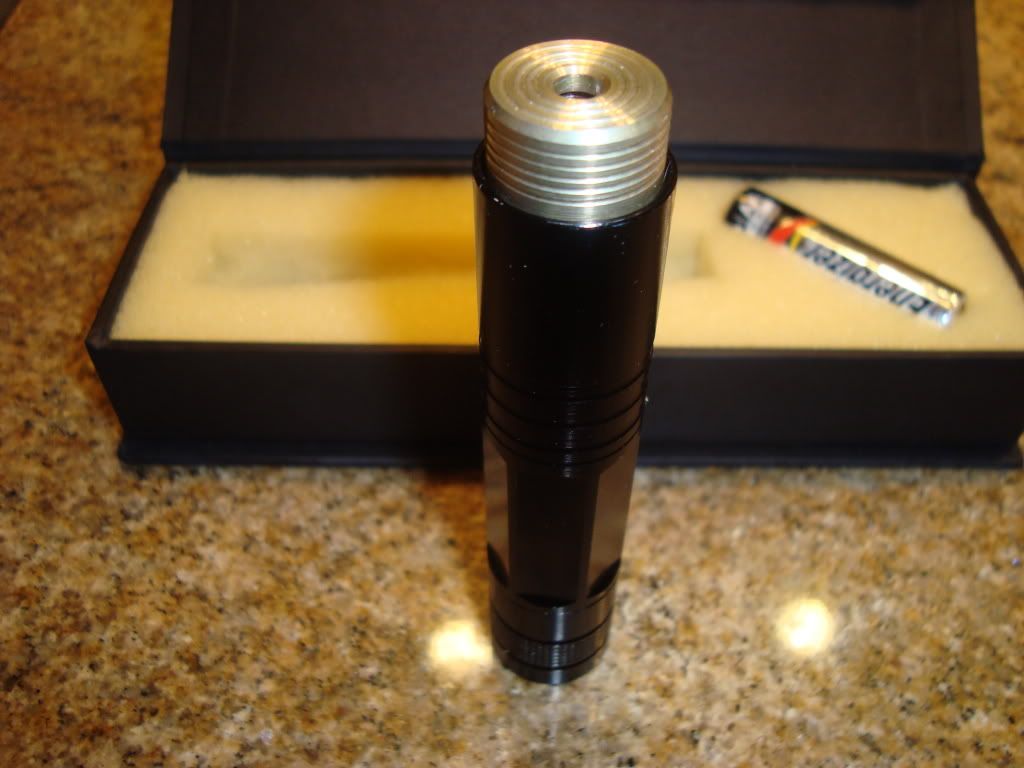
So I got a few and decided to turn one into a bluray laser for my brother's Christmas present. You can see in the top picture a whole flashlight and another flashlight gutted. Pretty much just a reflector, spring, driver/LED, body, and tail clicky. You can see the drop in laser head I put together for it too. I used an old WL pointer box and cut some foam to make a case for the laser (alkaline AA only for show).
On the "pill", an aixiz module is turned down and press fit into using some thermal epoxy. Then the pill and lens are both grooved for orings. Twin orings allow for the focus ring to have turning resistance against the body and to grip the lens assembly at the same time - smooth focusing that stays where you set it. Laser head materials are all chromate coated 6061 aluminum (conductive but protects against corrosion). The color is not off... chromate coated aluminum looks gold from the conversion coating. The rear terminal is just some radioshack breadboard with a large solder spot ground flat. The microboost is set at a conservative 150mW - so approximately 150mW. Uses a Microboost driver.
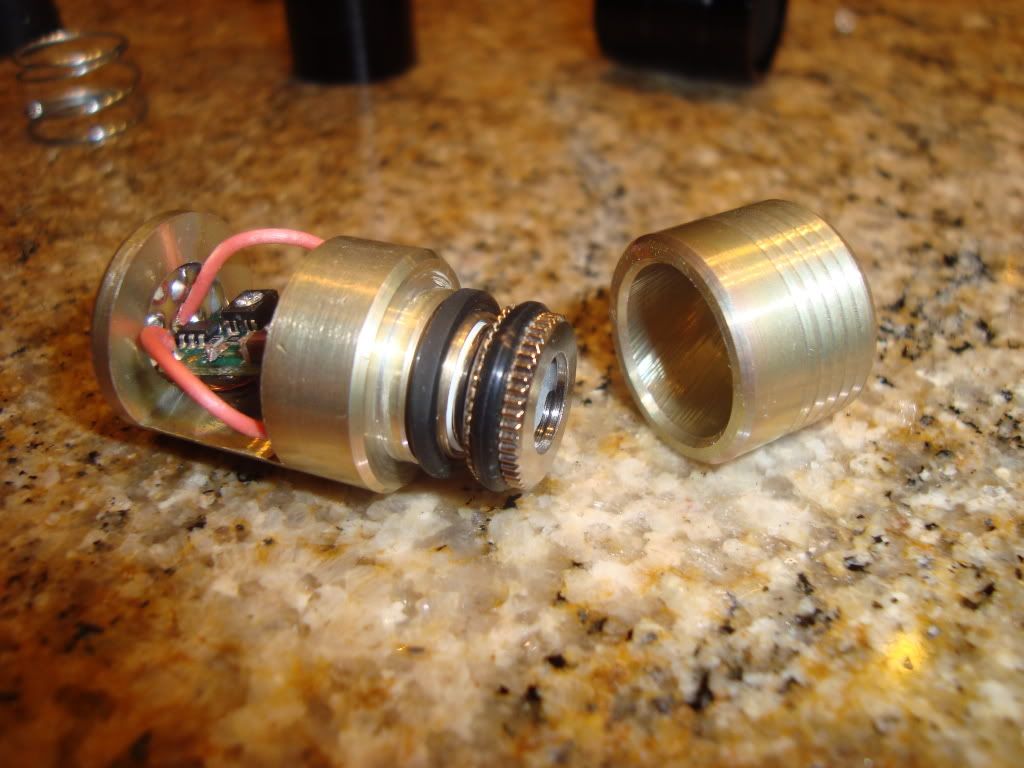
The pill is machined for an interference press-fit with the body. The thin host will be placed in the oven @250degF so it can expand and the laser head will be put in the freezer so it can shrink. The pill dropped right into the host and a few seconds later was stuck permanently. The parts return to their normal size as the temperature returns to normal and because the pill is larger than the host, the two become permanently stuck with great electrical contact and no need for glue/screws.
I'm still waiting on my DX 14500 trustfire li-ion batteries to show up... but I rigged up 2X AAA batteries to show the laser. The dot looks a little dim because the camera flash was on and only about 1 foot away from it. The dot pretty much looks just as bright as my other 180mW laser in my sig.


So I got a few and decided to turn one into a bluray laser for my brother's Christmas present. You can see in the top picture a whole flashlight and another flashlight gutted. Pretty much just a reflector, spring, driver/LED, body, and tail clicky. You can see the drop in laser head I put together for it too. I used an old WL pointer box and cut some foam to make a case for the laser (alkaline AA only for show).
On the "pill", an aixiz module is turned down and press fit into using some thermal epoxy. Then the pill and lens are both grooved for orings. Twin orings allow for the focus ring to have turning resistance against the body and to grip the lens assembly at the same time - smooth focusing that stays where you set it. Laser head materials are all chromate coated 6061 aluminum (conductive but protects against corrosion). The color is not off... chromate coated aluminum looks gold from the conversion coating. The rear terminal is just some radioshack breadboard with a large solder spot ground flat. The microboost is set at a conservative 150mW - so approximately 150mW. Uses a Microboost driver.
The pill is machined for an interference press-fit with the body. The thin host will be placed in the oven @250degF so it can expand and the laser head will be put in the freezer so it can shrink. The pill dropped right into the host and a few seconds later was stuck permanently. The parts return to their normal size as the temperature returns to normal and because the pill is larger than the host, the two become permanently stuck with great electrical contact and no need for glue/screws.
I'm still waiting on my DX 14500 trustfire li-ion batteries to show up... but I rigged up 2X AAA batteries to show the laser. The dot looks a little dim because the camera flash was on and only about 1 foot away from it. The dot pretty much looks just as bright as my other 180mW laser in my sig.


")
 Only so much can be done with just a lathe.