

- Joined
- Sep 16, 2007
- Messages
- 3,658
- Points
- 113
I waterproofed my G105. 
The final modification to my favorite laser.
Not really a big deal but it sure is fun.
Pictures and video later.
The friends are calling.
It's much better than wrapping your laser in heat shrink.
I really like this laser. If I manufactured lasers, this would be how I would make them.
It's nice having a water resistant >100mW laser with a constant on clicky, and large enough mass for 2 minute+ duty cycles powered by a single rechargeable CR123A, all while being small enough to fit in your pocket comfortably. And it's anodized aluminum.
Short Videos added, more pictures & videos to comealong with an explanation on how I did it.
If anyone is interested.
+++++++++++++++++++++++++++++++++++++++++++++++
Making this laser was pretty simple as it comes apart it just 3 pieces (the tailcap, body, and aperture cap).
What you need:
-A laser
-O-rings (I used thin ones, it makes it easier)
-Thread sealing tape (optional)
-Metal file
-Clear plastic sheet
-Epoxy or other waterproof adhesive/sealant (optional)
Aperture cap:
First, I needed to make sure the O-rings would fit nicely at the threads without being externally visible. To do this, I needed to reduce the thickness of the sides above the threading.
I don't have a lathe or anything so I just spun it in my drill and took a metal file to it.

This made enough room to fit the O-ring nicely and allowed for a good seal.
After the first O-ring was put in place, I had to make sure no water would leak in through the aperture.
This is how I did it:
I used a piece of plastic from a cellphone screen.
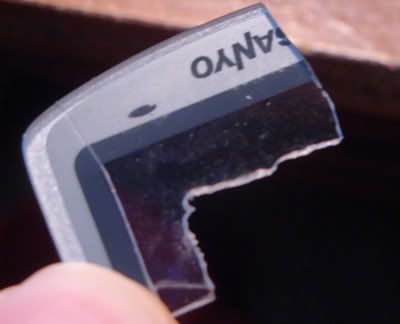
I cut it out and filed/sanded it down with a Dremel
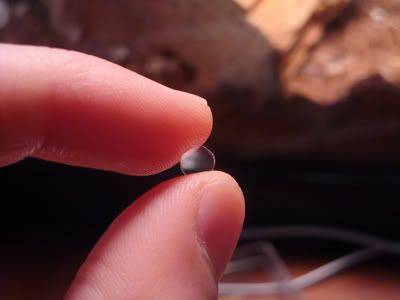
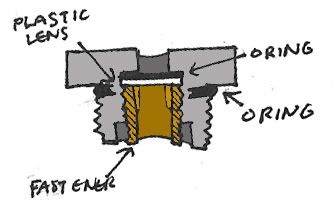
The lens goes underneath the O-ring, as shown in the diagram I drew.
If you can't find a small enough O-ring you can just glue the lens in.
The "fastener" I used was part of the lens holder for the Galileo. I sawed off the top and screwed it in to hold everything in place.
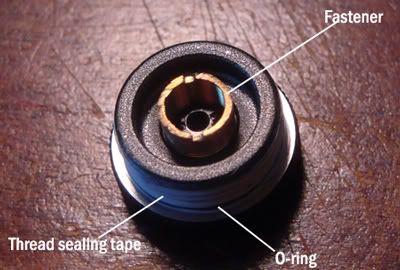
From the top it looks like this:
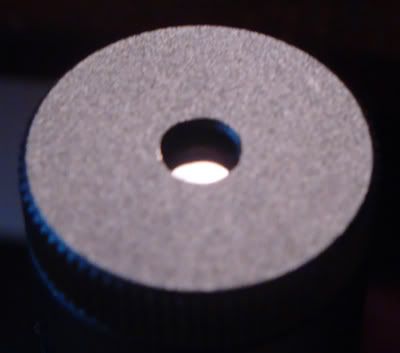
Be sure to clean the lens before you place it.
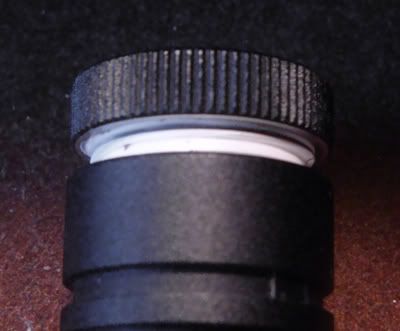
In this picture you can see the O-ring and the thread sealing tape.
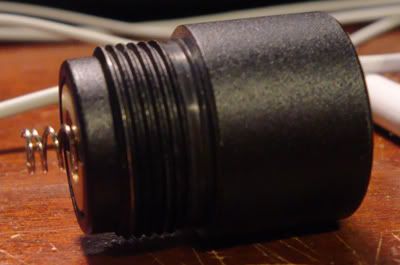
The tailcap:
Basically the same process as the aperture cap.
File down the sides and stick the O-ring in there.
I used a flat O-ring here because it fit better than the round ones.
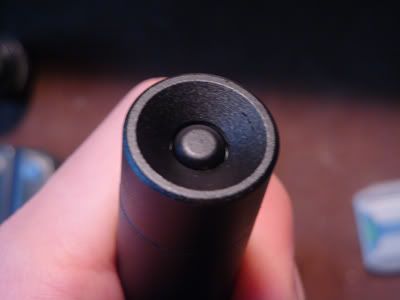
The clicky switch:
This was tough, and I couldn't really find a reliable method for using an O-ring, so I improvised.
I just wrapped the button with thread sealing tape so that when the clicky is replaced it fits in nice and snug. When I come up with a better way to seal the clicky I'll do that, but this works fine for now.
You can see the tape a little here:
Note:
I would not recommend this mod to someone who wants to go submerge their laser for extended periods of time or for swimming or diving with their laser.
I have submerged it in 3 feet of water and it did not leak, but I cannot guarantee that this will be effective for long term submersion under a depth beyond 1 foot of water.
This same concept can be applied to pen lasers, but it would require sealing the button and any other gaps that may leak.
+++++++++++++++++++++++++++++++++++++++++++++++
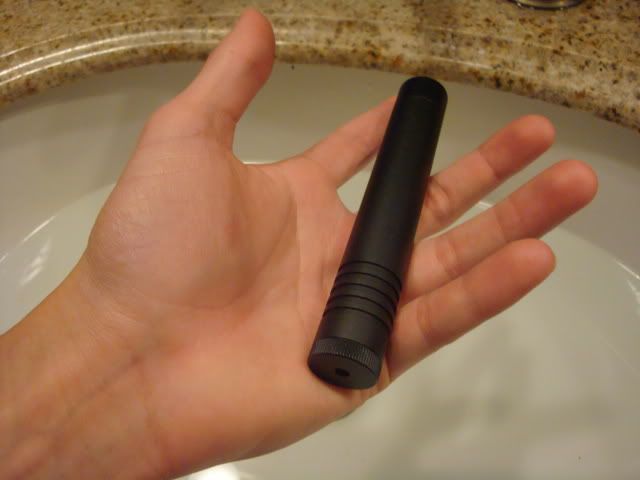
Final Result:
It's shorter than a pen laser, but fatter and made of anodized aluminum rather than brass.
In the grass on a rainy day:
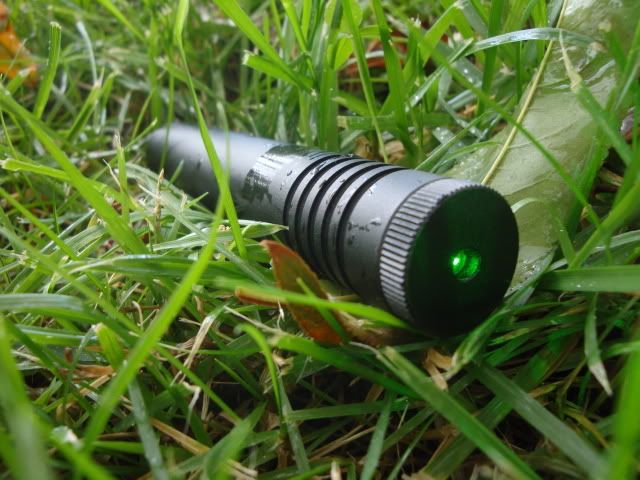
It's so pretty!
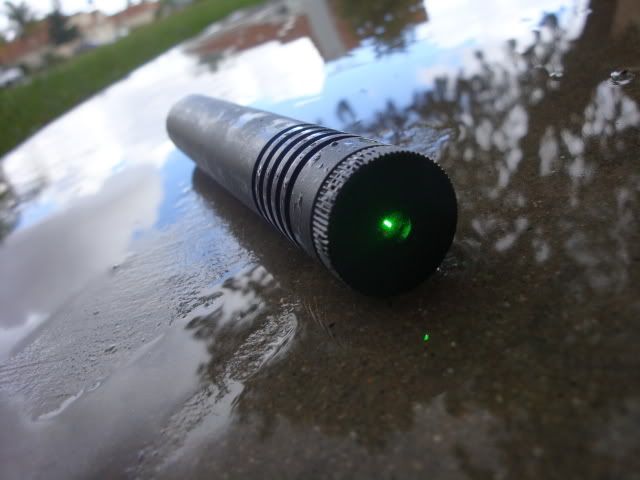
The plunge:
[media]http://www.youtube.com/watch?v=CnNDZiIw8pw[/media]
Still burning:
[media]http://www.youtube.com/watch?v=vIgrNjOM8BE[/media]
The final modification to my favorite laser.
Not really a big deal but it sure is fun.
Pictures and video later.
The friends are calling.
It's much better than wrapping your laser in heat shrink.
I really like this laser. If I manufactured lasers, this would be how I would make them.
It's nice having a water resistant >100mW laser with a constant on clicky, and large enough mass for 2 minute+ duty cycles powered by a single rechargeable CR123A, all while being small enough to fit in your pocket comfortably. And it's anodized aluminum.
Short Videos added, more pictures & videos to come
If anyone is interested.
+++++++++++++++++++++++++++++++++++++++++++++++
Making this laser was pretty simple as it comes apart it just 3 pieces (the tailcap, body, and aperture cap).
What you need:
-A laser
-O-rings (I used thin ones, it makes it easier)
-Thread sealing tape (optional)
-Metal file
-Clear plastic sheet
-Epoxy or other waterproof adhesive/sealant (optional)
Aperture cap:
First, I needed to make sure the O-rings would fit nicely at the threads without being externally visible. To do this, I needed to reduce the thickness of the sides above the threading.
I don't have a lathe or anything so I just spun it in my drill and took a metal file to it.
This made enough room to fit the O-ring nicely and allowed for a good seal.
After the first O-ring was put in place, I had to make sure no water would leak in through the aperture.
This is how I did it:
I used a piece of plastic from a cellphone screen.
I cut it out and filed/sanded it down with a Dremel
The lens goes underneath the O-ring, as shown in the diagram I drew.
If you can't find a small enough O-ring you can just glue the lens in.
The "fastener" I used was part of the lens holder for the Galileo. I sawed off the top and screwed it in to hold everything in place.
From the top it looks like this:
Be sure to clean the lens before you place it.
In this picture you can see the O-ring and the thread sealing tape.
The tailcap:
Basically the same process as the aperture cap.
File down the sides and stick the O-ring in there.
I used a flat O-ring here because it fit better than the round ones.
The clicky switch:
This was tough, and I couldn't really find a reliable method for using an O-ring, so I improvised.
I just wrapped the button with thread sealing tape so that when the clicky is replaced it fits in nice and snug. When I come up with a better way to seal the clicky I'll do that, but this works fine for now.
You can see the tape a little here:
Note:
I would not recommend this mod to someone who wants to go submerge their laser for extended periods of time or for swimming or diving with their laser.
I have submerged it in 3 feet of water and it did not leak, but I cannot guarantee that this will be effective for long term submersion under a depth beyond 1 foot of water.
This same concept can be applied to pen lasers, but it would require sealing the button and any other gaps that may leak.
+++++++++++++++++++++++++++++++++++++++++++++++
Final Result:
It's shorter than a pen laser, but fatter and made of anodized aluminum rather than brass.
In the grass on a rainy day:
It's so pretty!
The plunge:
[media]http://www.youtube.com/watch?v=CnNDZiIw8pw[/media]
Still burning:
[media]http://www.youtube.com/watch?v=vIgrNjOM8BE[/media]


