Welcome to Laser Pointer Forums - discuss green laser pointers, blue laser pointers, and all types of lasers

LPF Donation via Stripe | LPF Donation - Other Methods

Links below open in new window

ArcticMyst Security by Avery

L1117 Driver

Joined
Mar 29, 2011
Messages
1,056
Points
48
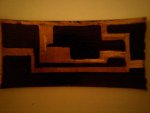
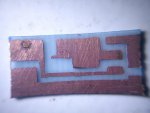
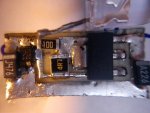
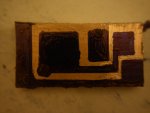
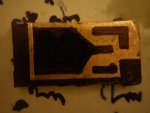
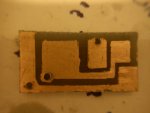
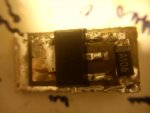
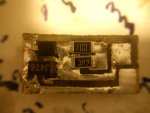
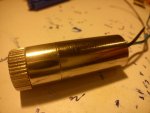
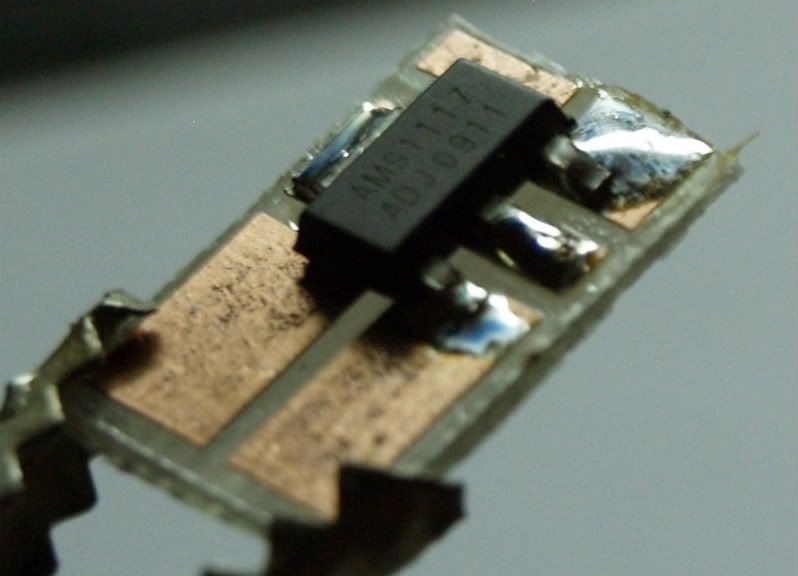
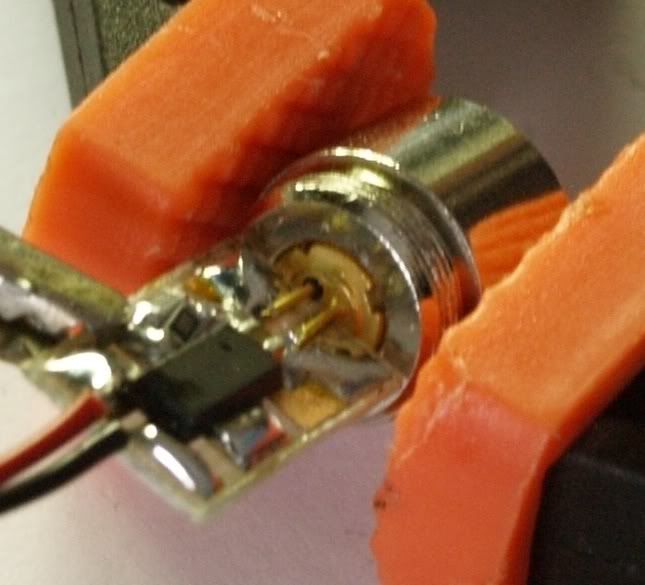
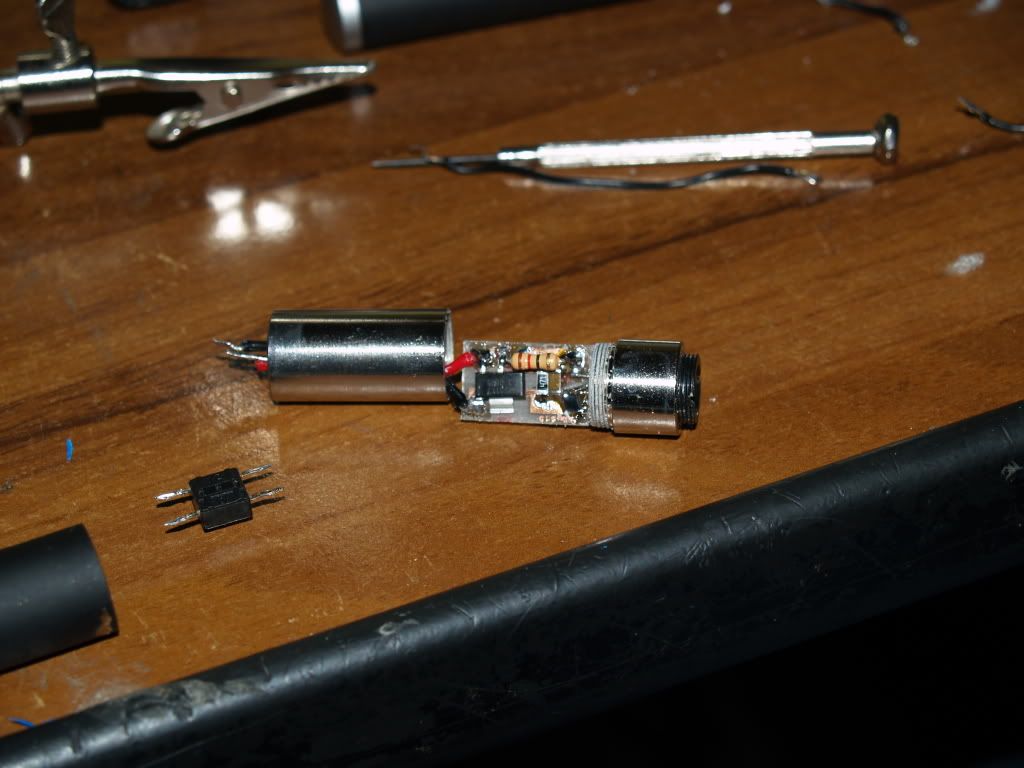
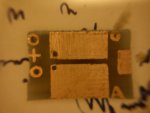
Here is my recent build driver for LOC Red diode running at 390mA
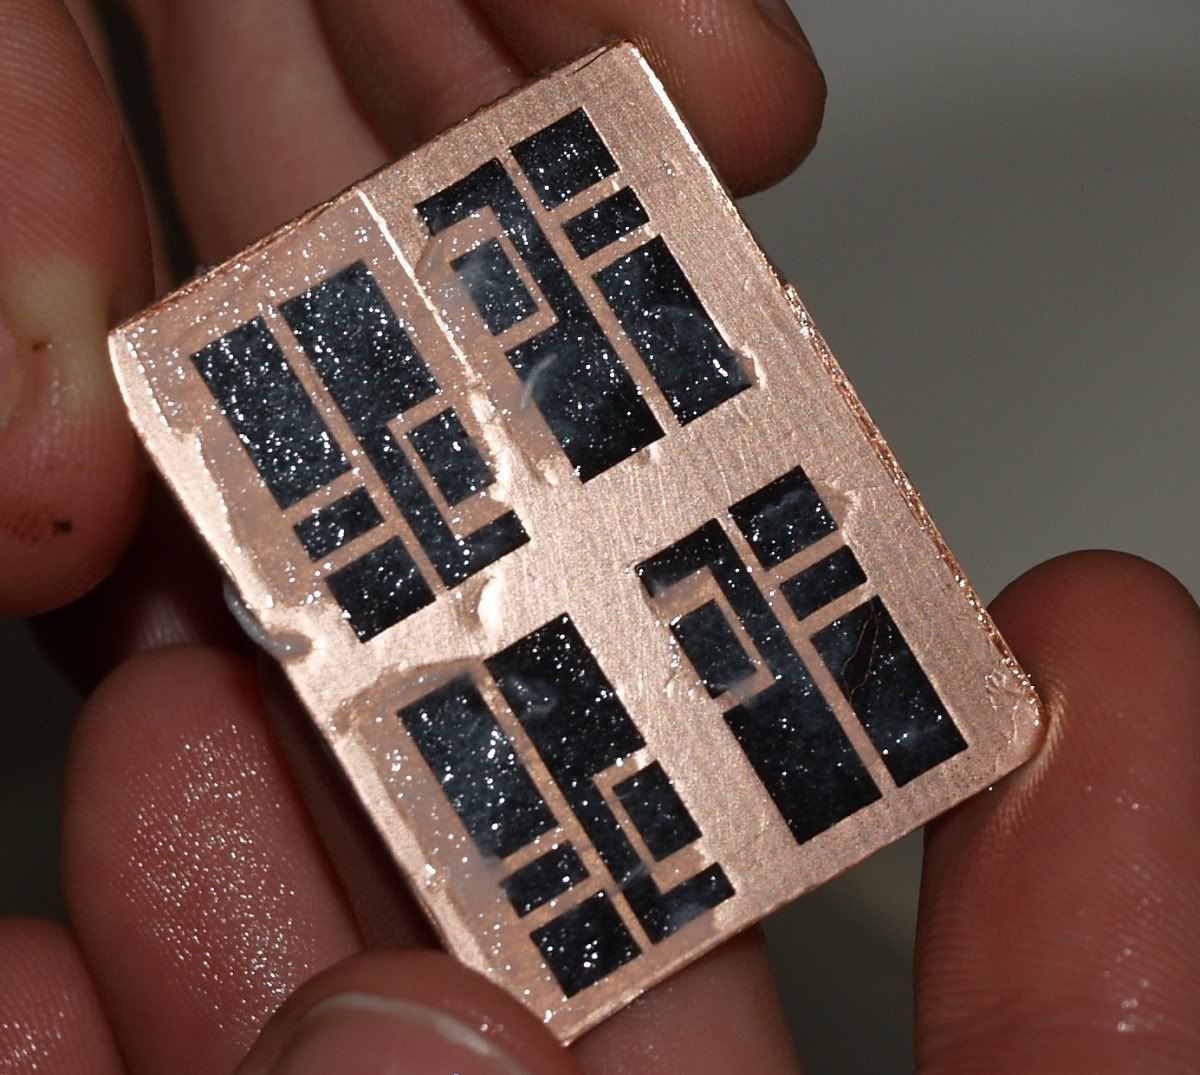
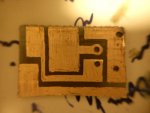
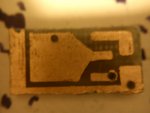
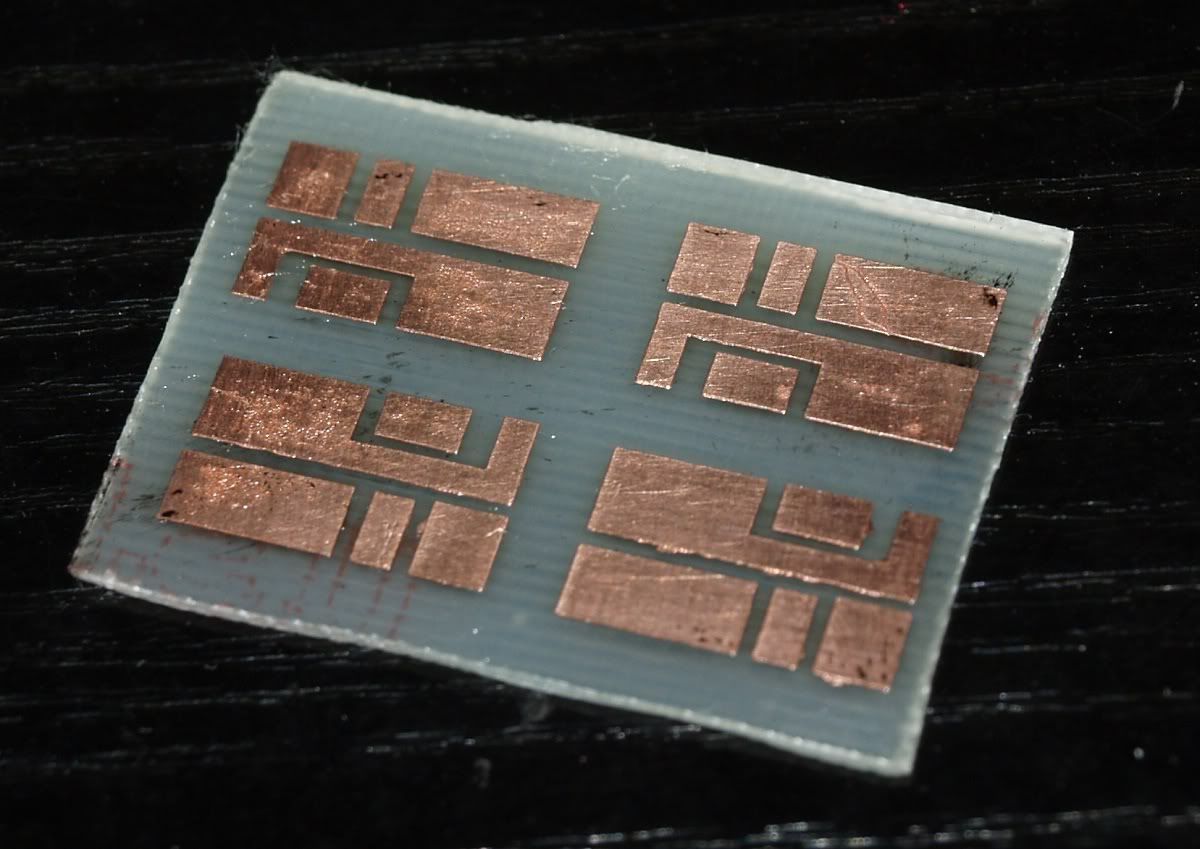
all is hand drawn and hand made

i used L1117

whacha think?


P.S. the led on the finish pcb is for size reference only
P.S.S. the shape is actually a rectangular but my super macro lens makes it look like it's curved
 

Attachments

  • DSC00692.JPG
    DSC00692.JPG
    48.2 KB · Views: 269
  • DSC00696.JPG
    DSC00696.JPG
    67.7 KB · Views: 426
  • DSC00697.JPG
    DSC00697.JPG
    81.4 KB · Views: 1,029


Joined
Mar 29, 2011
Messages
1,056
Points
48
ok no comments...

i guess nobody likes my driver :(

so I made a new one on 2 sided pcb (again hand drawn and hand made) :D

this time i run it at 431mA Long Open Can Red Diode :)
this time it fits Aixiz Module (or copy ones) :) :) :)

pls post some comments :D:bowdown::na::evil:
 

Attachments

  • DSC00989.JPG
    DSC00989.JPG
    136.5 KB · Views: 286
  • DSC00990.JPG
    DSC00990.JPG
    136.2 KB · Views: 201
  • DSC00991.JPG
    DSC00991.JPG
    125.8 KB · Views: 236
  • DSC00992.JPG
    DSC00992.JPG
    130.2 KB · Views: 240
  • DSC00993.JPG
    DSC00993.JPG
    132.6 KB · Views: 220
  • DSC00994.JPG
    DSC00994.JPG
    149.9 KB · Views: 197
  • DSC00995.JPG
    DSC00995.JPG
    127.1 KB · Views: 267
  • DSC00997.JPG
    DSC00997.JPG
    163.7 KB · Views: 201

Kevlar

0
Joined
Apr 26, 2010
Messages
1,353
Points
48
Nice job! Now thats a true DIY build!! I like seeing home etched drivers like this, +1 to you for that. :beer:

Are you going to make your own host too?
 
Joined
Mar 29, 2011
Messages
1,056
Points
48
Thanks Kevlar :)

about the host i haven't yet figured it out although i have a copper circular heat sink from a CPU radiator that i will probably use to put in my host but i haven't figured it out yet :)

i might change the driver a little bit to eliminate the wires and put a spring for the positive terminal and remove the enclosing case of the Aixiz module :)


I'll post photos when there is something new :) :beer:
 
Joined
Feb 5, 2008
Messages
6,252
Points
83
Always good to have somebody willing to make something himself, isntead of buying premade. Kudos! Nice work on the PCB etching, but design itself is a little bit more complicated than it needs to be.

Here's mine:
P3190305.jpg


P3190306.jpg


P3190309.jpg


P3200317.jpg


Sorry about the last two crappy photos.
 
Joined
Mar 29, 2011
Messages
1,056
Points
48
Eudaimonium your driver is pretty simple indeed but i did the complicated board because i wanted to use as less space as possible to be able to fit it in the Aixiz module loosely :)

i am making a bigger one right now with a spring for the positive terminal for a flashlight host with a 18650 battery and get rid of the closing case of the module and use the host as ground with a tail switch :)

i will post pictures when it's ready :)

nice to see someone etching their boards by themselves :p :beer: :bowdown:
 
Joined
Feb 5, 2008
Messages
6,252
Points
83
Those are aproximately 14x9 mm in footprint and as such fit isnide aixiz no problems.

PA234913.jpg


But yeah, true driver DIY is pretty rare on these forums.
 
Joined
Mar 29, 2011
Messages
1,056
Points
48
Hey nice i see you can actually put it in the aixiz module :) but I also see that you don't use any caps even at the ouput .....

I like to add the input and output caps and the rectifying diode just in case. :)

I just finished the other pcb - see the pics. :) and amazingly - IT WORKS :D

I left a lot of space on the back side (i want to put higher wattage resistors).
But I don't have them lying around just yet. :D

This time I won't fit it in the Aixiz module ... these days I will try to put it in a flashlight host and see what happens :D

the not connected piece of the board is for the 3rd pin of laser diode which is not in use .. for extra durability :D
 

Attachments

  • DSC01032.JPG
    DSC01032.JPG
    142.1 KB · Views: 188
  • DSC01033.JPG
    DSC01033.JPG
    130 KB · Views: 223
  • DSC01034.jpg
    DSC01034.jpg
    214.1 KB · Views: 199
  • DSC01036.jpg
    DSC01036.jpg
    233.1 KB · Views: 216
Joined
Feb 5, 2008
Messages
6,252
Points
83
Hey nice i see you can actually put it in the aixiz module :) but I also see that you don't use any caps even at the ouput .....

I like to add the input and output caps and the rectifying diode just in case. :)

I just finished the other pcb - see the pics. :) and amazingly - IT WORKS :D

I left a lot of space on the back side (i want to put higher wattage resistors).
But I don't have them lying around just yet. :D

This time I won't fit it in the Aixiz module ... these days I will try to put it in a flashlight host and see what happens :D

the not connected piece of the board is for the 3rd pin of laser diode which is not in use .. for extra durability :D
Ofcourse I used a capacitor, it's the little brown SMD component in parralel to diode, and "421" component, a resistor which serves as cap bleeder.
I never put rectifying diodes in my DIY drivers, I have never forgot which way do batteries go. I alway have a strict "case negative" policy, except for greens and IRs.

Nice work there!
 
Joined
Mar 29, 2011
Messages
1,056
Points
48
Ofcourse I used a capacitor, it's the little brown SMD component in parralel to diode, and "421" component, a resistor which serves as cap bleeder.
I never put rectifying diodes in my DIY drivers, I have never forgot which way do batteries go. I alway have a strict "case negative" policy, except for greens and IRs.

Nice work there!

oh yeah ... now I see the cap :) sorry my bad :)
I never forget the battery polarity but someone might :D

I saw your builds - very nice looking :)
I would like to build some other color lasers but I only got red and IRs ... Maybe my next one will be a high power IR :D

cheers :beer:
 

rkcstr

0
Joined
Dec 1, 2007
Messages
1,368
Points
0
Reminds me of when I started... Etched all my boards myself, cut and drilled all the holes, inserted vias by hand, and so on. Even sold over 500 of them like that, which was a crapload of work!

If you're drilling holes in the board, my suggestion is a Dremel (or other high speed rotary tool) and carbide bits. Regular steel bits wear out pretty quick. Then, I used spring-assisted sewing shears for cutting the PCB, but make sure you get the thinner board (0.032" vs the typical 0.064"). And try to find the 2oz copper for better heatsinking.

Also, I'd suggest staying away from the SO-8 or SOT-223 packages as they don't tend to stay very stable due to poor heat dissipation. The D2PAK seems to be the best for stability.
 
Last edited:

3zuli

0
Joined
May 30, 2009
Messages
810
Points
28
Eudaimonium, can you give us the project files (if you have any)? I was just going to start building a simillar driver (only for 100mA though)
Does it it need heatsinking with that current rating?

at 400mA, it should have some form of heatsink (but these chips should work fine even at 80°C :eg:)
 
Last edited:
Joined
Mar 29, 2011
Messages
1,056
Points
48
Eudaimonium, can you give us the project files (if you have any)? I was just going to start building a simillar driver (only for 100mA though)


at 400mA, it should have some form of heatsink (but these chips should work fine even at 80°C :eg:)

I didn't put anything to heatsink the chip except for it's out pad on the pcb... it doesn't get that hot :) but it would have been nice though :)


Top