IsaacT
0
- Joined
- Aug 25, 2010
- Messages
- 5,947
- Points
- 83
Now THERE is an entry no parent except Tony Stark's will ever add to a creepy record book of a child's life. By the way if you never saw Iron Man, go watch it right-the-fuck now before you lose your status as a human being.
So I finally made my first Laser! Incidentally, it is also my first electronics project. And I think I did fairly well, but leave me some notes on anything you think I should work on :beer: Btw, I am calling it the MARS250. Mars cuz I like Mars and it is a red planet and 250 due to the operating current. Would do it but I don't have an LPM yet....Expect a PM in a week or two MarioMaster
EDIT* FIRST OFF I need to thank everyone at Laserchat for being patient with me through all my stupid questions like, "What is parallel?" and "How do I use resistors?". Yall were really an invaluable part of my first build. Thanks a lot guys, yall rock!
So the parts I used are as follows:
1. 0.00 USD - A 16X Closed Can Red Diode I extracted from a broken dvd burner drive I got from a Computer Repair store.
2. 5.00 USD - An Aixiz module bought from Hightechdealz.com
3. 6.00 USD - Flaminpyro Wire(CANNOT recommend this enough!)
4. 8.00 USD - Project Box from Radioshack(useful products but the employees were NO help with resistors or switches or even voltage regulators)
5. 2.50 USD - LM317T
6. 2.00 USD - A pack of 10 Ohm Resistors
7. 2.50 USD - A 3-Prong Toggle Switch with a Safety Cover
8. 2.50 USD - Heatshrink Tubing
TOTAL PRICE OF ITEMS: 28.50
Tools I used:
1. Soldering Iron
2. Harbor Freight Rotary Tool
3. Hot Glue Gun
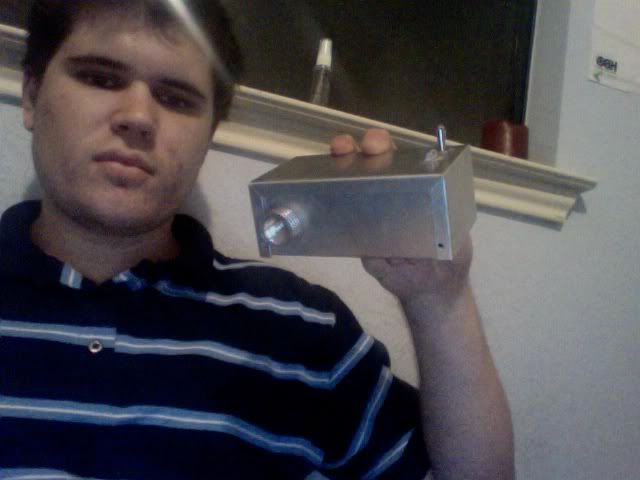
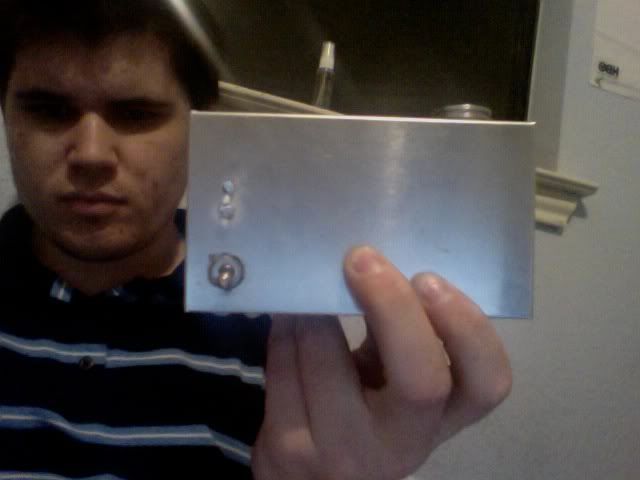
Before making this one, I had tried the day before to make a PHR build. I killed the first one because of my lack of experience and skill with a soldering iron.:yabbem: So I removed the dead diode from the heatsink I was using(one of pontiacq5's oversized heads from the Groove GB he was making them for.) Unfortunately, removing it made the part where you pressfit the diodes too wide to press fit again, so I had to put that project box to the side until I have time to work on it and change out the heads. :undecided: However, I feel that I did a nice job on the outside of it so I really wanna put a few pics of it up in this thread. Keep in mind this has been my first time using things like a dremel or soldering iron so what may not look perfect to you looks AMAZING to me Anyway, there are just 2 so here ya go:
Love the heads, Pontiacq5, cannot WAIT to get the Groove!
In this pic you can see two LEDs. I was using them to indicate emission.
What is really cool is that they were 405nm so they would have matched the PHR build PERFECTLY.
Anyway, love this laser, and now I will let the pictures do the talking.
But first a video
I will definitely get some burning videos and whatnot tomorrow when my sister isn't sleeping(she has the ACT tomorrow....let's see if she can do better than me :eg: ) *EDIT* HERE IS A VIDEO OF BALLOON POPPING. The matches I had were old, and it took awhile to make it work. Also, it wasn't showing up because the right side of the laser covered it up so I cut the majority of that portion. Anyway, here 'tis:
Now for teh pics
The innards:

The exterior:


Beam/Dot Shots:


Note: the wall I was shining it on was red. This was not a really bad collimation causing it to light up the whole wall.
Anyway, I hope yall like it, and again leave me some pointerz in the comments so I can get better
Peace,
Isaac
PS- I feel like more of a laserist now
So I finally made my first Laser!
Incidentally, it is also my first electronics project. And I think I did fairly well, but leave me some notes on anything you think I should work on :beer: Btw, I am calling it the MARS250. Mars cuz I like Mars and it is a red planet and 250 due to the operating current. Would do it but I don't have an LPM yet....Expect a PM in a week or two MarioMaster EDIT* FIRST OFF I need to thank everyone at Laserchat for being patient with me through all my stupid questions like, "What is parallel?" and "How do I use resistors?". Yall were really an invaluable part of my first build. Thanks a lot guys, yall rock!
So the parts I used are as follows:
1. 0.00 USD - A 16X Closed Can Red Diode I extracted from a broken dvd burner drive I got from a Computer Repair store.
2. 5.00 USD - An Aixiz module bought from Hightechdealz.com
3. 6.00 USD - Flaminpyro Wire(CANNOT recommend this enough!)
4. 8.00 USD - Project Box from Radioshack(useful products but the employees were NO help with resistors or switches or even voltage regulators)
5. 2.50 USD - LM317T
6. 2.00 USD - A pack of 10 Ohm Resistors
7. 2.50 USD - A 3-Prong Toggle Switch with a Safety Cover
8. 2.50 USD - Heatshrink Tubing
TOTAL PRICE OF ITEMS: 28.50
Tools I used:
1. Soldering Iron
2. Harbor Freight Rotary Tool
3. Hot Glue Gun
Before making this one, I had tried the day before to make a PHR build. I killed the first one because of my lack of experience and skill with a soldering iron.:yabbem: So I removed the dead diode from the heatsink I was using(one of pontiacq5's oversized heads from the Groove GB he was making them for.) Unfortunately, removing it made the part where you pressfit the diodes too wide to press fit again, so I had to put that project box to the side until I have time to work on it and change out the heads. :undecided: However, I feel that I did a nice job on the outside of it so I really wanna put a few pics of it up in this thread. Keep in mind this has been my first time using things like a dremel or soldering iron so what may not look perfect to you looks AMAZING to me
Anyway, there are just 2 so here ya go:Love the heads, Pontiacq5, cannot WAIT to get the Groove!
In this pic you can see two LEDs. I was using them to indicate emission.
What is really cool is that they were 405nm so they would have matched the PHR build PERFECTLY.
Anyway, love this laser, and now I will let the pictures do the talking.
But first a video
I will definitely get some burning videos and whatnot tomorrow when my sister isn't sleeping(she has the ACT tomorrow....let's see if she can do better than me :eg: ) *EDIT* HERE IS A VIDEO OF BALLOON POPPING. The matches I had were old, and it took awhile to make it work. Also, it wasn't showing up because the right side of the laser covered it up so I cut the majority of that portion. Anyway, here 'tis:
Now for teh pics
The innards:
The exterior:
Beam/Dot Shots:
Note: the wall I was shining it on was red. This was not a really bad collimation causing it to light up the whole wall.
Anyway, I hope yall like it, and again leave me some pointerz in the comments so I can get better
Peace,
Isaac
PS- I feel like more of a laserist now
Last edited: