- Joined
- May 8, 2012
- Messages
- 52
- Points
- 8
Hello everyone,
I'm working on a very simple, very cheap host to accept either an Aixiz module case or green assembly. As I'm a new member here, I figured I'd post the entire thing as a quick tutorial, as it truly cost me around 10$ in hardware store copper, a few dollars in tools and around 2 hours of labor. Mods, as I am new, I apologize if this is in the wrong section - but this host IS intended for a 532nm module!
Take a look if you're interested . I'm waiting on a few things to come in the mail, so I'll update as I finish this DIY project.
Supplies:
1$ - 1x 1/2" Brass PEX Sweat Adapter.
5$ - 1 section of 1/2" Copper Tubing. Bring a AA battery with you. Most batteries will JUST fit inside the tubing. Make sure your tubing has an adequate ID to accept a AA or 3.7v Lithium.
2.50$ - 5x 1/2" Copper Tubing Couplers.
0.50$ - 1/2" Copper Cap.
1x Micro-Switch for a flashlight Torch. eBay .
.
Solder and Torch (optional but highly recommended).
Sand paper or Polishing supplies for finishing.
Steps:
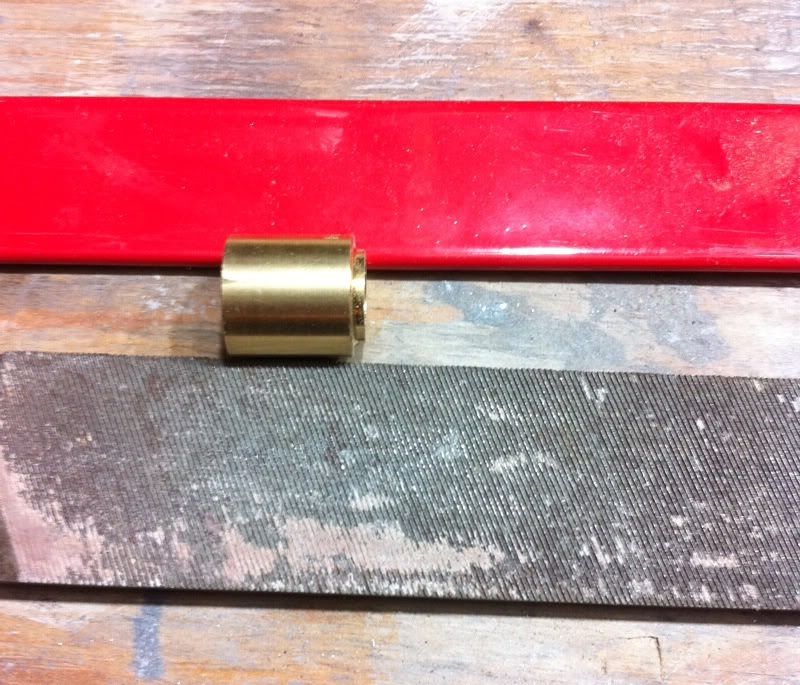
1. Cut the PEX sweat adapter at the base, leaving around 2-3mm of the barb side still attached to the sweat. The 2mm ring protruding from the adapter is what I'm referring to as the "barb". I simply used a hack saw, brass is simple to saw through with a high TPI blade. File the cut edge down with a metal file or some low grit (100g) sand paper.
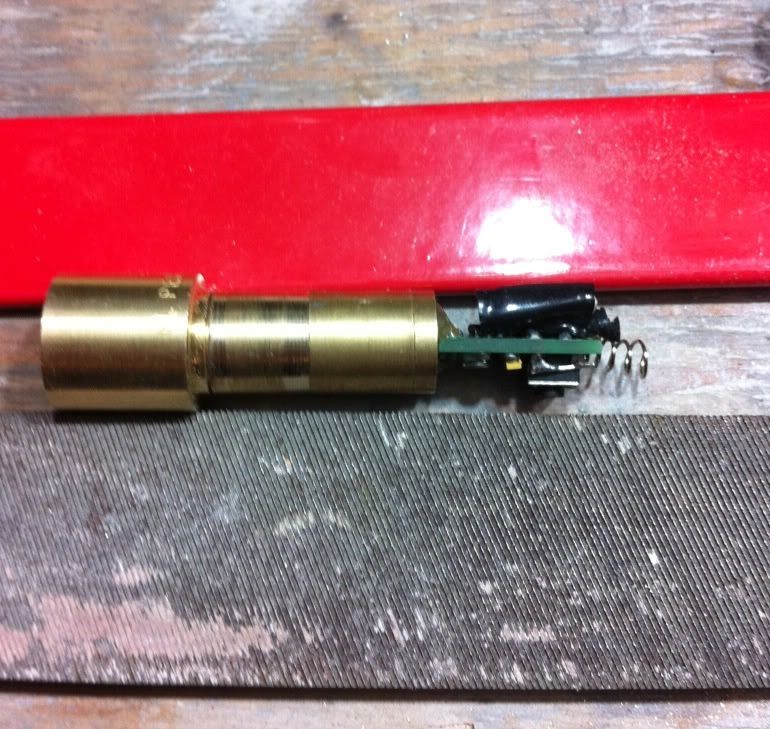
2. Using a corresponding drill bit, you want to drill out the ID of the sweat adapter so it can accept the green module or Aixiz module. A 9/16" drill bit will be perfect for an Aixiz Module as it has a boring diameter of 14.5mm. Just a bit more than the module for an easy press fit. I used a 12mm bit to accommodate the focus-threaded portion of my module. This focus threaded barrel was removable, so I unscrewed it from the diode assembly for soldering (as to not damage the diode) I soldered the focus barrel of my green module to the PEX sweat adapter using lead-free solder. Here you can see the diode portion re-screwed into the focus barrel portion of the module after soldering.
3. Press the PEX + Barrel portion BACKWARDS through one of the 1/2" couplings. You want the front half of the coupling filled with the pex sweat adapter, and the back half of the coupling OPEN. You'll be inserting the module INTO the 1/2" copper pipe.
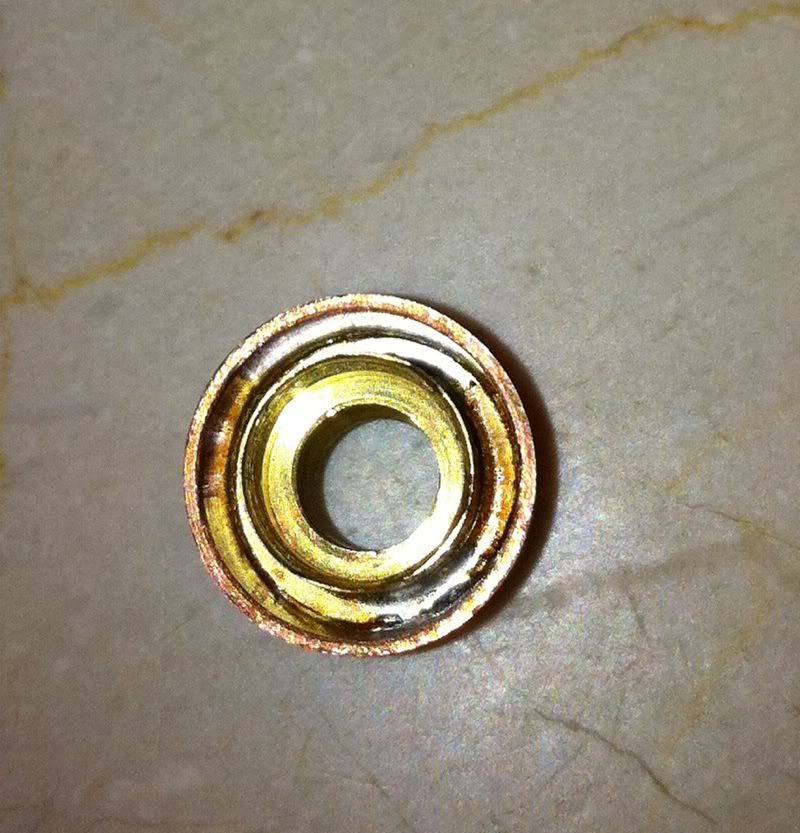
Here is a shot of the above piece with the diode assembly and driver board screwed in. The half of the coupler closest to the driver board is OPEN to accept the 1/2" pipe.
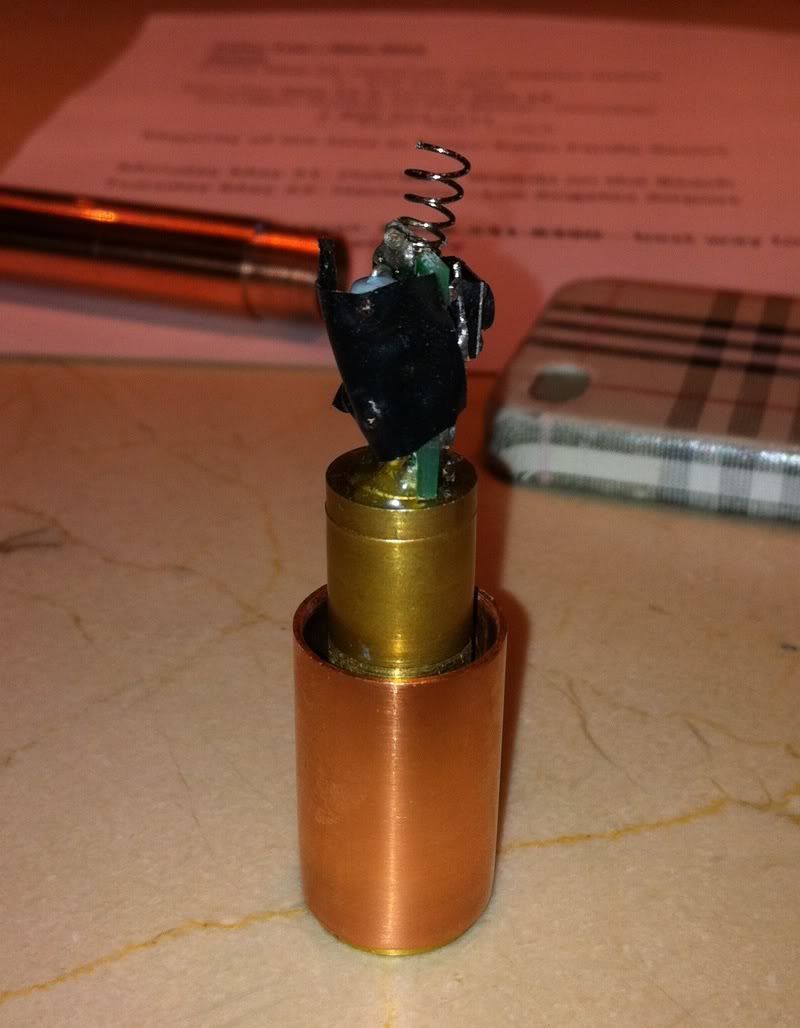
3. This part is a bit confusing, but it essentially comes down to cutting a section of your copper tubing to the proper length. Lay you module on the table, with your intended batteries behind it, as they would lay in the finished host. We're measuring the length of the entire host. Take the total length from the HALFWAY point of the "head" 1/2" coupler to the end of the battery. This is the length of the copper tubing you need. In my case, this length was 102mm, as seen in this "afterwards" pic I took for clarity.
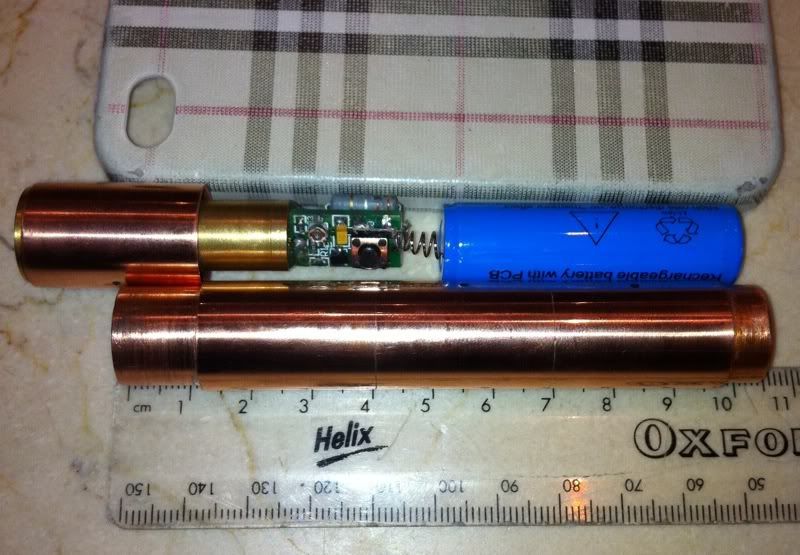
You can see what this host is going to look like. Cut the copper tubing to the proper length.
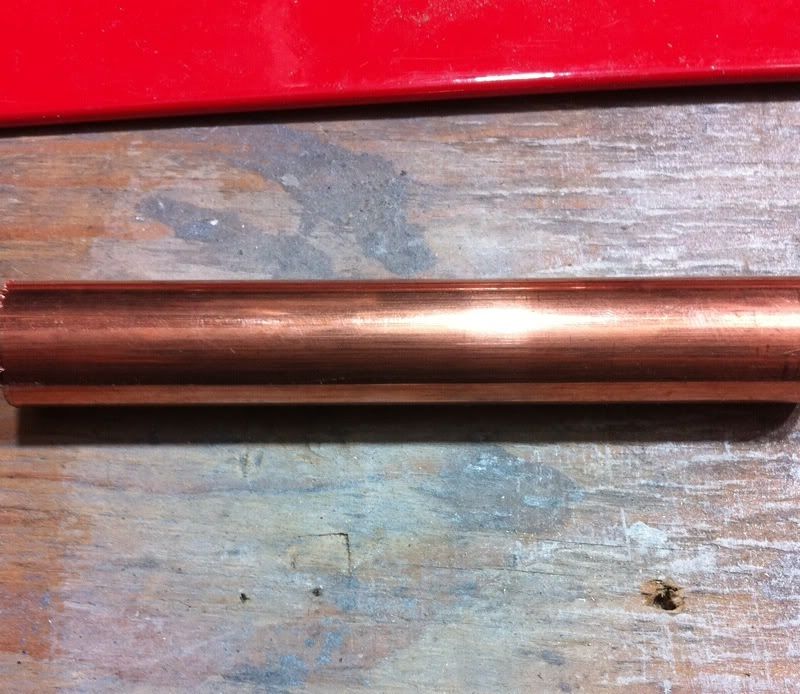
4. We'll be hammering the couplings over top of it, and soldering them in place. Using a small file or sand paper, you'll want to sand down the little "halfway nib" in the middle of each coupler. Using a rubber mallet, place the tube COUPLING SIDE DOWN on hard surface, and hammer the tube towards the coupling. You want the coupling to slide OVER the tube. Repeat as many times as necessary. For me, I had to repeat this two more times.
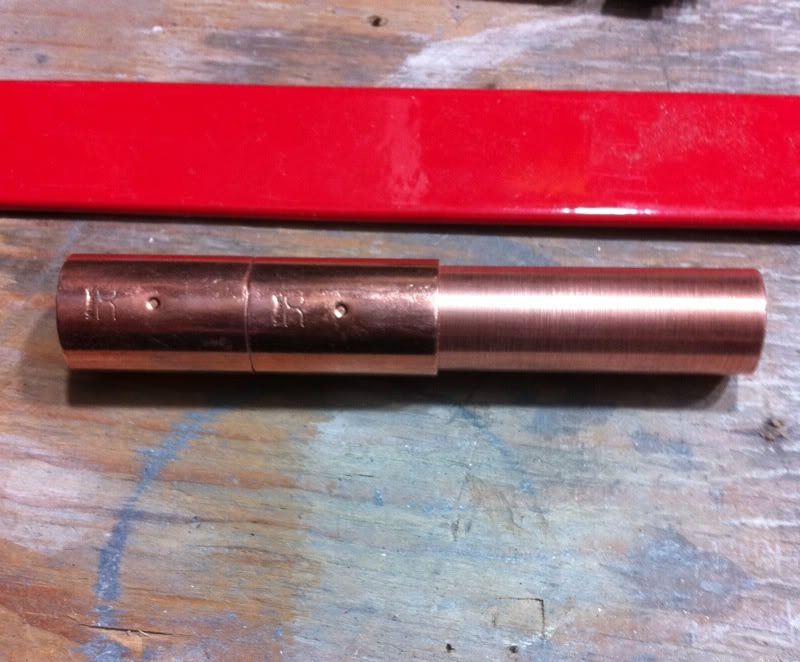
5. You want to leave about 14mm of the end exposed on one end, and 6mm on the other. The 14mm end will accept the other half of the front barrel coupling, and the 6mm end will accept a copper cap piece. Heat EACH gap between the couplers with a propane torch and solder them together. Add an additional solder joint where the 14mm section of pipe starts, and the 6mm section of pipe starts.
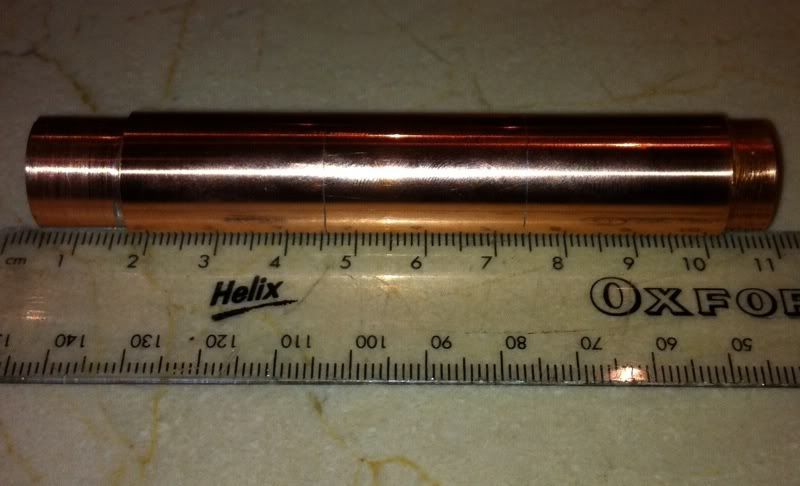
6. Attach the front barrel piece over the 14mm tube extrusion. This is what you get.
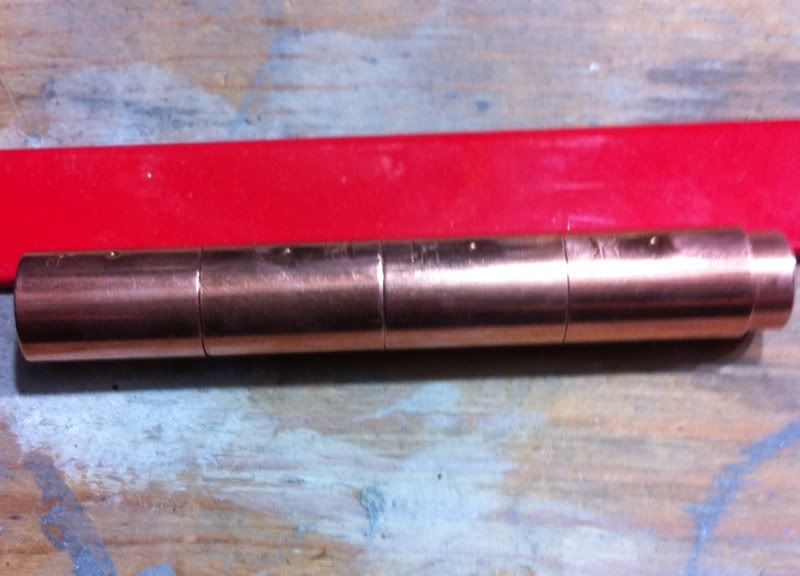
7. I removed the diode assembly and place the piece on my drill press. Using varying grits of sandpaper (100-2000) I polished it to a high shine.
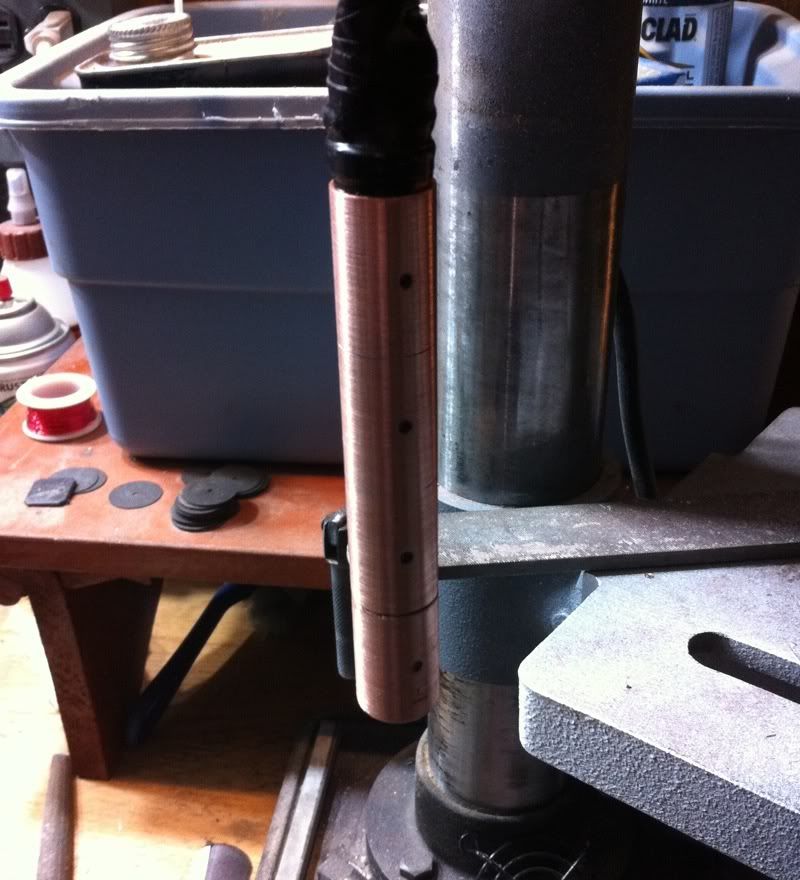
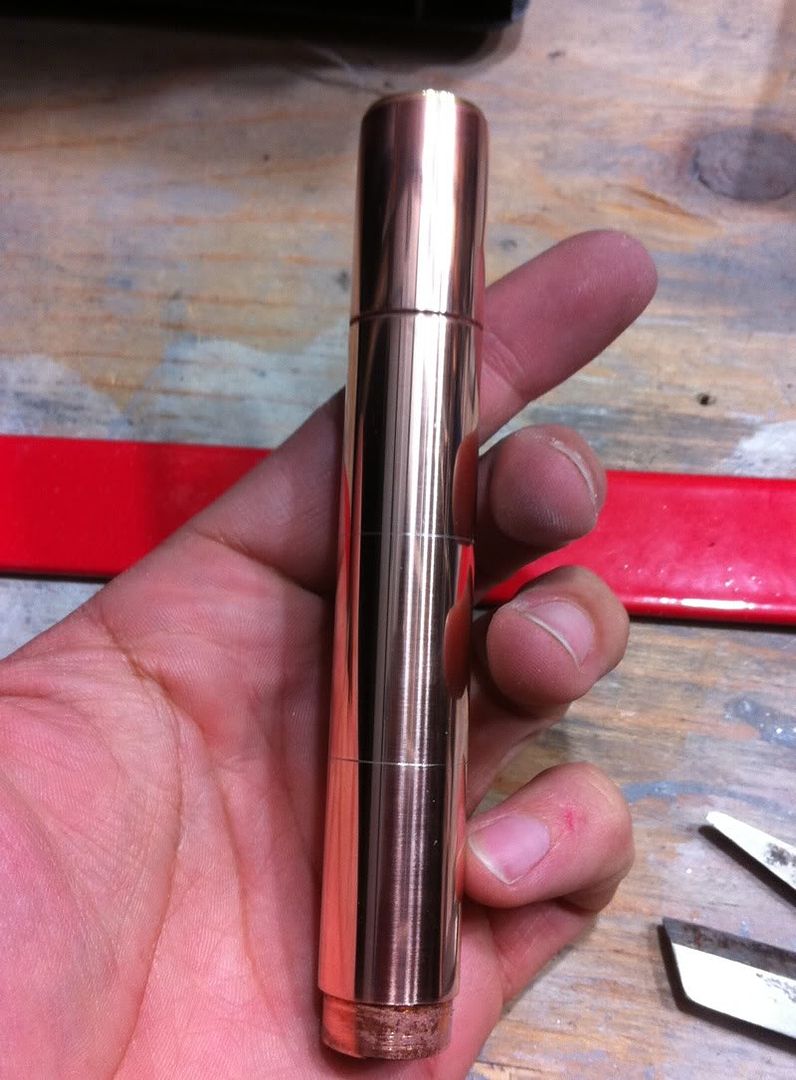
I'll be inserting a GITD ring between the front barrel coupler and the rest of the host, and I'm waiting on an eBay package to come in (with my micro latching switches). When they come in, I'll update the rest of the tutorial and show you how to make the end cap clicky switch The tail cap will eventually be soldered in place as well. The front barrel assembly fits VERY tightly in the rest of the host, for a great electrical connection. I'm using true trustfires with a good ~800mah rating. The assembly draws around 300mah, meaning I'll get just over 2 hours run time with a single charge. This means I won't have to abuse the press-fit electrical connections that much
Now. This is a fully soldered copper host. The thing transfers heat VERY well. My previous host would cause this 150mw green module to visibly dim after a 60s duty cycle (no LPM, building one next!). Preliminary testing using a bench supply allowed for a full 5 minute run without any issues.
I'm waiting for some corrective optics before I show any beam pics... Right now I'm using an awesome expanding lense for a great thick beam for night pointing, but sadly the intensity caught by my awful camera is nowhere near what it looks like to the eye.
Stay tuned
I'm working on a very simple, very cheap host to accept either an Aixiz module case or green assembly. As I'm a new member here, I figured I'd post the entire thing as a quick tutorial, as it truly cost me around 10$ in hardware store copper, a few dollars in tools and around 2 hours of labor. Mods, as I am new, I apologize if this is in the wrong section - but this host IS intended for a 532nm module!
Take a look if you're interested
Supplies:
1$ - 1x 1/2" Brass PEX Sweat Adapter.
5$ - 1 section of 1/2" Copper Tubing. Bring a AA battery with you. Most batteries will JUST fit inside the tubing. Make sure your tubing has an adequate ID to accept a AA or 3.7v Lithium.
2.50$ - 5x 1/2" Copper Tubing Couplers.
0.50$ - 1/2" Copper Cap.
1x Micro-Switch for a flashlight Torch. eBay
Solder and Torch (optional but highly recommended).
Sand paper or Polishing supplies for finishing.
Steps:
1. Cut the PEX sweat adapter at the base, leaving around 2-3mm of the barb side still attached to the sweat. The 2mm ring protruding from the adapter is what I'm referring to as the "barb". I simply used a hack saw, brass is simple to saw through with a high TPI blade. File the cut edge down with a metal file or some low grit (100g) sand paper.

2. Using a corresponding drill bit, you want to drill out the ID of the sweat adapter so it can accept the green module or Aixiz module. A 9/16" drill bit will be perfect for an Aixiz Module as it has a boring diameter of 14.5mm. Just a bit more than the module for an easy press fit. I used a 12mm bit to accommodate the focus-threaded portion of my module. This focus threaded barrel was removable, so I unscrewed it from the diode assembly for soldering (as to not damage the diode) I soldered the focus barrel of my green module to the PEX sweat adapter using lead-free solder. Here you can see the diode portion re-screwed into the focus barrel portion of the module after soldering.

3. Press the PEX + Barrel portion BACKWARDS through one of the 1/2" couplings. You want the front half of the coupling filled with the pex sweat adapter, and the back half of the coupling OPEN. You'll be inserting the module INTO the 1/2" copper pipe.

Here is a shot of the above piece with the diode assembly and driver board screwed in. The half of the coupler closest to the driver board is OPEN to accept the 1/2" pipe.

3. This part is a bit confusing, but it essentially comes down to cutting a section of your copper tubing to the proper length. Lay you module on the table, with your intended batteries behind it, as they would lay in the finished host. We're measuring the length of the entire host. Take the total length from the HALFWAY point of the "head" 1/2" coupler to the end of the battery. This is the length of the copper tubing you need. In my case, this length was 102mm, as seen in this "afterwards" pic I took for clarity.

You can see what this host is going to look like. Cut the copper tubing to the proper length.

4. We'll be hammering the couplings over top of it, and soldering them in place. Using a small file or sand paper, you'll want to sand down the little "halfway nib" in the middle of each coupler. Using a rubber mallet, place the tube COUPLING SIDE DOWN on hard surface, and hammer the tube towards the coupling. You want the coupling to slide OVER the tube. Repeat as many times as necessary. For me, I had to repeat this two more times.

5. You want to leave about 14mm of the end exposed on one end, and 6mm on the other. The 14mm end will accept the other half of the front barrel coupling, and the 6mm end will accept a copper cap piece. Heat EACH gap between the couplers with a propane torch and solder them together. Add an additional solder joint where the 14mm section of pipe starts, and the 6mm section of pipe starts.

6. Attach the front barrel piece over the 14mm tube extrusion. This is what you get.

7. I removed the diode assembly and place the piece on my drill press. Using varying grits of sandpaper (100-2000) I polished it to a high shine.


I'll be inserting a GITD ring between the front barrel coupler and the rest of the host, and I'm waiting on an eBay package to come in (with my micro latching switches). When they come in, I'll update the rest of the tutorial and show you how to make the end cap clicky switch
Now. This is a fully soldered copper host. The thing transfers heat VERY well. My previous host would cause this 150mw green module to visibly dim after a 60s duty cycle (no LPM, building one next!). Preliminary testing using a bench supply allowed for a full 5 minute run without any issues.
I'm waiting for some corrective optics before I show any beam pics... Right now I'm using an awesome expanding lense for a great thick beam for night pointing, but sadly the intensity caught by my awful camera is nowhere near what it looks like to the eye.
Stay tuned
Last edited:


