

nztdm
0
- Joined
- Jun 18, 2012
- Messages
- 67
- Points
- 0
I started off in the laser hobby just over a year ago. My previous electronics experience and genuine interest made me learn quickly. I am a student studying Electrical Engineering in New Zealand.
My goal was to make the best, most safest laser I could and I think I have done well so far. Ideas and criticism is welcome!
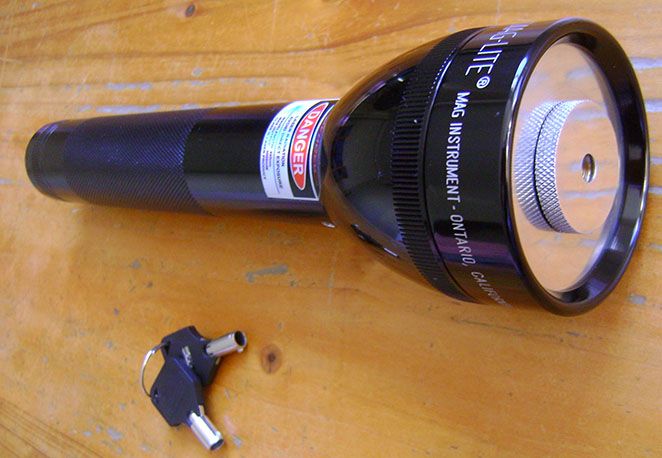
The JD-Lasers 3W MagLite Laser has matured over the past five builds of it. This is of the latest build, making a customer in the Phillipines very happy.
KEY POINTS:
Microcontroller Features:
Temperature Sensor. LED flashes faster as the laser gets hotter. From about 1Hz at 20degC to 10Hz (strobe) at 50degC. At 50degC, it will beep quickly (in time with LED) telling you that you should let it cool down. With the huge heatsink, this gives you 5 minutes on a gruelling 30degC day to 12mins in Winter (or Unlimited time in cold wind).
I made it SMART. It knows when you have turned off the laser to cool down, and will not beep at you.

Battery monitor. At 3.5V (7V total) the battery monitor LED will change from Green to Red telling you that you should charge the battery. 3.5V still has quite a bit of capacity left, but you shouldn't let it get very low to conserve the life of your Li-Ion cells.
Armed Reminder. It will be hard to forget to disarm it as it has a flashing temperature LED, but just in case, after 1 minute of not firing, it will do long beeps at 0.25Hz. The alarm is disabled when you fire the laser or by of-course, disarming it (keyswitch).
Startup Sound. Sort of useless. But adds to the quality feel of the laser. Sounds a bit like a dishwasher startup sound when you turn on the keyswitch.
(Coming soon in next build) Digitally controlled switch. The MagLite clicky is replaced with a tiny momentary microswitch (like in a mouse). This switch is connected to the microcontroller instead of the laser. The microcontroller turns on a very low resistance Logic MOSFET which turns on the laser. This means three more features can be added.
1) Auto power off for noobs that leave it on trying to bun something.
2) Delay before firing. Through software, can make the laser not be able to fire for 2 seconds after arming (one step closer to FDA aprooval).
3) Multiple modes. Strobe anyone? (You will be able to toggle on the laser by double-clicking the switch).
Firstly I started off with a 2C Black MagLite. Why?
> Black contrasts with the silver heatsink and looks awesome
> 2C just feels right compared to 2D but still offers decent capacity
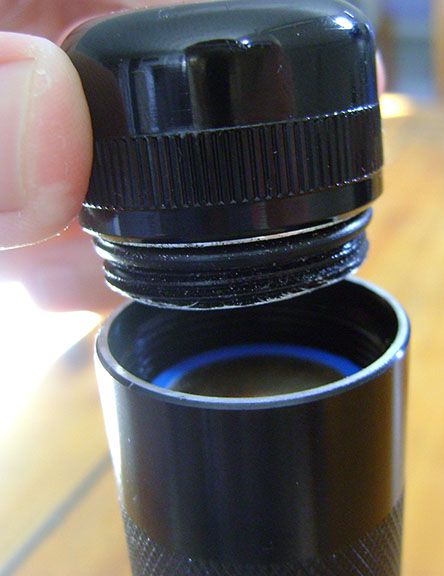
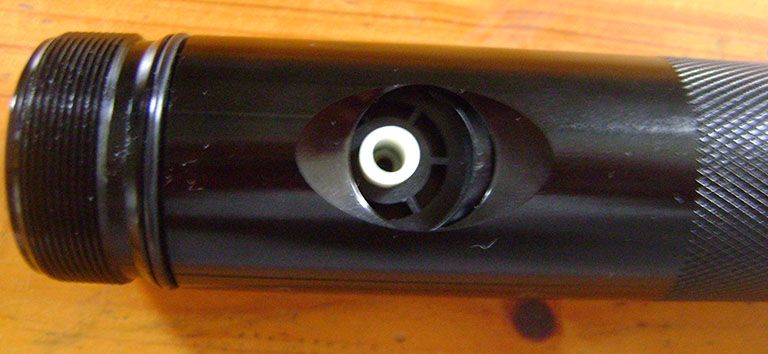
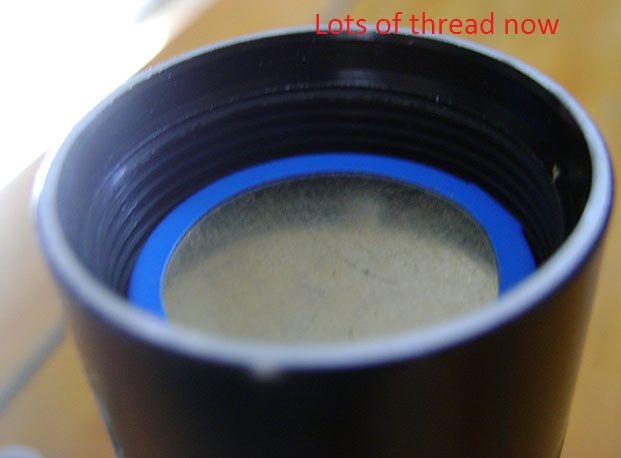
The first thing I did was shorten the tailcap by two threads. This is used with the +nub and nub-less 25500 cells.
Protected 25500 Cells from DX (good experiences with them) with + nub:
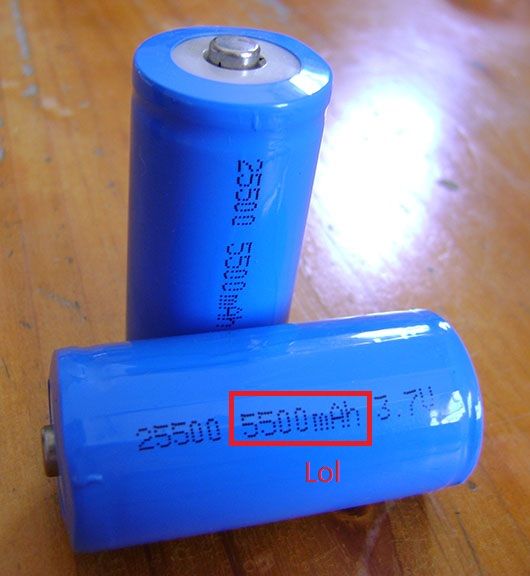
I recently got some Trustfire Protected 25500 Cells from DX that have no +nub. This allowed me to make a shallow solder blob on the negative ends of the cells so they still connect in series. These cells were a GREAT find and I hope they stack up the the blue cells's capacity. EDIT: I have tested these cells, and they take 1 hour 10 mins to drop from 4.15V to 3.00V. I'd say 1 hour is the battery life of this laser.
The reason I like these cells so much is because being a little shorter, they COMPLETELY remove a very difficult and dangerous step from the build. Modifying the switch.
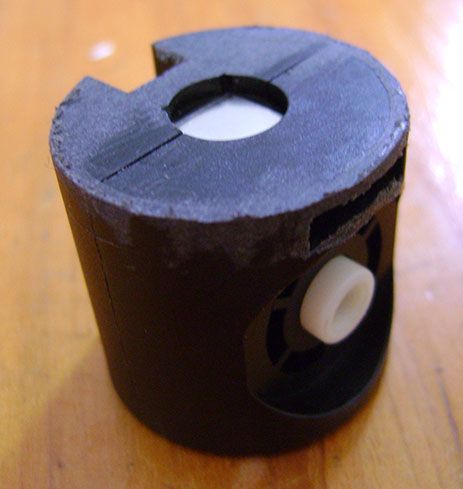
With the blue cells, I would have to shorten the top of the switch, making it sit a little above the switch hole:
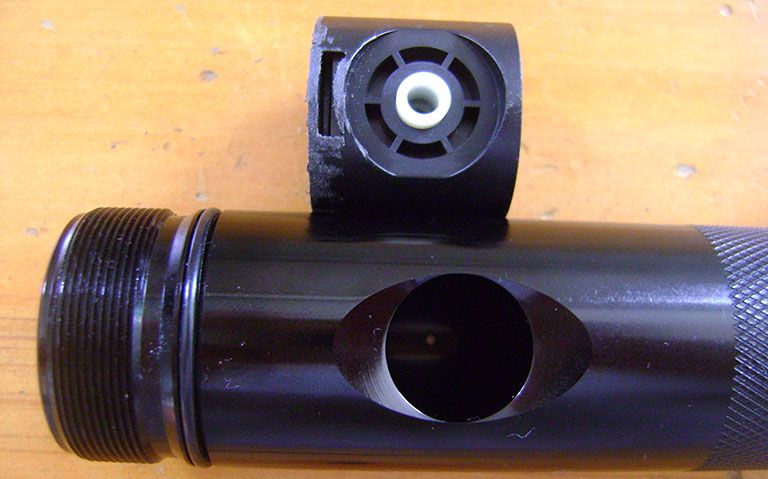
This made the original rubber cap not fit, and have to be modified and glued to fit. I managed to wreck a cap, and get glue in a switch once making it stick :O
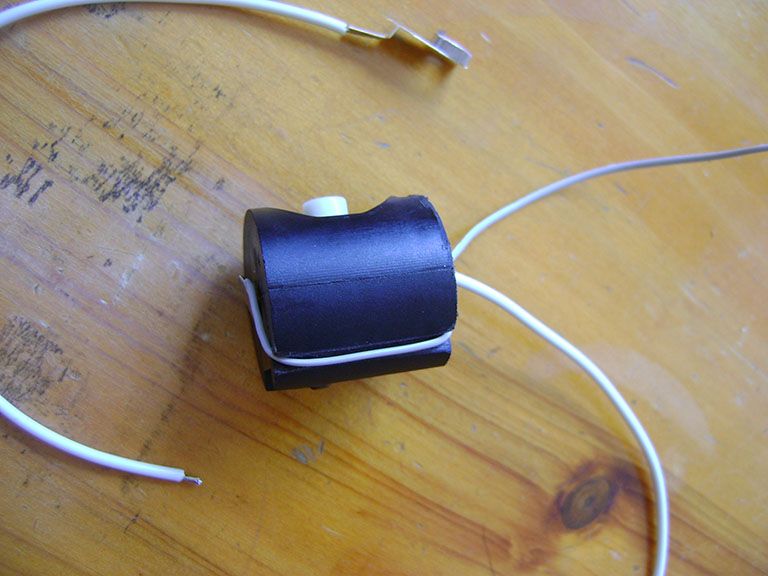
Next, I added the keyswitch to the tailcap:
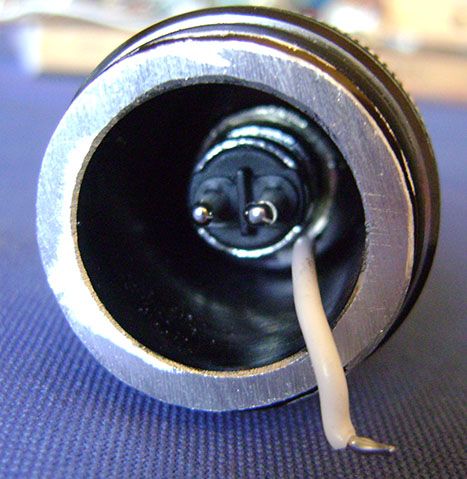
Wire soldered to nut.
Other end of wire soldered to one of the keyswitch terminals.
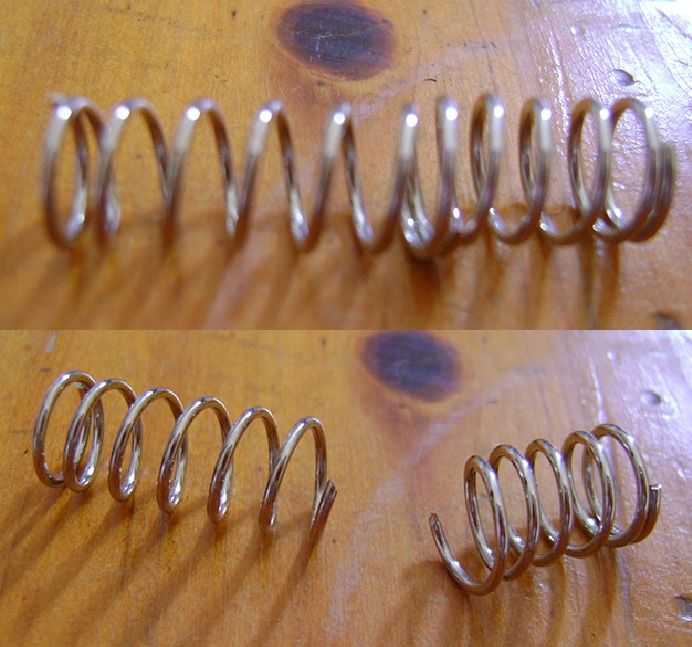
The left half of this spring gets soldered and epoxied onto the other terminal of the switch. This spring was originally part of the MagLite's bulb assembly.
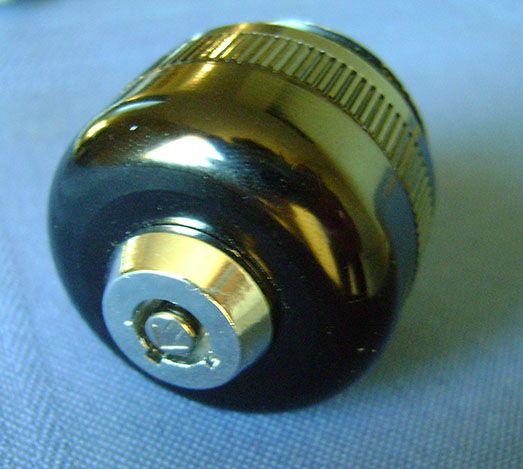
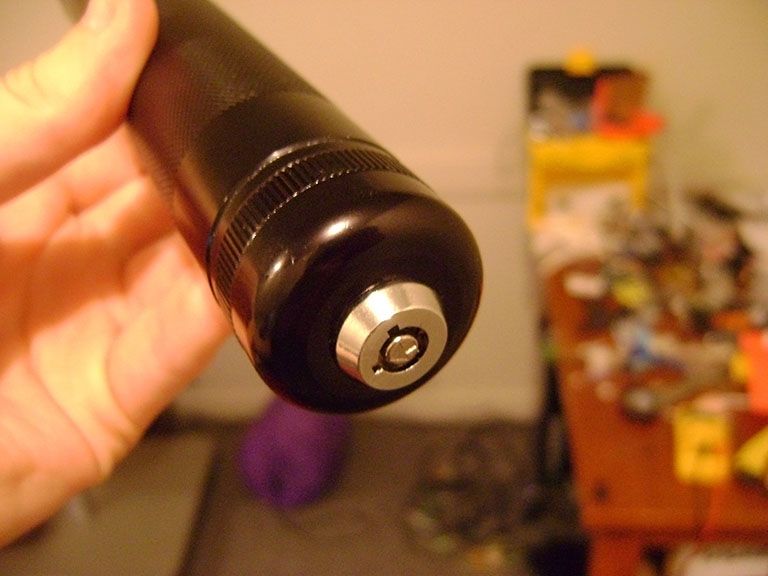
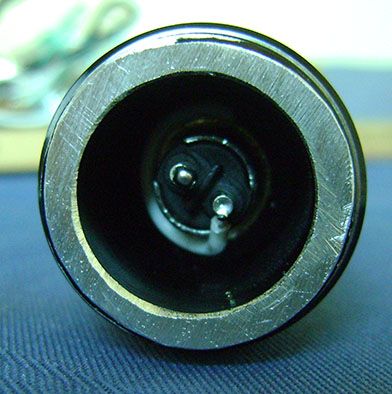
The barrel type keyswitch feels VERY tough and is shorter than the key-type I have tried.
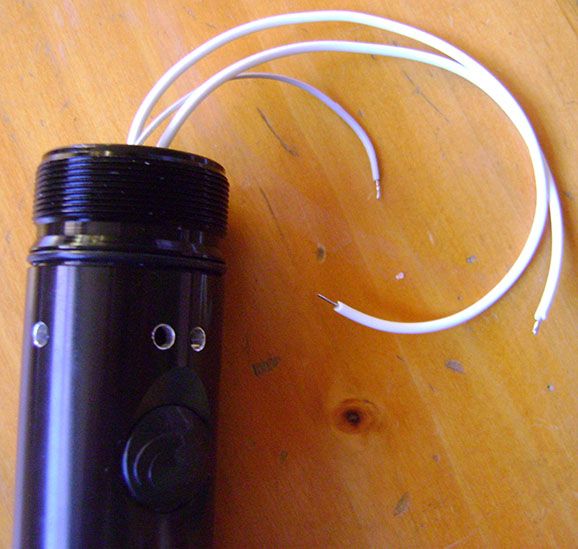
Drill LED holes:
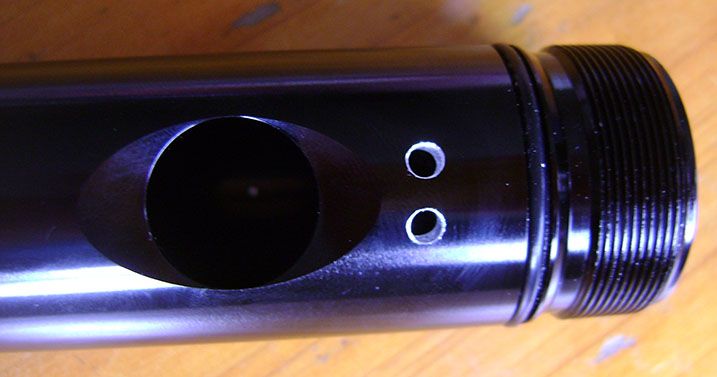
Wires are soldered to the switch output, the negative tag, and the the bottom of the switch. The wire on the bottom of the switch is thin and goes through a groove in the side of the switch, bypassing the switch, to the microcontroller board. This supplies the microcontroller with power when the laser isn't firing.
Microcontroller board:
This is mainly what makes my laser unique.

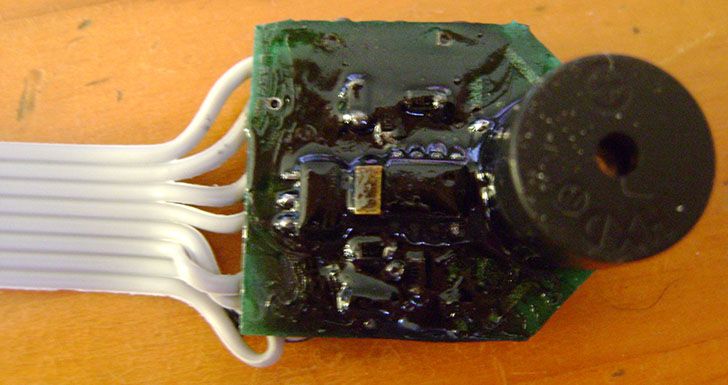
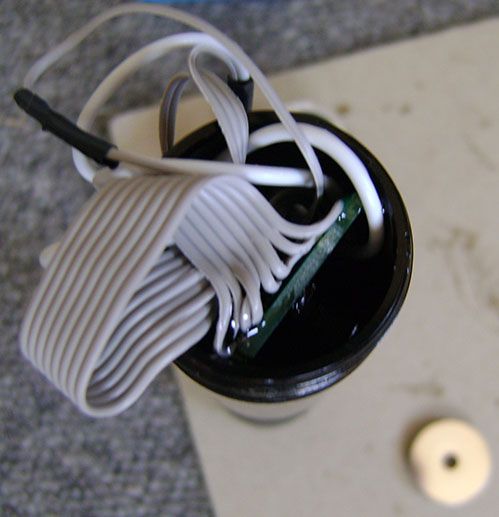
Covered with liquid electrical tape for protection.

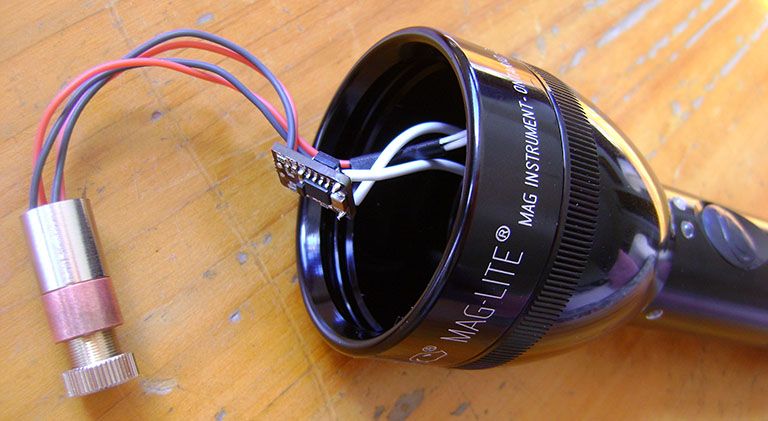
A previous build used PATA ribbon cable for all the connections to the board. The most recent build, I planned the lengths thoroughly and used thin silicone wire instead.
Fits very nicely. Still plenty of room in the head for future improvements.
Aixiz module set up:
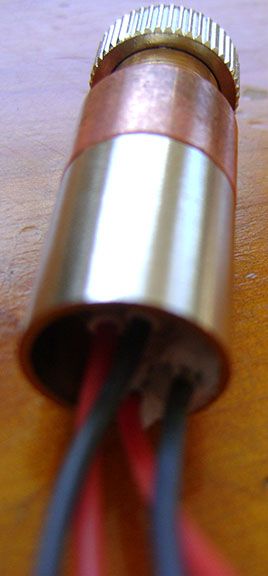
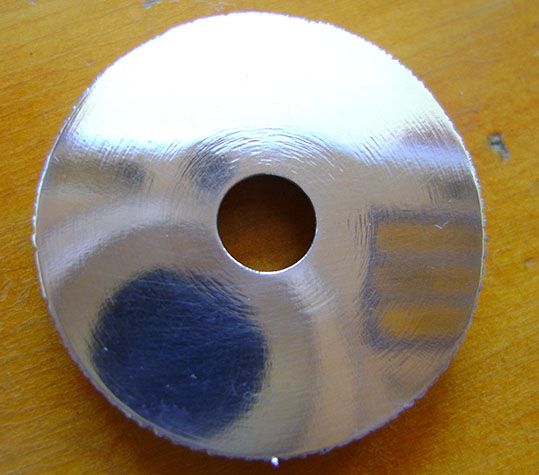
Previously, I used a cut-off back-end of the Aixiz module to mount the NTC thermistor for temperature sensing.
Now, I mount the thermistor on the heatsink itself as it is stronger (can put epoxy there) and aluminium equalizes the heat well enough for accurate readings.
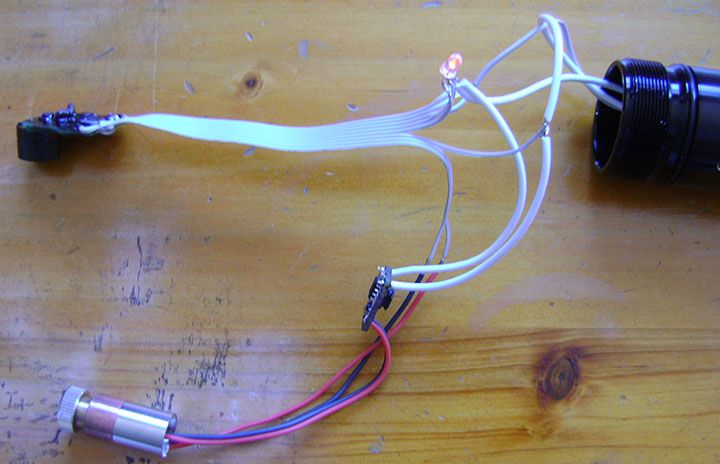
Wiring set up.
Ready to put together:
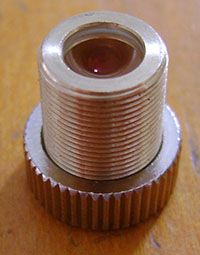
405-G-2 Lens
Mrcrouse's focus adapter custom made extra thin so that the MagLite can stand on its crown.
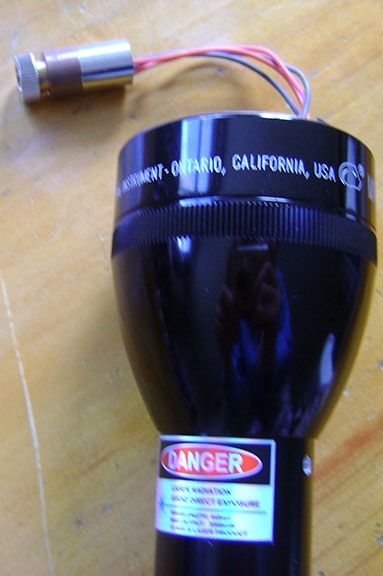
Beautiful custom warning sticker by Innovative-Lasers.
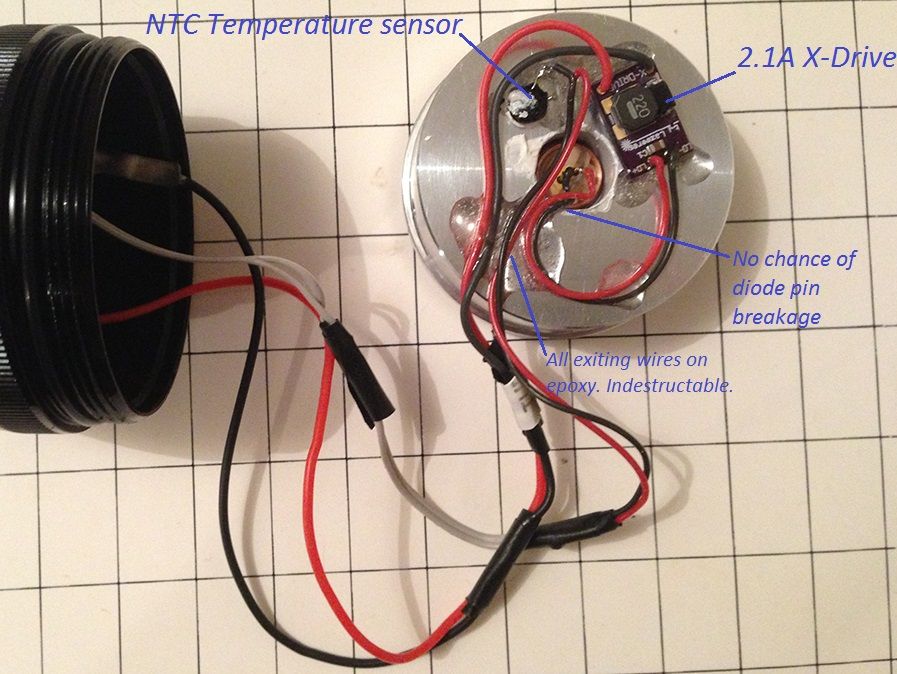
This is how everything is arranged on the back of the heatsink for maximum durability. (X-Drive has IC thermal pasted btw)
This is the current build, where the thermistor is attached to the heatsink, rather than the Aixiz back-end.
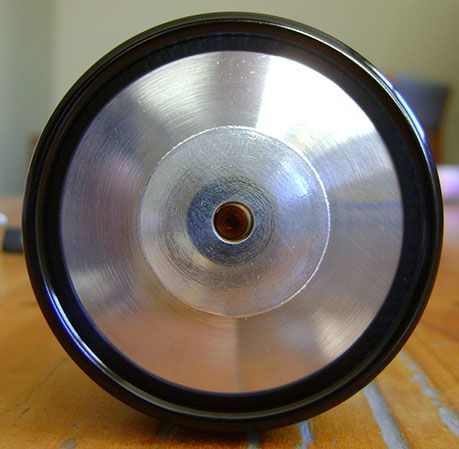
Autosol polish.

FEATURES DEMONSTRATION VIDEO:
This is a product I make and sell worldwide.
So people... What do you think?
My goal was to make the best, most safest laser I could and I think I have done well so far. Ideas and criticism is welcome!
The JD-Lasers 3W MagLite Laser has matured over the past five builds of it. This is of the latest build, making a customer in the Phillipines very happy.
KEY POINTS:
- 9mm 445nm Diode
- Copper Aixiz module (Arctic Ceramique 2 Thermal compund between module and heatsink)
- Aluminium Heatsink made here in New Zealand
- 405-G-2 Lens (Brass Lens holder)
- Custom thin Focus Adapter (from Mrcrouse)
- Barrel-type keyswitch
- 2.1A Buck regulator (Lazerer X-Drive in this build)
- 2 x Protected 25500 Cells without + nub
- Highlight > JD-Lasers Custom Microcontroller board
Microcontroller Features:
Temperature Sensor. LED flashes faster as the laser gets hotter. From about 1Hz at 20degC to 10Hz (strobe) at 50degC. At 50degC, it will beep quickly (in time with LED) telling you that you should let it cool down. With the huge heatsink, this gives you 5 minutes on a gruelling 30degC day to 12mins in Winter (or Unlimited time in cold wind).
I made it SMART. It knows when you have turned off the laser to cool down, and will not beep at you.
Battery monitor. At 3.5V (7V total) the battery monitor LED will change from Green to Red telling you that you should charge the battery. 3.5V still has quite a bit of capacity left, but you shouldn't let it get very low to conserve the life of your Li-Ion cells.
Armed Reminder. It will be hard to forget to disarm it as it has a flashing temperature LED, but just in case, after 1 minute of not firing, it will do long beeps at 0.25Hz. The alarm is disabled when you fire the laser or by of-course, disarming it (keyswitch).
Startup Sound. Sort of useless. But adds to the quality feel of the laser. Sounds a bit like a dishwasher startup sound when you turn on the keyswitch.
(Coming soon in next build) Digitally controlled switch. The MagLite clicky is replaced with a tiny momentary microswitch (like in a mouse). This switch is connected to the microcontroller instead of the laser. The microcontroller turns on a very low resistance Logic MOSFET which turns on the laser. This means three more features can be added.
1) Auto power off for noobs that leave it on trying to bun something.
2) Delay before firing. Through software, can make the laser not be able to fire for 2 seconds after arming (one step closer to FDA aprooval).
3) Multiple modes. Strobe anyone? (You will be able to toggle on the laser by double-clicking the switch).
Firstly I started off with a 2C Black MagLite. Why?
> Black contrasts with the silver heatsink and looks awesome
> 2C just feels right compared to 2D but still offers decent capacity
The first thing I did was shorten the tailcap by two threads. This is used with the +nub and nub-less 25500 cells.
Protected 25500 Cells from DX (good experiences with them) with + nub:
I recently got some Trustfire Protected 25500 Cells from DX that have no +nub. This allowed me to make a shallow solder blob on the negative ends of the cells so they still connect in series. These cells were a GREAT find and I hope they stack up the the blue cells's capacity. EDIT: I have tested these cells, and they take 1 hour 10 mins to drop from 4.15V to 3.00V. I'd say 1 hour is the battery life of this laser.
The reason I like these cells so much is because being a little shorter, they COMPLETELY remove a very difficult and dangerous step from the build. Modifying the switch.
With the blue cells, I would have to shorten the top of the switch, making it sit a little above the switch hole:
This made the original rubber cap not fit, and have to be modified and glued to fit. I managed to wreck a cap, and get glue in a switch once making it stick :O
Next, I added the keyswitch to the tailcap:
Wire soldered to nut.
Other end of wire soldered to one of the keyswitch terminals.
The left half of this spring gets soldered and epoxied onto the other terminal of the switch. This spring was originally part of the MagLite's bulb assembly.
The barrel type keyswitch feels VERY tough and is shorter than the key-type I have tried.
Drill LED holes:
Wires are soldered to the switch output, the negative tag, and the the bottom of the switch. The wire on the bottom of the switch is thin and goes through a groove in the side of the switch, bypassing the switch, to the microcontroller board. This supplies the microcontroller with power when the laser isn't firing.
Microcontroller board:
This is mainly what makes my laser unique.
Covered with liquid electrical tape for protection.
A previous build used PATA ribbon cable for all the connections to the board. The most recent build, I planned the lengths thoroughly and used thin silicone wire instead.
Fits very nicely. Still plenty of room in the head for future improvements.
Aixiz module set up:
Previously, I used a cut-off back-end of the Aixiz module to mount the NTC thermistor for temperature sensing.
Now, I mount the thermistor on the heatsink itself as it is stronger (can put epoxy there) and aluminium equalizes the heat well enough for accurate readings.
Wiring set up.
Ready to put together:
405-G-2 Lens
Mrcrouse's focus adapter custom made extra thin so that the MagLite can stand on its crown.
Beautiful custom warning sticker by Innovative-Lasers.
This is how everything is arranged on the back of the heatsink for maximum durability. (X-Drive has IC thermal pasted btw)
This is the current build, where the thermistor is attached to the heatsink, rather than the Aixiz back-end.
Autosol polish.
FEATURES DEMONSTRATION VIDEO:
This is a product I make and sell worldwide.
So people... What do you think?
Last edited:


")
