

- Joined
- Aug 16, 2013
- Messages
- 971
- Points
- 43
Hey guys,
First I want to say this build has been crazy. I have been planning it for at least 3 months. I'd like to thank several members here that helped me Jander6442, ARG, Cyparagon with alignment issues.
Mcrouse for the machine work. :thanks:
Without further ado I introduce you to build I have named Angel Breath because it burns anything you put in its way! Two fan cooled lab modules from Techhood, 2X NDB7A75 diodes. 3 stainless steel tubes, Aluminum plate cut into 3 brackets to space the tubes/add support.
Mcrouse machined AL adapters to press fit into the tubing to thread his tail caps on.
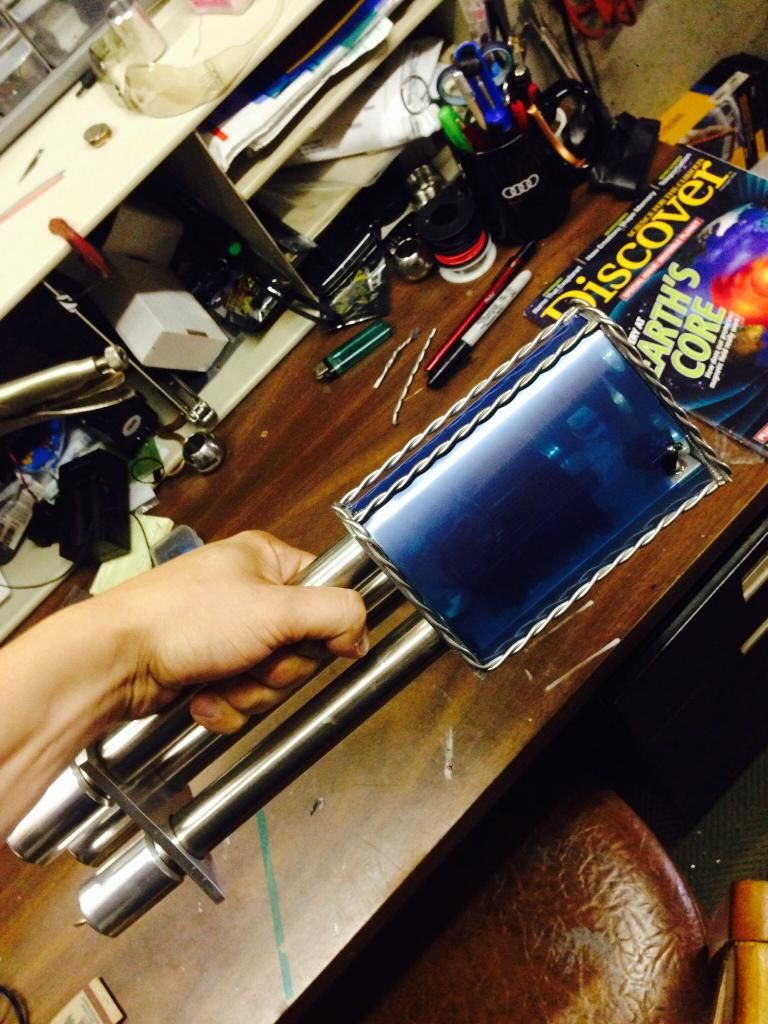
The laser unit(if I may call it that) is Lightweight, structurally sound and Relatively ergonomic. However I never intended it to be small.
Lets start at the beginning
I tried to keep the design simple, unique, powerful, and functional.
The three tail caps: one for each laser and one for the fans. I ordered the diodes from DTR with the option for 3.5A drivers and G2 lenses. Copper pills from survival laser were epoxied in the tubes that fit 2 Efests 18650s. Whip up some battery contacts and here we go.

Next come the fan cooled labbies from Techhood:
One of the first problems I ran into was the rectangular labbys didn't accept the 12mm copper modules. I took the module provided and had it machined at a local shop and tapped with a set screw.
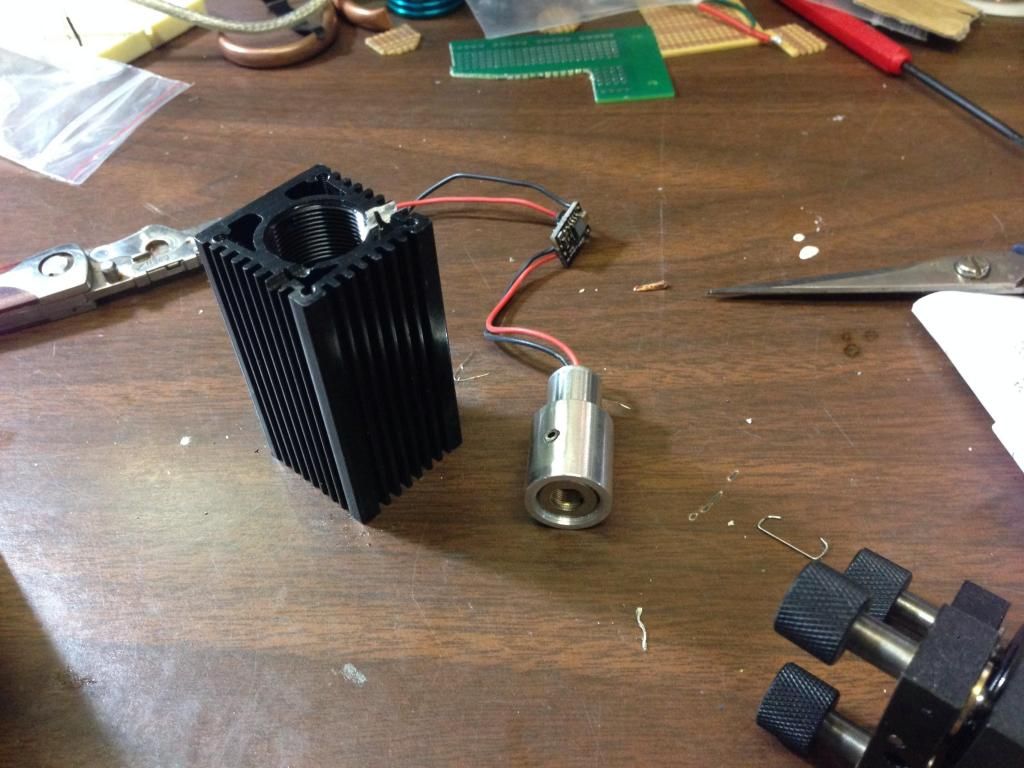
Arctic silver 5 FTW
Next I squared the these up and soldered the connections. The fans are connected in parallel and run off Four 3V disposable 123s to provide 12volts. I could have probably made a quick drive circuit and used lipos but this seems to work fine. Don't mind the mess
Optics
I ordered the waveplate & cube mount from Stanwaxlaser. The mirror mount and dichro from Newport. Yesssss I accidentally ordered the wrong cube mount but I refuse to dump anymore money into this build.
The hardest part was orientating the mounts and modules. It still could use some adjustments but I believe it's ok. The waveplate is actually glued to a threaded fitting that makes it easy to rotate.
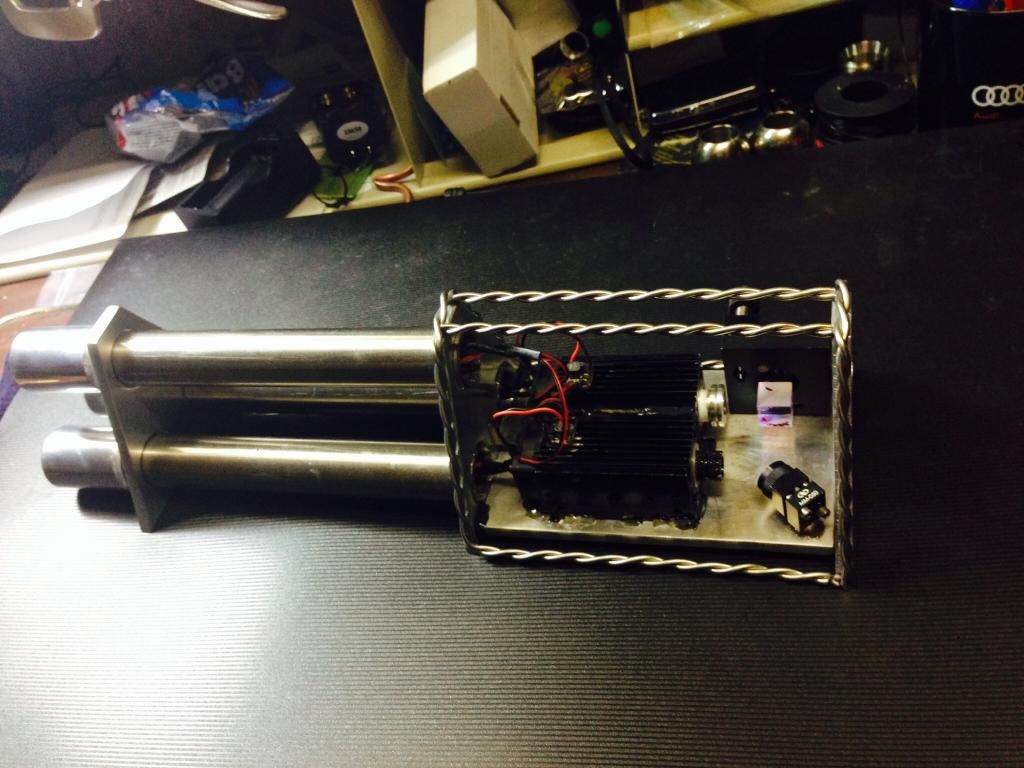
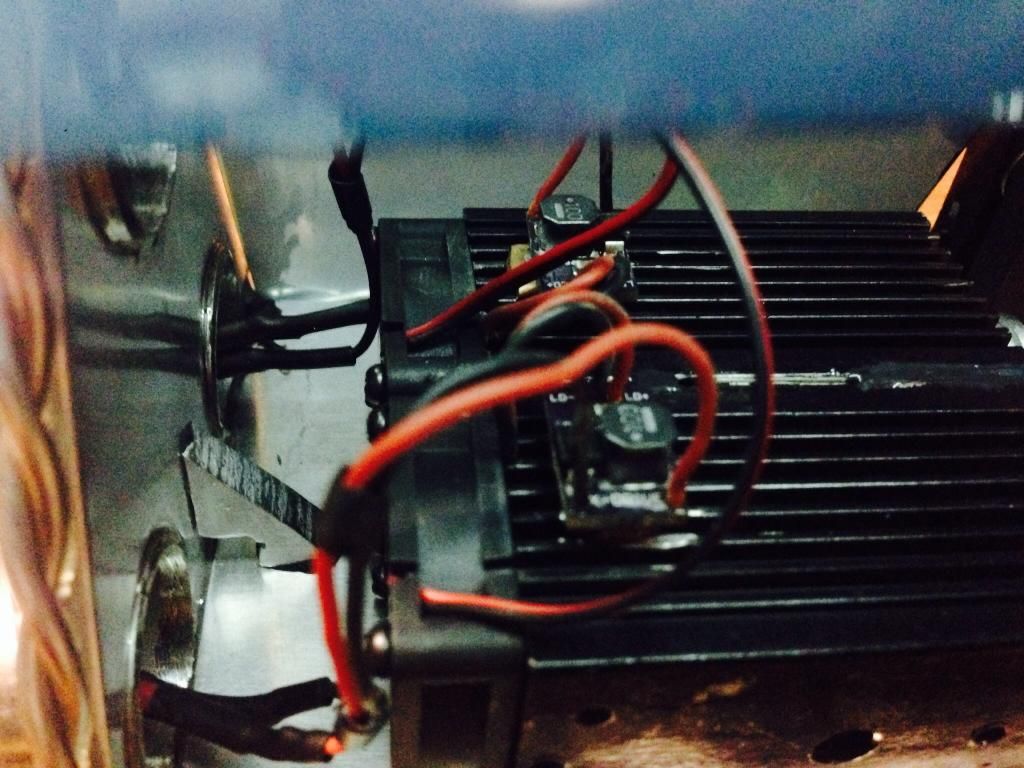
In this photo I tacked the rectangular heatsinks with hot glue but later thermal epoxied them down to the aluminum plate. The hot glue has since been cut away.
Time to build a wire frame and add support.
The drivers benefit from this fan cooled system. Interesting to note the super small fans take 1m16s to warm up to full speed. I consulted an electrical engineer friend and he said this is normal and not to push these brushless motors. Admittingly I don't know much about them but I know at 12V they draw roughly .08A. They seem to be very effective.
Fire it up!
I have the option of turning on one laser at a time. It's hard to tell how powerful this laser is but each Individual laser soars very rapidly and tops out my LPM at 3891mW, at that point I turned the laser off in fear of ruining my radiant X4. The sensor was positioned 4 feet away because at this point I didn't want to defocus the alignment set to infinite. @ 4 feet the divergence was slightly smaller than a centimeter. That lighter beam exiting the cube...no matter how I position the wave plate or modules the lowest power I could achieve was 49mW each. :yabbem:
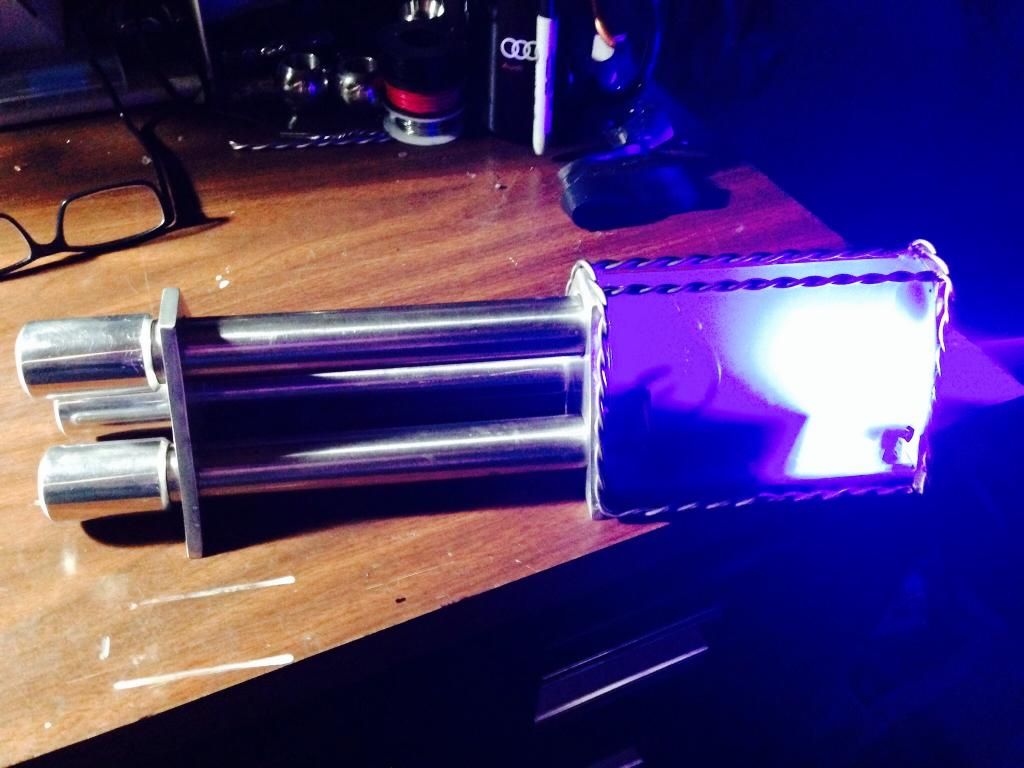
The tinted shroud is to contain the bright light given off by the optics.
Conclusion
I consider this build 90% finished. It's a bit bulky and not the most beautiful but I like it so far ahh It was a challenge indeed. I maintain a beam profile that resembles a plus sign+. Soon to come I will try to get some outdoor beam shots and a burn video. But for now this will do. I might update this thread periodically as I make adjustments. I think it's Conceivable this laser puts out over 8Watts but I cannot confirm that.
No doubt about it this laser Incinerates. Steel wool and wood from 10+ feet away I accidentally discovered.
Thank you everyone!
Jefferson
(No eye balls or pets were hurt in the making of this laser..except some furniture)
First I want to say this build has been crazy. I have been planning it for at least 3 months. I'd like to thank several members here that helped me Jander6442, ARG, Cyparagon with alignment issues.
Mcrouse for the machine work. :thanks:
Without further ado I introduce you to build I have named Angel Breath because it burns anything you put in its way! Two fan cooled lab modules from Techhood, 2X NDB7A75 diodes. 3 stainless steel tubes, Aluminum plate cut into 3 brackets to space the tubes/add support.
Mcrouse machined AL adapters to press fit into the tubing to thread his tail caps on.


The laser unit(if I may call it that) is Lightweight, structurally sound and Relatively ergonomic. However I never intended it to be small.

Lets start at the beginning
I tried to keep the design simple, unique, powerful, and functional.
The three tail caps: one for each laser and one for the fans. I ordered the diodes from DTR with the option for 3.5A drivers and G2 lenses. Copper pills from survival laser were epoxied in the tubes that fit 2 Efests 18650s. Whip up some battery contacts and here we go.

Next come the fan cooled labbies from Techhood:
One of the first problems I ran into was the rectangular labbys didn't accept the 12mm copper modules. I took the module provided and had it machined at a local shop and tapped with a set screw.

Arctic silver 5 FTW

Next I squared the these up and soldered the connections. The fans are connected in parallel and run off Four 3V disposable 123s to provide 12volts. I could have probably made a quick drive circuit and used lipos but this seems to work fine. Don't mind the mess

Optics
I ordered the waveplate & cube mount from Stanwaxlaser. The mirror mount and dichro from Newport. Yesssss I accidentally ordered the wrong cube mount but I refuse to dump anymore money into this build.
The hardest part was orientating the mounts and modules. It still could use some adjustments but I believe it's ok. The waveplate is actually glued to a threaded fitting that makes it easy to rotate.

In this photo I tacked the rectangular heatsinks with hot glue but later thermal epoxied them down to the aluminum plate. The hot glue has since been cut away.

Time to build a wire frame and add support.
The drivers benefit from this fan cooled system. Interesting to note the super small fans take 1m16s to warm up to full speed. I consulted an electrical engineer friend and he said this is normal and not to push these brushless motors. Admittingly I don't know much about them but I know at 12V they draw roughly .08A. They seem to be very effective.

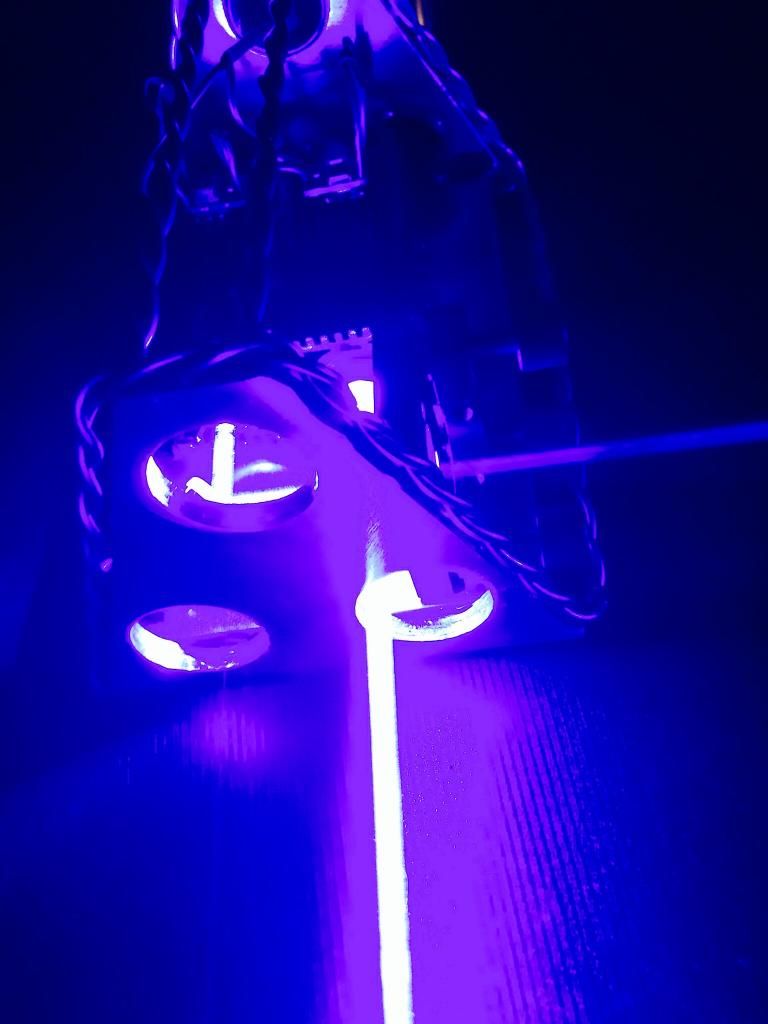
Fire it up!
I have the option of turning on one laser at a time. It's hard to tell how powerful this laser is but each Individual laser soars very rapidly and tops out my LPM at 3891mW, at that point I turned the laser off in fear of ruining my radiant X4. The sensor was positioned 4 feet away because at this point I didn't want to defocus the alignment set to infinite. @ 4 feet the divergence was slightly smaller than a centimeter. That lighter beam exiting the cube...no matter how I position the wave plate or modules the lowest power I could achieve was 49mW each. :yabbem:


The tinted shroud is to contain the bright light given off by the optics.
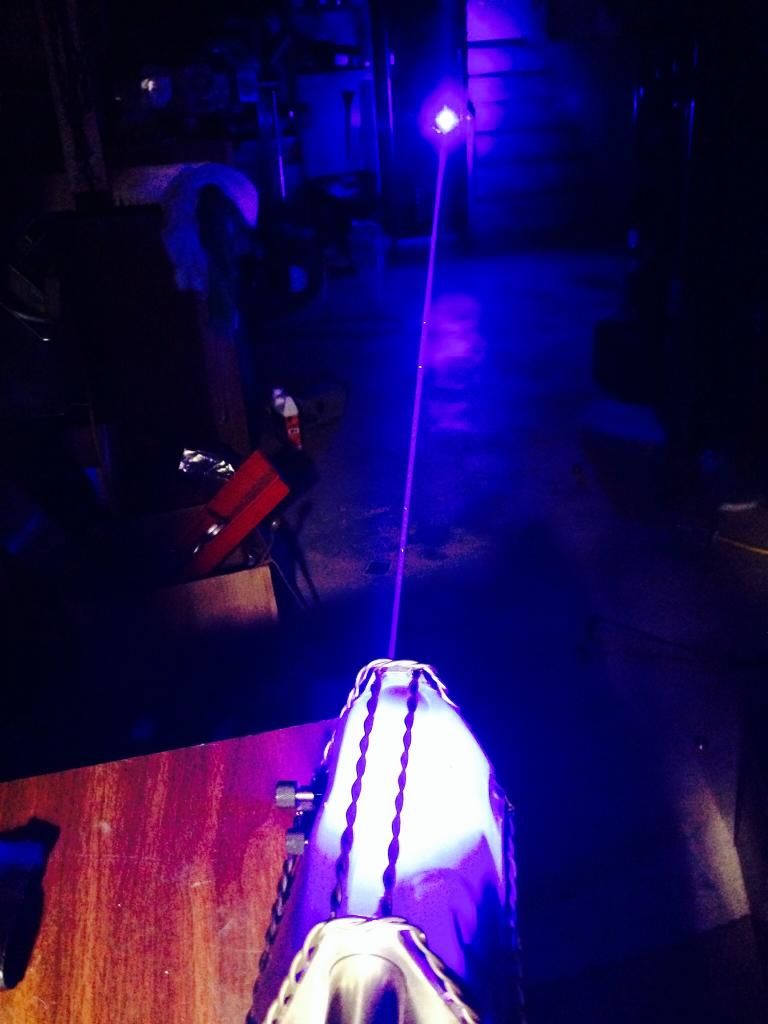
Conclusion
I consider this build 90% finished. It's a bit bulky and not the most beautiful but I like it so far ahh It was a challenge indeed. I maintain a beam profile that resembles a plus sign+. Soon to come I will try to get some outdoor beam shots and a burn video. But for now this will do. I might update this thread periodically as I make adjustments. I think it's Conceivable this laser puts out over 8Watts but I cannot confirm that.
No doubt about it this laser Incinerates. Steel wool and wood from 10+ feet away I accidentally discovered.
Thank you everyone!
Jefferson
(No eye balls or pets were hurt in the making of this laser..except some furniture)
Last edited:


