jayrob
0
- Joined
- Sep 21, 2007
- Messages
- 9,862
- Points
- 113
Senkat, just letting you know that I am sending your Pocket Mini kits (and other item) today. (Thursday)
Thanks!
Jay
Thanks!
Jay
Last edited:


I really want to emphasize studying the information in the link I posted to rog8811's site...
With a red diode/single battery/FlexDrive set up, you won't be pulling extra current to boost voltage, because the diode is only asking for about 2 volts.
")
Try something...
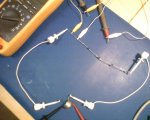
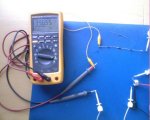
Current is what you want to measure.
Jay
Thanks,
So sounds like you're saying to hook up the Aixiz module again (after discharging the flex)?
This time, I'll do it on the bench first instead of installing everything and epoxying the heatsink!
You shouldn't need to use epoxy on the heatsink. Take a look at the build tips in the first post...
* As you know, the brass ring will press into the bottom of the pill. Use a little Thermal adhesive here. Maybe just in three spots. (not all the way around, because this is your negative contact point) That way, when you finish the build and go to tighten the assembly into the head, you won't have the problem of the brass ring 'spinning' in the pill instead of everything getting tight.
I press the ring and heatsink together with thumb and forefinger and spin it all up into the head by rotating the head. With a little practice it works very well.
Do not doubt this build. It is legendary.