

- Joined
- Aug 25, 2010
- Messages
- 533
- Points
- 63
Hello forum.
Many things happened during last months: I have learned many lessons,
tried and found many solutions (with my patended system
TRY-ERROR-JUMP IN AIR-CHANGE-RETRY ), and finally refined the entire project.
I have also invested many moneys to buy all the needed chems and tools to
become a serious pyro-man.
I must thanks Mr. Jason (NeighborJ) from APC forum a lot for his patience and expertness.
A lot of formulas, modifications and procedures come directly from him.
Without his help probably my actual state will be at a greenhorn level
This is not a R-Candy only related thread ... I will explain the whole
procedure to build nice fireworks using sugar rockets.
Chapter one: the tools.
-------------------------
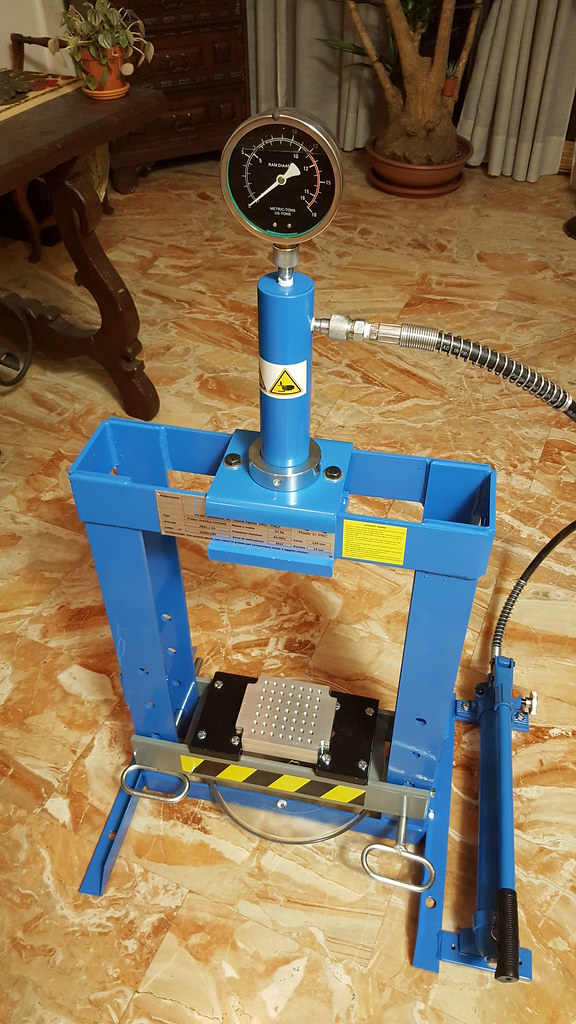
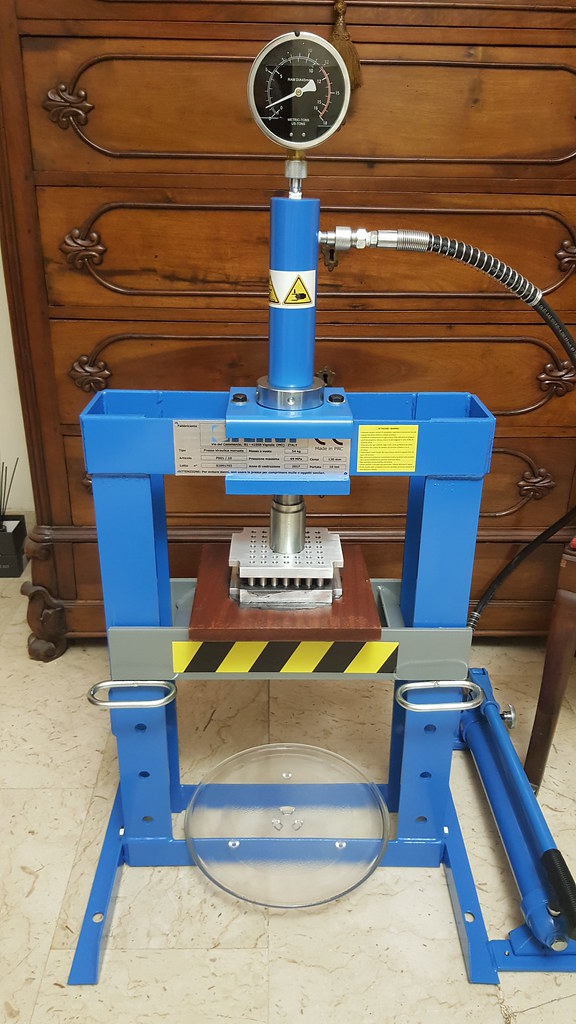
The 10tons hydraulic press:
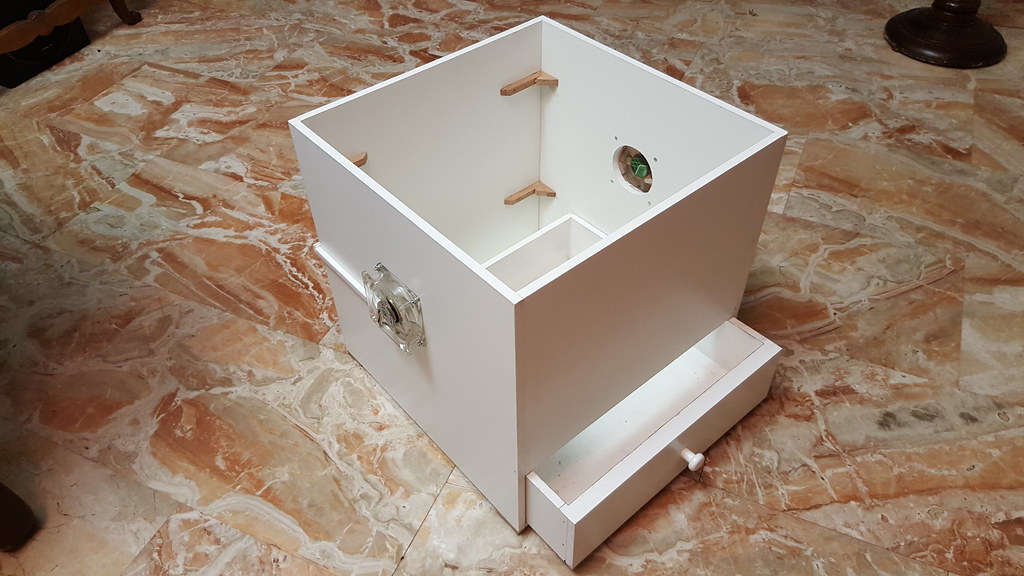
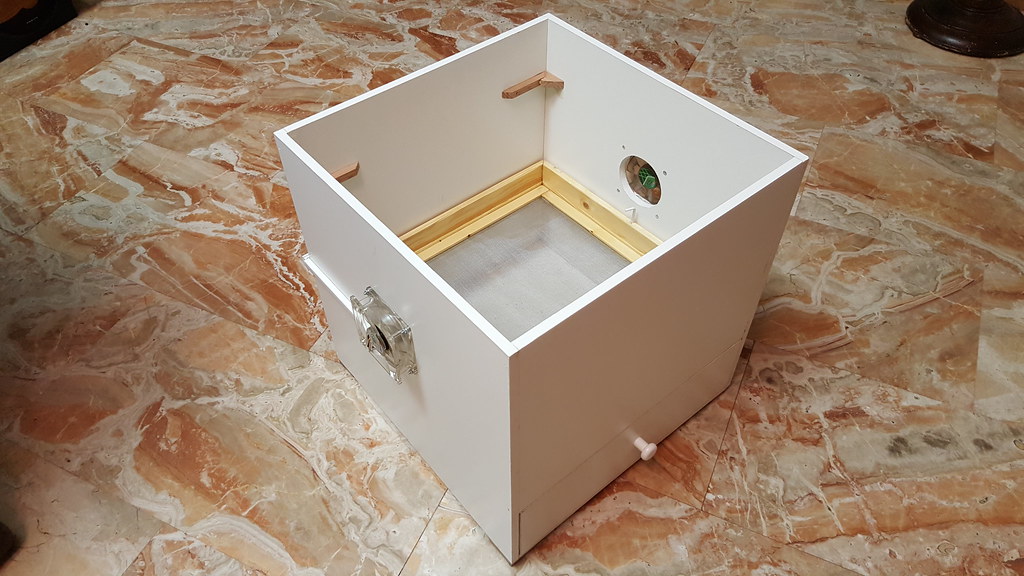
The custom multi-purpose drying box:

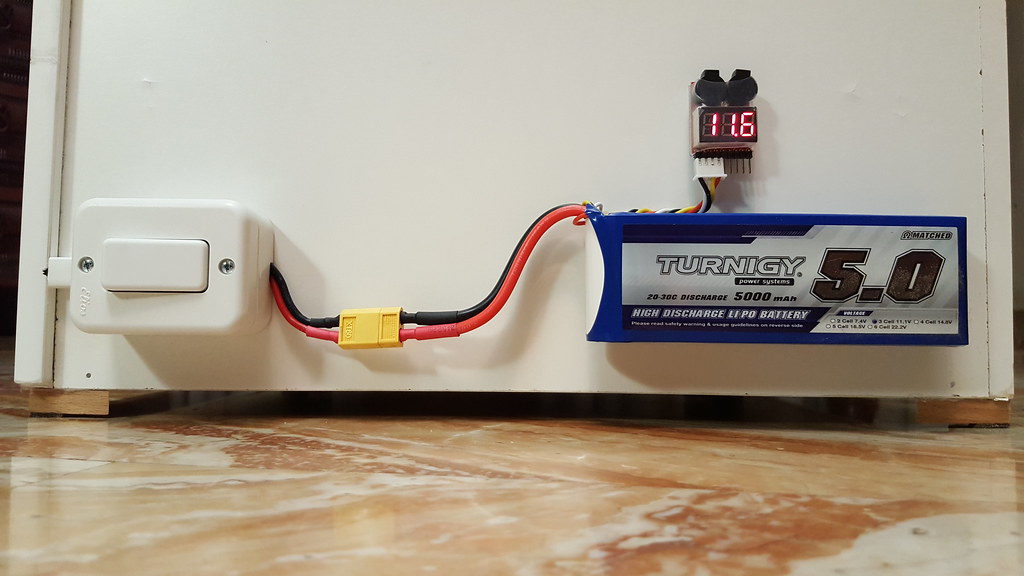
The box is alimentated by a 5A 11.1V LiPo cell, that is able to provide enough current to the fans for about 7 days:
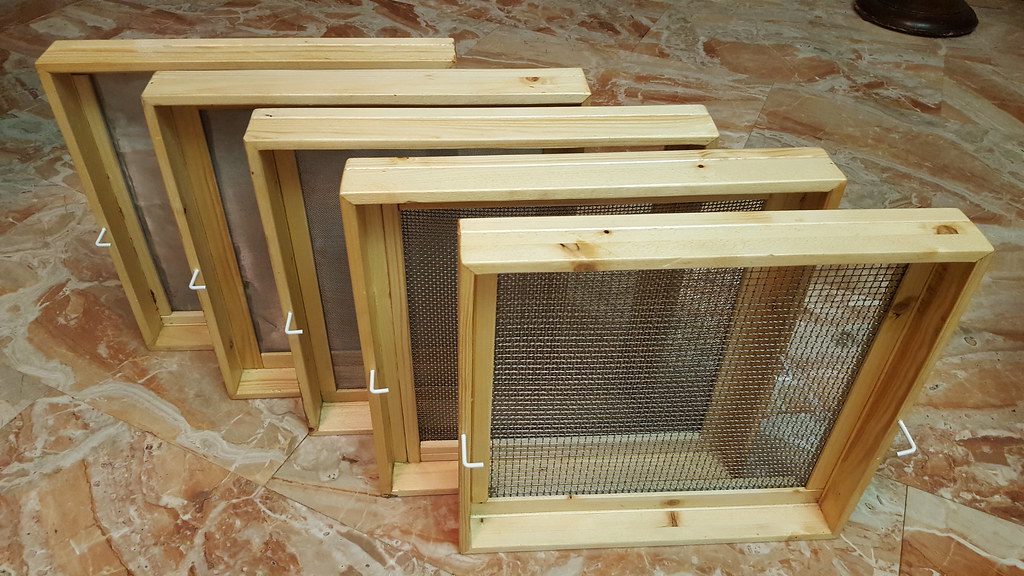
Different screen meshes:
The Lortone ballmill with 100x1.5mm brass balls medias:

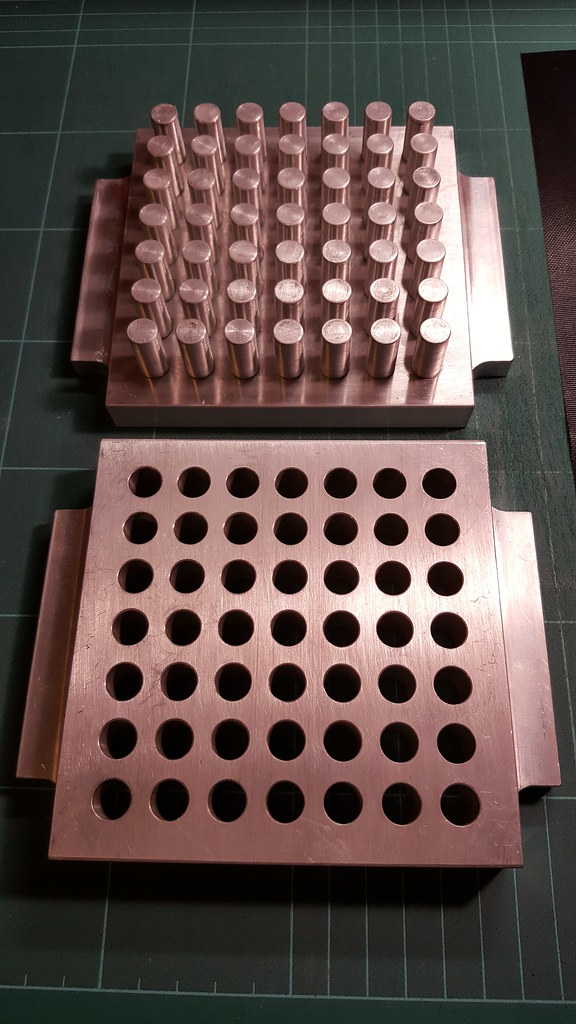
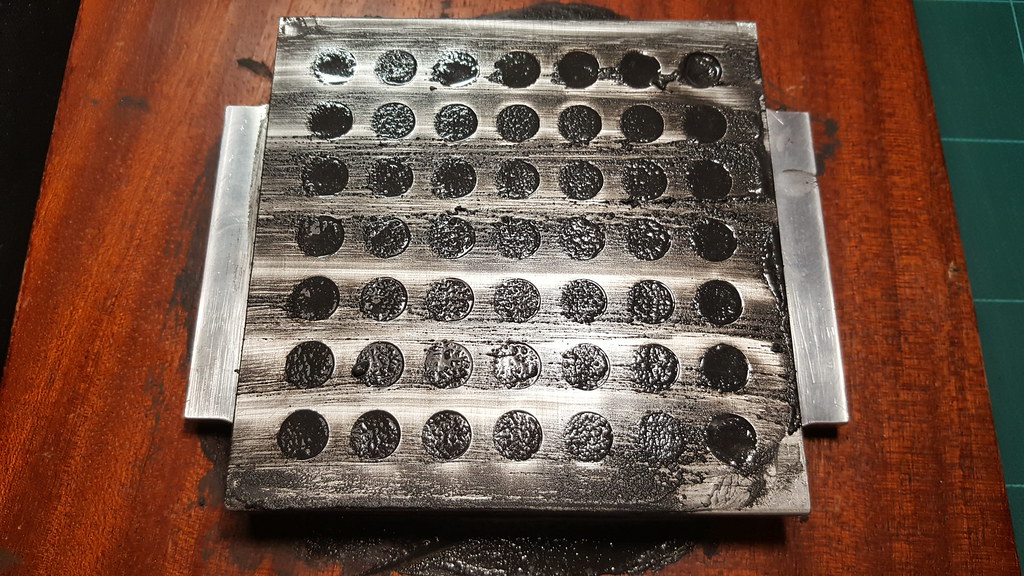
The star plate (it can create 10x10mm 49 cylinder stars):
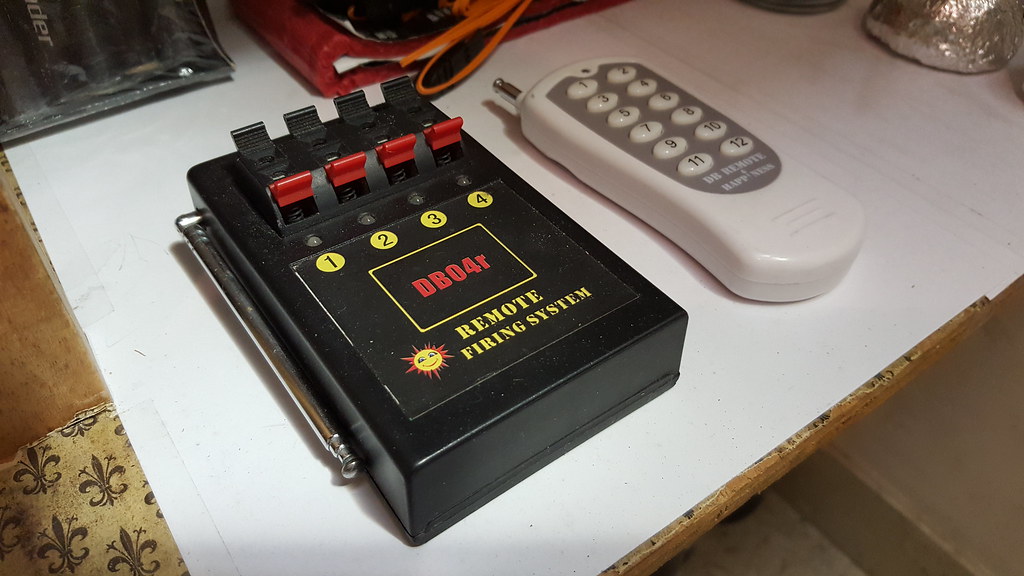
The 4 channel radio-controlled system (to ignite fireworks from a distance up to 300 meters):
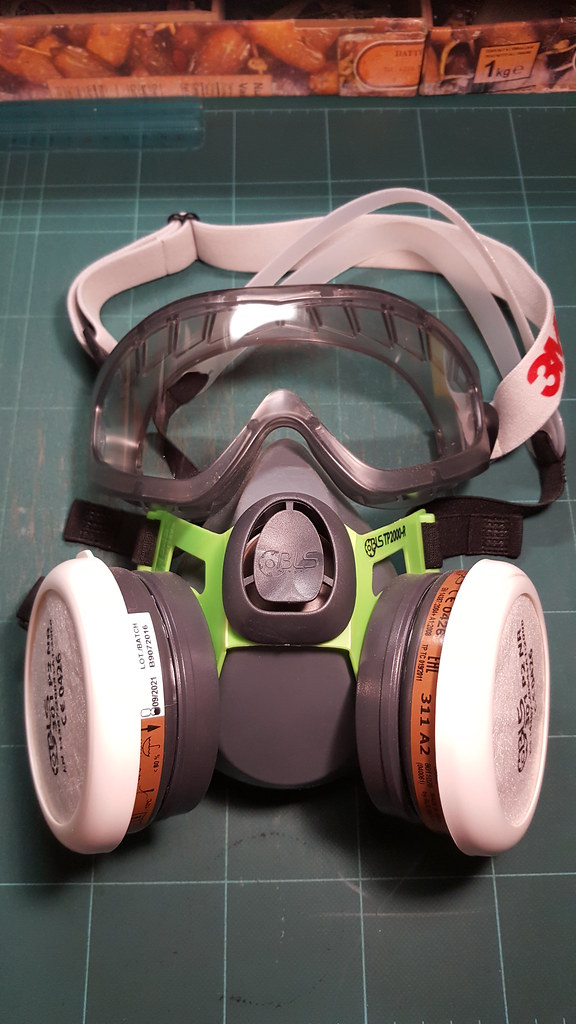
The goggles and the mask to protect myself against harmful dusty chems:
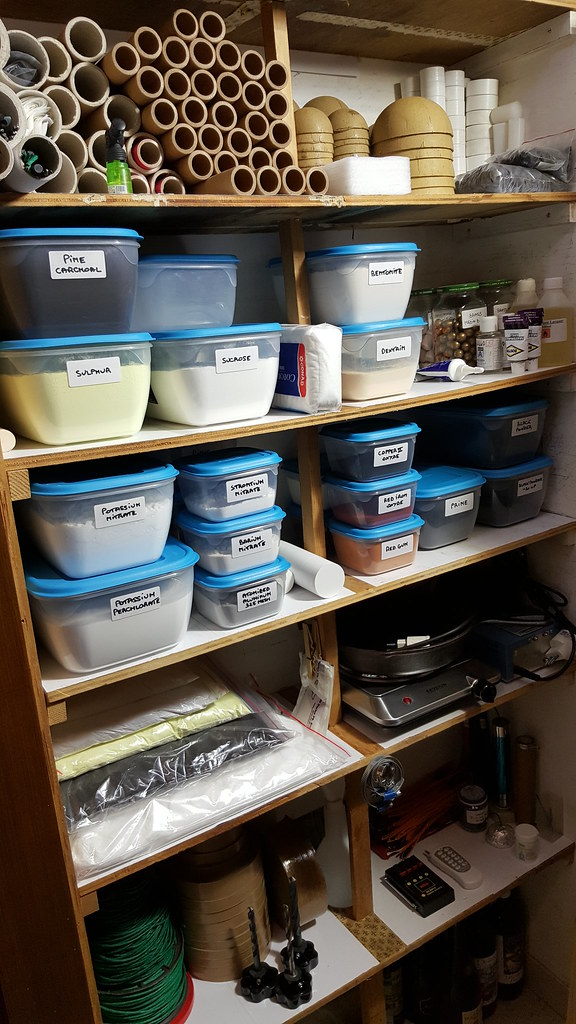
The chems storage room:
Chapter two: making a very good granulated BP with a modified CIA method + pucking and corning.
---------------------------------------------------------------------------------------------------------------
First of all 80 grams of airfloat pine charcoal, 53,2 grams of sulphur and 21,2 grams of dextrin
must be ballmilled for some hours:
The above doses are calculated to fill my ballmill for half barrell,
exactly a little bit over the brass balls, to obtain a rapid and perfect creation of a very fine compound.
The rotation speed of the original rock tumbler was modified following the good infos
quoted in these sites:
https://www.911metallurgist.com/blog/ball-mill-critical-speed
Ball mill | PyroData
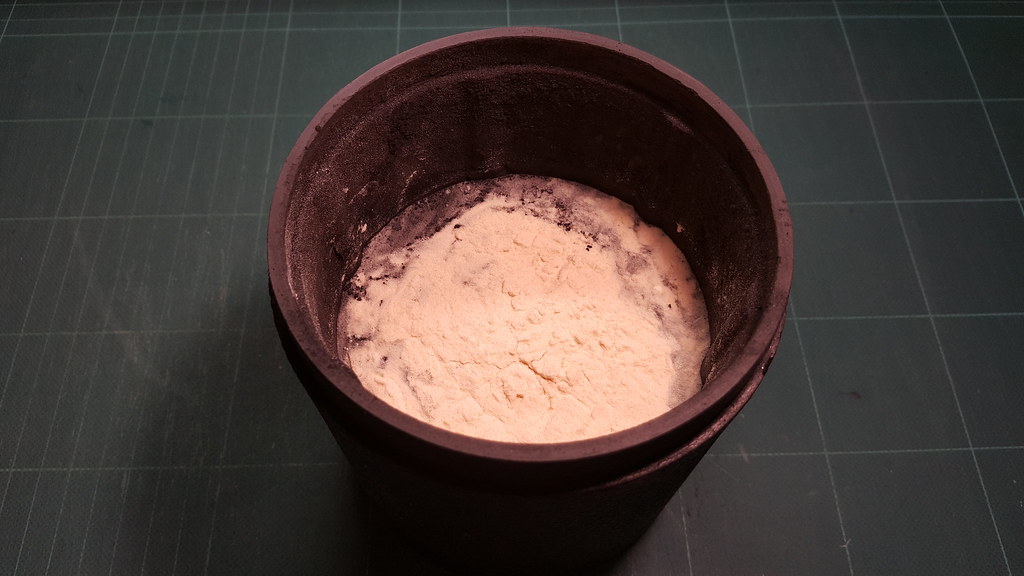
Then 400gr. of potassium nitrate is dissolved in 200ml of boiling water:
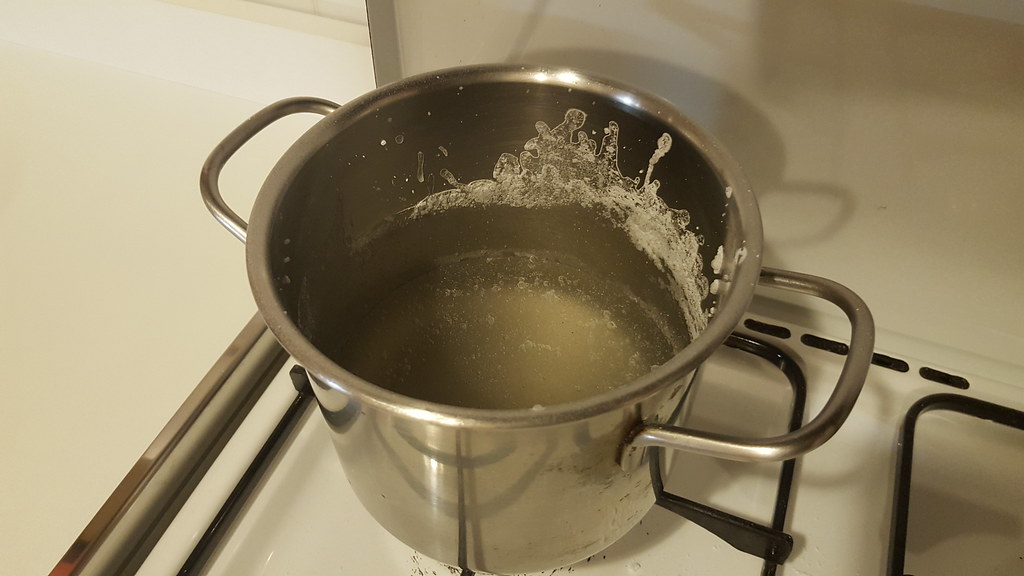
Once all the nitrate is dissolved, the heat is turned off and the premilled mix is dumped into the hot nitrate solution and mixed with a spoon:
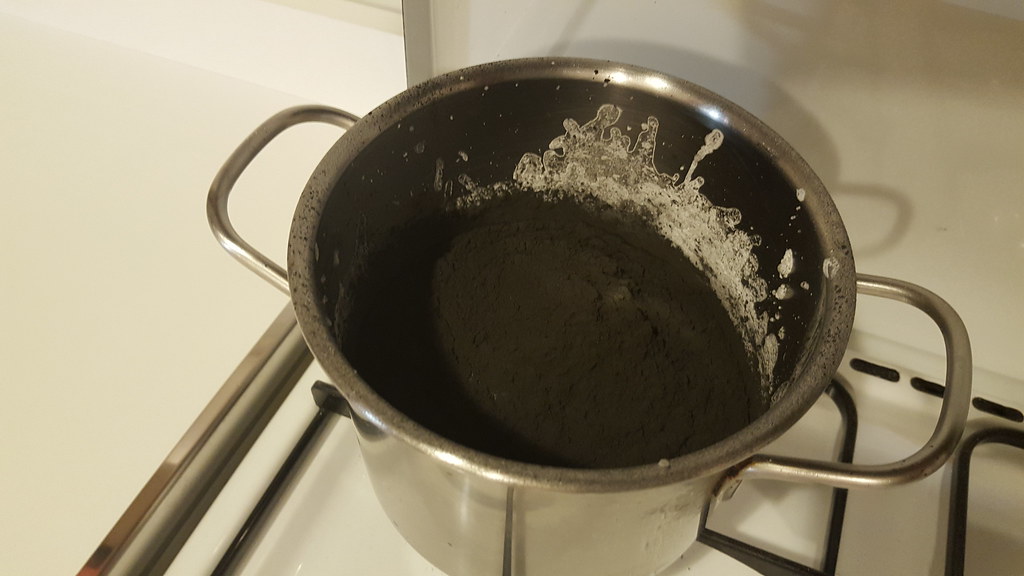
The mix is runny and hot so a gentle breeze and constant mixing helps to reduce the H2O content:
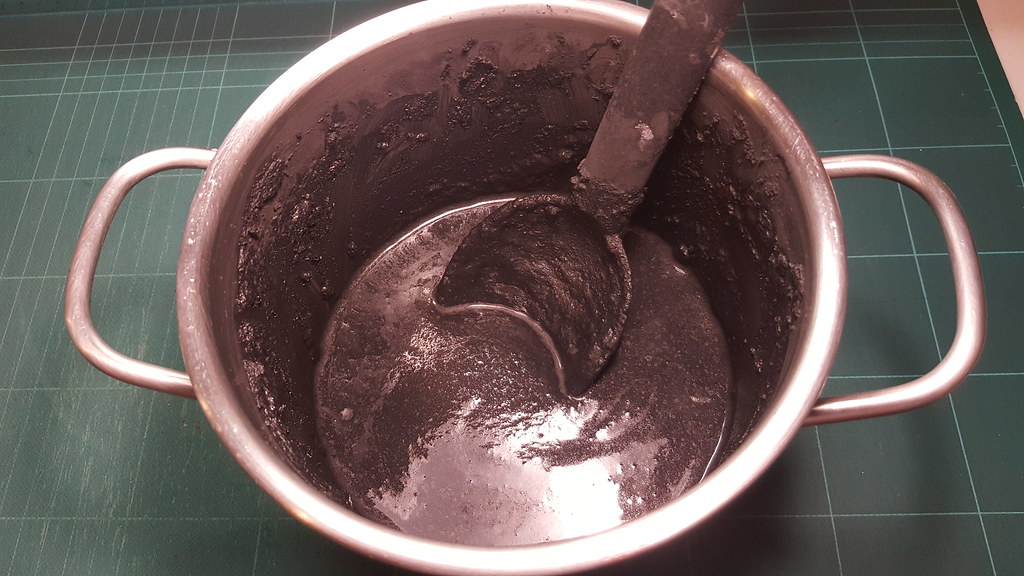
After it is cooled to room temperature the mix is spread out on waxpaper to dry:
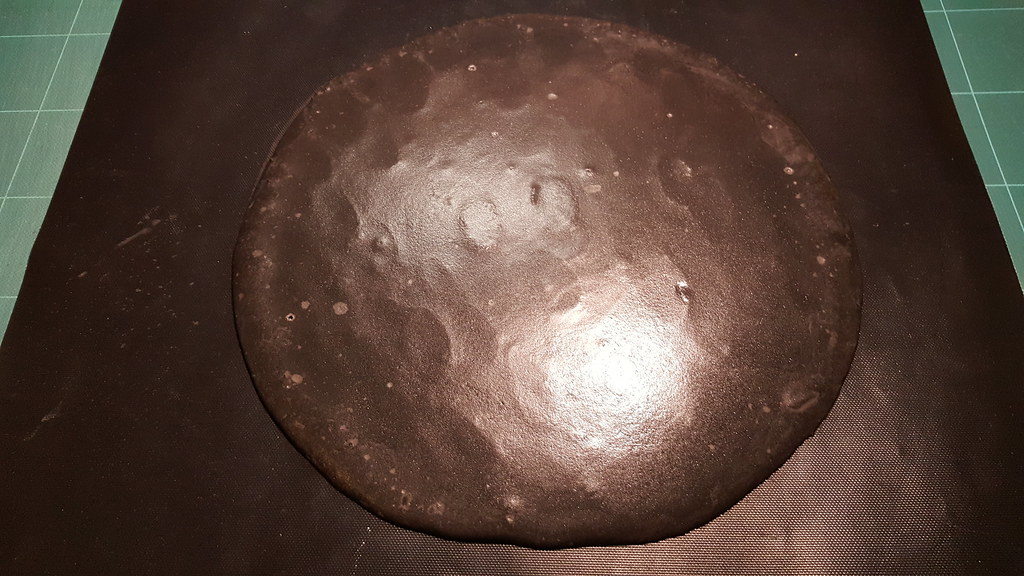
It can be left to completely dry or it can be dried just enough to press it into pucks for corning:
Pressing the wetted black powder to make cylinders suitable to be granulated:
The BP cylinders ejected and ready to be granulated:
This is a much better procedure than the method described on pyro creations because you will not
loose any of the dissolved nitrates in the waste water and the exact chemical ratios are 75-15-10+4.
This makes powder which will be faster than the screen mix pucking and corning method because the
nitrate is more intimately incorporated into all the ingredients.
The most difficult part of the entire process is drying the very wet mix without letting the KNO3
crystallize on the surface. The best way to avoid that is to dry it at room temperature without heat
and use a fan to increase airflow.
The final +20-8 granulated and fully dried black powders:
Chapter three: making gold glitter stars.
--------------------------------------------
The N1 modified glitter stars are credited to Ned Gorski and after added with Magnalium by Mr. Jason (NeighborJ from APC Forum).
Before I start I feel that I need to state that there are a few things which will prevent these stars from performing properly.
One of the more common mistakes is adding too much water, the second common mistake is force drying them.
Both mistakes will cause the Al and MgAl to oxidize and start a chain reaction of degradation.
These kinds of reactions are not a danger unless they react fast enough to create its own heat and self ignite.
Start by weighing out 272 grams of loosely granulated screen mixed BP 75-15-10+4% dextrine (also called pulverone):
Adding 48 grams of sodium bicarbonate, 32 grams of sulphur, 16 grams of dextrin and 4 gram of boric acid:
Screen mixed these chemicals thru a kitchen sieve 3 times then added 32 grams of 325mesh atomized aluminum and 8 grams of
-60+100 mesh MgAl:
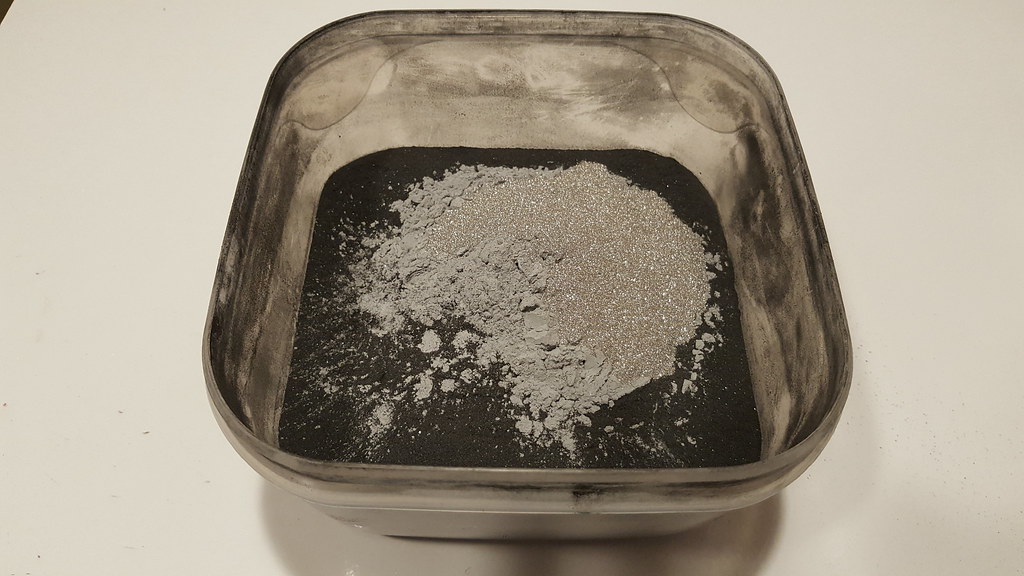
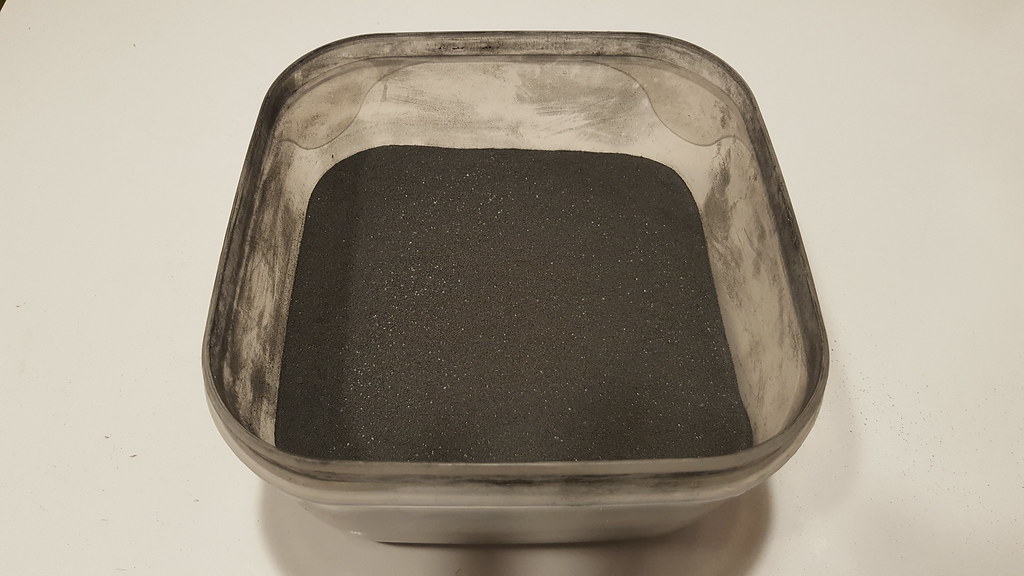
Gently shaked the batch in a closed box to evenly distribute the metals:
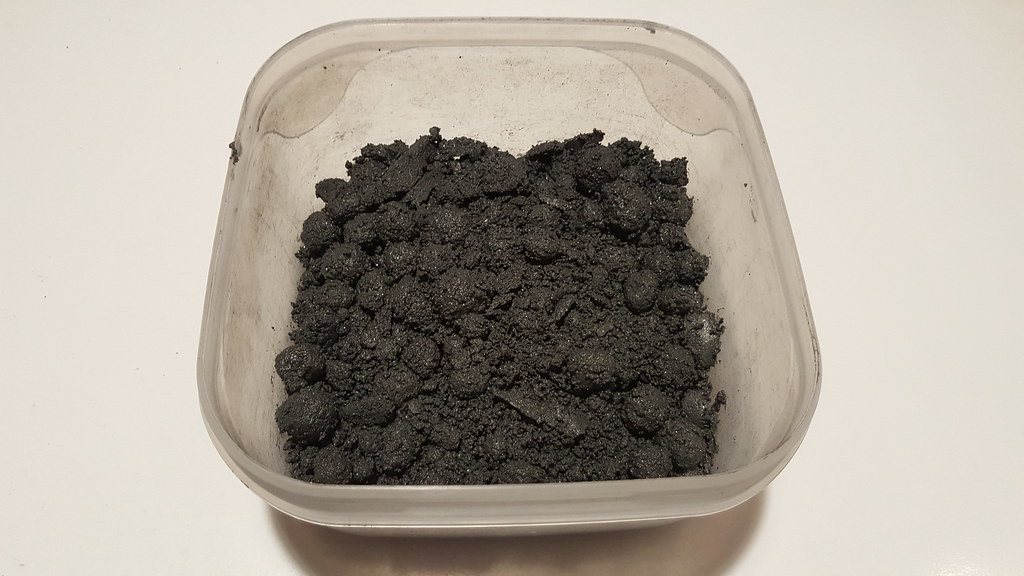
At this point 90% demineralized water with 10% isoprophylic alcohol can be added.
I used a spray bottle to slowly add water while shaking the box to expose dry comp.
I don't have an exact water content recorded because different charcoal are more thirsty than others but 18-25% is normal.
It will start to clump in the box when enough moisture is achieved:
The wet compund is coated and pressed with a spatula inside the cylinders of the star plate:
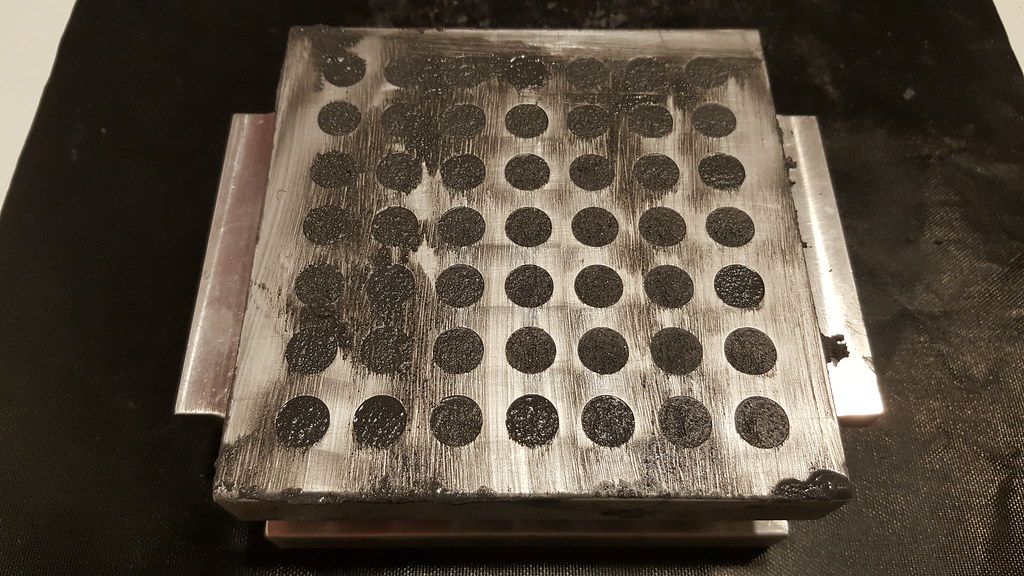
Pressing the wetted golden glitters compound at 2 tons pressure to create the stars:
The stars are ready to be dried:

Now the stars needed to be primed.
Also if they are quite easy to ignite, the stars will benefit from a quick and complete ignition of the entire star surface.
Prime is a good insurance of this and it helps to ensure the display is "crisp" meaning they lite simultaniously and burnout at the same moment.
The cylinders needs to be re-wetted superficially with a spray bottle containing 90% demineralized water and 10% isoprophylic alcohol,
and then floured into a mixture of pulverone plus 10% of silicium.
Here is the primed stars, aka the final product:
Now they are ready to load into shells.
They will not burn properly on the ground because atmospheric oxygen is needed to feed the reaction in the air.
They will burn anyway, but they will turn into a molten blob of slag.
If at any time they get hot while drying it is better set the batch outside in case of accidental ignition.
The risk goes down as they dry, and after 8hrs they are usually dry enough to prevent any reaction at all.
Chapter four: creating nice 4" shells.
----------------------------------------
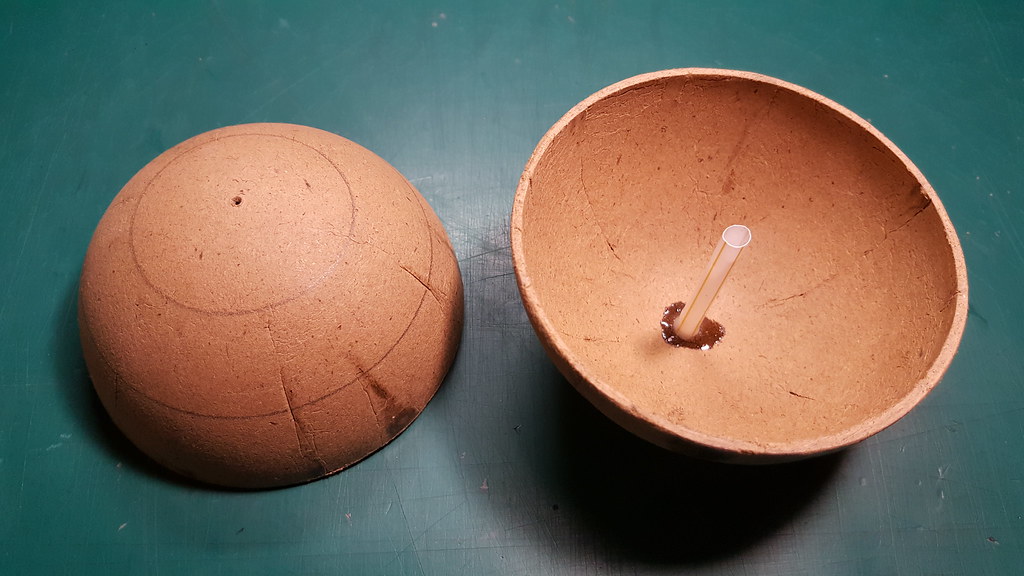
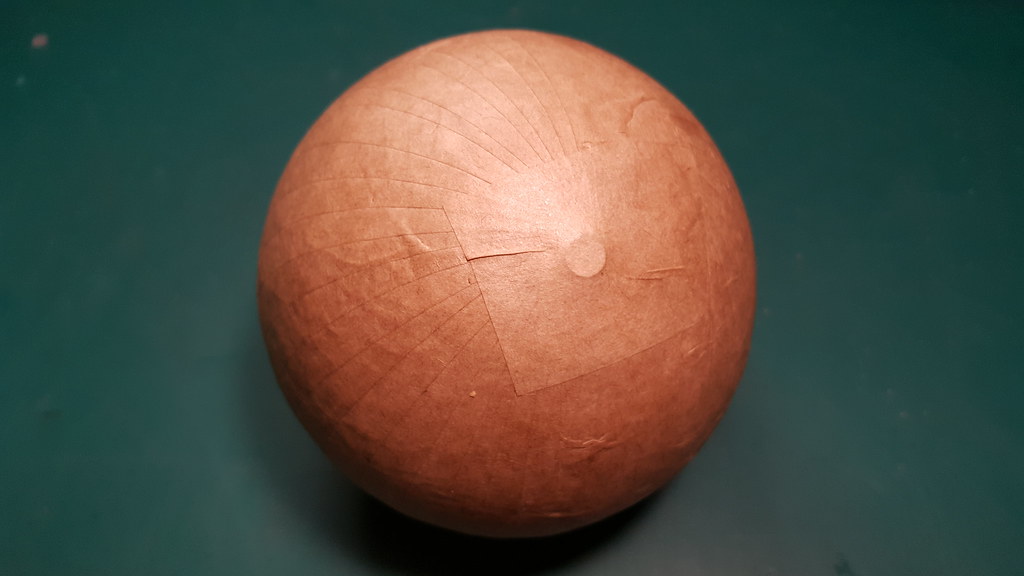
First of all an hole is made to insert and glue a straw.
This is necessary because the shell needs to be ignited from the inner center to obtain a simmetric effect after the crack.
A fast fuse is also needed.
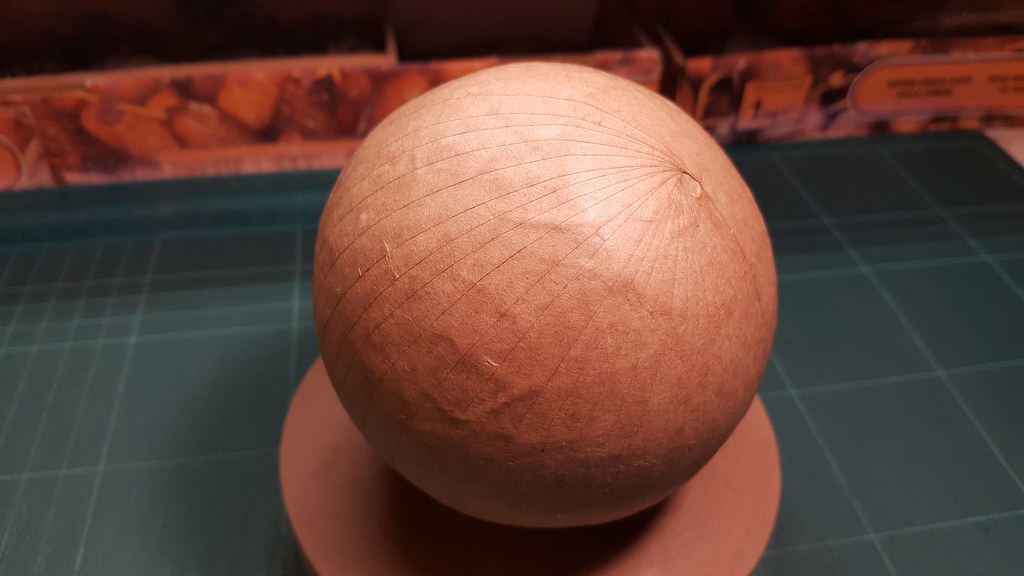
With the help of a compass two circles were traced on both the hemis:
Placing the stars around the inner walls of the shells:
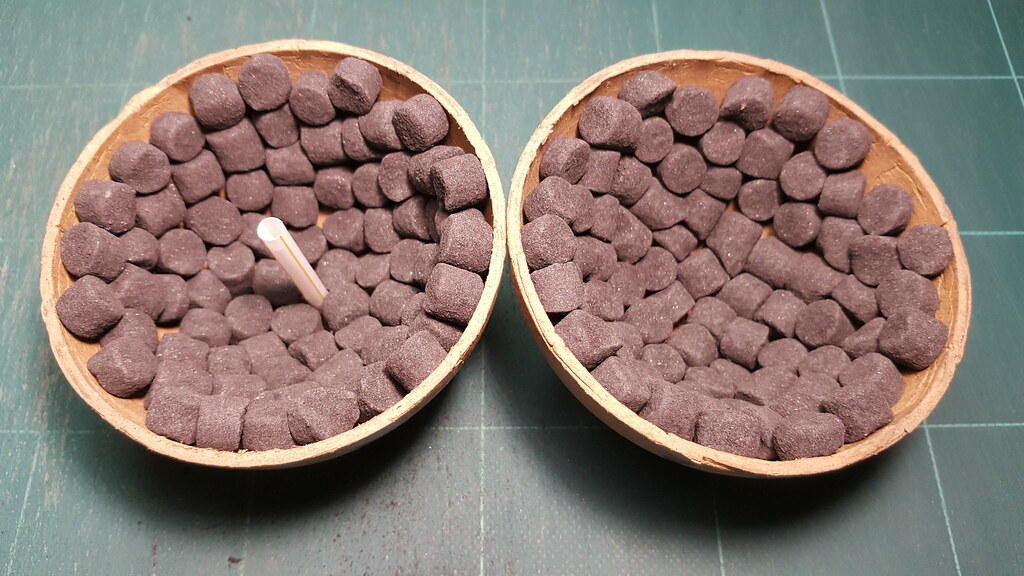
Fill the spaces between the stars with enough 20 mesh granulated black powder:
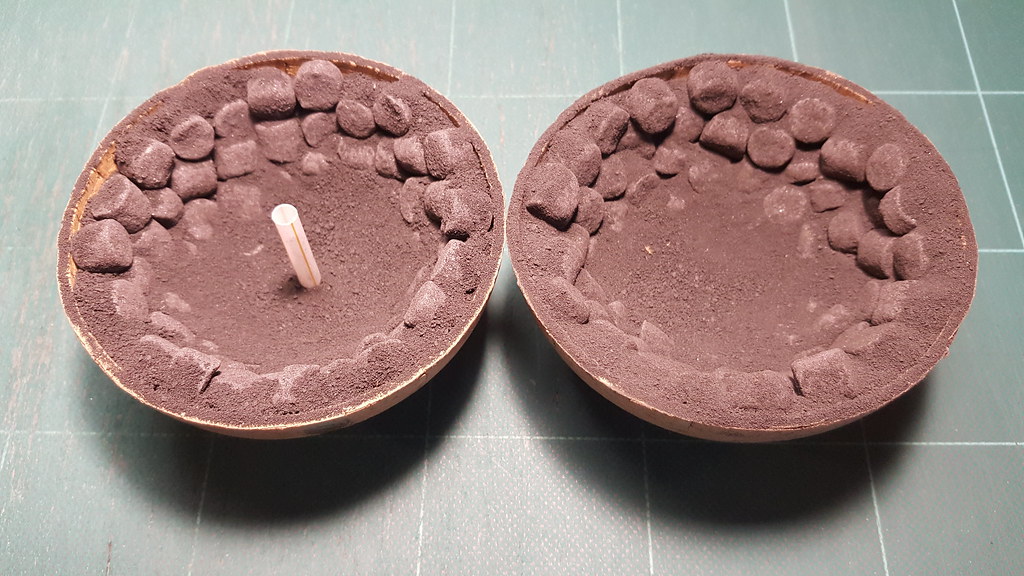
Creating a sort of bags with tissue paper filled with 8 mesh granulated black powder, then placed the bags over the stars and pressing well
to keep the stars in place:
Wrapping an hemis with the help of a tissue paper foil:
Carefully place the wrapped hemis over the other hemis:
Removing the extra paper and tap around the upper hemis with a rubber hammer to compact and fit everything inside:
Gluing the two hemis with a wood glue:
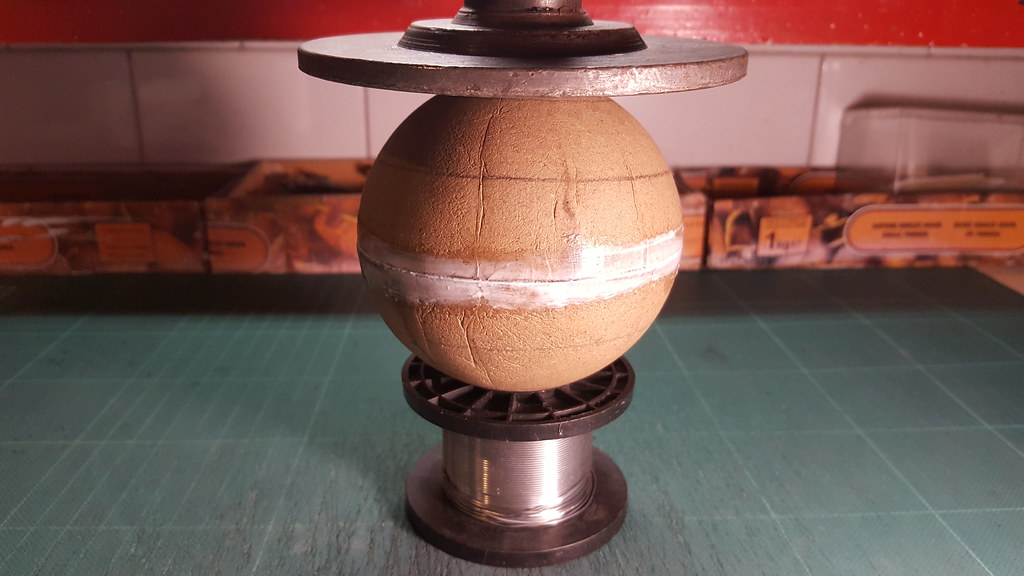
The best option for the 4" shell is to use the 20mm tape with two latitude lines which makes 3 tape rings then repeat the process a second time.
This should create the 30 layers required.
The first ring will be 23.5mm from the pole and the second will be 44.5mm:
Mr. NeighborJ has refined a good way to manually paste the shells in a homogeneous manner, as explained in this video:
Equatorial layer:
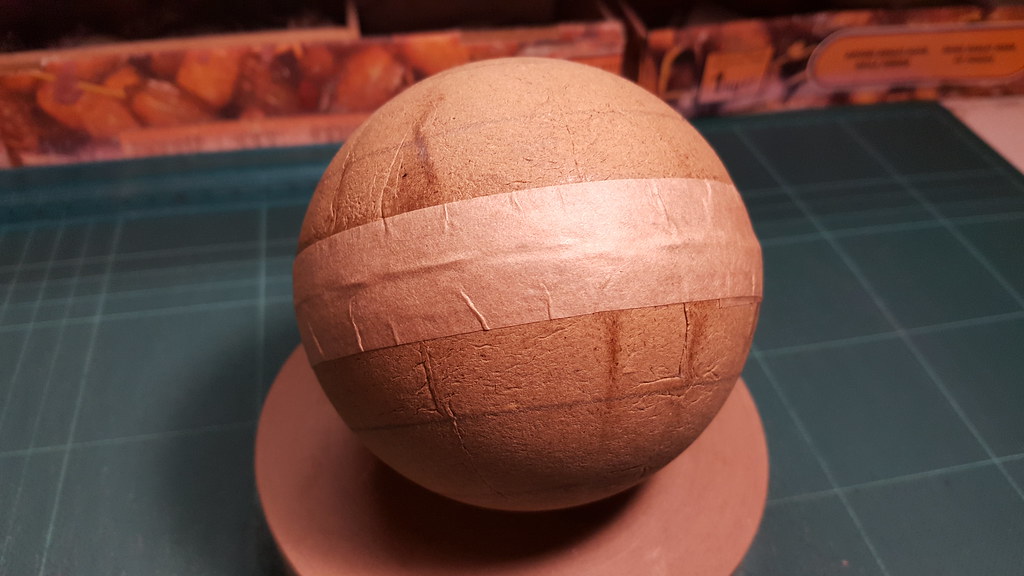
First layer:
Second layer:
Third layer. Due to the amount of wetted paper used, the shell needs to be dried for 24 hours:
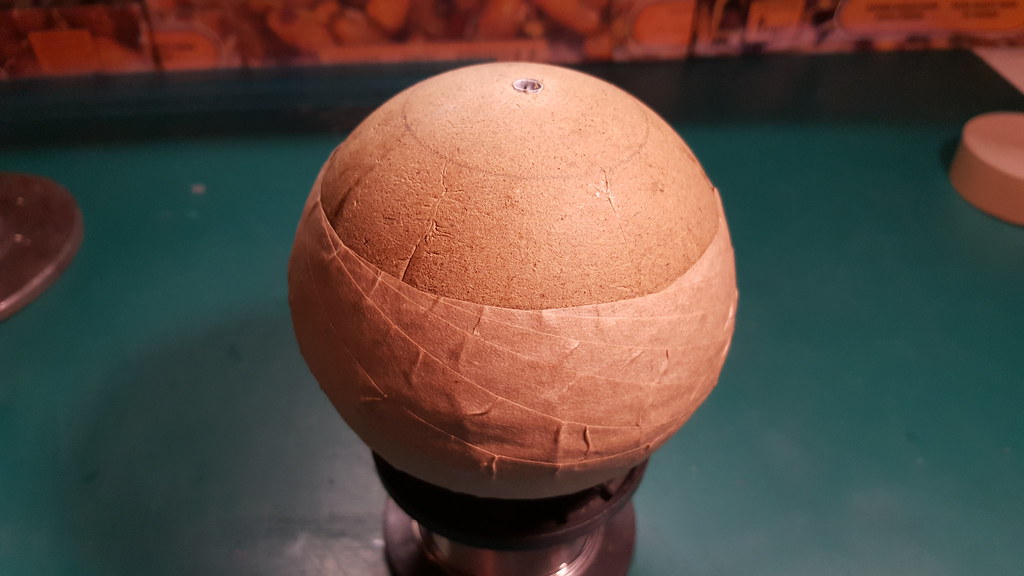
Placing a small neodimium magnet to easy find the hole after applying the new layers:
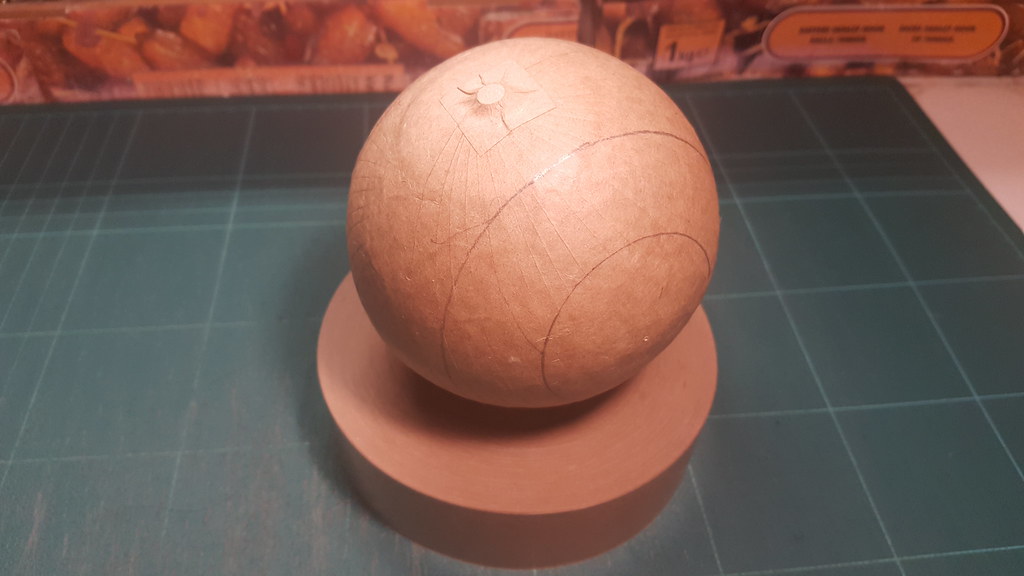
Tracing again the circles.
To create a better homogeneous pasting, this time the compass was pointed over the equatorial line, just in the joint of the two shells:
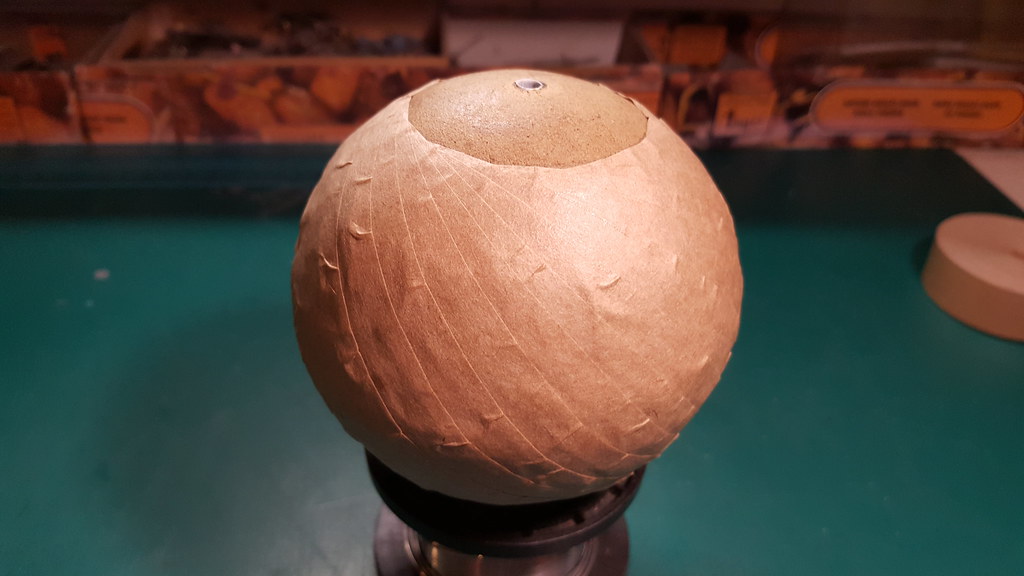
Fourth, fifth and sixth layers pasted.
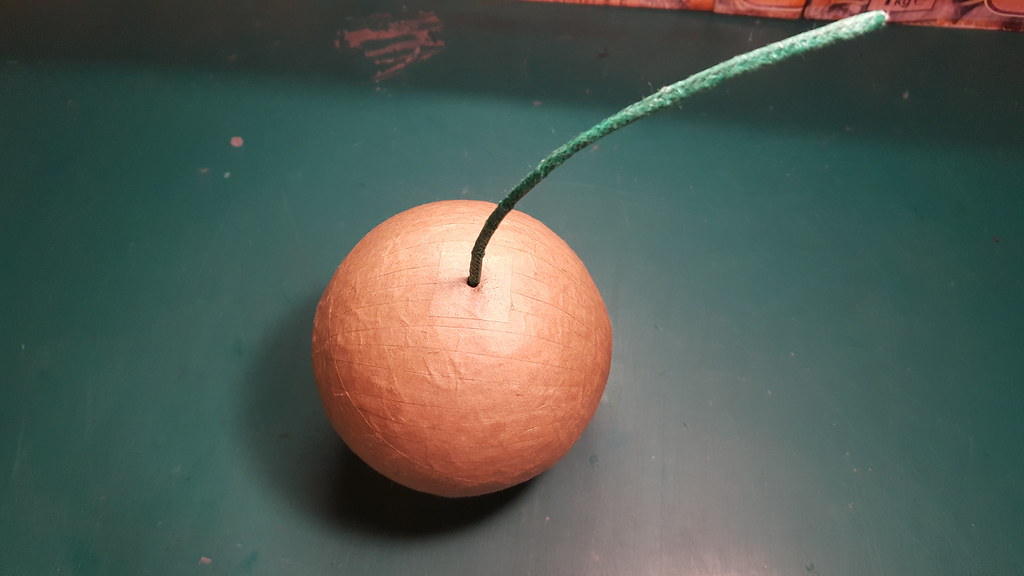
Finding the magnet with the help of a iron item, removing it and placing the fast fuse.
Other 24 hours are needed to completely dry the shell:
Chapter five: creating a sugar rocket.
-----------------------------------------
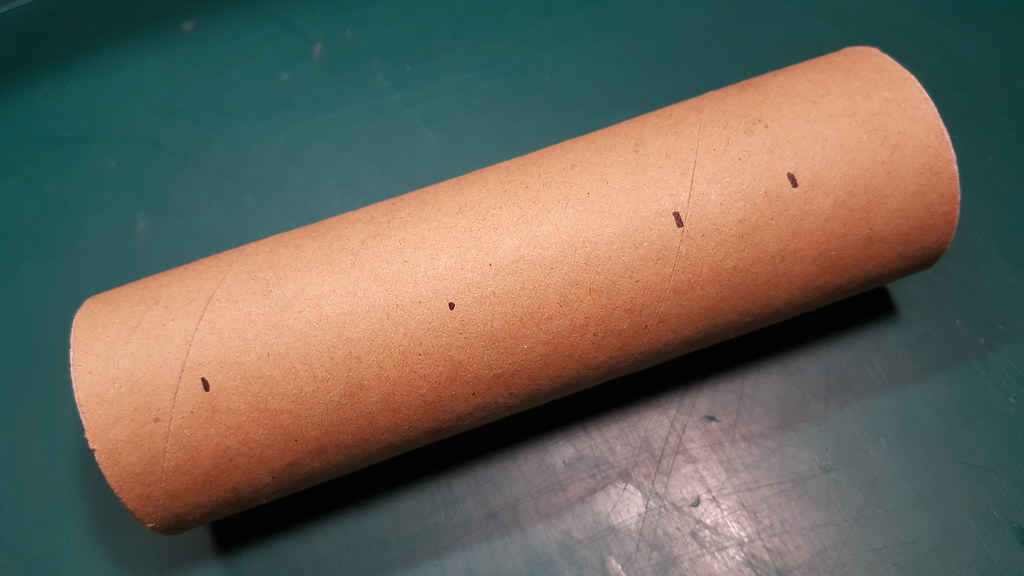
The original cardboard tube: 150mm lenght, 45mm outside diameter, 37mm inside diameter, 4mm wall thickness.
Internal partitions: 20mm for the PET nozzle, 80mm for the propellant, 20mm for the plug, 30mm reserved for other purposes:
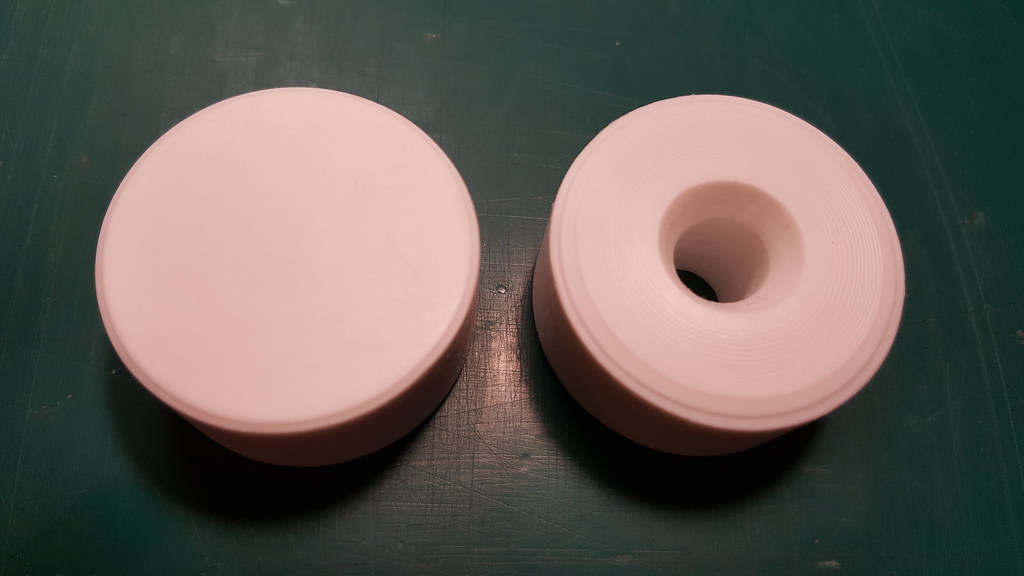
Plug and nozzle created from a PET bar with a precision lathe.
Plug: 20mm thickness, 3mm hole, 37mm diameter.
Nozzle: 20mm thickness, 10mm hole, 37mm diameter:
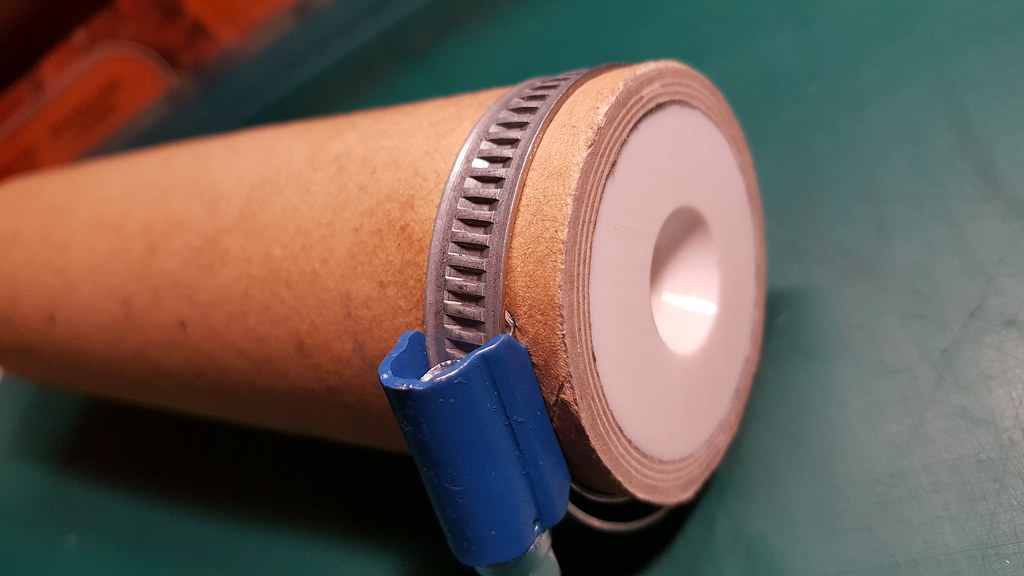
Nozzle pressed and glued with a strong bicomponent epossidic glue:
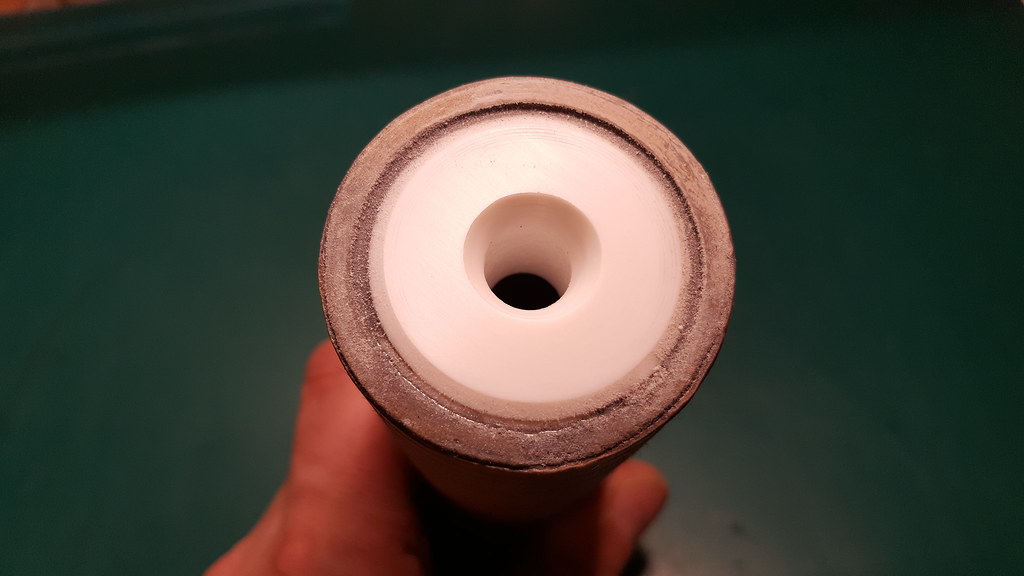
Nozzle deadly hold with a massive band:
Inside the tube:
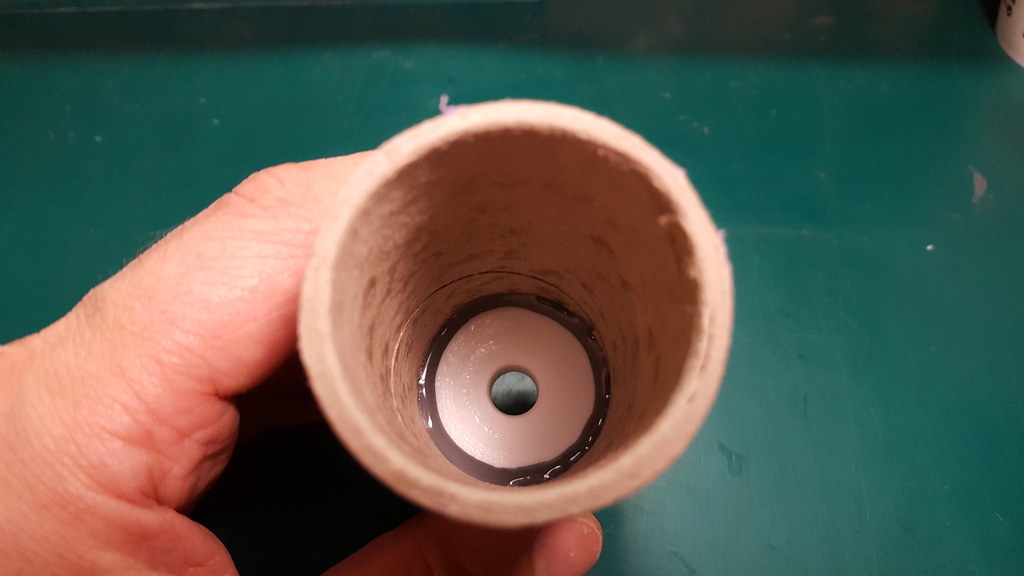
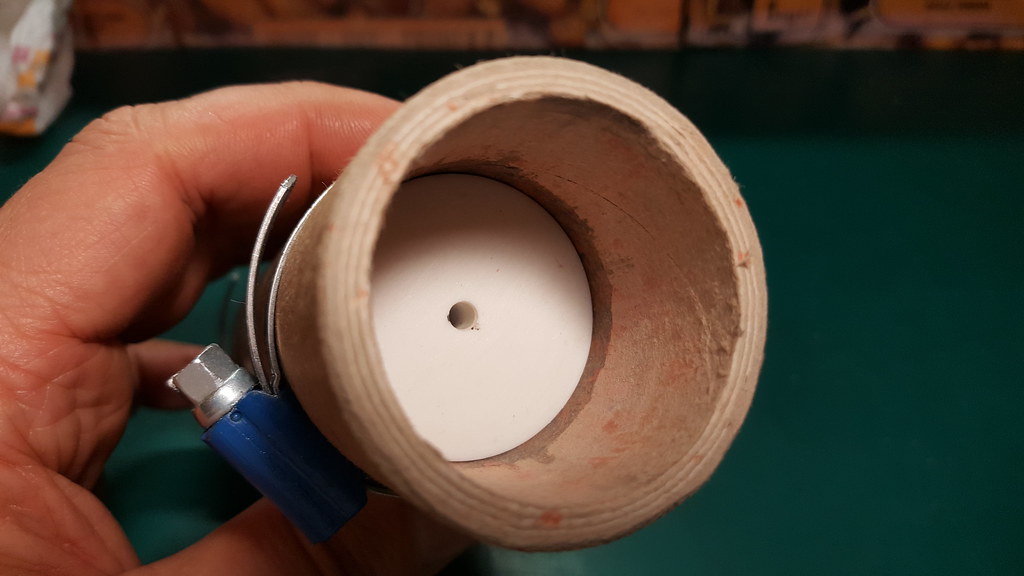
Nozzle hole filled with pressed bentonite to avoid spilled compound during the compacting procedure:
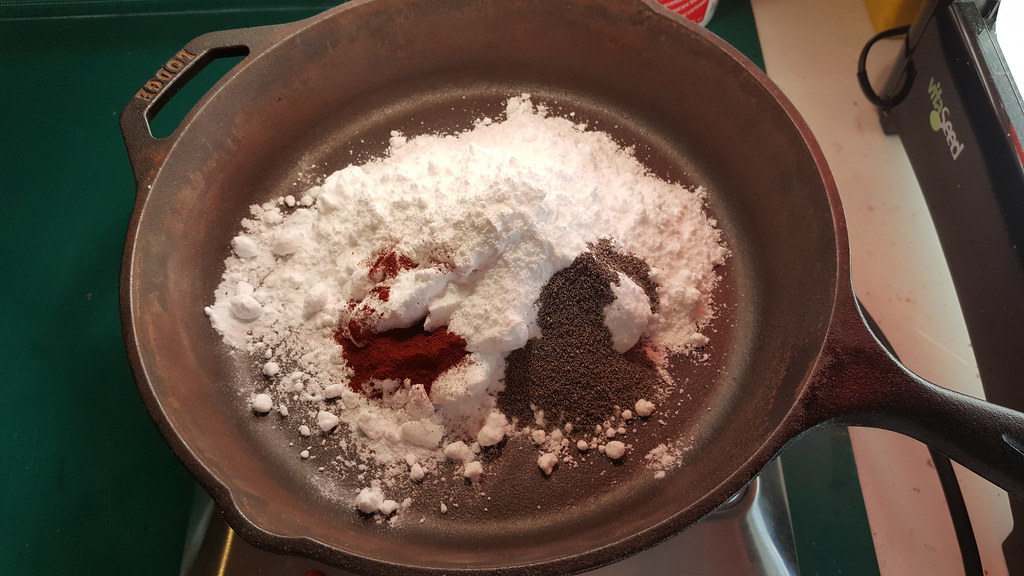
130 grams of potassium nitrate, 70 grams sucrose, 2 grams iron oxyde and 6 grams of titanium sponge 450-1000µm.
I used a heavy and thick cast iron cooking pan over an electric cast iron plate to avoid dangerous hot spot that could
accidentally ignite the compound:
Dissolved powders adding 2 big spoons of distilled water:
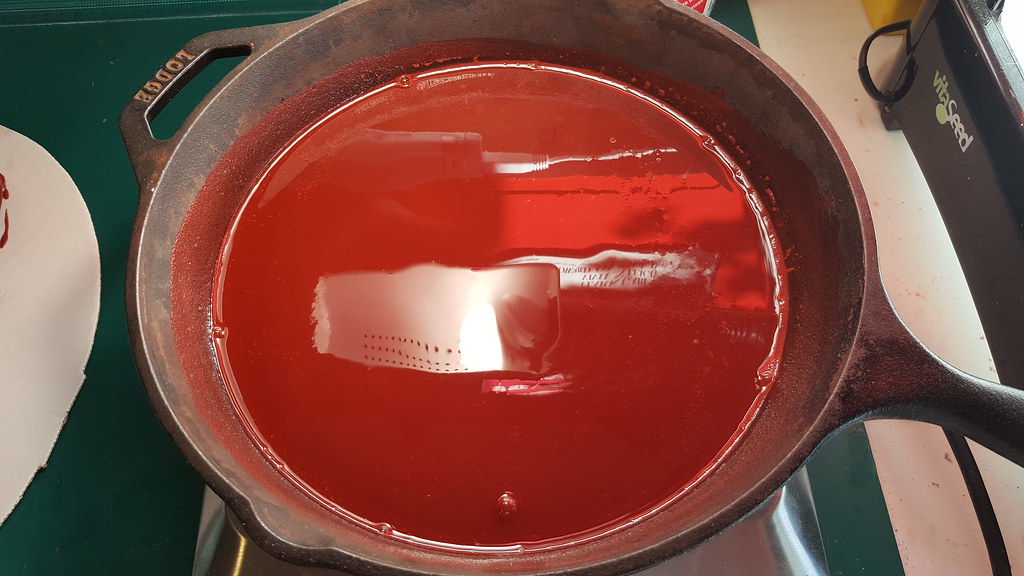
Cooking the compound at medium heat:
The compound is near to be ready. It is important to stir often the compound for safety reasons and to obtain a homogeneous paste:
Compound dried and melted. Max care is now necessary because it is extremely flammable:

Packing the compound with a PET bar. The fit is perfect, so no compound can get off the sides.
To reach optimal results it is necessary to pack the compound not all together, but the equivalent of two tea spoons every time.
Every time I will apply a pressure with the weight of my body (95 KG).
In that way every part will be well compacted over the previous one:
Well packed and cold compound:

Removing band, bind a spiralled layer of 20mm wide gummed paper:
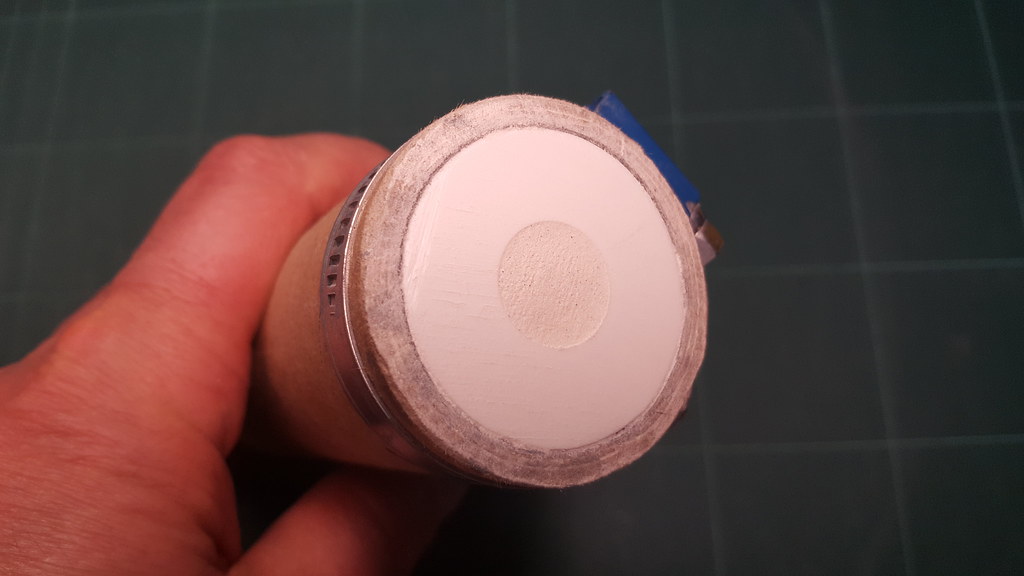
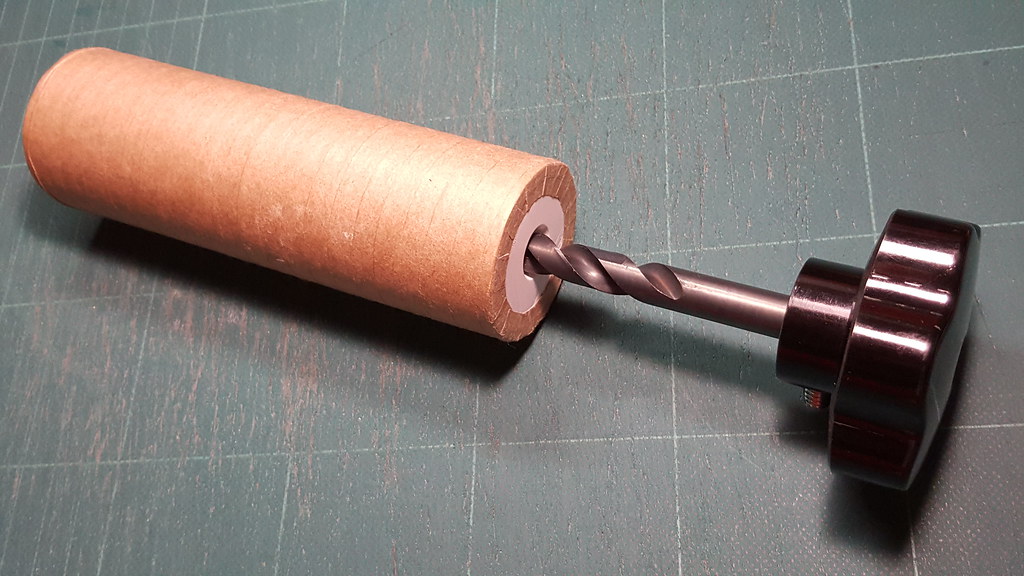
Removing bentonite from the nozzle and making a 10mm diameter, 40mm deep hole in the propellant:
Gluing and pressing the cap, deadly lock it with a massive band:
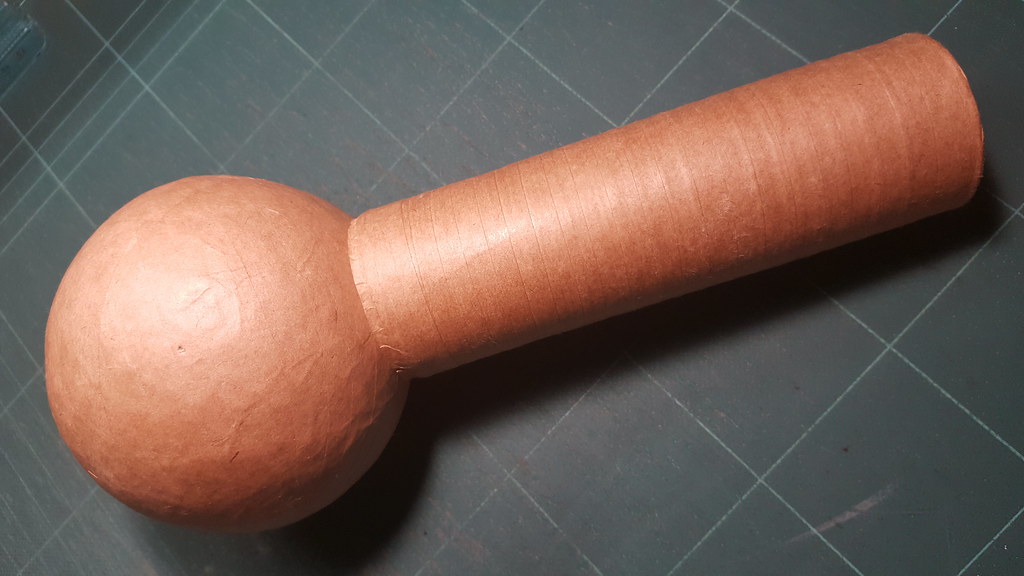
Removing band, insert the fast fuse of the shell inside the 3mm plug hole, gluing the shell on the top:
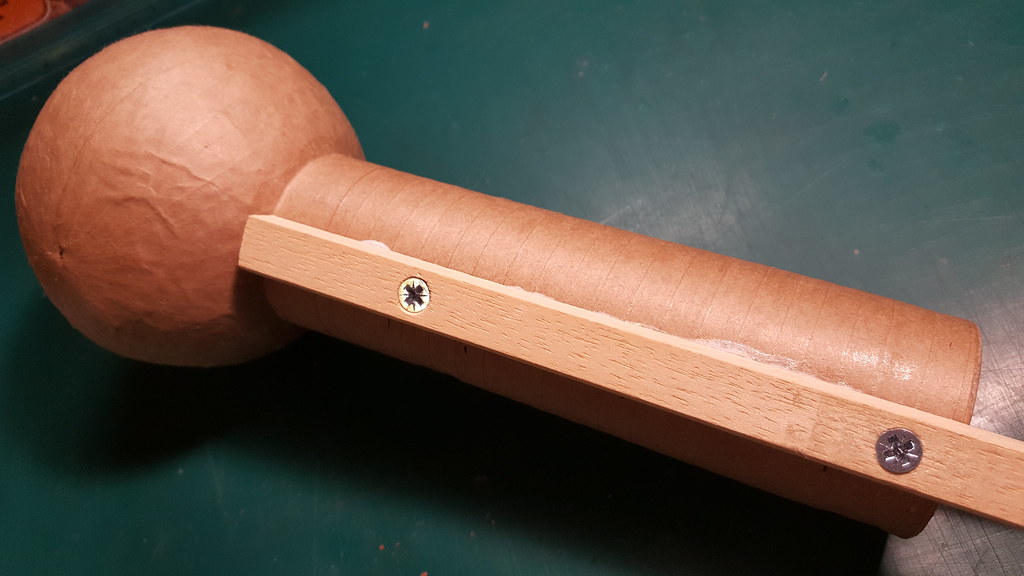
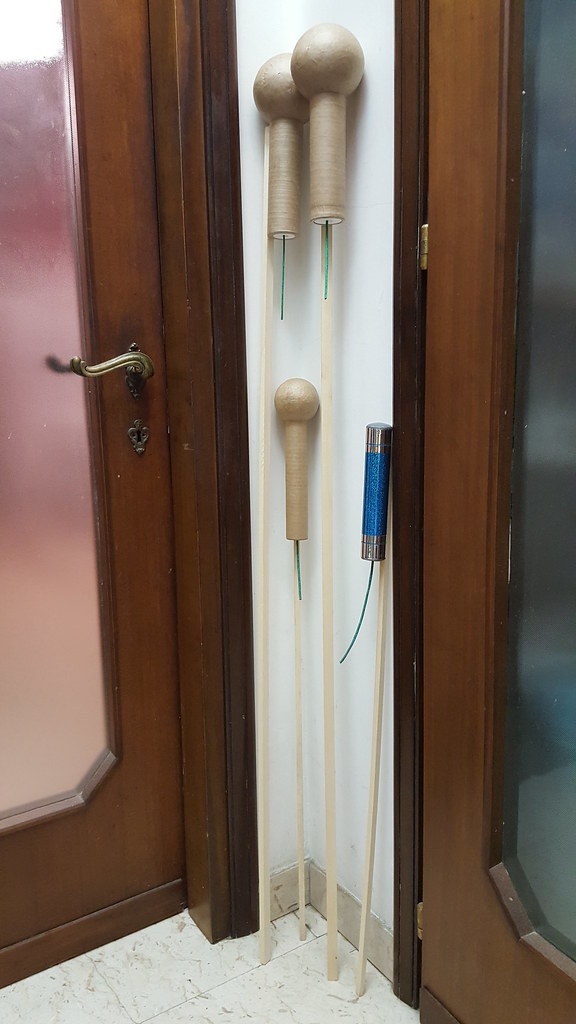
Gluing a suitable long stick, locking the stick with the cardboard tube, the nozzle and the plug with two long tapping screws:
Inserting 3mm fast fuse, keep the fuse locked inside the hole with some small pieces of cotton:
Two beasts of about 770 grams each are ready to be launched:
... and now, the awesome radio-controlled launch:
I'm very proud for the results obtained from this complicated project.
Many many thanks to Mr. NeighborJ for introducing me into this fantastic world. Keep following this thread, this is only the beginning ...
-----------------------------------------------------------------------------------------------------------------------------------------------------------
Updates 26/11/2017.
-----------------------
- I had problems changing potassium nitrate from the anti-caking version to the not anti-caking one.
In fact the anti-caking version, the one that used for my rockets, is added to magnesium carbonate to avoid caking,
but as a secondary effect it slow down a lot the performance of the mix. So, using the potassium nitrate in pure form,
the internal pressure raise so much that every rocket made with the new compound exploded
So the choices was two: slow down the internal combustion adding 5% of sodium bicarbonate or enlarge the rocket nozzle
diameter from 10mm to 12mm.
Both the solutions worked very well, but the second was surely the more professional and faster to realize.
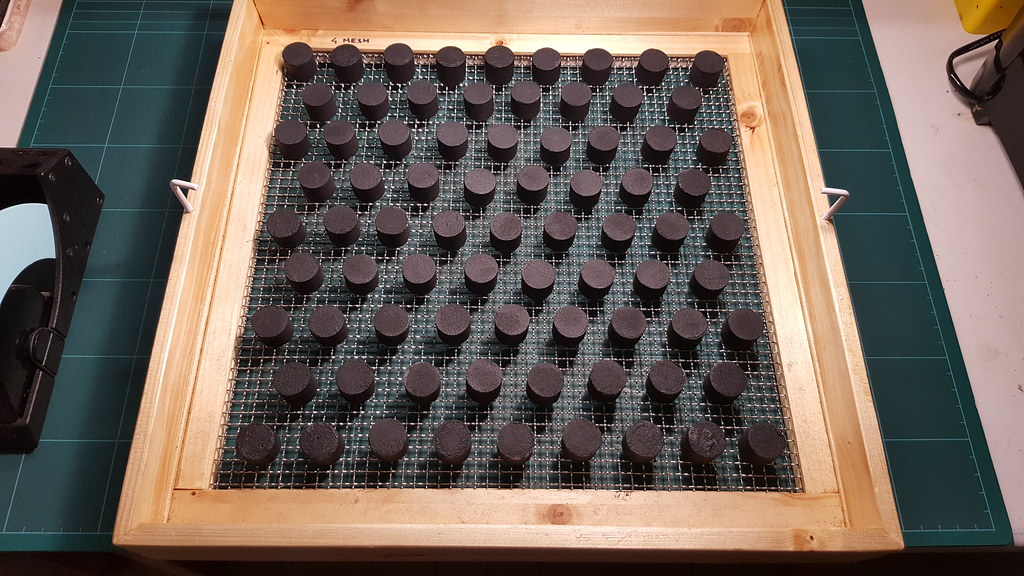
- I commissioned a new star plate with bigger cylinders to optimize and to speed up the granulating process of the BP:
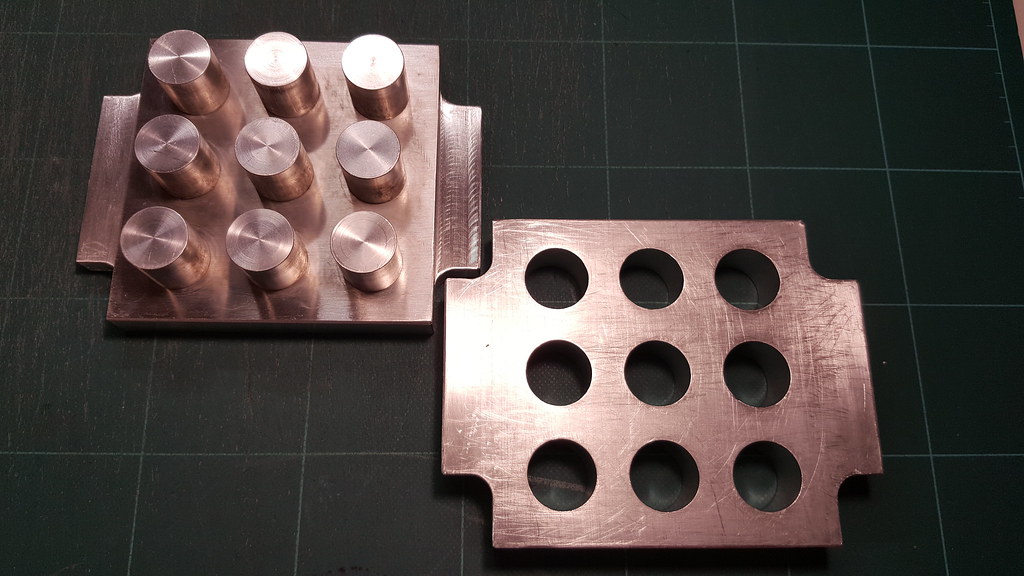
The BP cylinders:
- I added a second layer made by fast BP over the first layer made by slow BP (also called pulverone):
This trick add two nice new features:
1. It ensure a better ignition of all the stars (avoiding the so-called "blinded stars");
2. Add an ignition delay of the stars, making the peony wider and more durable.
And finally, here is the result of the new modded rocket/stars:
.. a wider, longer, beautiful peony!
Many things happened during last months: I have learned many lessons,
tried and found many solutions (with my patended system
TRY-ERROR-JUMP IN AIR-CHANGE-RETRY
), and finally refined the entire project.I have also invested many moneys to buy all the needed chems and tools to
become a serious pyro-man.
I must thanks Mr. Jason (NeighborJ) from APC forum a lot for his patience and expertness.
A lot of formulas, modifications and procedures come directly from him.
Without his help probably my actual state will be at a greenhorn level
This is not a R-Candy only related thread ... I will explain the whole
procedure to build nice fireworks using sugar rockets.
Chapter one: the tools.
-------------------------
The 10tons hydraulic press:
The custom multi-purpose drying box:
The box is alimentated by a 5A 11.1V LiPo cell, that is able to provide enough current to the fans for about 7 days:
Different screen meshes:
The Lortone ballmill with 100x1.5mm brass balls medias:
The star plate (it can create 10x10mm 49 cylinder stars):
The 4 channel radio-controlled system (to ignite fireworks from a distance up to 300 meters):
The goggles and the mask to protect myself against harmful dusty chems:
The chems storage room:
Chapter two: making a very good granulated BP with a modified CIA method + pucking and corning.
---------------------------------------------------------------------------------------------------------------
First of all 80 grams of airfloat pine charcoal, 53,2 grams of sulphur and 21,2 grams of dextrin
must be ballmilled for some hours:
The above doses are calculated to fill my ballmill for half barrell,
exactly a little bit over the brass balls, to obtain a rapid and perfect creation of a very fine compound.
The rotation speed of the original rock tumbler was modified following the good infos
quoted in these sites:
https://www.911metallurgist.com/blog/ball-mill-critical-speed
Ball mill | PyroData
Then 400gr. of potassium nitrate is dissolved in 200ml of boiling water:
Once all the nitrate is dissolved, the heat is turned off and the premilled mix is dumped into the hot nitrate solution and mixed with a spoon:
The mix is runny and hot so a gentle breeze and constant mixing helps to reduce the H2O content:
After it is cooled to room temperature the mix is spread out on waxpaper to dry:
It can be left to completely dry or it can be dried just enough to press it into pucks for corning:
Pressing the wetted black powder to make cylinders suitable to be granulated:
The BP cylinders ejected and ready to be granulated:
This is a much better procedure than the method described on pyro creations because you will not
loose any of the dissolved nitrates in the waste water and the exact chemical ratios are 75-15-10+4.
This makes powder which will be faster than the screen mix pucking and corning method because the
nitrate is more intimately incorporated into all the ingredients.
The most difficult part of the entire process is drying the very wet mix without letting the KNO3
crystallize on the surface. The best way to avoid that is to dry it at room temperature without heat
and use a fan to increase airflow.
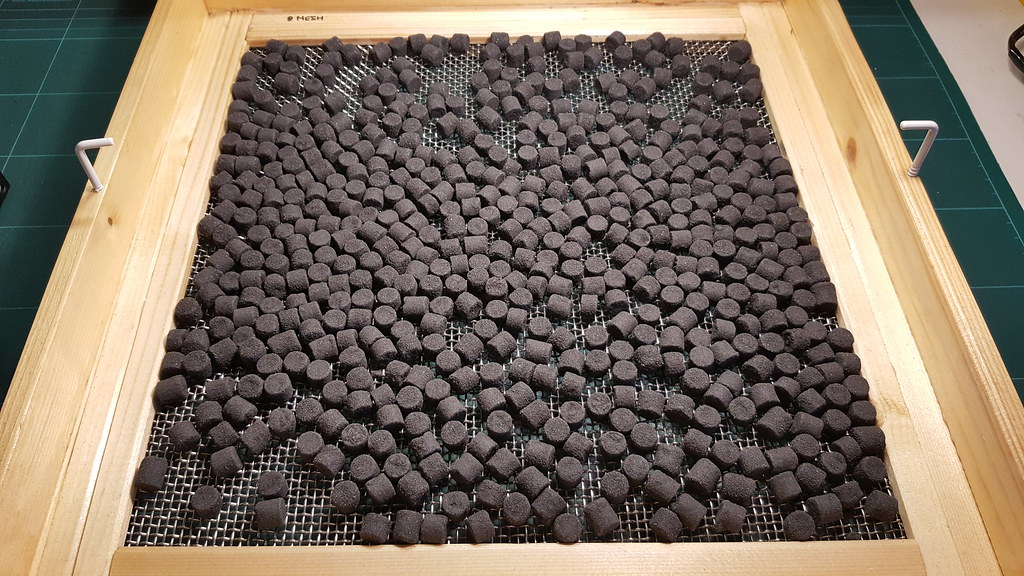
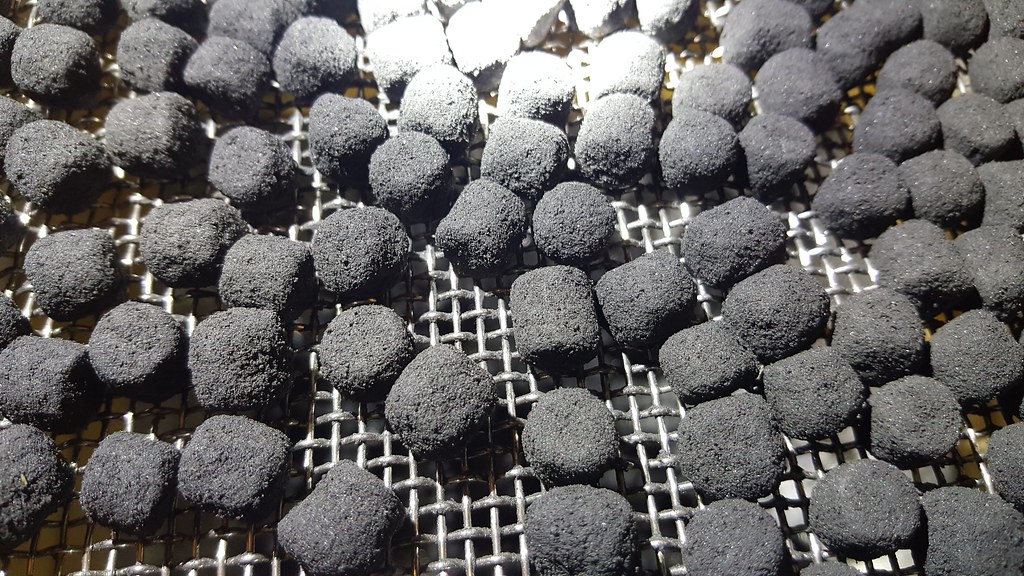
The final +20-8 granulated and fully dried black powders:
Chapter three: making gold glitter stars.
--------------------------------------------
The N1 modified glitter stars are credited to Ned Gorski and after added with Magnalium by Mr. Jason (NeighborJ from APC Forum).
Before I start I feel that I need to state that there are a few things which will prevent these stars from performing properly.
One of the more common mistakes is adding too much water, the second common mistake is force drying them.
Both mistakes will cause the Al and MgAl to oxidize and start a chain reaction of degradation.
These kinds of reactions are not a danger unless they react fast enough to create its own heat and self ignite.
Start by weighing out 272 grams of loosely granulated screen mixed BP 75-15-10+4% dextrine (also called pulverone):
Adding 48 grams of sodium bicarbonate, 32 grams of sulphur, 16 grams of dextrin and 4 gram of boric acid:
Screen mixed these chemicals thru a kitchen sieve 3 times then added 32 grams of 325mesh atomized aluminum and 8 grams of
-60+100 mesh MgAl:
Gently shaked the batch in a closed box to evenly distribute the metals:
At this point 90% demineralized water with 10% isoprophylic alcohol can be added.
I used a spray bottle to slowly add water while shaking the box to expose dry comp.
I don't have an exact water content recorded because different charcoal are more thirsty than others but 18-25% is normal.
It will start to clump in the box when enough moisture is achieved:
The wet compund is coated and pressed with a spatula inside the cylinders of the star plate:
Pressing the wetted golden glitters compound at 2 tons pressure to create the stars:
The stars are ready to be dried:
Now the stars needed to be primed.
Also if they are quite easy to ignite, the stars will benefit from a quick and complete ignition of the entire star surface.
Prime is a good insurance of this and it helps to ensure the display is "crisp" meaning they lite simultaniously and burnout at the same moment.
The cylinders needs to be re-wetted superficially with a spray bottle containing 90% demineralized water and 10% isoprophylic alcohol,
and then floured into a mixture of pulverone plus 10% of silicium.
Here is the primed stars, aka the final product:
Now they are ready to load into shells.
They will not burn properly on the ground because atmospheric oxygen is needed to feed the reaction in the air.
They will burn anyway, but they will turn into a molten blob of slag.
If at any time they get hot while drying it is better set the batch outside in case of accidental ignition.
The risk goes down as they dry, and after 8hrs they are usually dry enough to prevent any reaction at all.
Chapter four: creating nice 4" shells.
----------------------------------------
First of all an hole is made to insert and glue a straw.
This is necessary because the shell needs to be ignited from the inner center to obtain a simmetric effect after the crack.
A fast fuse is also needed.
With the help of a compass two circles were traced on both the hemis:
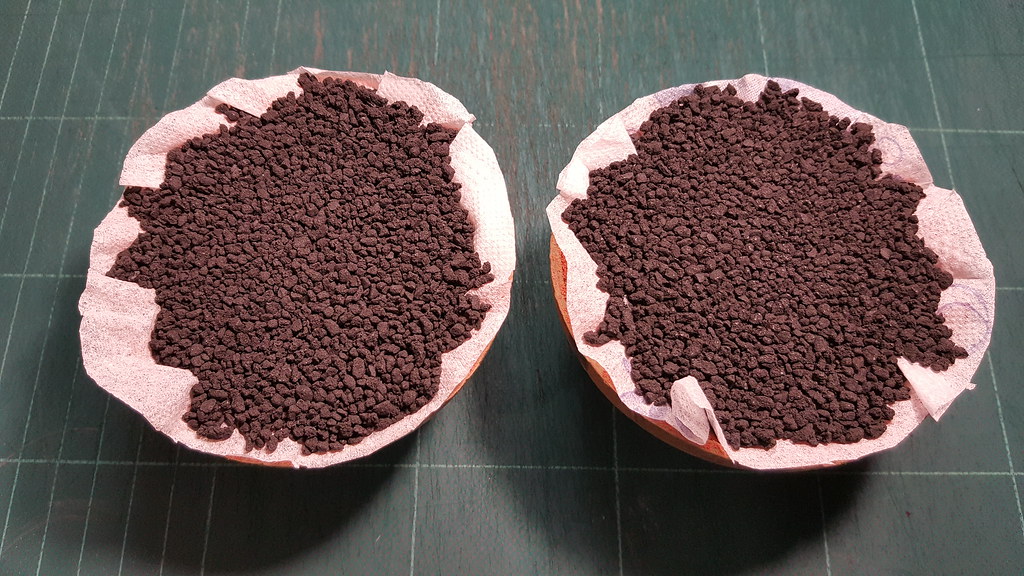
Placing the stars around the inner walls of the shells:
Fill the spaces between the stars with enough 20 mesh granulated black powder:
Creating a sort of bags with tissue paper filled with 8 mesh granulated black powder, then placed the bags over the stars and pressing well
to keep the stars in place:
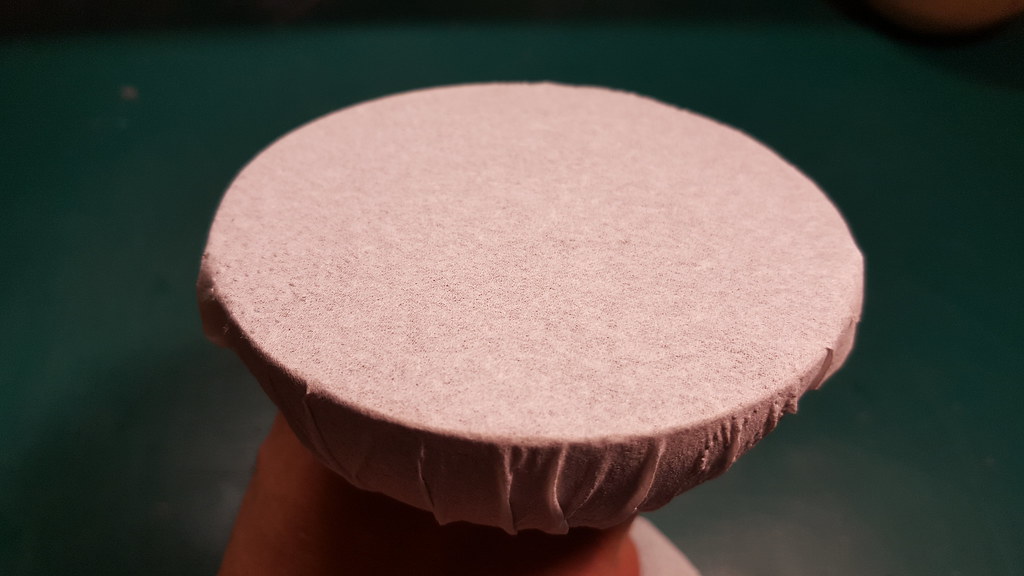
Wrapping an hemis with the help of a tissue paper foil:
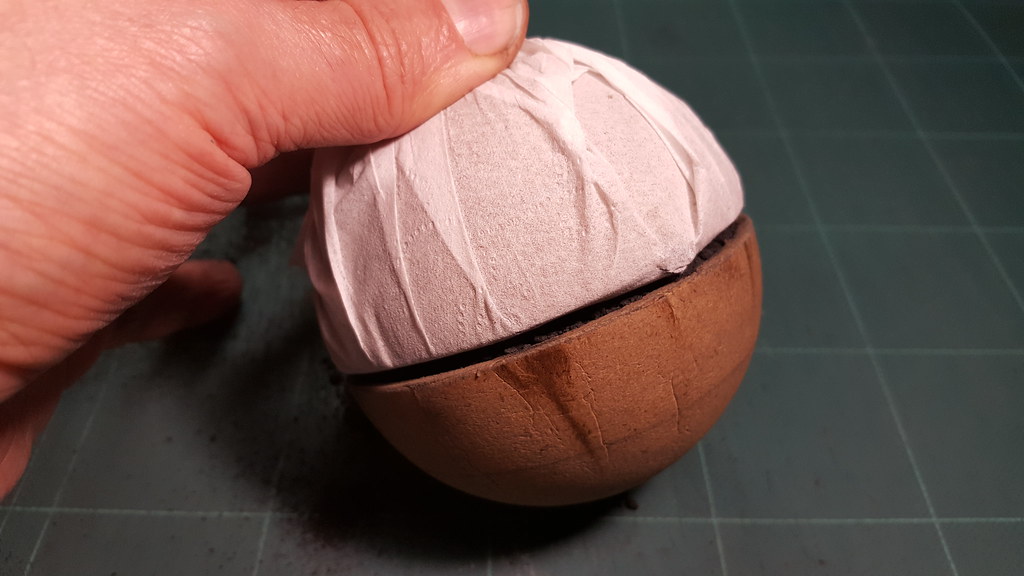
Carefully place the wrapped hemis over the other hemis:
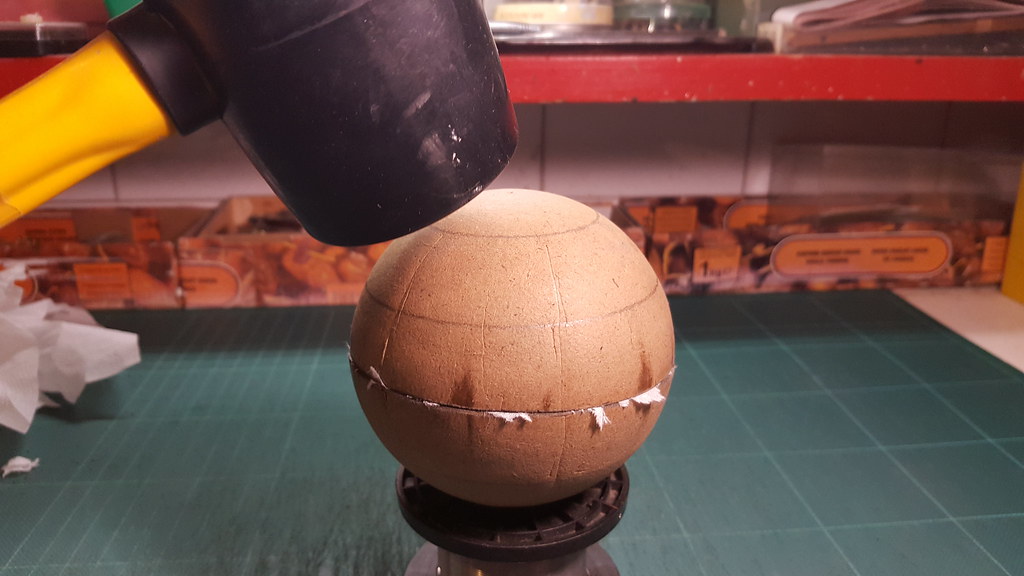
Removing the extra paper and tap around the upper hemis with a rubber hammer to compact and fit everything inside:
Gluing the two hemis with a wood glue:
The best option for the 4" shell is to use the 20mm tape with two latitude lines which makes 3 tape rings then repeat the process a second time.
This should create the 30 layers required.
The first ring will be 23.5mm from the pole and the second will be 44.5mm:
Mr. NeighborJ has refined a good way to manually paste the shells in a homogeneous manner, as explained in this video:
Equatorial layer:
First layer:
Second layer:
Third layer. Due to the amount of wetted paper used, the shell needs to be dried for 24 hours:
Placing a small neodimium magnet to easy find the hole after applying the new layers:
Tracing again the circles.
To create a better homogeneous pasting, this time the compass was pointed over the equatorial line, just in the joint of the two shells:
Fourth, fifth and sixth layers pasted.
Finding the magnet with the help of a iron item, removing it and placing the fast fuse.
Other 24 hours are needed to completely dry the shell:
Chapter five: creating a sugar rocket.
-----------------------------------------
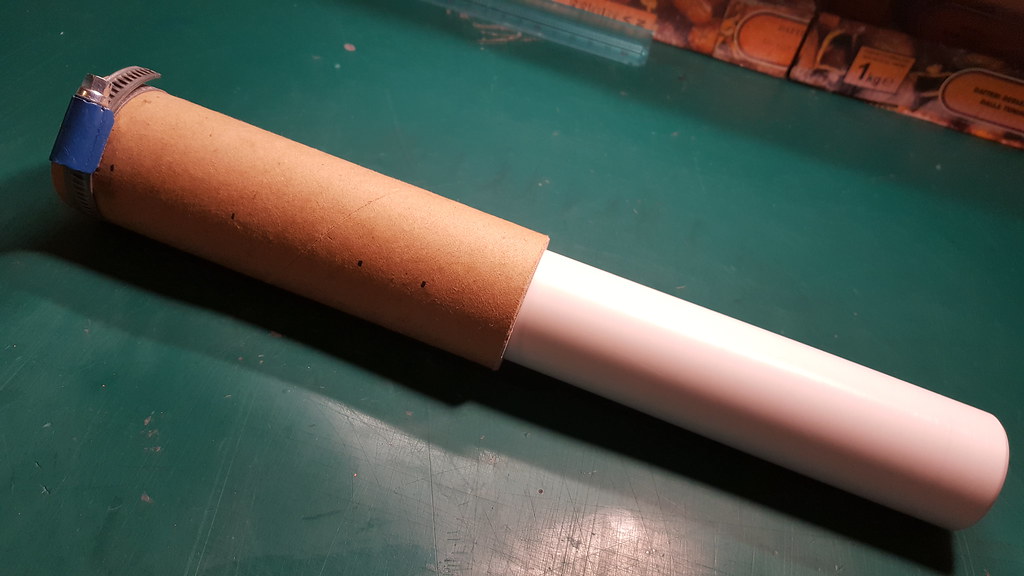
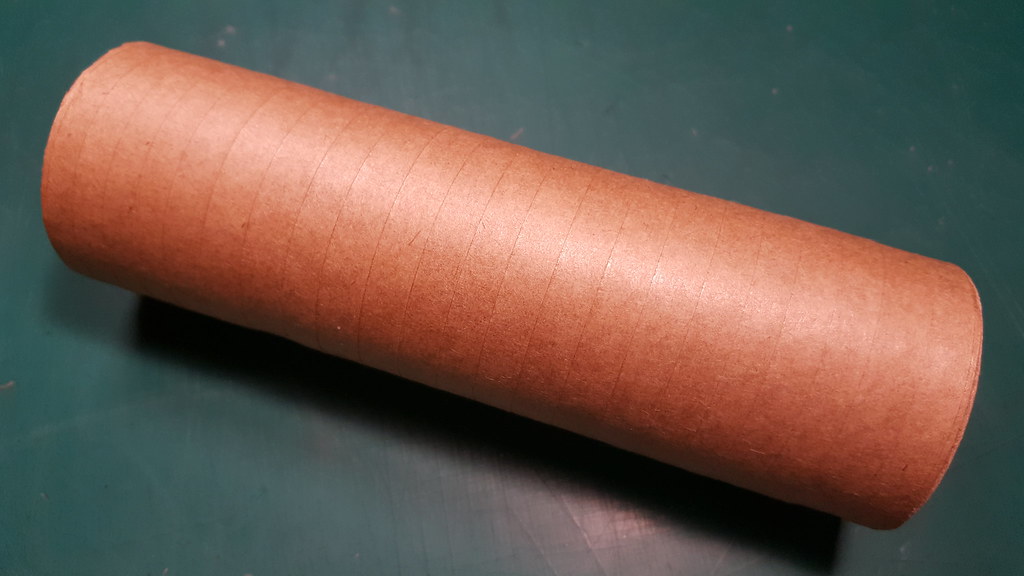
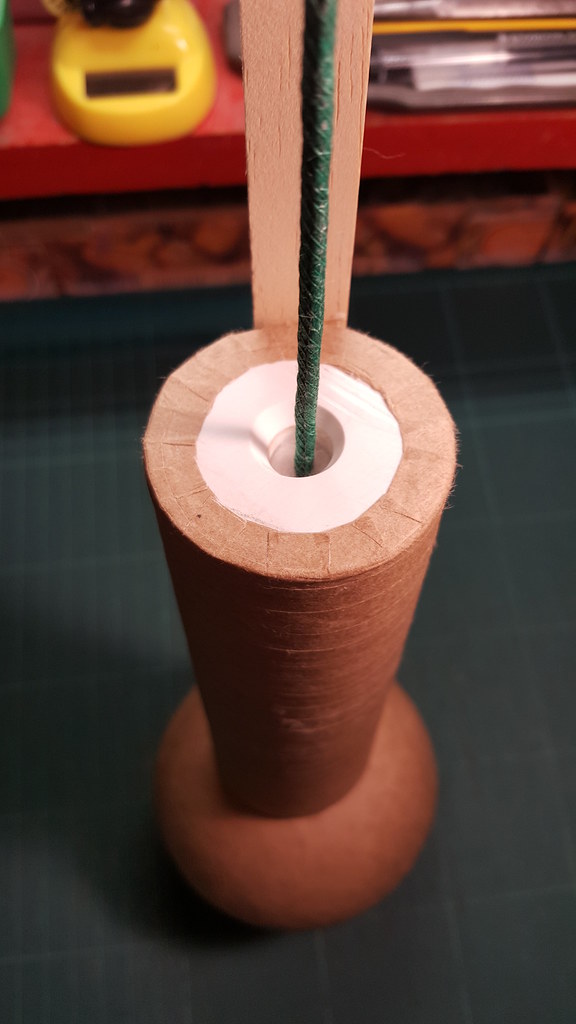
The original cardboard tube: 150mm lenght, 45mm outside diameter, 37mm inside diameter, 4mm wall thickness.
Internal partitions: 20mm for the PET nozzle, 80mm for the propellant, 20mm for the plug, 30mm reserved for other purposes:
Plug and nozzle created from a PET bar with a precision lathe.
Plug: 20mm thickness, 3mm hole, 37mm diameter.
Nozzle: 20mm thickness, 10mm hole, 37mm diameter:
Nozzle pressed and glued with a strong bicomponent epossidic glue:
Nozzle deadly hold with a massive band:
Inside the tube:
Nozzle hole filled with pressed bentonite to avoid spilled compound during the compacting procedure:
130 grams of potassium nitrate, 70 grams sucrose, 2 grams iron oxyde and 6 grams of titanium sponge 450-1000µm.
I used a heavy and thick cast iron cooking pan over an electric cast iron plate to avoid dangerous hot spot that could
accidentally ignite the compound:
Dissolved powders adding 2 big spoons of distilled water:
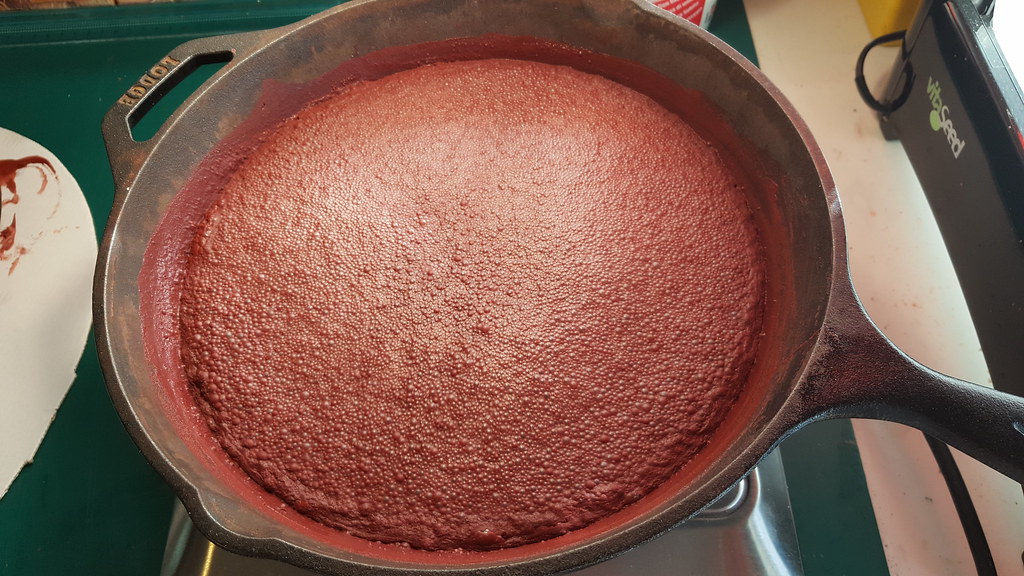
Cooking the compound at medium heat:
The compound is near to be ready. It is important to stir often the compound for safety reasons and to obtain a homogeneous paste:
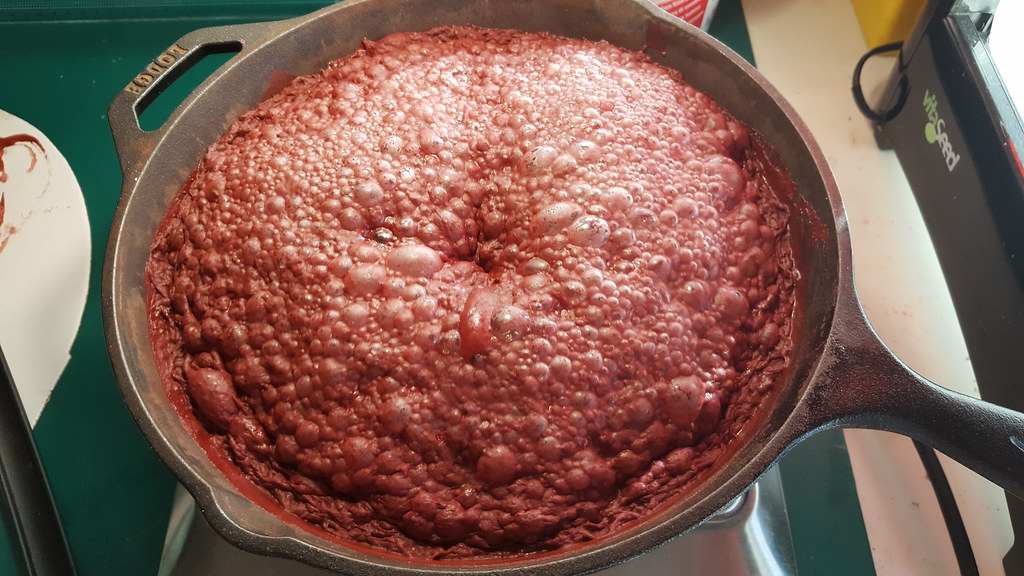
Compound dried and melted. Max care is now necessary because it is extremely flammable:
Packing the compound with a PET bar. The fit is perfect, so no compound can get off the sides.
To reach optimal results it is necessary to pack the compound not all together, but the equivalent of two tea spoons every time.
Every time I will apply a pressure with the weight of my body (95 KG).
In that way every part will be well compacted over the previous one:
Well packed and cold compound:
Removing band, bind a spiralled layer of 20mm wide gummed paper:
Removing bentonite from the nozzle and making a 10mm diameter, 40mm deep hole in the propellant:
Gluing and pressing the cap, deadly lock it with a massive band:
Removing band, insert the fast fuse of the shell inside the 3mm plug hole, gluing the shell on the top:
Gluing a suitable long stick, locking the stick with the cardboard tube, the nozzle and the plug with two long tapping screws:
Inserting 3mm fast fuse, keep the fuse locked inside the hole with some small pieces of cotton:
Two beasts of about 770 grams each are ready to be launched:
... and now, the awesome radio-controlled launch:
I'm very proud for the results obtained from this complicated project.
Many many thanks to Mr. NeighborJ for introducing me into this fantastic world. Keep following this thread, this is only the beginning ...
-----------------------------------------------------------------------------------------------------------------------------------------------------------
Updates 26/11/2017.
-----------------------
- I had problems changing potassium nitrate from the anti-caking version to the not anti-caking one.
In fact the anti-caking version, the one that used for my rockets, is added to magnesium carbonate to avoid caking,
but as a secondary effect it slow down a lot the performance of the mix. So, using the potassium nitrate in pure form,
the internal pressure raise so much that every rocket made with the new compound exploded
So the choices was two: slow down the internal combustion adding 5% of sodium bicarbonate or enlarge the rocket nozzle
diameter from 10mm to 12mm.
Both the solutions worked very well, but the second was surely the more professional and faster to realize.
- I commissioned a new star plate with bigger cylinders to optimize and to speed up the granulating process of the BP:
The BP cylinders:
- I added a second layer made by fast BP over the first layer made by slow BP (also called pulverone):
This trick add two nice new features:
1. It ensure a better ignition of all the stars (avoiding the so-called "blinded stars");
2. Add an ignition delay of the stars, making the peony wider and more durable.
And finally, here is the result of the new modded rocket/stars:
.. a wider, longer, beautiful peony!
Last edited:


