

- Joined
- Feb 11, 2009
- Messages
- 505
- Points
- 0
Hey guys,
Recently, I have found it unbearable to marvel at my father’s dashboard melting or that red match igniting without knowing how many milliwatts of coherent-goodness is behind the burning-business! So I finally decided to scrape up the cash to buy a Laserbee I Standard LPM. Within a week of ordering it, it was in my room being opened, which is a lot to say for a Canada to USA purchase.
I have nothing but good things to say about Jerry and his product. The power meter works wonderfully and I love it’s features, such as datalogging and a backlit LCD screen. Soon after getting my LPM, I decided I would try to build it into an enclosure. After some horrific incidents caused by my stupidity (I shall cover this later), I finally finished building the enclosure of my LPM. Since the only way I have figured out how to cut “precise” holes into plastic project boxes is with a soldering iron, the whole thing looks pretty messy and amateur, but it works for me. Here are some pictures:
The Front:

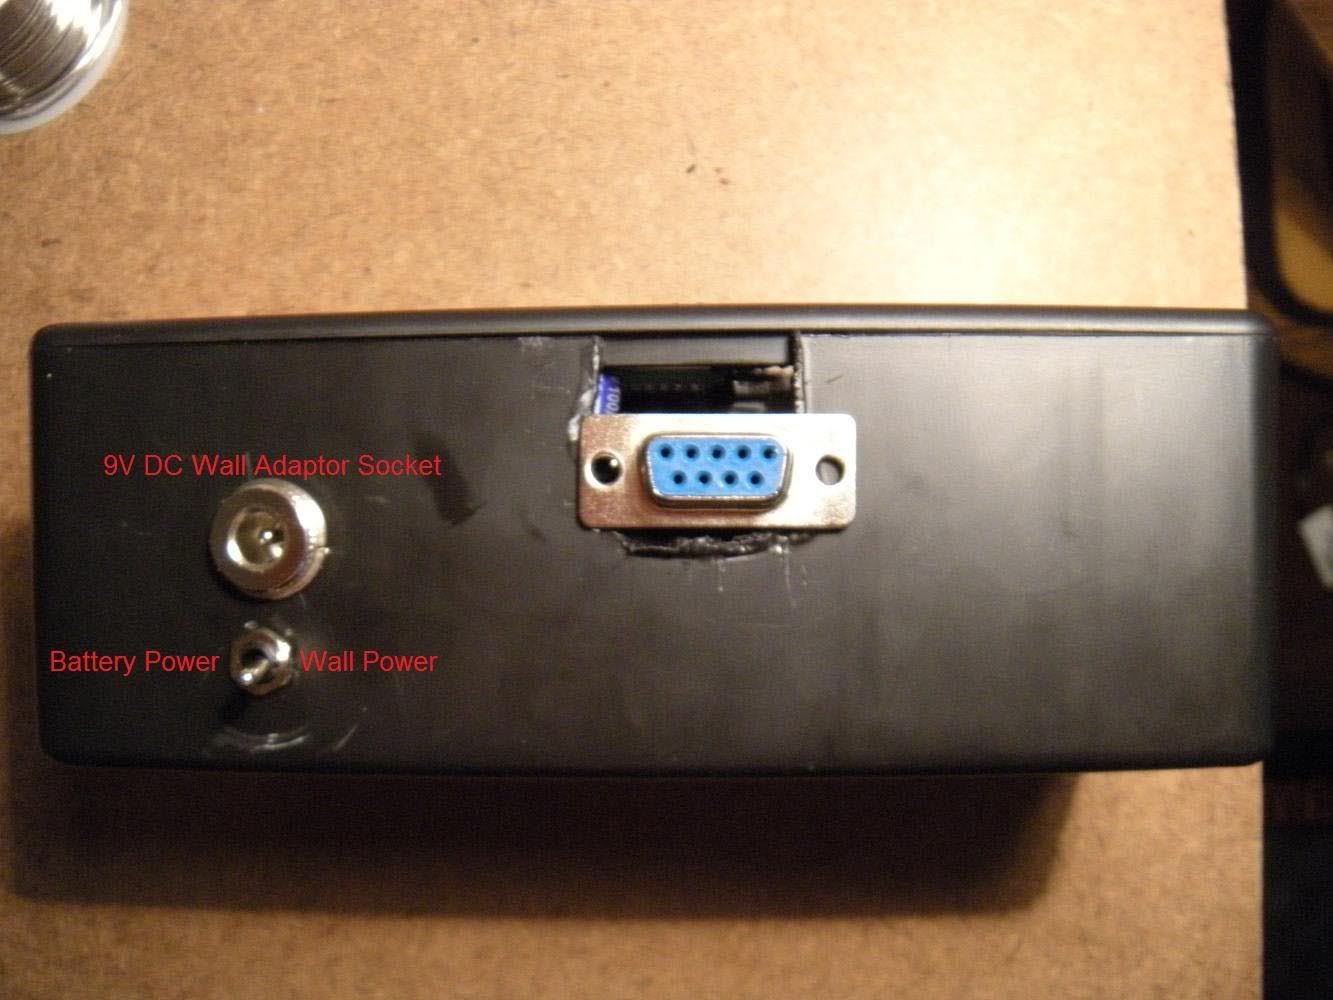
The Side:
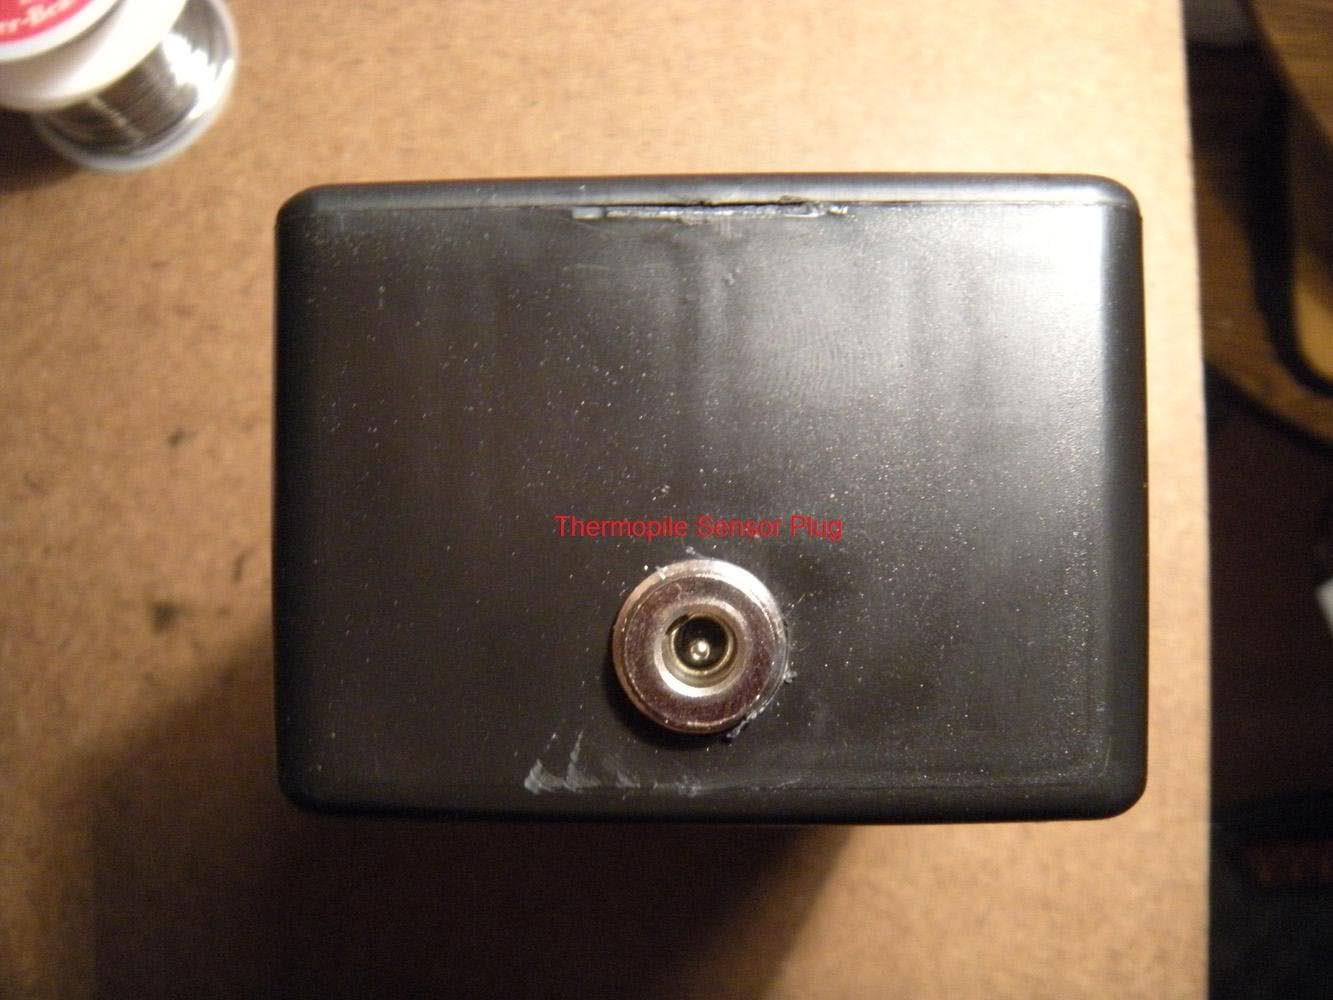
The Bottom:
Measuring my DX “5mW” Greenie:

While enclosing the LPM into a project box, I added a few neat features to it. My favorite one is the addition of the ability to switch between battery power and wall power, so this can be both a stationary or portable LPM. The switch for this is seen in the second picture. I also added some male/female power connector sockets that I got from Radioshack so that I could attach and un-attach the wall adaptor and thermopile sensor from my LPM (2nd and 3rd pictures).
My Idiotic Mistake
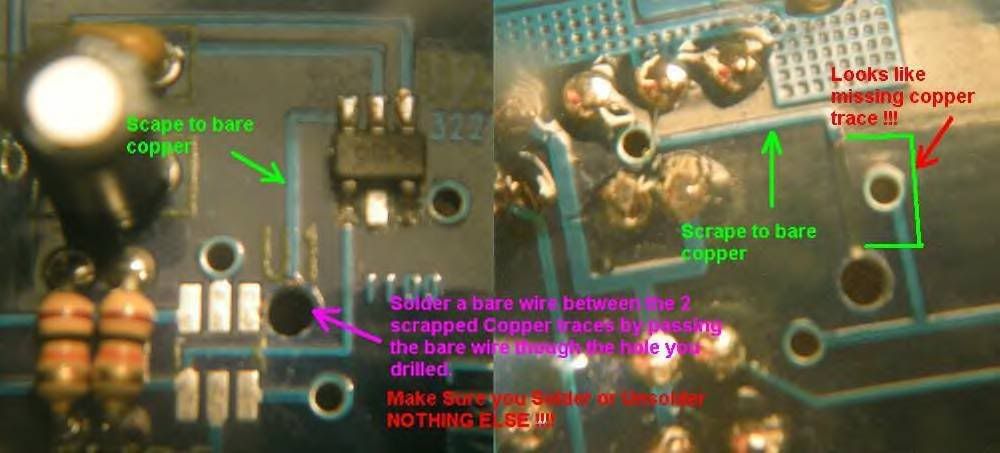
While creating an enclosure for the LPM, I tried to mount the main PCB into the enclosure by widening what I thought was an “unused” hole with a 1/16” drill bit. Little did I know, I was actually disrupting an electrical connection from one side of the PCB to the other, and the whole I was drilling through was a “via route”. This caused a horrible malfunction where the LPM displayed random power readings and didn’t react to the thermopile sensor.
At the time, I freaked out, thinking that I would have to buy a whole new LPM or at least buy a new main PCB, but after messaging Jerry and taking some pictures of the problem, I fixed in less than 10 minutes. This free, easy, DIY repair was possible all because of Jerry, and if I were dealing with some other businessman, I would have probably had to send in the LPM and pay a shitload of money for nothing. THANKS JERRY, YOU’RE AWESOME!!!
A picture of what I did to the LPM to break it and Jerry’s solution (for any who are interested):
Overall, I give the LPM a 10/10 rating and Jerry’s customer service another 10/10 rating. I hope to do business with Jerry in the future, and I am extremely pleased with how everything went.
-Jakob
Edit: Sorry for the massive pictures.
Here are the power readings of all my laserz
1* Jayrob Host 405nm - 190mW-200mW
2* Taskforce 405nm - 80mW
3* Oceanus 473nm - <5mW
4* Rayfoss 532nm - 150mW-190mW
5* BudgetGadgets50 532nm - 60mW
6* DX5 532nm - 8mW
7* Coherent HeNe 543nm - 1mW
8* Rigel2 593.5nm - <5mW
9* TaskForce 650nm - 200mW-220mW
Recently, I have found it unbearable to marvel at my father’s dashboard melting or that red match igniting without knowing how many milliwatts of coherent-goodness is behind the burning-business! So I finally decided to scrape up the cash to buy a Laserbee I Standard LPM. Within a week of ordering it, it was in my room being opened, which is a lot to say for a Canada to USA purchase.
I have nothing but good things to say about Jerry and his product. The power meter works wonderfully and I love it’s features, such as datalogging and a backlit LCD screen. Soon after getting my LPM, I decided I would try to build it into an enclosure. After some horrific incidents caused by my stupidity (I shall cover this later), I finally finished building the enclosure of my LPM. Since the only way I have figured out how to cut “precise” holes into plastic project boxes is with a soldering iron, the whole thing looks pretty messy and amateur, but it works for me. Here are some pictures:
The Front:
The Side:
The Bottom:
Measuring my DX “5mW” Greenie:
While enclosing the LPM into a project box, I added a few neat features to it. My favorite one is the addition of the ability to switch between battery power and wall power, so this can be both a stationary or portable LPM. The switch for this is seen in the second picture. I also added some male/female power connector sockets that I got from Radioshack so that I could attach and un-attach the wall adaptor and thermopile sensor from my LPM (2nd and 3rd pictures).
My Idiotic Mistake
While creating an enclosure for the LPM, I tried to mount the main PCB into the enclosure by widening what I thought was an “unused” hole with a 1/16” drill bit. Little did I know, I was actually disrupting an electrical connection from one side of the PCB to the other, and the whole I was drilling through was a “via route”. This caused a horrible malfunction where the LPM displayed random power readings and didn’t react to the thermopile sensor.
At the time, I freaked out, thinking that I would have to buy a whole new LPM or at least buy a new main PCB, but after messaging Jerry and taking some pictures of the problem, I fixed in less than 10 minutes. This free, easy, DIY repair was possible all because of Jerry, and if I were dealing with some other businessman, I would have probably had to send in the LPM and pay a shitload of money for nothing. THANKS JERRY, YOU’RE AWESOME!!!
A picture of what I did to the LPM to break it and Jerry’s solution (for any who are interested):
Overall, I give the LPM a 10/10 rating and Jerry’s customer service another 10/10 rating. I hope to do business with Jerry in the future, and I am extremely pleased with how everything went.
-Jakob
Edit: Sorry for the massive pictures.
Here are the power readings of all my laserz
1* Jayrob Host 405nm - 190mW-200mW
2* Taskforce 405nm - 80mW
3* Oceanus 473nm - <5mW
4* Rayfoss 532nm - 150mW-190mW
5* BudgetGadgets50 532nm - 60mW
6* DX5 532nm - 8mW
7* Coherent HeNe 543nm - 1mW
8* Rigel2 593.5nm - <5mW
9* TaskForce 650nm - 200mW-220mW


