jayrob
0
- Joined
- Sep 21, 2007
- Messages
- 9,862
- Points
- 113
This is one my favorite host yet! ") It's small, but feels nice and 'weighty' in your hand with my heatsink in there!
It's small, but feels nice and 'weighty' in your hand with my heatsink in there!
Except now this light is out of date and can't be found. I have a 'New Side Button Build' shown here:
http://laserpointerforums.com/laser_pointer_forums_3/forum/showthread.php?t=22607
* Small package, large capacity. Only 7/8" longer than my tail switch 'Pocket Pal' build: http://laserpointerforums.com/laser_pointer_forums_3/forum/showthread.php?t=36799
* 3 X AAA batteries. (option to use rechargeable AAA's as well)
* FlexDrive
* Nice side button clicky! (on/off)
* Easy diode access design!
* Choice of AixiZ or Meredith module. (kind of my 'trademark design trait')

This one puts out more mW's than mA's fed!... using the Meredith glass lens. My nicest 803T diode yet! (measured with my Coherent PM5200)
You can buy the heatsink from me, and follow this tutorial. ($25 plus shipping) Or,
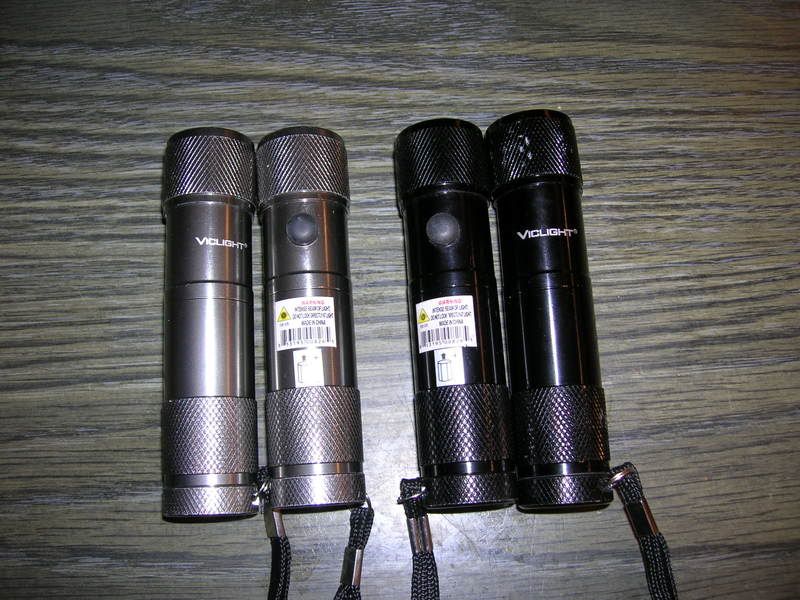
The host starts out as a combination laser pointer/flashlight...
It is made by VicLight. You have to check with the suppliers to see if they have the correct one though. (read down in this thread to learn about the differences)
You can try here:
http://www.physlink.com/estore/cart/Viclight8LEDandLaserPointer.cfm
Or here:
http://www.xump.com/Science/Viclight8LEDandLaserPointer.cfm?SID=126
Please post links if you find it elsewhere!
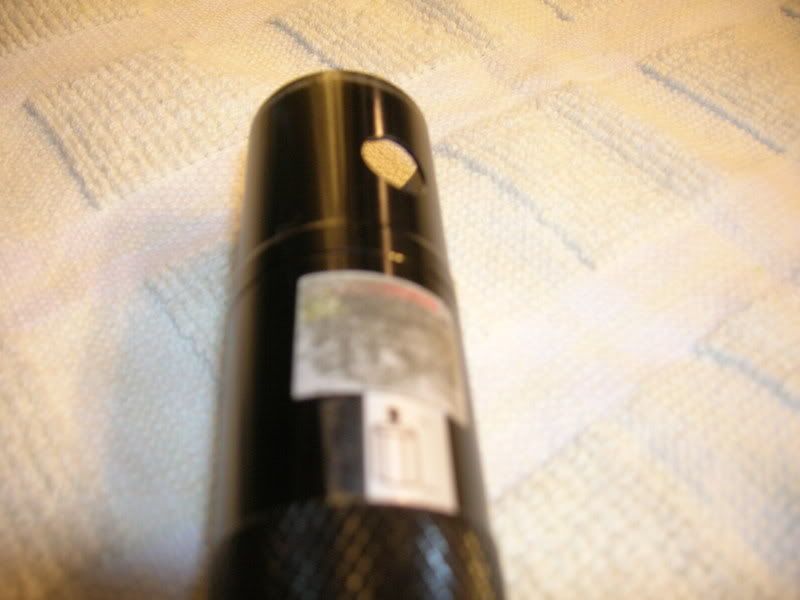
Caution: There is a similar looking light from VicLight (shown below by Silent_Dawn, take a close look and make sure you get the ones with the 'thick' metal bump out under the switch as shown in my pictures) UPC code: 853195008173
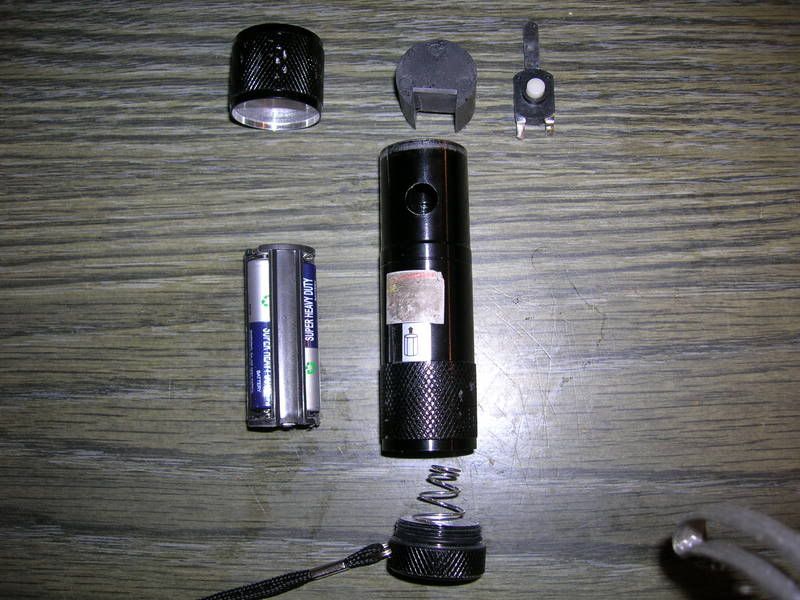
First step:


It's easy to take the switch out... Just bend the positive contact straight, so that you can slide the plastic piece out...

The rubber switch cap is formed to the roundness of the barrel. Just take note of this when you replace the switch...
Next:

A couple of points here....
1. The switch has two load leads. One for the 5mW red laser, and one for the flashlight. You can connect the two together and make one lead for the Flexdrive input. (this is because the switch turns 'off', after each side is 'on'. So if you connect them together. You will simply get 'on', 'off')
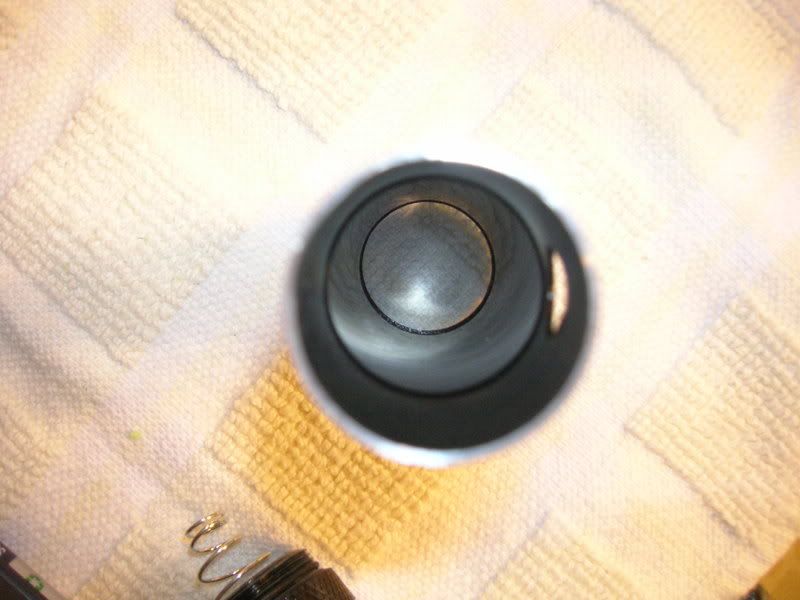
2. It is difficult to unscrew the head. It is glued on. It is easy to scratch the host. Be careful...
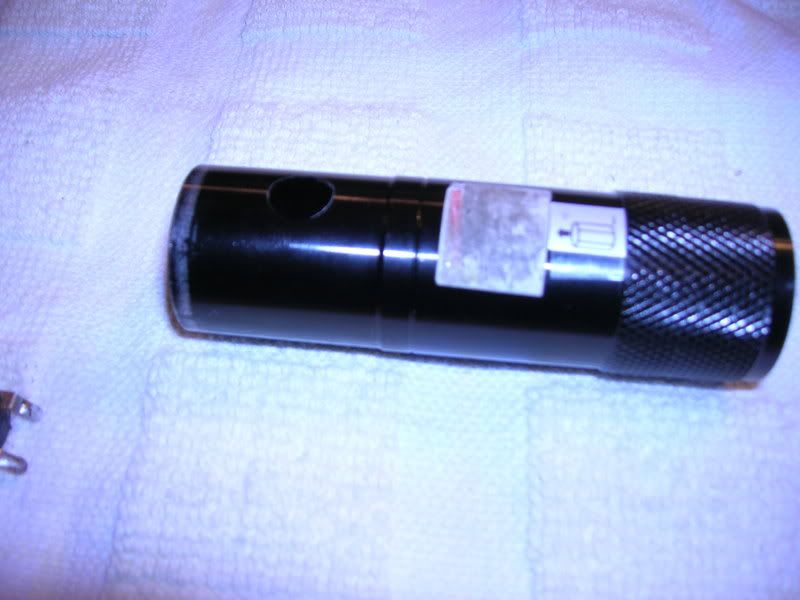
Business end:

Here, I made a 'flat' spot with some 'Quick Set Putty'. I will mount the FlexDrive there with some 'strong, red' double sided tape.
Notice the ground feed for the FlexDrive is just 'stubbed out' here. I will show you why...


I am using the heatsink to 'pinch or press' the ground wire to the case, when the head is tightened down onto the heatsink. This is a very good and stable grounding method for this build.
Important: Using this grounding method means that you will have to use your finger and press the ground wire very tight onto the host for setting the FlexDrive current. This can be a way to 'switch' the driver on and off for setting the current.
Note: Do not power the FlexDrive without a test load. It can damage the driver.
Final steps:

* Set driver current
* Have your diode and module mounted into the heatsink with leads soldered on.
Tip: Use very fine, flexible wire. (the best I have found is in a mouse cord)
After soldering your diode leads to your driver leads, and insulating the connections with heat shrink tubing...
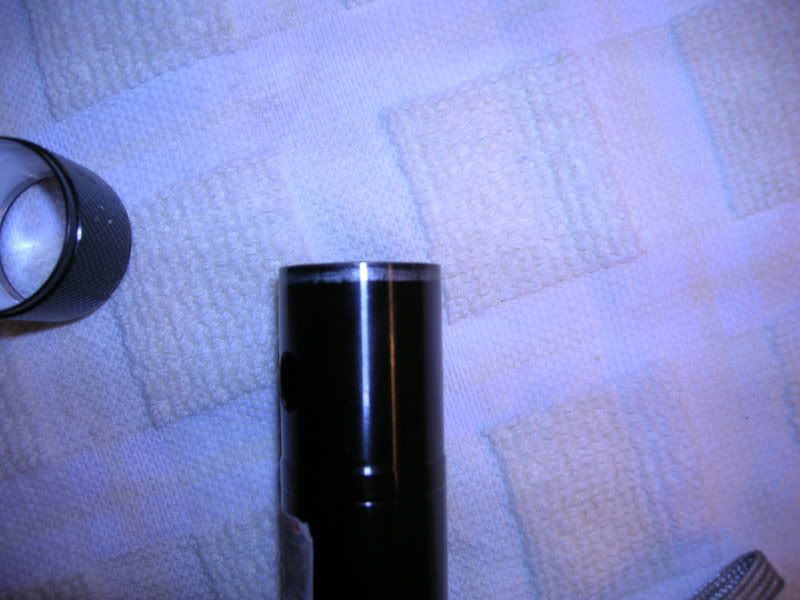
Carefully tuck your wire's into the space under the heatsink... (nice heatsink design huh?)
Notice the ground wire...

Just don't let the heatsink 'spin' or 'twist' when you screw the cap down into place!

This one got scratched when I was taking it apart. So I had to do a little custom lathe work to 'dress' it up a little...
One more thing...
The battery holder (whether it be black or clear), has these small 'tabs' at a couple of points where the POSITIVE end of the batteries need to make contact with the flat metal contact points...

Use a knife and 'snap' or cut the tabs to make sure your batteries make good contact. The thickness of the tabs can cause a weak connection, or no connection at all...
It really is a great host with a very nice side button clicky switch! Hope you enjoy it! These heatsinks will be $25 plus shipping...
Jay
Kryton EzFocus Adapter! - Must See!
http://laserpointerforums.com/laser_pointer_forums_3/forum/showthread.php?t=22510
Key Chain Laser Build!- Awesome!
http://laserpointerforums.com/laser_pointer_forums_3/forum/showthread.php?t=20124
Side Button Build Kit!
http://laserpointerforums.com/laser_pointer_forums_3/forum/showthread.php?t=22607
It's small, but feels nice and 'weighty' in your hand with my heatsink in there!Except now this light is out of date and can't be found. I have a 'New Side Button Build' shown here:
http://laserpointerforums.com/laser_pointer_forums_3/forum/showthread.php?t=22607
* Small package, large capacity. Only 7/8" longer than my tail switch 'Pocket Pal' build: http://laserpointerforums.com/laser_pointer_forums_3/forum/showthread.php?t=36799
* 3 X AAA batteries. (option to use rechargeable AAA's as well)
* FlexDrive
* Nice side button clicky! (on/off)
* Easy diode access design!
* Choice of AixiZ or Meredith module. (kind of my 'trademark design trait')
This one puts out more mW's than mA's fed!... using the Meredith glass lens. My nicest 803T diode yet!
(measured with my Coherent PM5200)You can buy the heatsink from me, and follow this tutorial. ($25 plus shipping) Or,
The host starts out as a combination laser pointer/flashlight...
It is made by VicLight. You have to check with the suppliers to see if they have the correct one though. (read down in this thread to learn about the differences)
You can try here:
http://www.physlink.com/estore/cart/Viclight8LEDandLaserPointer.cfm
Or here:
http://www.xump.com/Science/Viclight8LEDandLaserPointer.cfm?SID=126
Please post links if you find it elsewhere!
Caution: There is a similar looking light from VicLight (shown below by Silent_Dawn, take a close look and make sure you get the ones with the 'thick' metal bump out under the switch as shown in my pictures) UPC code: 853195008173
First step:
It's easy to take the switch out... Just bend the positive contact straight, so that you can slide the plastic piece out...
The rubber switch cap is formed to the roundness of the barrel. Just take note of this when you replace the switch...
Next:
A couple of points here....
1. The switch has two load leads. One for the 5mW red laser, and one for the flashlight. You can connect the two together and make one lead for the Flexdrive input. (this is because the switch turns 'off', after each side is 'on'. So if you connect them together. You will simply get 'on', 'off')
2. It is difficult to unscrew the head. It is glued on. It is easy to scratch the host. Be careful...
Business end:
Here, I made a 'flat' spot with some 'Quick Set Putty'. I will mount the FlexDrive there with some 'strong, red' double sided tape.
Notice the ground feed for the FlexDrive is just 'stubbed out' here. I will show you why...
I am using the heatsink to 'pinch or press' the ground wire to the case, when the head is tightened down onto the heatsink. This is a very good and stable grounding method for this build.
Important: Using this grounding method means that you will have to use your finger and press the ground wire very tight onto the host for setting the FlexDrive current. This can be a way to 'switch' the driver on and off for setting the current.
Note: Do not power the FlexDrive without a test load. It can damage the driver.
Final steps:
* Set driver current
* Have your diode and module mounted into the heatsink with leads soldered on.
Tip: Use very fine, flexible wire. (the best I have found is in a mouse cord)
After soldering your diode leads to your driver leads, and insulating the connections with heat shrink tubing...
Carefully tuck your wire's into the space under the heatsink... (nice heatsink design huh?)
Notice the ground wire...
Just don't let the heatsink 'spin' or 'twist' when you screw the cap down into place!
This one got scratched when I was taking it apart. So I had to do a little custom lathe work to 'dress' it up a little...
One more thing...
The battery holder (whether it be black or clear), has these small 'tabs' at a couple of points where the POSITIVE end of the batteries need to make contact with the flat metal contact points...
Use a knife and 'snap' or cut the tabs to make sure your batteries make good contact. The thickness of the tabs can cause a weak connection, or no connection at all...
It really is a great host with a very nice side button clicky switch!
Hope you enjoy it! These heatsinks will be $25 plus shipping...Jay
Kryton EzFocus Adapter! - Must See!
http://laserpointerforums.com/laser_pointer_forums_3/forum/showthread.php?t=22510
Key Chain Laser Build!- Awesome!
http://laserpointerforums.com/laser_pointer_forums_3/forum/showthread.php?t=20124
Side Button Build Kit!
http://laserpointerforums.com/laser_pointer_forums_3/forum/showthread.php?t=22607
Last edited: