

- Joined
- Sep 16, 2007
- Messages
- 3,658
- Points
- 113
In this tutorial I modified an Nova X50 into a ~500mW 808nm laser.
If you don't feel like sacrificing your laser for a half Watt then you can ignore this.
The X50 only cost about $150 so that's a good deal for a powerful NIR burner (Dragonlasers sells their 400mW 808nm pointer for $300 and Techlasers sells theirs for $290).
You can do this to any CNI pen (Dragonlaser Viper, Nova X-series, or Techlasers Infiniti).
The lower power models should be capable of this too but I'm not sure if they use the 500mW pump diode or a lower power one.
I will recommend IR safety goggles if you plan on doing this mod. Make sure they protect from 808nm and have a high OD rating. 500mW is a LOT of power especially compared to the <50mW greens and <250mW reds most of us are used to.
EXTRACTING THE MODULE
Here's a couple pictures of the X50 showing how the module comes out:
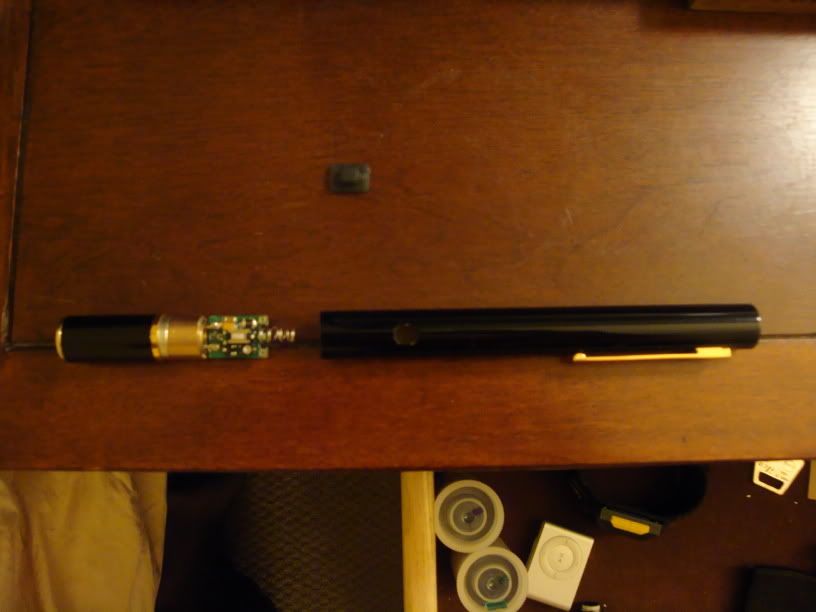
It's pressed and epoxied together. If you look inside the battery tube you'll see a white plastic ring. That keeps the driver in place. If you twist the top you may break the driver.
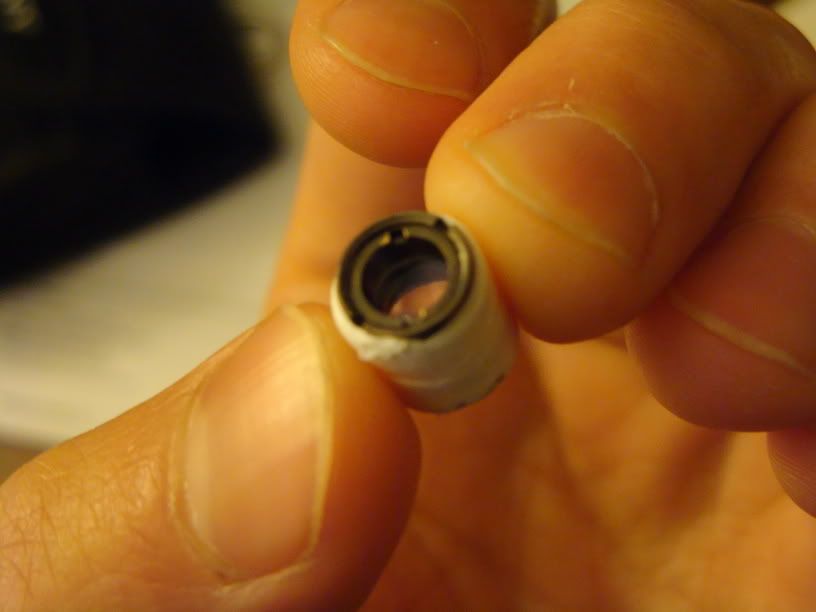
The module should come out with the top of the case and the gold ring still attached.
I cut up a shirt and used a strip of it to wrap around the top (to keep the paint job from being destroyed). I used pliers to wiggle it out. This is probably the most frustrating and time consuming part of the extraction. Progress is slow.
The "wood block method" may be more efficient, but I didn't want to scratch the laser or yank everything out too hard and break something. You can try that if you want.
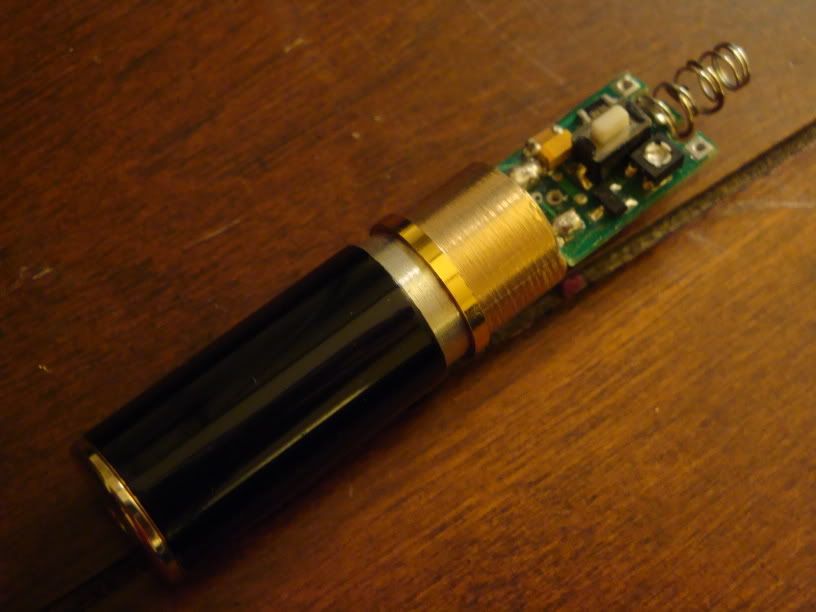
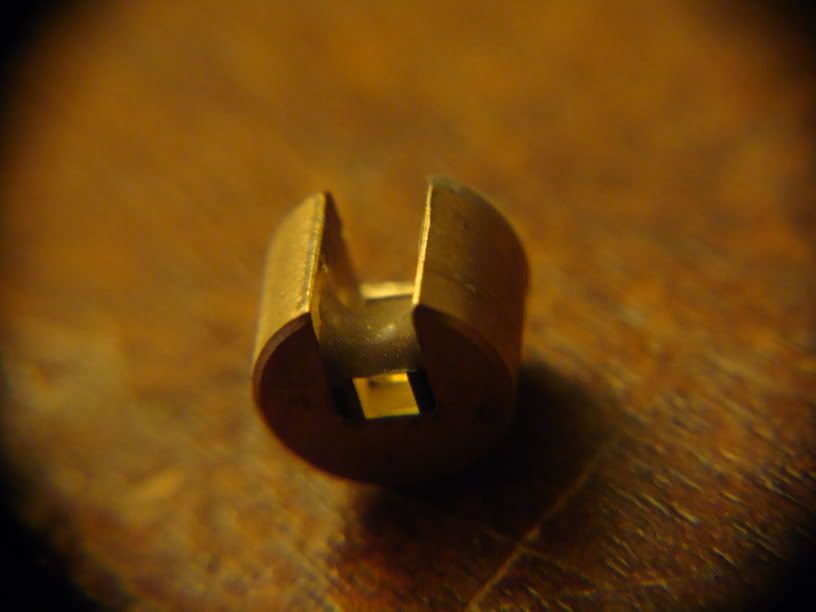
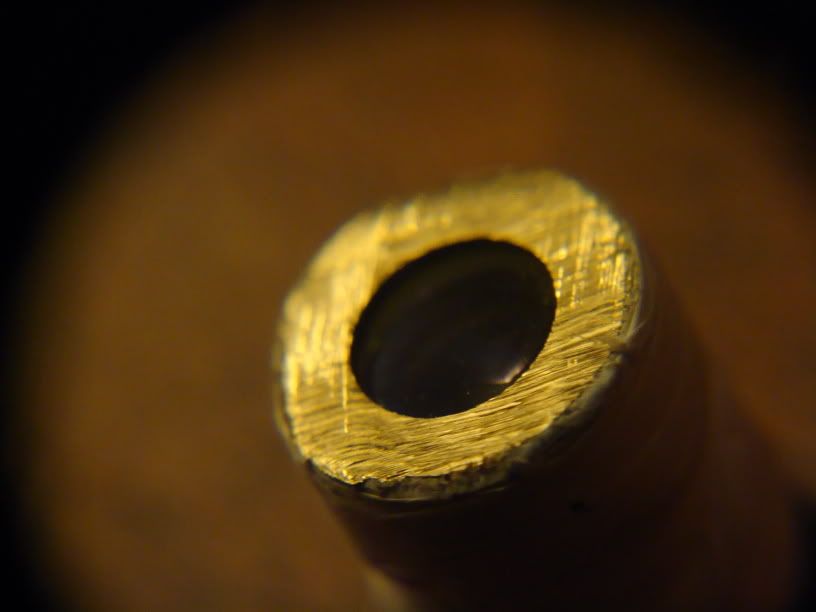
The pump diode is threaded into the brass part of the heatsink and held in place by a small blob of glue. Remove the glue and the pump diode should unscrew easily.
It will look like this:
LENSES AND CRYSTALS
If you want to remove the crystals and all the optics from the heatsink, you will first need to take out the collimator lens and the IR filter.
Remove the gold aperture cap. You will see the lens which is glued to an aluminum (or brass, for the newer models) nut with two holes on either side. There is a grey adhesive around the lens nut that holds it to the heatsink.
I used an exacto knife and a sewing needle to to remove the glue holding the lens nut in place.
Make sure you clear away as much glue as possible and do not damage the threads or the lens nut will not come out easily.
To unscrew the lens nut without damaging the lens, I made a tool out of a paper clip.
I used one of these (the tiny ones)
And made this:
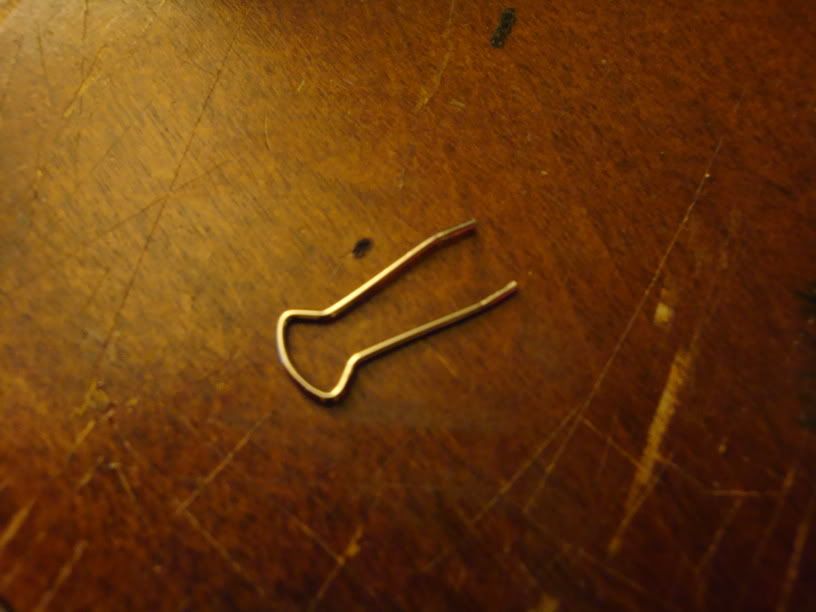
This tool fits nicely into the holes on the lens nut and makes it easy to unscrew it.
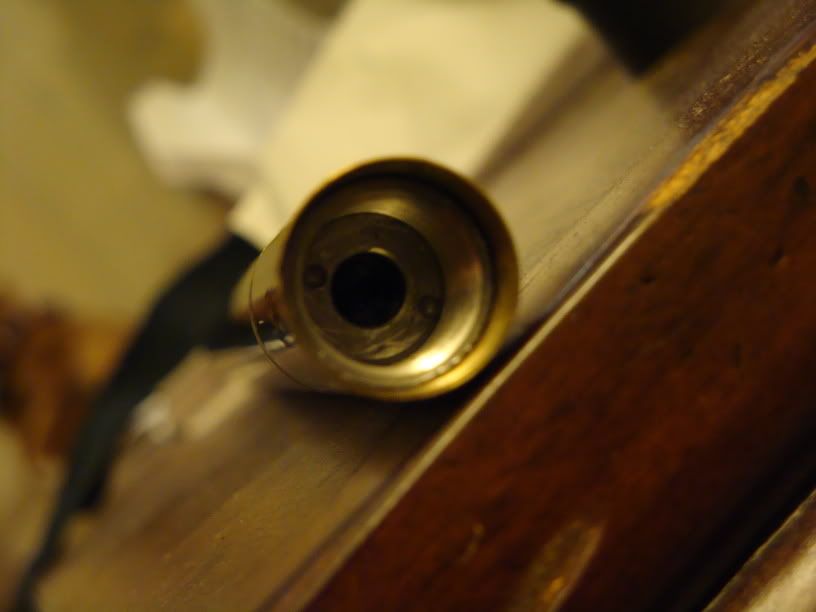
Once you have the collimator lens out, you will see the IR filter.
It will look like this (except inside the heatsink, of course):
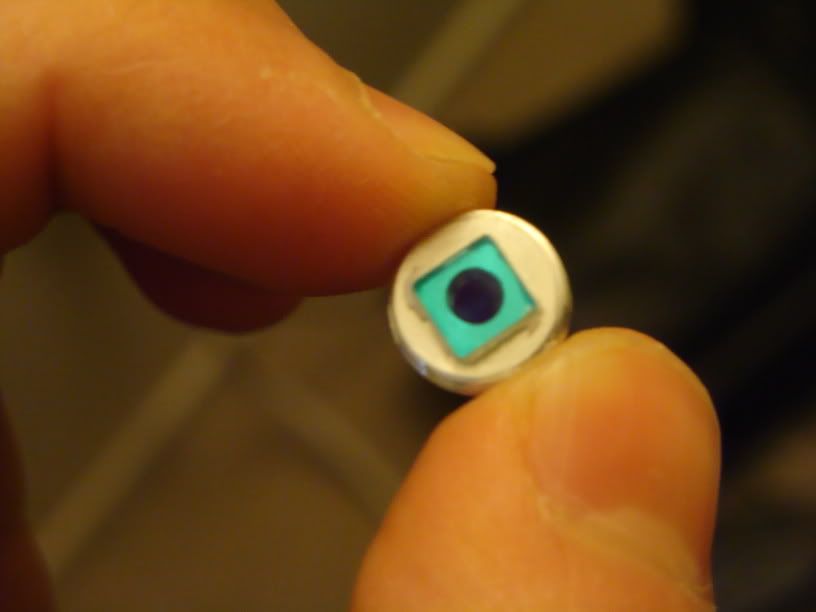
There is a white, flaky, rubbery glue that holds it in place.
You'll notice that unlike the lens nut, the nut for the IR filter does not have the two holes to unscrew it.
The easiest way to remove the filter is to drill two holes into the nut yourself so you can unscrew it.
I used a Dremel with a small engraving tool attachment.
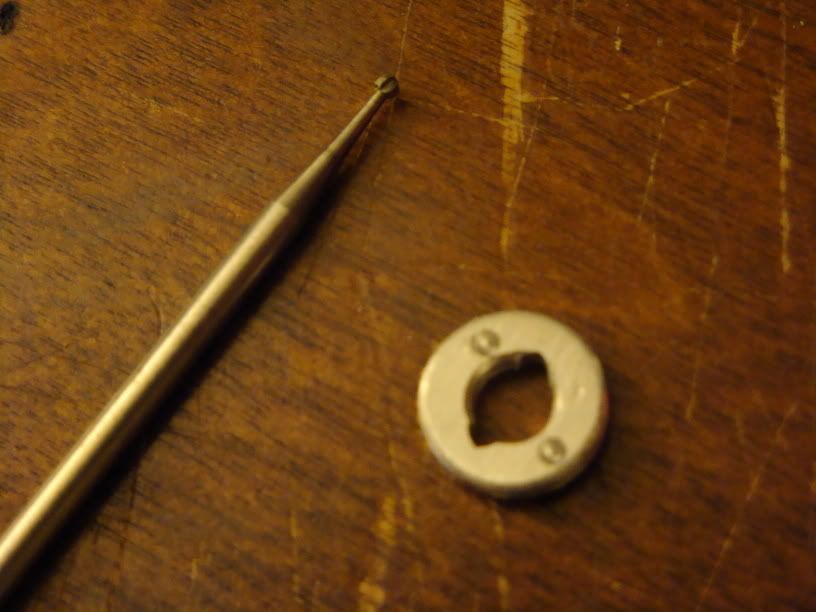
After you drill the holes (carefully) you can unscrew it with your paper clip tool.
The next piece you need to remove is a concave lens.

It is not threaded into the heatsink like the IR filter and collimator lens. Instead, it is glued in place right on top of the crystals.
The easiest way to get this out is to press it out with the crystals.
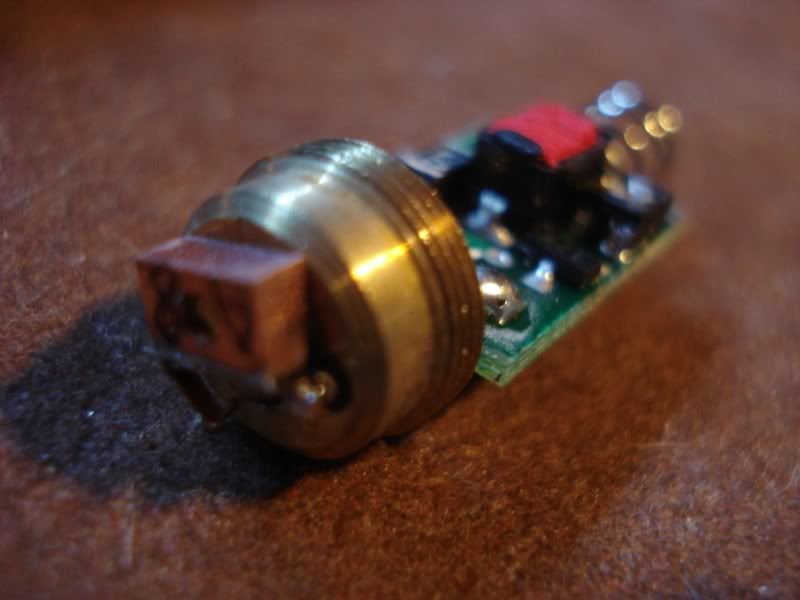
Remove the pump diode.
You will see the crystals inside the heatsink.
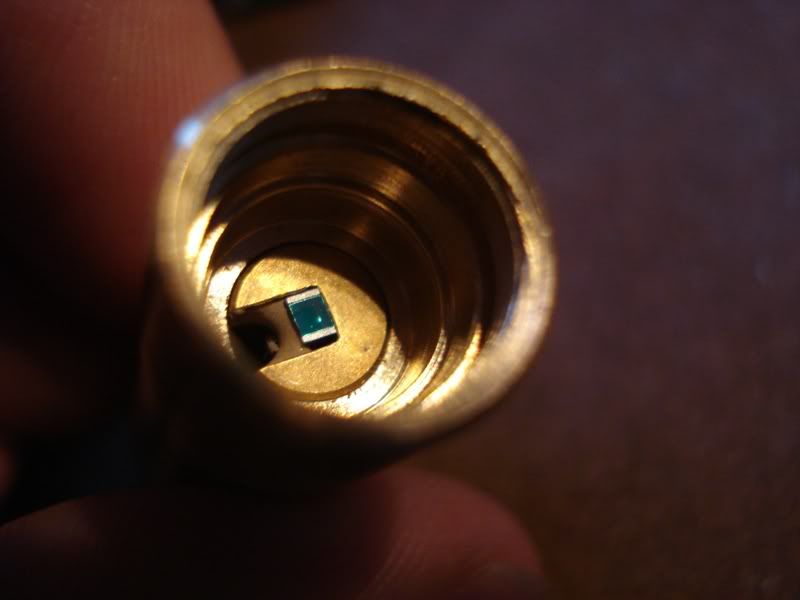
Using a small, hollow, metal tube, press the crystals out with a vise. A piece of a radio antenna works well. Be very careful not to scratch the crystals.
When you press the crystals out (press from the side visible to you after removing the diode as shown in the above picture) the concave expander lens will pop out with it.
You should now have a hollow brass and aluminum heatsink.
I found that an easy way to focus the beam from the pump diode is to use a glass Aixiz lens.
I removed the IR filter from the nut it was on.
I cranked up the pot (all the way up, then a tiny fraction of a turn down) and put the diode back in the heatsink. Turning clockwise increases current.
Put the module back in the casing, and epoxy it together.
I wrapped some thread sealing tape around the lens. This keeps it from wiggling around inside the heatsink.
You can just drop it right in and secure it with the IR filter nut or you can file down the back of the Aixiz lens (not the actual lens but the metal part that holds the lenses).
It will look like this:
The purpose of this is to make the lens closer to the diode, which will extend the focal point. The more metal you take off, the closer the lens will be to the diode and the further the focal point will be.
With the Aixiz glass lens secured by the IR filter nut it should look like this:
You can experiment with your own lenses to try to get the best results.
I have found that the best way to do this is to secure a very short focal length lens (convex) in the module (instead of the Aixiz glass lens) and install the original X-series lens above that. This way you can easily adjust the focal point of the laser.
I tried to make this as easy to understand as possible. If any part is confusing just let me know and I'll do my best to explain it")
If you don't feel like sacrificing your laser for a half Watt then you can ignore this.
The X50 only cost about $150 so that's a good deal for a powerful NIR burner (Dragonlasers sells their 400mW 808nm pointer for $300 and Techlasers sells theirs for $290).
You can do this to any CNI pen (Dragonlaser Viper, Nova X-series, or Techlasers Infiniti).
The lower power models should be capable of this too but I'm not sure if they use the 500mW pump diode or a lower power one.
I will recommend IR safety goggles if you plan on doing this mod. Make sure they protect from 808nm and have a high OD rating. 500mW is a LOT of power especially compared to the <50mW greens and <250mW reds most of us are used to.
EXTRACTING THE MODULE
Here's a couple pictures of the X50 showing how the module comes out:
It's pressed and epoxied together. If you look inside the battery tube you'll see a white plastic ring. That keeps the driver in place. If you twist the top you may break the driver.
The module should come out with the top of the case and the gold ring still attached.
I cut up a shirt and used a strip of it to wrap around the top (to keep the paint job from being destroyed). I used pliers to wiggle it out. This is probably the most frustrating and time consuming part of the extraction. Progress is slow.
The "wood block method" may be more efficient, but I didn't want to scratch the laser or yank everything out too hard and break something. You can try that if you want.
The pump diode is threaded into the brass part of the heatsink and held in place by a small blob of glue. Remove the glue and the pump diode should unscrew easily.
It will look like this:
LENSES AND CRYSTALS
If you want to remove the crystals and all the optics from the heatsink, you will first need to take out the collimator lens and the IR filter.
Remove the gold aperture cap. You will see the lens which is glued to an aluminum (or brass, for the newer models) nut with two holes on either side. There is a grey adhesive around the lens nut that holds it to the heatsink.
I used an exacto knife and a sewing needle to to remove the glue holding the lens nut in place.
Make sure you clear away as much glue as possible and do not damage the threads or the lens nut will not come out easily.
To unscrew the lens nut without damaging the lens, I made a tool out of a paper clip.
I used one of these (the tiny ones)
And made this:
This tool fits nicely into the holes on the lens nut and makes it easy to unscrew it.
Once you have the collimator lens out, you will see the IR filter.
It will look like this (except inside the heatsink, of course):
There is a white, flaky, rubbery glue that holds it in place.
You'll notice that unlike the lens nut, the nut for the IR filter does not have the two holes to unscrew it.
The easiest way to remove the filter is to drill two holes into the nut yourself so you can unscrew it.
I used a Dremel with a small engraving tool attachment.
After you drill the holes (carefully) you can unscrew it with your paper clip tool.
The next piece you need to remove is a concave lens.
It is not threaded into the heatsink like the IR filter and collimator lens. Instead, it is glued in place right on top of the crystals.
The easiest way to get this out is to press it out with the crystals.
Remove the pump diode.
You will see the crystals inside the heatsink.
Using a small, hollow, metal tube, press the crystals out with a vise. A piece of a radio antenna works well. Be very careful not to scratch the crystals.
When you press the crystals out (press from the side visible to you after removing the diode as shown in the above picture) the concave expander lens will pop out with it.
You should now have a hollow brass and aluminum heatsink.
I found that an easy way to focus the beam from the pump diode is to use a glass Aixiz lens.
I removed the IR filter from the nut it was on.
I cranked up the pot (all the way up, then a tiny fraction of a turn down) and put the diode back in the heatsink. Turning clockwise increases current.
Put the module back in the casing, and epoxy it together.
I wrapped some thread sealing tape around the lens. This keeps it from wiggling around inside the heatsink.
You can just drop it right in and secure it with the IR filter nut or you can file down the back of the Aixiz lens (not the actual lens but the metal part that holds the lenses).
It will look like this:
The purpose of this is to make the lens closer to the diode, which will extend the focal point. The more metal you take off, the closer the lens will be to the diode and the further the focal point will be.
With the Aixiz glass lens secured by the IR filter nut it should look like this:
You can experiment with your own lenses to try to get the best results.
I have found that the best way to do this is to secure a very short focal length lens (convex) in the module (instead of the Aixiz glass lens) and install the original X-series lens above that. This way you can easily adjust the focal point of the laser.
I tried to make this as easy to understand as possible. If any part is confusing just let me know and I'll do my best to explain it


