

- Joined
- Dec 27, 2011
- Messages
- 2,062
- Points
- 48
Ok,
I know that building a green is not a monumental task, but next to my Survival Laser kit, this is my first build so far. You gotta walk before you can run!
I was really excited with how it turned out.
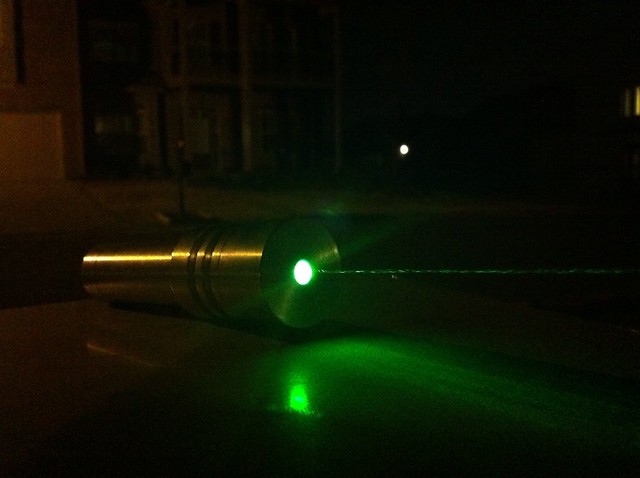
EUdaimonium Phobos with nexbox360 green module beam shot 1 by tsteele93, on Flickr
I started with Eudaimonium's Phobos Host which proved to have a couple of challenges.
I decided to use the Phobos host to house my ~150mW 532nm nexbox360 module. http://laserpointerforums.com/f39/1...m-results-listed-shipped-usa-stock-70846.html
The host is very short and the nexbox360 driver requires 3v. So no 3.7v Li-ion build.
I ended up just ordering a box of good CR123A Li-ion primary (aka, not rechargeable) batteries from Amazon.
Amazon.com: 10 pcs Panasonic Lithium CR123A 3V Photo Lithium Batteries: Camera & Photo
I expect the box will last quite a while. If I decide to stick with this config, I will probably order some rechargeables in the future.
My first problem was that the tail cap on my host was too small in inner diameter to accept this battery. I'm not sure if my tailcap was machined incorrectly, but I also could not use the clickie that was sent by Argon (arranged by Eudaimonium) either.
I ended up taking a Proxxon tool (Dremel) with a metal cutter head and enlarging the inner diameter. It is soft Aluminum and it was easy to do.
I still had to find another clickie and I had a cheap flashlight from lowes laying around with a small enough clickie to fit. I will eventually get a better one in there.
Once I was able to get he clickie working, I had to modify the driver to turn on and off using the clickie instead of the momentary on button. This was easily done by soldering some of flaming pyros silicone wire across the leads, thus shorting the switch into an always on condition and enabling the clickie to become the new switch for the power circuit.
Then came the physical installation. It is pretty easy to press the module in place and tighten the set screw. The fit was nice and firm even without the set screw.
The only "rigged" part of my build is the lens cover on the front of the unit.mit isn't threaded or set screwed in place. It has threads on the inside of the aperture that are not large enough for the green module to work with, resulting in no real way to attach the cover.
I have several rolls of copper and silver tape for any situations where I may need to tighten a fitment.
9 feet ~ 1/2 Inch ~SILVER BOTH SIDES~ Copper Foil Tape | eBay
I used a couple of turns of this tape to the point that the cover fits very firmly on to the head and is still removable at a later date.
In all honesty, right now this laser is not quite built (by me, not Eudaimonium or nexbox360) to the quality of one that I would sell, but it is a great learning experience and personally I love it as a very bright green laser to easily carry around.
Here are the pics, I apologize for the iPhone pics. I have a Canon 7D with macro lenses but it is too late for that so I'll just use what I have...
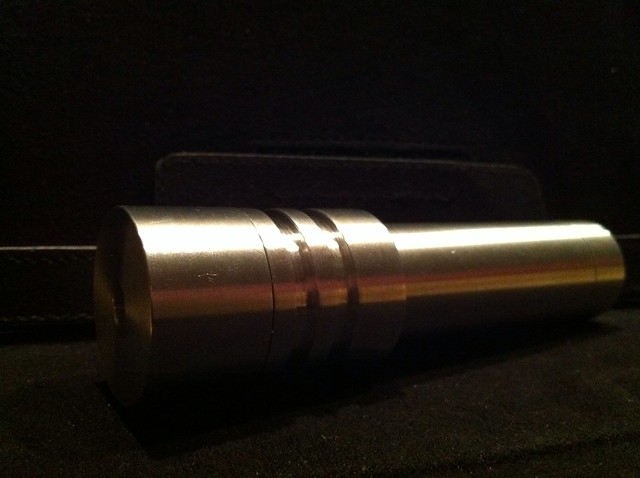
Eudaimonium Phobos host - cruddy iPhone pic... by tsteele93, on Flickr
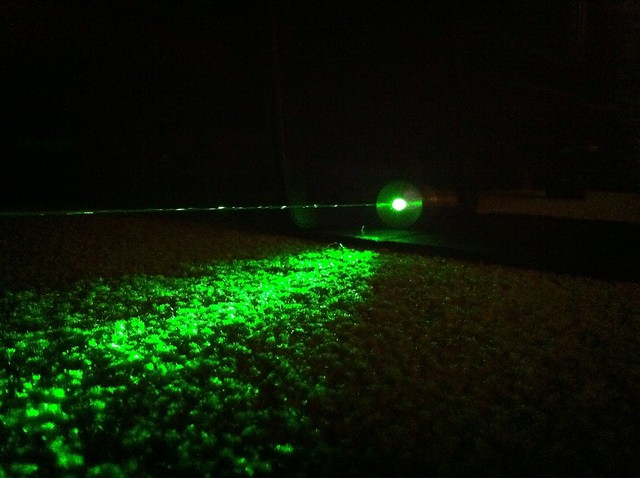
Eudaimonium Phobos with nexbox360 green module beam shot 4 by tsteele93, on Flickr
Eudaimonium Phobos with nexbox360 green module beam shot 2 by tsteele93, on Flickr

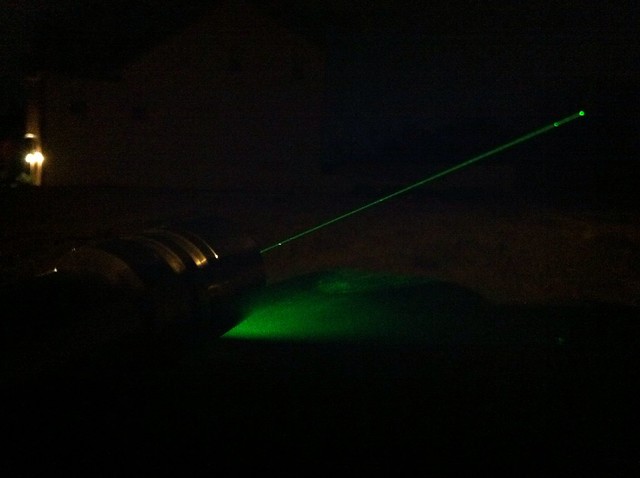
Eudaimonium Phobos with nexman360 green module beam shot 3 by tsteele93, on Flickr
I know that building a green is not a monumental task, but next to my Survival Laser kit, this is my first build so far. You gotta walk before you can run!
I was really excited with how it turned out.
EUdaimonium Phobos with nexbox360 green module beam shot 1 by tsteele93, on Flickr
I started with Eudaimonium's Phobos Host which proved to have a couple of challenges.
I decided to use the Phobos host to house my ~150mW 532nm nexbox360 module. http://laserpointerforums.com/f39/1...m-results-listed-shipped-usa-stock-70846.html
The host is very short and the nexbox360 driver requires 3v. So no 3.7v Li-ion build.
I ended up just ordering a box of good CR123A Li-ion primary (aka, not rechargeable) batteries from Amazon.
Amazon.com: 10 pcs Panasonic Lithium CR123A 3V Photo Lithium Batteries: Camera & Photo
I expect the box will last quite a while. If I decide to stick with this config, I will probably order some rechargeables in the future.
My first problem was that the tail cap on my host was too small in inner diameter to accept this battery. I'm not sure if my tailcap was machined incorrectly, but I also could not use the clickie that was sent by Argon (arranged by Eudaimonium) either.
I ended up taking a Proxxon tool (Dremel) with a metal cutter head and enlarging the inner diameter. It is soft Aluminum and it was easy to do.
I still had to find another clickie and I had a cheap flashlight from lowes laying around with a small enough clickie to fit. I will eventually get a better one in there.
Once I was able to get he clickie working, I had to modify the driver to turn on and off using the clickie instead of the momentary on button. This was easily done by soldering some of flaming pyros silicone wire across the leads, thus shorting the switch into an always on condition and enabling the clickie to become the new switch for the power circuit.
Then came the physical installation. It is pretty easy to press the module in place and tighten the set screw. The fit was nice and firm even without the set screw.
The only "rigged" part of my build is the lens cover on the front of the unit.mit isn't threaded or set screwed in place. It has threads on the inside of the aperture that are not large enough for the green module to work with, resulting in no real way to attach the cover.
I have several rolls of copper and silver tape for any situations where I may need to tighten a fitment.
9 feet ~ 1/2 Inch ~SILVER BOTH SIDES~ Copper Foil Tape | eBay
I used a couple of turns of this tape to the point that the cover fits very firmly on to the head and is still removable at a later date.
In all honesty, right now this laser is not quite built (by me, not Eudaimonium or nexbox360) to the quality of one that I would sell, but it is a great learning experience and personally I love it as a very bright green laser to easily carry around.
Here are the pics, I apologize for the iPhone pics. I have a Canon 7D with macro lenses but it is too late for that so I'll just use what I have...
Eudaimonium Phobos host - cruddy iPhone pic... by tsteele93, on Flickr
Eudaimonium Phobos with nexbox360 green module beam shot 4 by tsteele93, on Flickr
Eudaimonium Phobos with nexbox360 green module beam shot 2 by tsteele93, on Flickr
Eudaimonium Phobos with nexman360 green module beam shot 3 by tsteele93, on Flickr
Last edited:


 )
)