Welcome to Laser Pointer Forums - discuss green laser pointers, blue laser pointers, and all types of lasers

LPF Donation via Stripe | LPF Donation - Other Methods

Links below open in new window

ArcticMyst Security by Avery

DIY Homemade laser diode driver

Status
Not open for further replies.

phenol

0
Joined
Oct 30, 2007
Messages
533
Points
18
This is the source after I modified it to kill the oscillation. All caps are tantalum and their negative terminals are connected together in one point with leads as short as possible as impedances are low. the 2.2u capacitor (Vout to GND) must be tantalum or ceramic-type. the load is a 15-ohm resistor.
 

Attachments

  • reg.GIF
    reg.GIF
    4.1 KB · Views: 766


phenol

0
Joined
Oct 30, 2007
Messages
533
Points
18
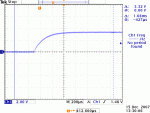
...and this is the voltage across the 15-ohm dummy load resistor.
 

Attachments

  • IUout.GIF
    IUout.GIF
    11.3 KB · Views: 452
C

Chris.

Guest
I've been running this circuit for about a month now, I'm wondering if I can swap input to 9v very easily?
 

phenol

0
Joined
Oct 30, 2007
Messages
533
Points
18
9v should be fine. just make sure the input filter cap/if present/ is rated for 16v or more
 

phenol

0
Joined
Oct 30, 2007
Messages
533
Points
18
9v should be fine. just make sure the input filter cap/if present/ is rated for 16v or more
 
C

Chris.

Guest
It's rated for 67v but only 0.1uF, I keep meaning to change it.
Thanks for the info but I think I just fried my diode with 9v full of cap :-[
 
Joined
Nov 8, 2007
Messages
11
Points
0
Well, i built it this evening and fired up my blu-ray and it's purty... i used a 10uF cap on the input, a 47uF and a .1uF cap at the output, 4001 for reverse protection and a 33ohm resistor for the current limit tied to the adjust... that put me at about 38mA and 4.10V
 
Joined
Nov 8, 2007
Messages
11
Points
0
sorphin said:
Well, i built it this evening and fired up my blu-ray and it's purty... i used a 10uF cap on the input, a 47uF and a .1uF cap at the output, 4001 for reverse protection and a 33ohm resistor for the current limit tied to the adjust... that put me at about 38mA and 4.10V

Bumped down to 30ohms got 4.41V @ 41.8mA i think that's close enough :)
 

Gazoo

0
Joined
Jun 9, 2007
Messages
3,206
Points
38
I lit a match with mine and it was not easy. I put 56ma's to the diode....I do not suggest doing this unless you know you may very well fry the diode.. ;D Now I am running it with ~38ma's.
 
Joined
Jul 8, 2007
Messages
530
Points
0
Finally getting around to making this...

Got all the parts at Radioshack today and I just bread boarded up Deadal's circuit. I'm using a 10 ohm resistor for now so the current does not go beyond 125-150 mA with the pot I'm using.. fine. However when I meter the voltage it's too high - it reads around 5 volts when it should be around 2.5. I'm using a 47uF electrolytic cap. Any suggestions? I haven't hooked up the LD, just testing the circuit with a multimeter.
 

roSSco

0
Joined
Dec 5, 2007
Messages
649
Points
18
Put a load on the circuit. ;) Four 1N4001 diodes in series (in place of the LD) and measure the voltage again. ;)
 
Joined
Jul 8, 2007
Messages
530
Points
0
YES! F*ck yes it works!

Finally. I ordered just a couple of these diodes from Senkat months ago, and I didn't even open the package until today. Those ~5mm diode cans are tiny.

Anyway, couple pics below of the prototype. I still need to stuff the works into some sort of package, but my burning laser works and I haven't toasted a diode yet (knock on wood). Currently I'm using a large 3 watt rheostat (from radioshack, recommended) to adjust the current to the diode. Combined with the 10 ohm resistor this gives me a max current of ~140 mA, which is about spec for the diode. I'm planning on driving the diode at around 200mA in the final design, and I'd like to keep the pot also as I like to be able to adjust the brightness.

I'm using a Meredith 'LDC-1' mounting block/optics to house the diode. It's focusable.

Pic #1... from left to right, Senkat diode in housing, Daedal circuit, battery pack (4 AA NiMH).

DIY_red1.jpg


pic #2... lasing. ah the speckly goodness.

DIY_red2.jpg


When I get it all packaged up I'll post another picture or two.
 
Last edited:
Status
Not open for further replies.


Top