Welcome to Laser Pointer Forums - discuss green laser pointers, blue laser pointers, and all types of lasers

LPF Donation via Stripe | LPF Donation - Other Methods

Links below open in new window

ArcticMyst Security by Avery

Converting to 18650

Kenom

0
Joined
May 4, 2007
Messages
5,629
Points
63
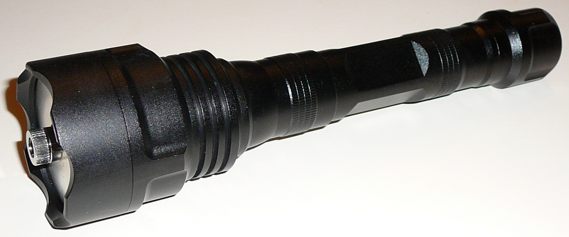
well, I've purchased a 3W replacement diode to go into this laser. Probably a bit much for this but I didn't want to burn up my laser diode by over driving it and I can tune it DOWN so that it's in it's comfort range.


Joined
Jan 12, 2008
Messages
3,290
Points
83
This is so confusing. With a 1 ohm resistor I get 520-570mV (climbing slowly). With two C batteries I get 398mV. This can't be right, this laser is quite powerful. Lights matches, burns paper and makes ember in seconds. What is going on???

I bought the laser from rhildinger at the forums, and he took a measurement before sending it.

Aries-200.png


I don't know what 200mW of green looks like, but I trust the measurement he did.

It has a small modehoping issue while warming up, but ones it gets to TEM00 after 30-60 seconds depending on the temperature, it stays there.
 
Joined
Jan 12, 2008
Messages
3,290
Points
83
I just tried it again with a totally fresh 18650 battery, this time I got 660mV.
 
Joined
Feb 21, 2008
Messages
1,056
Points
0
Sounds like you're getting good power from a recently tested laser. Still strange about the lower than expected current draw ... Perhaps your particular laser has a smaller pump diode and a high quality very well aligned crystal set ... Well, since it's lighting the matches and burning paper, it seems to have good power, so maybe don't worry too much ...

I had suggested a 0.1 [ch937] resistor as I didn't want this current sense resistor interfering with the laser in any way. Still, the 1 [ch937] resiistor that you are using seems to be confirming your earlier results from the DMM set on 10A.
 

Kenom

0
Joined
May 4, 2007
Messages
5,629
Points
63
FireMyLaser said:
This is so confusing. With a 1 ohm resistor I get 520-570mV (climbing slowly). With two C batteries I get 398mV. This can't be right, this laser is quite powerful. Lights matches, burns paper and makes ember in seconds. What is going on???

I bought the laser from rhildinger at the forums, and he took a measurement before sending it.

Aries-200.png


I don't know what 200mW of green looks like, but I trust the measurement he did.

It has a small modehoping issue while warming up, but ones it gets to TEM00 after 30-60 seconds depending on the temperature, it stays there.


Now that was tested on C batteries did you compare the beam strength with the C batteries to see if there is a visible difference in dot brightness?
 
Joined
Jan 12, 2008
Messages
3,290
Points
83
Hardly any change in output between 18650/C batts. Slightly brighter with 18650 and diodes.
 
Joined
Dec 6, 2008
Messages
1,581
Points
63
FireMyLaser;

Good choice on the #18650 battery type. Let me know if you need some Sony cells.

I have used them in all my DIY lasers (Green, BR & Red) and many UV LED lights I have built.

For direct-drive I would use a resistor, since the voltage drop is proportional to the current.

The diodes have a more constant voltage drop.

This is a Blu-Ray I built with 2 #18650's, a LM317 regulator & Hi-Power AR Lens:
uvl2.jpg

Larry
 
Joined
Jan 12, 2008
Messages
3,290
Points
83
Thanks for the offer, I'm only interested in protected cells.

It's doing fine on the diodes so far, great actually. The only weird thing about this laser at all is the ridiculously low current.
 
Joined
Dec 26, 2007
Messages
682
Points
28
I have (4) of these Aries from Scopeguy's LG-group-buy. One is a little different than the rest and came set-up to use a 18650-cell, I think it was their prototype. This 1865o-model unscrews in the middle of the host to replace the battery, and is outputting 220mW of 532nM, but is missing it's final focusing-lens to make a nice beam. GG is checking it out in detail for me now. Thanks so much to SG for putting all of these great deals into our hands. hopefully this will happen again.

Of the four units, 2 were actually outputting a small 532-beam when I received them, (even though I purchased "non-working" units). A quick trip to Gooey-Gus's-shop and so far 3 of them are putting-out at or near 200mW each, and the remaining one may be capable of putting out much more, (the 18650-model)!

If you have one of these that is not working properly, (or any other DPSS laser-system), do yourself a favor and contact GG.

About the C-18650 conversion, I am going to machine some units similar to the one used by Firemylaser. Ultimately, I would like to replace the driver and diode in one of mine and, (like Kenom had mentioned), and maybe give them a cool anodize-job and laser-engraving. I eagerly await Dr. Lava's new "Beast-driver".
 
Joined
Mar 8, 2008
Messages
2,669
Points
48
forget the diode array, it's just wasting battery life.

Get the driver out and turn the pot all the way down (counterclockwise). Put in your 18650 without any extra diodes or anything. Now slowly turn the pot up until you get the current draw you're looking for. Easy as pie, and no need to worry about any extra stuff.
 
Joined
Jan 12, 2008
Messages
3,290
Points
83
Good advice, but how do I get the driver out? And also, what do you think about the low current it set at? Is it possible it is using a 1.2W diode and is just way under driven? Or could it be that LG set it at this power because of the nature of this particular crystal assembly?
 
Joined
Mar 8, 2008
Messages
2,669
Points
48
If it's doing 600mA, the pot is probably maxed out. The most I could get out of one of those drivers was close to 700mA on C batteries. On an 18650 I had the diode putting out 1.1W and that was only a little over half way turned up. They should have either 1W or 1.2W diodes, so they can handle quite a bit. The crystals are also pretty beefy.

As far as getting the driver out, it's not too bad.

Step one: unscrew the big 'finned' part of the host.
Step two: pull off the power button (just use a pair of pliers or something, it comes off really easily)
step three: you will see a big 'ring' screwed into the lower half of the host, it will have two little holes 180° away from each other. Put something in those holes (I use a pair of hemostats) and unscrew it. Now your module is loose
Step Four: pull the module out (make sure the power button is in the 'on' position, or else it wont clear the host)
Step Five: Use the batteries to gently push the plastic 'base' piece out of the host, you'll see what I mean when you get in there. But remember that the batteries can only go so far, so if it seems like the plastic piece is stuck and the batteries cant push it out anymore, go in through the hole for the power button or the key and give it a little push with a screwdriver or something. I should also add that if you are only doing driver adjustments, it might not even be completely necessary to get the plasic piece out of the host. The driver will be between the plastic and the metal, which should separate effortlessly. You'll see the pot on the board. Good luck!
 
Joined
Jan 12, 2008
Messages
3,290
Points
83
Ok I got the head off and the "ring", and button. But I can't pull the module out. It is a little loose, I can move it a mm from side too side, in and out. But even if I pull really hard it just doesn't give, it feels like something is in the way... any ideas?
 
Joined
Mar 8, 2008
Messages
2,669
Points
48
check the power button, that's the most likely culprit! If it's not coming out press it in a tiny bit. Other than that just work with it a little bit and it should pop out.
 

Kenom

0
Joined
May 4, 2007
Messages
5,629
Points
63
once you pull the button out, you need to then click it into the "on" position. Else it won't clear the tab on the button. Be very careful in adjusting that pot. I would hook up your voltmeter to the unit and power it with the entire unit out. You can then set it to the desired current and don't have to worry about assembling and dissasembling if you get it wrong the first time.


Top