

Well, it's finally here. I never really introduced myself properly in the forums, so I might as well give a little bit of background behind this, and me.
First of all, I'm a french canadian, so you'll have to pardon the somewhat dysfunctional english at times. I'm a 27 year old 'self taught' enthusiast that's dabbled in a whole spectrum of different hobbies... from backyard mechanic, to building miniature wargame models, model boats, console modifications, computer mods, custom game controllers... and just now getting into building stuff that shoots out as much light as possible.
Got a few unimpressive laser builds down, but nothing out of the ordinary; until I built this practical, usable, SST90 powered flashlight.
Let's break it down;
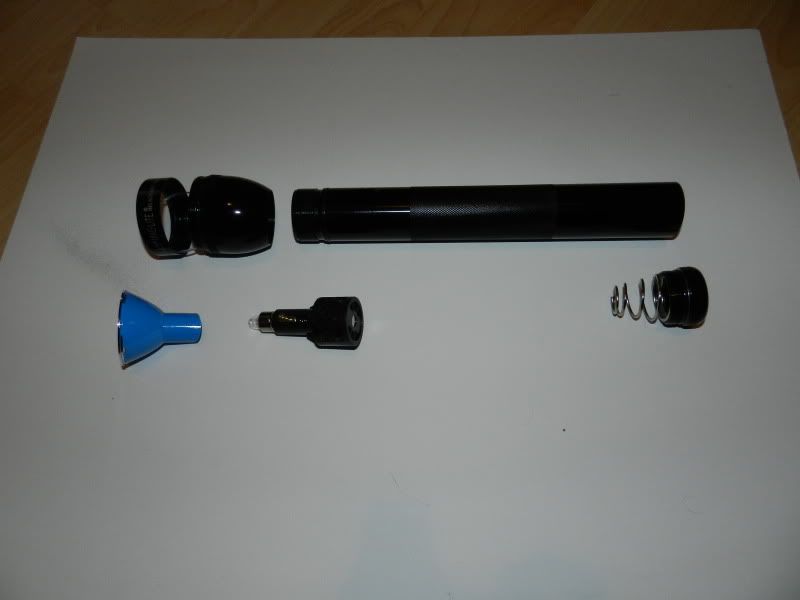
1) The host : Maglite 2D
For me, picking a host for my flashlight was the easy part. As far back as I can remember (about 20 years ago); this pretty much identical flashlight has been standing next to my dad's bed... as his 'just in case' light. My gramps had the same light from the police force; and I've always known just how solid these things were. I picked up a few of these hosts in 2D and 3D configuration at my local walmart for about 20$ each.
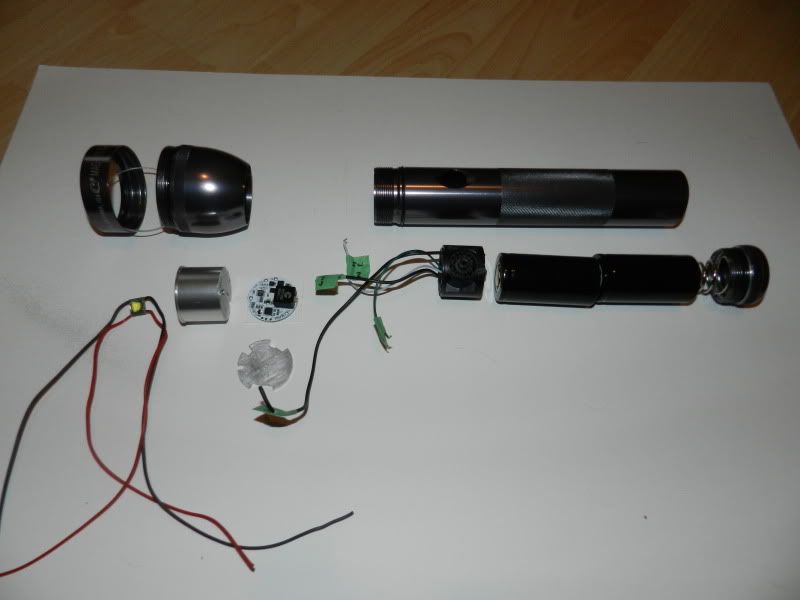
Here's a quick shot of the internals 'before and after' the build
2) The Emitter : Luminus SST-90
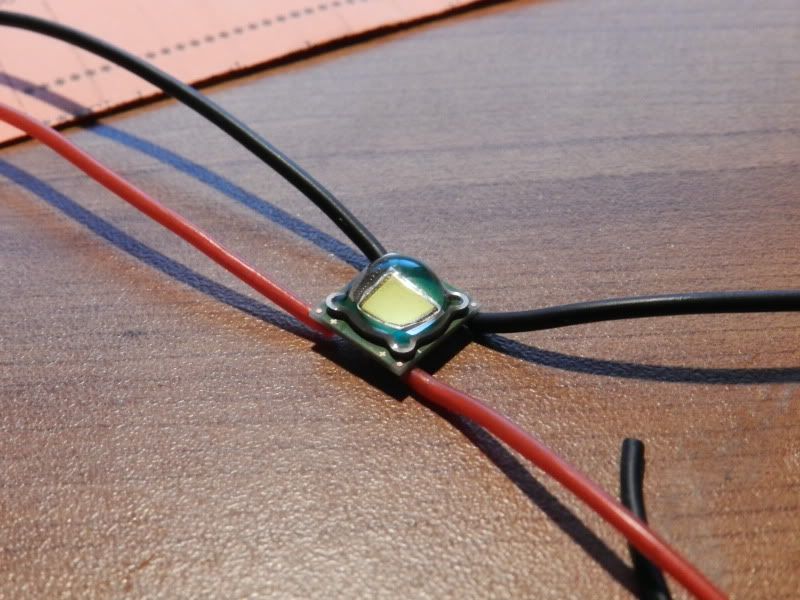
I had a few options here, the standard 3x Cree XML, the Phlatlights, the SSTs... but for my first build I really wanted a light that would be useful for everyday use, while still being able to provide way too much light for anyone to really have a need for. It was all about versatility, and useful duty. I decided to go with the SST90 because I would be able to retain much more 'throw' with this emitter and the stock Maglite reflector, than if I went with a multi-led setup and smaller reflectors. Since it was going to be used for camping trips and night strolls, Red/Green/Blue phlatlights didn't make the cut. (They're in the plan for my next build, tho)
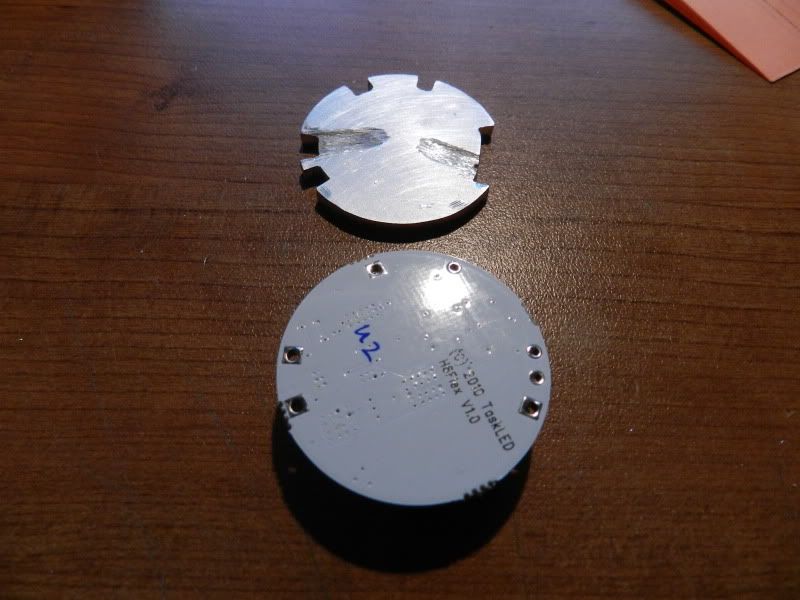
3) The Driver : TaskLED H6Flex
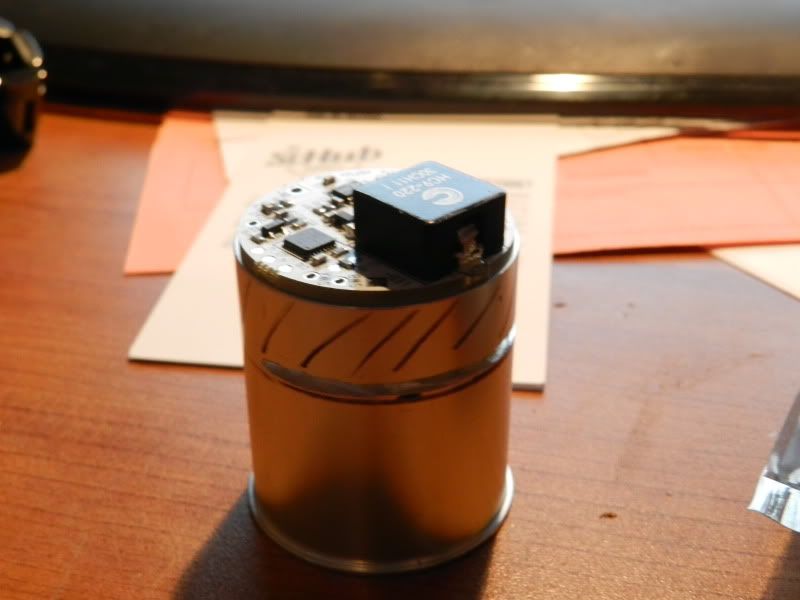
Now, this is what makes this light. I could have driven this light with a few different options, but most of which restricted me with a single mode 9Amp full power or no power; fine for impressing folks with a 30 second demonstration, but not really useable as a flashlight. That's why I ended up going with the H6Flex, which won't 'fully' drive this LED at it's spec 9A, but at 6.6A, it is giving me plenty of light. The benefits of this driver, on the other hand, just keep piling up :
- 9 levels; 5 modes per level, adjustable on the fly via user-menu.
- low voltage warning; critical voltage auto-off
- polarity protection
- thermal protection
- safety lockout (3 clicks to turn on to prevent accidental power-on)
This driver can be used to control bike lights, stationary lamps, and portables. While on the portable configuration, a 'click' turns the light on in any of the 5 modes, set thru the configuration menu. Mine is set to turn on at 'mid'. A long 'press' will turn it on and cycle through the 5 levels, and releasing will 'set' the light at the current level until it is powered off. Once turned on for more than 3 seconds, a long 'press' will force it to Max power, and a second long 'press' will return to whichever level it was set at.
Low voltage and critical voltage are set via the menu, anywhere from 0.0-21.0V can be set. I decided to configure mine to shut down at 6.0V (3.0V per cell) and to warn me around 6.8V. The warning system is also configurable, by flashing the light briefly once per 5-10-30-60 seconds.
Thermal protection is configurable @ 50-60-70-80-90 Celcius, I elected to set mine at 60... and after a good 5 minute test on max power, I don't think I'll ever need to run it hotter than that. The temperature probe is housed inside the driver IC so driver and LED must be heatsinked to the same body for adequate temperature sensing.
Safety lockout feature for transportation etc can be easily turned on by 3 quick successive clicks when the light is on (essentially turning it off-on-off very quickly) The light will then respond with 3 quick flashes, and lock itself. It will now require 3 clicks within 0.3 second intervals to turn back on.
One thing that is important to note with this driver, is that it requires a constant supply from the battery, and uses a momentary switch for mode-changing, and menu selections. 2 things to note from this : the stock maglite switch needs modification to be usable, and storing the light for a prolonged period, with batteries left in host, is potentially dangerous for overdischarging the cells.
On to the build!
The build was pretty straightforward, every single part needed modifications, but nothing too complicated; or that my Dremel couldn't handle.
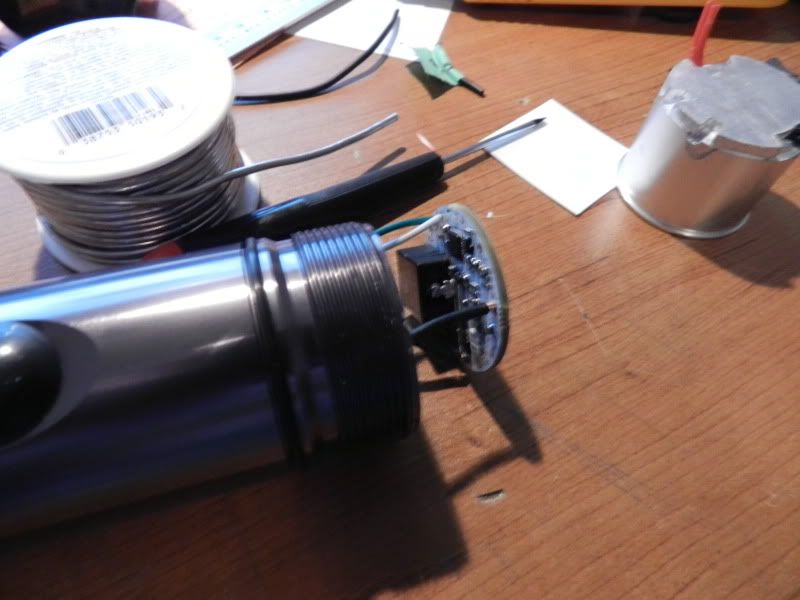
First up, the switch needed modifications. The stock emitter has to be chopped off to make room for the new heatsink/driver dropin. Followed instructions on CPF on how to make the switch into a momentary push button with Power and Ground bypassing the switch completely.


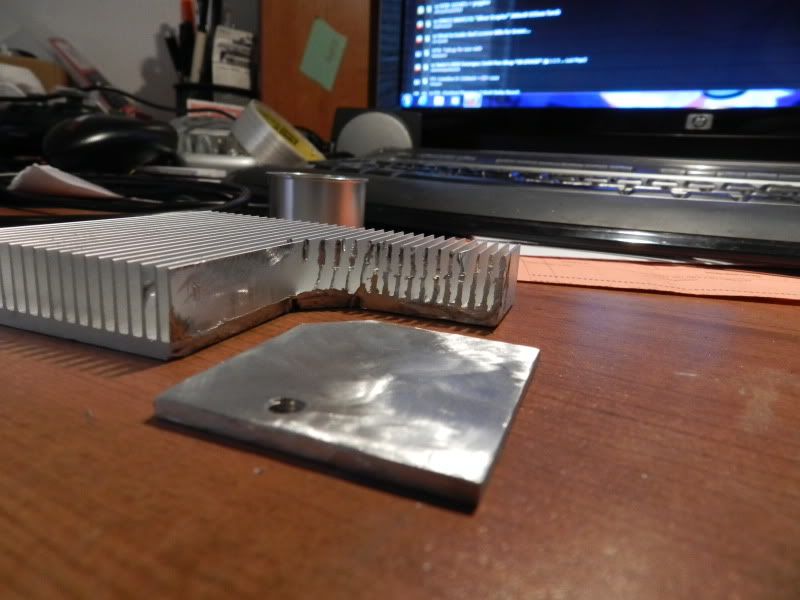
Next up, the heatsink I had ordered secondhand from a member on here, came from Der Wichtel @ CPF... and had to be modified to suit my driver selection. I started by cutting off the bottom section; which was hollowed out for a smaller size driver. After cutting the bottom off, I lapped it as smooth as possible, for better contact with the bottom of the driver for better heatsinking.
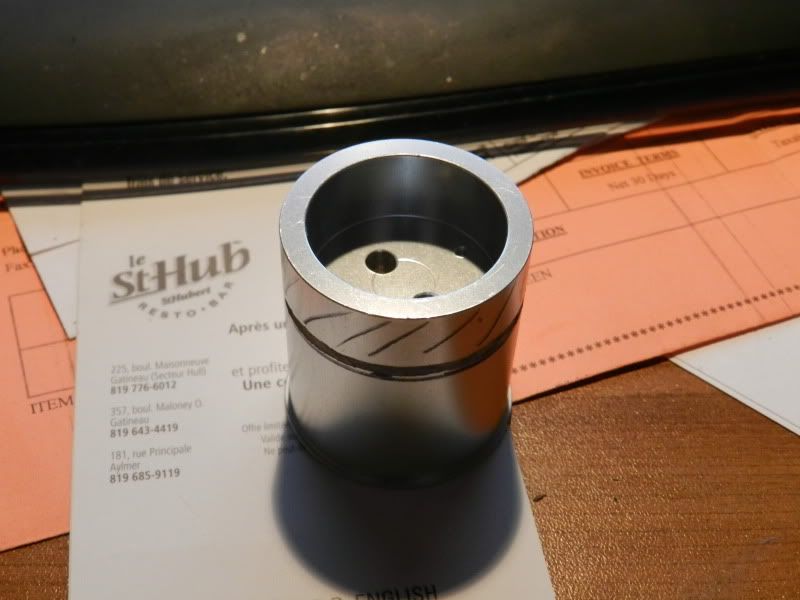

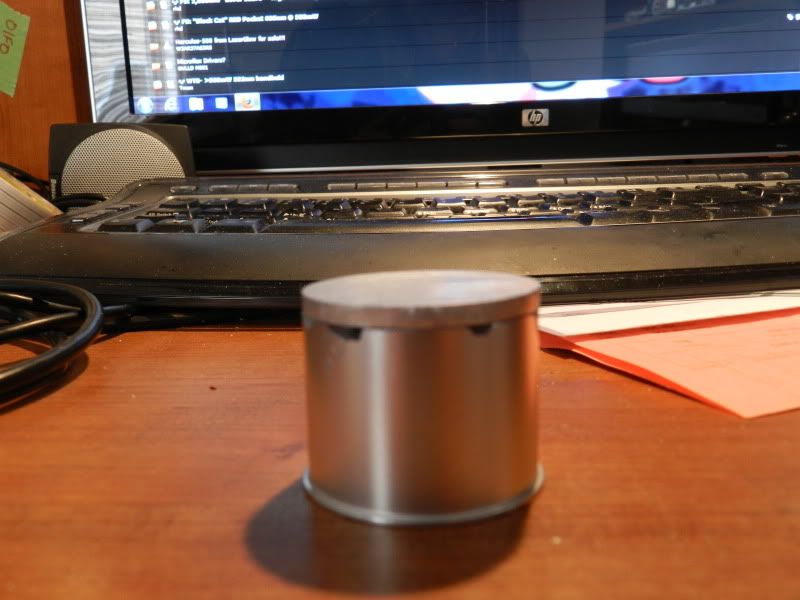
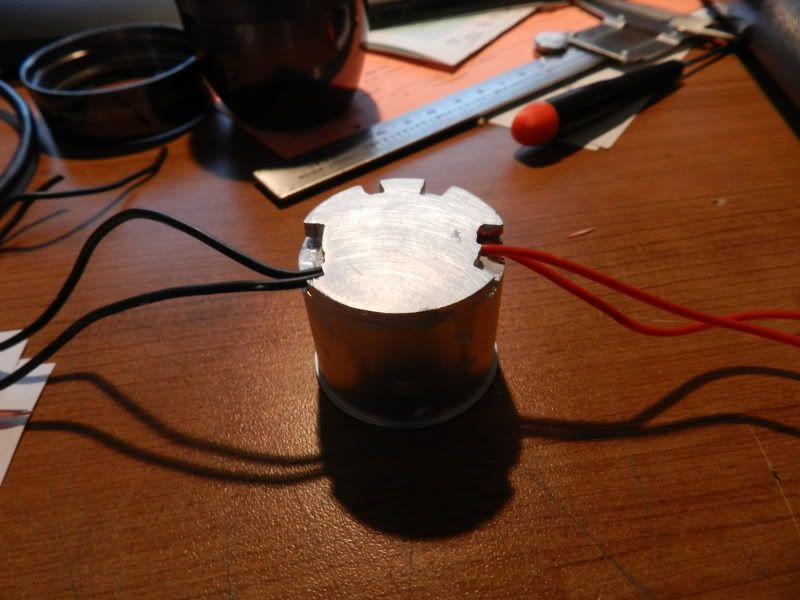
Cutting the bottom of the heatsink did take alot of the weight out of the unit, and thus losing out on some heat dissipation. I decided at this point to rape my parts bin... and make a "pill" to connect the driver to, and adhere that to the heatsink with Arctic Alumina. A few hours with the dremel... and here's what I got.
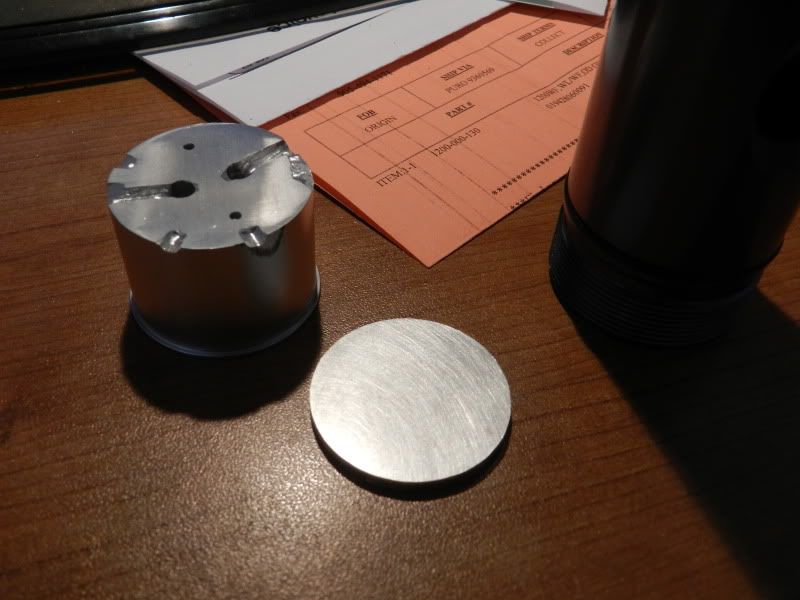
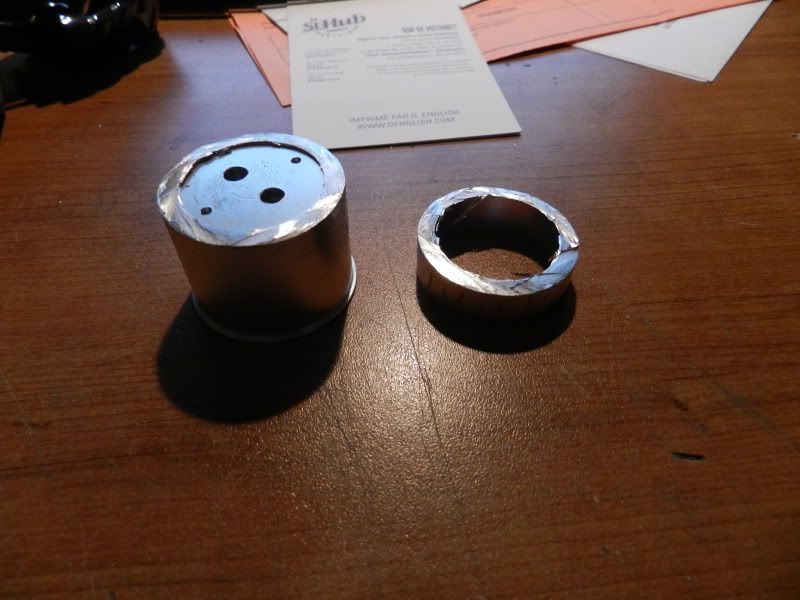
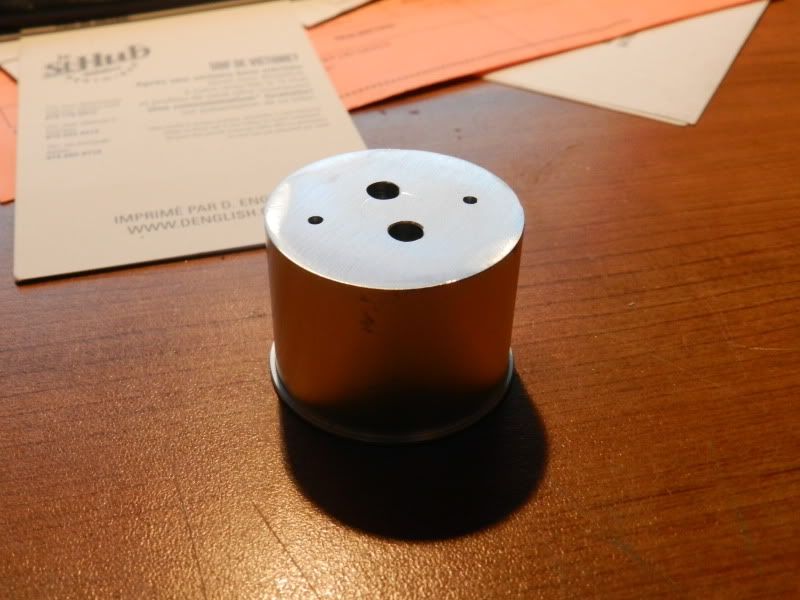
I then gave it the profile I wanted to make sure it wouldn't short out with any of the connections I had to make to the driver
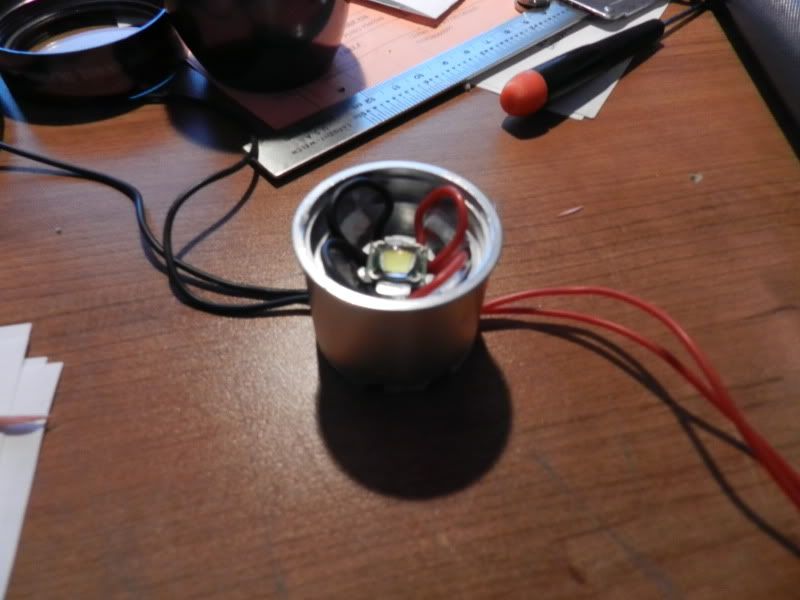
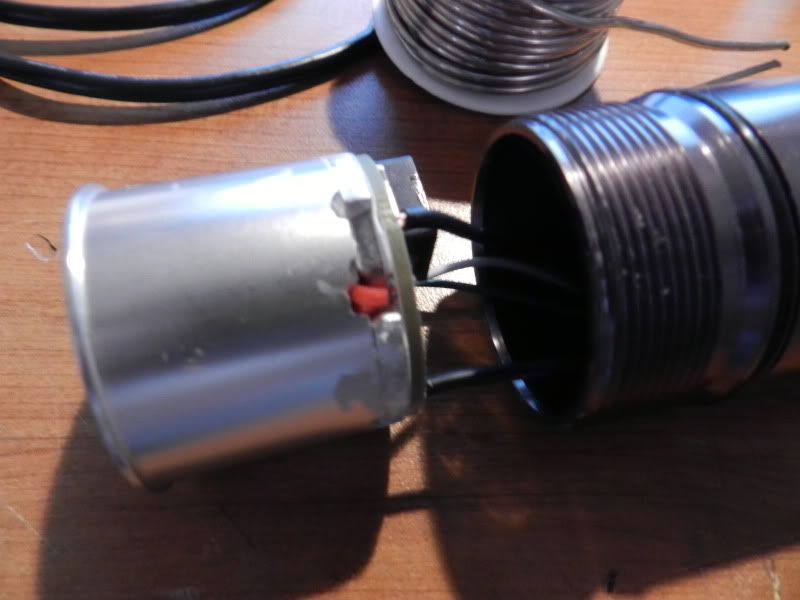
Once done, I epoxied the emitter in place, added some small pieces leftover from the bottom of the heatsink back on top around the edges... soldered it to the modified Switch, power and ground... and popped the whole unit into the head. This is a tight fit if I've ever seen one, with only about 5mm of clearance between top of driver and top of the switch.
Modified the tailcap spring, and reflector, as per 99% of maglite builds.
Popped some batteries in and;
(EDIT) Forgot about it the first time around, but this does use an upgraded UCL glass lens from flashlightlens.com
Bingo, only running 1.4 Amps right now though, as this is the 'factory' setting on the driver.
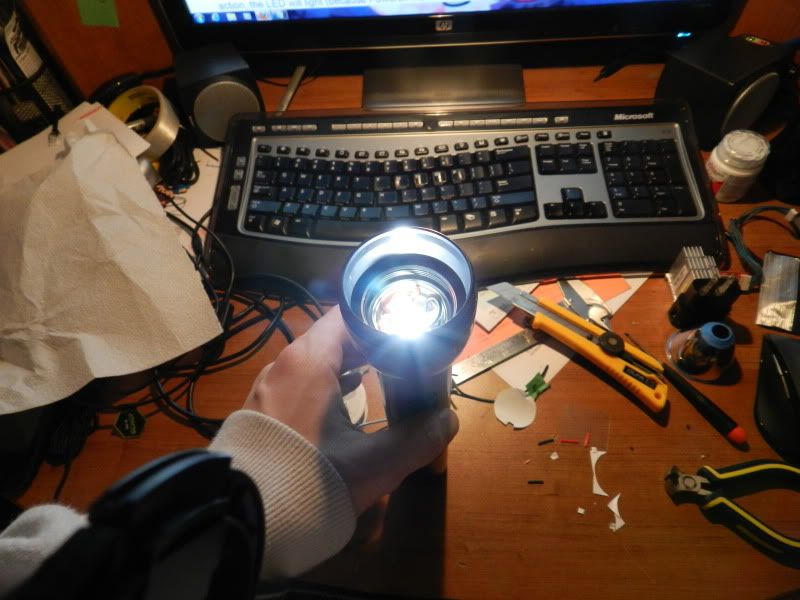
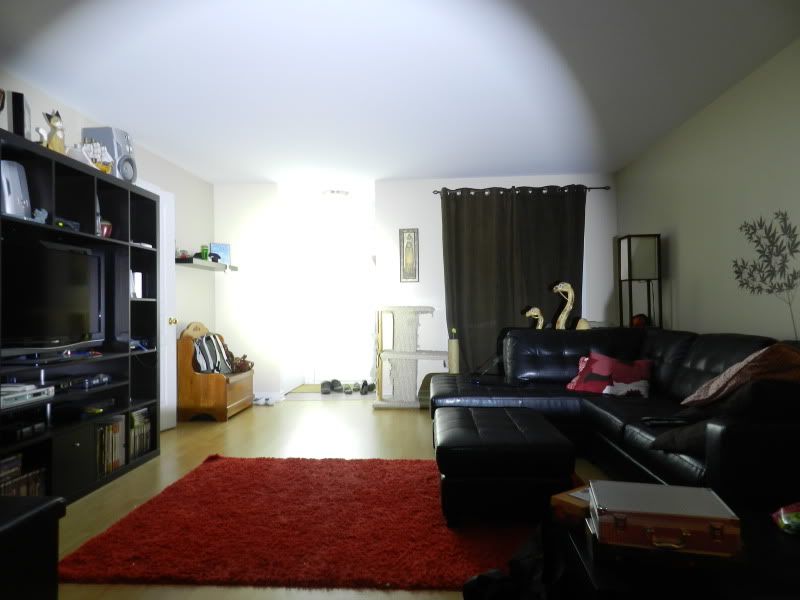
Here's a few shots of the finished setup, and a video of it running @ 6.6A, shooting at my front door about 20 feet away. This thing's quite a thrower. I'll be sure to take some night shots, beamshots, etc tonight...

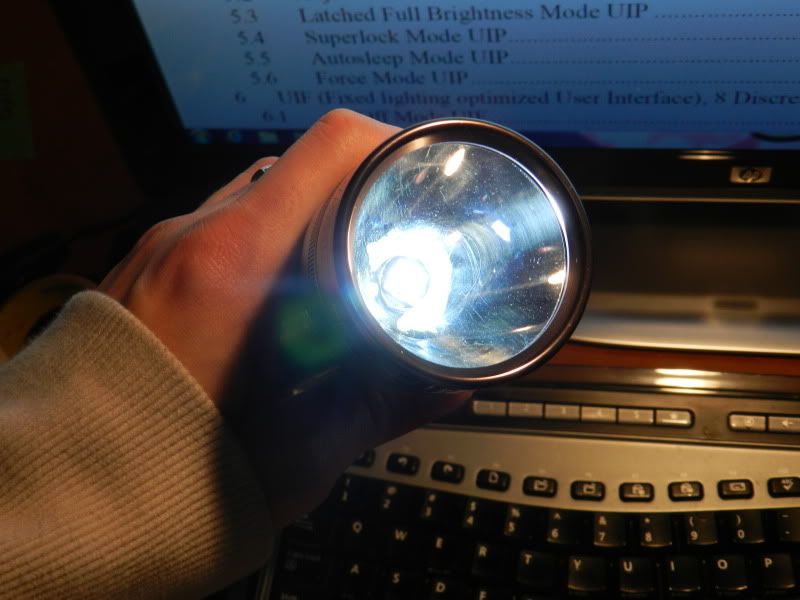
Video shows cycling through the 5 levels, the using the long 'press' to force it to Max. Please, forgive the choice of soundtracks... if anyone can tell me where I took that from; I'll have a good laugh.
First of all, I'm a french canadian, so you'll have to pardon the somewhat dysfunctional english at times. I'm a 27 year old 'self taught' enthusiast that's dabbled in a whole spectrum of different hobbies... from backyard mechanic, to building miniature wargame models, model boats, console modifications, computer mods, custom game controllers... and just now getting into building stuff that shoots out as much light as possible.
Got a few unimpressive laser builds down, but nothing out of the ordinary; until I built this practical, usable, SST90 powered flashlight.
Let's break it down;
1) The host : Maglite 2D
For me, picking a host for my flashlight was the easy part. As far back as I can remember (about 20 years ago); this pretty much identical flashlight has been standing next to my dad's bed... as his 'just in case' light. My gramps had the same light from the police force; and I've always known just how solid these things were. I picked up a few of these hosts in 2D and 3D configuration at my local walmart for about 20$ each.
Here's a quick shot of the internals 'before and after' the build
2) The Emitter : Luminus SST-90
I had a few options here, the standard 3x Cree XML, the Phlatlights, the SSTs... but for my first build I really wanted a light that would be useful for everyday use, while still being able to provide way too much light for anyone to really have a need for. It was all about versatility, and useful duty. I decided to go with the SST90 because I would be able to retain much more 'throw' with this emitter and the stock Maglite reflector, than if I went with a multi-led setup and smaller reflectors. Since it was going to be used for camping trips and night strolls, Red/Green/Blue phlatlights didn't make the cut. (They're in the plan for my next build, tho)
3) The Driver : TaskLED H6Flex
Now, this is what makes this light. I could have driven this light with a few different options, but most of which restricted me with a single mode 9Amp full power or no power; fine for impressing folks with a 30 second demonstration, but not really useable as a flashlight. That's why I ended up going with the H6Flex, which won't 'fully' drive this LED at it's spec 9A, but at 6.6A, it is giving me plenty of light. The benefits of this driver, on the other hand, just keep piling up :
- 9 levels; 5 modes per level, adjustable on the fly via user-menu.
- low voltage warning; critical voltage auto-off
- polarity protection
- thermal protection
- safety lockout (3 clicks to turn on to prevent accidental power-on)
This driver can be used to control bike lights, stationary lamps, and portables. While on the portable configuration, a 'click' turns the light on in any of the 5 modes, set thru the configuration menu. Mine is set to turn on at 'mid'. A long 'press' will turn it on and cycle through the 5 levels, and releasing will 'set' the light at the current level until it is powered off. Once turned on for more than 3 seconds, a long 'press' will force it to Max power, and a second long 'press' will return to whichever level it was set at.
Low voltage and critical voltage are set via the menu, anywhere from 0.0-21.0V can be set. I decided to configure mine to shut down at 6.0V (3.0V per cell) and to warn me around 6.8V. The warning system is also configurable, by flashing the light briefly once per 5-10-30-60 seconds.
Thermal protection is configurable @ 50-60-70-80-90 Celcius, I elected to set mine at 60... and after a good 5 minute test on max power, I don't think I'll ever need to run it hotter than that. The temperature probe is housed inside the driver IC so driver and LED must be heatsinked to the same body for adequate temperature sensing.
Safety lockout feature for transportation etc can be easily turned on by 3 quick successive clicks when the light is on (essentially turning it off-on-off very quickly) The light will then respond with 3 quick flashes, and lock itself. It will now require 3 clicks within 0.3 second intervals to turn back on.
One thing that is important to note with this driver, is that it requires a constant supply from the battery, and uses a momentary switch for mode-changing, and menu selections. 2 things to note from this : the stock maglite switch needs modification to be usable, and storing the light for a prolonged period, with batteries left in host, is potentially dangerous for overdischarging the cells.
On to the build!
The build was pretty straightforward, every single part needed modifications, but nothing too complicated; or that my Dremel couldn't handle.
First up, the switch needed modifications. The stock emitter has to be chopped off to make room for the new heatsink/driver dropin. Followed instructions on CPF on how to make the switch into a momentary push button with Power and Ground bypassing the switch completely.
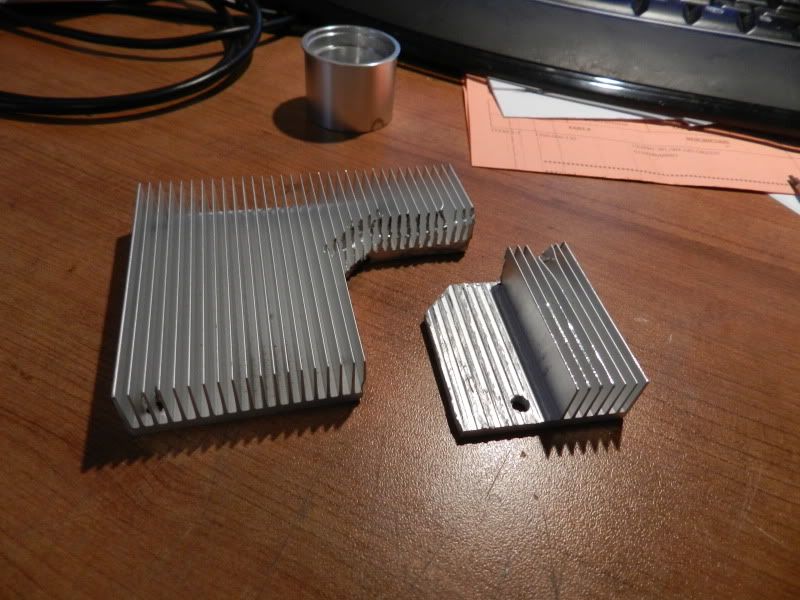
Next up, the heatsink I had ordered secondhand from a member on here, came from Der Wichtel @ CPF... and had to be modified to suit my driver selection. I started by cutting off the bottom section; which was hollowed out for a smaller size driver. After cutting the bottom off, I lapped it as smooth as possible, for better contact with the bottom of the driver for better heatsinking.
Cutting the bottom of the heatsink did take alot of the weight out of the unit, and thus losing out on some heat dissipation. I decided at this point to rape my parts bin... and make a "pill" to connect the driver to, and adhere that to the heatsink with Arctic Alumina. A few hours with the dremel... and here's what I got.
I then gave it the profile I wanted to make sure it wouldn't short out with any of the connections I had to make to the driver
Once done, I epoxied the emitter in place, added some small pieces leftover from the bottom of the heatsink back on top around the edges... soldered it to the modified Switch, power and ground... and popped the whole unit into the head. This is a tight fit if I've ever seen one, with only about 5mm of clearance between top of driver and top of the switch.
Modified the tailcap spring, and reflector, as per 99% of maglite builds.
Popped some batteries in and;
(EDIT) Forgot about it the first time around, but this does use an upgraded UCL glass lens from flashlightlens.com
Bingo, only running 1.4 Amps right now though, as this is the 'factory' setting on the driver.
Here's a few shots of the finished setup, and a video of it running @ 6.6A, shooting at my front door about 20 feet away. This thing's quite a thrower. I'll be sure to take some night shots, beamshots, etc tonight...
Last edited:


