Welcome to Laser Pointer Forums - discuss green laser pointers, blue laser pointers, and all types of lasers

LPF Donation via Stripe | LPF Donation - Other Methods

Links below open in new window

ArcticMyst Security by Avery

FS: Pocket Mini Build Kit! - Easy Assembly!

Joined
Nov 24, 2007
Messages
2,735
Points
0
jayrob said:
No need with this kit!

Since you have your ground from the stock round circuit board as shown by Dave above! ::)

That is all you need... those two wires to you FlexDrive input side. Then two wires from the FlexDrive output to your diode...

Connecting the diode case pin to the negative pin won't hurt anything, but it is only necessary when this is the only route from the battery negative to the FlexDrive.

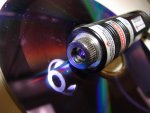
Let us know how your 6X build turns out! :)
Jay
Alright thanks :)
I was just thinking in case it has a bad connection...


Joined
Nov 24, 2007
Messages
2,735
Points
0
BTW, the little circuit board popped out of the brass ring...
Should i secure it with thermal adhesive and solder the negative pad and the inside of the brass ring together?
 

jayrob

0
Joined
Sep 21, 2007
Messages
9,862
Points
113
Yes, your positive contact is from the board. And as long as it is not going to fall out, there is no problem...

But your negative contact is the 'pill' via the case. (notice that the threads in the barrel are bare metal) So, it is important to solder the negative wire back to the brass ring, and then only glue the ring in 3 small spots. That way your brass ring will make good contact with the pill! ;)
Jay
 
Joined
Nov 24, 2007
Messages
2,735
Points
0
jayrob said:
Yes, your positive contact is from the board. And as long as it is not going to fall out, there is no problem...

But your negative contact is the 'pill' via the case. (notice that the threads in the barrel are bare metal) So, it is important to solder the negative wire back to the brass ring, and then only glue the ring in 3 small spots. That way your brass ring will make good contact with the pill! ;)
Jay
Ok, thanks :)
Now, all i need to do is wait for my flexdrive to come.
 

jayrob

0
Joined
Sep 21, 2007
Messages
9,862
Points
113
It's a good practice to test voltage just from the wire leads coming out of the pill, once you get the brass ring and board in place...

My method for this, is to use a 3.0 volt Primary (3.6 is too long for this test), and after filing a small part of the edge of the barrel clean, just touch the edge of the pill onto the clean edge of the barrel, with the battery positive making contact in the center of the board. (obviously the switch has to be on)

Pocket mini 21.jpg


I use this same method to set current after my FlexDrive is installed into the pill...
Jay
 

jayrob

0
Joined
Sep 21, 2007
Messages
9,862
Points
113
Yes, you need a bare metal contact point. The anodized finish on the edge will not make contact. It is thin, and easy to just file a little spot clean...

But obviously there are other ways to test voltage and set current on your driver. I was just showing a method that I found to be very easy with these builds...
Jay
 
Joined
Nov 24, 2007
Messages
2,735
Points
0
jayrob said:
Yes, you need a bare metal contact point. The anodized finish on the edge will not make contact. It is thin, and easy to just file a little spot clean...

But obviously there are other ways to test voltage and set current on your driver. I was just showing a method that I found to be very easy with these builds...
Jay
Oh, i thought the edge was bare metal...
 
Joined
Mar 30, 2008
Messages
6,058
Points
0
Spyderz20x6 said:
Is the filing necessary?

Hey - if you have a Harbor Freight near you, they sell TONS of files - and very cheap, too....just in case your question was framed due to a lack of files.... ;)
 
Joined
Nov 24, 2007
Messages
2,735
Points
0
h
SenKat_Stonetek said:
[quote author=Spyderz20x6 link=1231664443/96#101 date=1235607665]Is the filing necessary?

Hey - if you have a Harbor Freight near you, they sell TONS of files - and very cheap, too....just in case your question was framed due to a lack of files.... ;)[/quote]
As a matter of fact, I DO have a Harbor Freight near me.
However, I also have files...
I was just wondering about what the filing was for...
 

jayrob

0
Joined
Sep 21, 2007
Messages
9,862
Points
113
Everybody has their own building methods that work...

I just thought I would share that one testing method for the Pocket Mini build. And to add to it, I'll tell you another method that is 'key' for me anyway. :)

I have a 'test host' with FlexDrive and leads coming out that is just for testing only. Since there are differences in individual diodes, it is necessary to test the diode before you mount it into the build.

* After I have the diode mounted in the module with leads soldered on. I then put it into a heatsink.
* Now I can adjust my 'test host with leads' to the guesstimated current that should give me my expected power and measure the power of the diode.

This initial test allows you to know what current to set your 'build driver' to before connecting the diode and finishing your build! ;)
Jay
 

jayrob

0
Joined
Sep 21, 2007
Messages
9,862
Points
113
HOT option: :D

I can include a FlexDrive mounted into the pill with the brass ring glued in place and the driver set to your desired current with lead wires soldered on for you! :)

All you would need is your module/diode, and a battery. (and a 1.5mm Allen wrench for the set screw)

Important: For those who are new to lasers, this modification can damage the eye instantly with a direct shot or reflection. Proper eye protection for 405nm wave length is recommended. And extreme caution needed when using. I would recommend storing it in a lockable case so that it cannot be accessed by just any person or child...

Eye Protection: (405nm)
http://store.oemlasersystems.com/ind...91239ce0cbfdb4

Hot%20option.jpg


Here's the breakdown:

Pocket Mini kit - $43 (Host/heatsink/drill the pill)
'Hot' option - $48 (FlexDrive installed with lead wires ready and current set)
Shipping - $6

Shipping: Out of U.S. buyer assumes responsibility at that price. It should not be a problem though... (I would mark the package as a gift, with a description of 'LED Flashlight' with a low value of $15)
Total - $97 dollars. PM me for Paypal!

This option does not include the diode, module, stickers, or battery. But it will be really easy for you to complete the build. I have several good tips for assembly in the first post...


Where to get your diode and module!:

You can buy the sleds and harvest your own diodes if you want. Check the BST section!

Or you can get diodes pre-mounted in AixiZ modules (recommended) from several forum members:

DTR
Daguin


Assembly!:

With the 'Hot' option, the FlexDrive will come already mounted into the pill like this picture shows:

Pocketmini7.jpg


See how the wires that come out of the pill show some heat shrink tubing on them between the driver and the module/diode?
That is where you would make your connection. I would send the kit with the Flexdrive installed and wires coming out of the pill with the ends already stripped and the current set. The heatsink will be included in the kit, but not the module or diode.

Your part will be to mount your module/diode into the heatsink (as shown) with small wire leads soldered onto your diode pins. (notice how I have the wires bent over at the pins to give more room in the small build) The wires are bent, not the pins. You do this when the heat shrink tubing is still warm, right when you shrink it. Then the heat shrink tubing cools into the bent over shape...


Pin connection:

Blu-ray%20pin%20out.jpg


Here's a good tutorial on harvesting a PHR diode and pressing it into an AixiZ module. There is also a diagram for pin connection: (better to remove the ribbon cable before pressing it into your module)
http://laserpointerforums.com/laser_pointer_forums_3/forum/showthread.php?t=36852


Here's a great video from Mohrenberg on harvesting a PHR diode:


Here's a great video from rkcstr showing another sytle of harvesting a GGW 6X diode:

 
Last edited:
Joined
Feb 19, 2009
Messages
3
Points
0
I just built my pocket mini, and it's awesome!  Great build quality, it's a very professional package.

Jayrob is a great guy too, a class act.  Fast shipping, good communication, all that good stuff :)

Thanks Jayrob!

The build is a PHR-803t from Modwerx (no LM to measure mW, sorry  :() using Dr. Lava's V4 MicroDrive (which fits without modification now!  It's super-tiny.) set to 120mA using Rkcstr's test load (I'm gonna be doing a build with his driver once I get my host in from DX) and running off of an UltraFire 3.6v RCR123A - which fits a little tight in this host, but it might be tolerance issues with the battery.

I'll try and get some beam shots tonight if it's dark enough!

Chris
 

Attachments

  • Reflection.jpg
    Reflection.jpg
    552.1 KB · Views: 260

jayrob

0
Joined
Sep 21, 2007
Messages
9,862
Points
113
Nice job man! That looks like the same (cut up) sticker that I use from andy_con. I wish he was still making them. I only have a few left and I'm hanging on to them!

About the tight fit with the UltraFire 3.6 volt rechargeable batteries...

You are correct. Some batteries fit a little tight, and others are fine. It's the protection circuit. And also because with a protection circuit, there is a connection that runs down the side under the shrink wrap. I have found that usually, I can just hold the battery in one hand, and the host in the other hand, and put battery 1/3 of the way in, and lightly bend it back and forth and all around. Then flip ends and do the same. This usually helps it fit better...

Thanks for posting back! :)
Jay
 

jayrob

0
Joined
Sep 21, 2007
Messages
9,862
Points
113
flucero28, your Pocket Mini Kit, along with your (new style) 4171/AixiZ version 2 heatsink package is going to make it to the Post Office today before they close...

Please post back when you build the Pocket Mini! :)
Jay


Top