Welcome to Laser Pointer Forums - discuss green laser pointers, blue laser pointers, and all types of lasers

LPF Donation via Stripe | LPF Donation - Other Methods

Links below open in new window

ArcticMyst Security by Avery

Tesla Coil Build Thread

Joined
Jul 4, 2008
Messages
2,499
Points
113
One more safety question, if you don't mind: TCs and other HV stuff usually generate UV. Do you know if it's just UVA/UVB or if UVC is also generated? I googled but couldn't find anything that specific.


Back on his design:
If I decide to build it I'm thinking the best approach is to leave the interrupter on one of those small breadboards so I can change resistors/cap to get a huge frequency range (small with no audio or high with audio). Either that or I'll use a switch with various caps for the 555. Or perhaps it'd be best to use a PWM chip instead?

All TCs, and other high voltage equipment that make/produce sparks are capable of emitting a broad range of UV spectra. Yes, sparkgap coils are the most dangerous in that they do make quite a bit of hard UV in the spark gap area. SSTCs are not quite as dangerous in that regard.
There is also a "potential" X-ray hazard associated with the extremely high voltage output that you should be aware of as well. Some evacuated glass tubes are under low enough pressure that when subjected to the high potential of a TC begin to emit some significant amounts of X-rays. Some of the larger coils that output +1MV also can produce small amounts of X-rays from their discharges, usually right and the point of earthing. Lightning also does this as well, but on a far grander scale.


Joined
Jun 22, 2011
Messages
2,431
Points
83
Actually, I recommend against using JUST an electrolytic. Electrolytics typically have high-ish ESR, and ESR to a cap basically limits how much pulse current they can shove out, and since that's basically what a decoupling cap is there for, that's an issue!

If you want to decouple something, a 1 uF ceramic cap is usually enough (hell even 0.1 uF works!) super close to the supply pins, and you should be good to go.

Actually that's exactly what's on the original schematics - a 1/0.1uF cap across each IC.

All TCs, and other high voltage equipment that make/produce sparks are capable of emitting a broad range of UV spectra. Yes, sparkgap coils are the most dangerous in that they do make quite a bit of hard UV in the spark gap area. SSTCs are not quite as dangerous in that regard.
There is also a "potential" X-ray hazard associated with the extremely high voltage output that you should be aware of as well. Some evacuated glass tubes are under low enough pressure that when subjected to the high potential of a TC begin to emit some significant amounts of X-rays. Some of the larger coils that output +1MV also can produce small amounts of X-rays from their discharges, usually right and the point of earthing. Lightning also does this as well, but on a far grander scale.

That's the kind of think that makes me think 10x before building a TC. UVA/UVB I can handle, UVC from the spark gap I can shield but X-rays are just too dangerous to take the chance :/

And TBH if I'm gonna make a small one it seems better to go the SSTC route...
 
Last edited:
Joined
Jul 4, 2008
Messages
2,499
Points
113
Actually that's exactly what's on the original schematics - a 1/0.1uF cap across each IC.


That's the kind of think that makes me think 10x before building a TC. UVA/UVB I can handle, UVC from the spark gap I can shield but X-rays are just too dangerous to take the chance :/

And TBH if I'm gonna make a small one it seems better to go the SSTC route...

Well, UVB/UVC are fairly easy to shield against. I put a glass welders mask filter infront of the SPKGP. problem solved.
X-rays can be avoided as long as you don't use any evacuated tubes near them or try and zap any filament (old school) lightbulbs. SSTCs still can produce X-rays as well under the correct circumstances. Just be safe, and you'll be fine.
 
Joined
Dec 11, 2011
Messages
4,364
Points
83
Actually, I recommend against using JUST an electrolytic. Electrolytics typically have high-ish ESR, and ESR to a cap basically limits how much pulse current they can shove out, and since that's basically what a decoupling cap is there for, that's an issue!

If you want to decouple something, a 1 uF ceramic cap is usually enough (hell even 0.1 uF works!) super close to the supply pins, and you should be good to go.

I was under this impression too, but when decoupling a very high frequency oscillator (>700KHz) 555 chip I found that 0.1uF ceramic did nothing to help the ringing on the output, in some instances it even made it worse. When I swapped it for a 0.1uF nonpolar electrolytic the ringing completely stopped and the waveform squared up very nicely again. So I've been using electrolytics since, usually about 10uF since I have a lot of them.

Atomicrox said:
One more safety question, if you don't mind: TCs and other HV stuff usually generate UV. Do you know if it's just UVA/UVB or if UVC is also generated? I googled but couldn't find anything that specific.


Back on his design:
If I decide to build it I'm thinking the best approach is to leave the interrupter on one of those small breadboards so I can change resistors/cap to get a huge frequency range (small with no audio or high with audio). Either that or I'll use a switch with various caps for the 555. Or perhaps it'd be best to use a PWM chip instead?

Spark gaps emit broadband Electromagnetic Radiation, all the way from radiowaves up to hard UV (beyond UVC). Fortunately, air is a good absorber of UVC and beyond, so just a few inches between the spark gap and you is enough to block all of the hard UV and most of the UVC. For the UVB you can just put a cheap welding mask filter in front of the spark gap, or even just put something opaque in front, it's light distracts from output anyway! A small flyback based spark gap doesn't emit tons of UV anyway, it's pretty gentle as far as things go. An ARSG fed by a pole pig on the other hand.... well now that is another story!

I'll see if I can draw up my schematic for ya real quick, then you can make further plans. Right now there are so many modifications needed to Ward's schematic that it isn't worth it IMO to work off it unless you already know what you're doing or can afford to (and plan to) make rebuilds and revisions.


UPDATE: Here is my SSTC schematic. http://imageshack.us/a/img833/9048/shalfbridgesstc.png
 
Last edited:
Joined
Jul 4, 2008
Messages
2,499
Points
113
I was under this impression too, but when decoupling a very high frequency oscillator (>700KHz) 555 chip I found that 0.1uF ceramic did nothing to help the ringing on the output, in some instances it even made it worse. When I swapped it for a 0.1uF nonpolar electrolytic the ringing completely stopped and the waveform squared up very nicely again. So I've been using electrolytics since, usually about 10uF since I have a lot of them.


Spark gaps emit broadband Electromagnetic Radiation, all the way from radiowaves up to hard UV (beyond UVC). Fortunately, air is a good absorber of UVC and beyond, so just a few inches between the spark gap and you is enough to block all of the hard UV and most of the UVC. For the UVB you can just put a cheap welding mask filter in front of the spark gap, or even just put something opaque in front, it's light distracts from output anyway! A small flyback based spark gap doesn't emit tons of UV anyway, it's pretty gentle as far as things go. An ARSG fed by a pole pig on the other hand.... well now that is another story!

I'll see if I can draw up my schematic for ya real quick, then you can make further plans. Right now there are so many modifications needed to Ward's schematic that it isn't worth it IMO to work off it unless you already know what you're doing or can afford to (and plan to) make rebuilds and revisions.


UPDATE: Here is my SSTC schematic. http://imageshack.us/a/img833/9048/shalfbridgesstc.png

Just throwing in some additional info here, I totally agree with you Sigurthr,
When decoupling high frequencies, you're asking for problems with heating by going ceramic cap route , that is, unless they are rated specifically for RF. For your use you'd be paying an arm and a leg for the kind of voltage tolerances and capacitance you'd need. (none exist beyond a few 100pf)
PE and some Electolytics are great to use as you just pointed out. Stay far away from your basic ceramics unless you're doing DC work or low freq AC.
 
Joined
Jun 22, 2011
Messages
2,431
Points
83
Thanks for the schematic, Sig!
I was able to find the "new" ICs on ebay but I'm not really confident I can pull this off. This is at least some 5 times more complex than any circuit I've ever done :p

Edit:
After a closer look your circuit isn't much more complicated than his, you just included more detail and the IC "boxes".

I do have some questions:
-What's with the voltage divider between the PWM output and the gate driver's on pins?
-If I got the calculations right you're getting 40kHz to 400 on the PWM, right? Won't I want some lower frequencies for strong interrupted streamers?
-Is that 1:1 transformer really necessary?
-What are all those MUR860's and zeners for?

Sorry for asking too many questions, I'm still learning ;)
 
Last edited:

Hiemal

0
Joined
Dec 27, 2011
Messages
1,443
Points
63
Looking at his schematic, I understand that the zener diodes are for gate protection; in case the gate drive goes over the zener voltage, the zeners will start to conduct preventing gate damage.

I don't know what the voltage divider is for actually.

The 1:1 transformer on the primary Telsa circuit side is for isolation; it's for safety reasons, and I would recommend keeping it in. It also lets you scope things while the circuit is on without any ground faults causing shorts.

The MUR860 diodes are for protection as well, though I don't think the ones in series with the mosfet's are necessary... the ones in parallel aren't either; the FDL100N50F has an ultrafast diode built into it, so I fail to see the point in them.

That's my take on the schematic anyway! :p
 
Joined
Jun 22, 2011
Messages
2,431
Points
83
Thanks for clearing those points! I'm definitely using IRFP260s, those FDL100N50F are way too expensive... but they seem to have the internal diodes as well. Can I safely remove the MURs?
 

Hiemal

0
Joined
Dec 27, 2011
Messages
1,443
Points
63
Now with the IRFP260's, yes, you want to use the MUR diodes :p Their internal diode is a lot slower.
 
Joined
Dec 11, 2011
Messages
4,364
Points
83
Thanks for the schematic, Sig!
I was able to find the "new" ICs on ebay but I'm not really confident I can pull this off. This is at least some 5 times more complex than any circuit I've ever done :p

Edit:
After a closer look your circuit isn't much more complicated than his, you just included more detail and the IC "boxes".

I do have some questions:
-What's with the voltage divider between the PWM output and the gate driver's on pins?
-If I got the calculations right you're getting 40kHz to 400 on the PWM, right? Won't I want some lower frequencies for strong interrupted streamers?
-Is that 1:1 transformer really necessary?
-What are all those MUR860's and zeners for?

Sorry for asking too many questions, I'm still learning ;)

The voltage divider drops the 12V output of the PWM chip to 6V which is safe for (most) logiv level inputs. You shouldn't feed 12V in to an input expecting 5V.

I'd have to check the frequency range again, but the frequency set pot and resistor combo are easily modified for different choices. You want >21KHz for audio modulation though, that is a hard-etched requirement, and it sounds much better near 40KHz. SSTCs don't do long arcs, pretty much ever. It just isn't in their nature. With interuption around 130Hz-300Hz you can get slightly longer streamers than would be present in a CW output, but if you just remove the filter capacitors on the DC rails to the bridge and leave it as unfiltered 120Hz pulses from the bridge cap you get a much better power factor, and even longer streamers than with using an interrupter.

The 1:1 transformer is a Gate Drive Transformer (GDT) and is a CRUCIAL part of any inverter technology. It not only isolates the gates from eachother, but also from the logic side of the board, and provides an inverted signal with NO phase errors or delay. In a half bridge the "top" transistor's Source/Emitter will be at positive voltage potential half the time instead of always at ground potential like in a single transistor topology, so if you didn't have a GDT in there you would be putting the positive DC high voltage rail straight in to the low voltage output of your gate drive chips and instantly blow them. The GDT also functions like the primary in a royer oscillator, where placing a pulsing DC positive signal across a coil in different directions produces an AC squarewave which turns what was a DC signal to an AC signal on the secondary of the transformer. This is crucual for multiple reasons, especially as you reach higher frequencies or use transistors with higher gate charges. The Core material for the GDT is VERY IMPORTANT and a bad or incorrect core can destabilize and even destroy the circuit. EasternVoltageResearch sells cores for GDTs which have been specially hand-picked. Also, I can give you the part numbers for the cores that I use from EPCOS if you need. Each secondary winding on the GDT will see the full voltage applied to the high voltage rails of the half bridge and needs to be insulated accordingly. NEVER use bare wire or magnet wire.

The Zeners are for Gate Protection, because we are applying an AC signal to the gates to quickly turn off and remove the charge stored at the transistor's gates. If leakeage or parasitic inductance in the secondary side of the GDT is too high (which is a common condition) the voltage across the gates can spike well over the 20V limit where the gate will die explosively upon applying power to the Drain.

The MUR diodes serve several purposes;
1) The anti-parallel ones across the DS of the fets are called "freewheeling diodes" which removes and blocks the reverse polarity voltage developed by the primary when current stops flowing through it at each half cycle. Without these, that voltage/current is forced to go through the body diode which is either not fast enough to handle it or not robust enough to handle it for long without adding stress to the actual transistor.
2) the series forward biased ones after the MOSFETs' sources are to completely isolate the body diode in order to make it inactive entirely. This migrates heat away from the transistor which will generate its own heat and doesn't need any more. This also doubles the reverse blocking voltage of the transistor further protecting it from killer spikes.
Without these 4 diodes per half-bridge there is about 25% more heating in each MOSFET package, and any sudden stop of current flow to the primary such as when a breaker trips or fuse blows will cause a VERY high voltage Back-EMF (inductive kick) to form across the MOSFETs which will blow them out creating a dead short across both. I've had this happen with even the beefy 500V 100A FDL100N50F's WITH just the anti-parallel MURs on. Adding the series MURs solved the problem. Talk about $4 of diodes saving $50 of MOSFETs.


Looking at his schematic, I understand that the zener diodes are for gate protection; in case the gate drive goes over the zener voltage, the zeners will start to conduct preventing gate damage.

I don't know what the voltage divider is for actually.

The 1:1 transformer on the primary Telsa circuit side is for isolation; it's for safety reasons, and I would recommend keeping it in. It also lets you scope things while the circuit is on without any ground faults causing shorts.

The MUR860 diodes are for protection as well, though I don't think the ones in series with the mosfet's are necessary... the ones in parallel aren't either; the FDL100N50F has an ultrafast diode built into it, so I fail to see the point in them.

That's my take on the schematic anyway! :p

Pretty good take, see above for diodes and divider.

Thanks for clearing those points! I'm definitely using IRFP260s, those FDL100N50F are way too expensive... but they seem to have the internal diodes as well. Can I safely remove the MURs?

I get the 100N50F's as samples mostly. Remember with the IRFP260s you'll need to limit input AC voltage to the rectifier bridge to less than 120Vac.
 
Last edited:
Joined
Jun 22, 2011
Messages
2,431
Points
83
The voltage divider drops the 12V output of the PWM chip to 6V which is safe for (most) logiv level inputs. You shouldn't feed 12V in to an input expecting 5V.

The datasheet says it can take up to Vcc +0.3V.. also I don't think I've seen this in any other interrupter around but I could be wrong.

I'd have to check the frequency range again, but the frequency set pot and resistor combo are easily modified for different choices. You want >21KHz for audio modulation though, that is a hard-etched requirement, and it sounds much better near 40KHz. SSTCs don't do long arcs, pretty much ever. It just isn't in their nature. With interuption around 130Hz-300Hz you can get slightly longer streamers than would be present in a CW output, but if you just remove the filter capacitors on the DC rails to the bridge and leave it as unfiltered 120Hz pulses from the bridge cap you get a much better power factor, and even longer streamers than with using an interrupter.

The streamers on Steve's site don't look huge but seem quite decent. Nice idea of removing the caps, I'll surely try that!

The 1:1 transformer is a Gate Drive Transformer (GDT) and is a CRUCIAL part of any inverter technology. It not only isolates the gates from eachother, but also from the logic side of the board, and provides an inverted signal with NO phase errors or delay. In a half bridge the "top" transistor's Source/Emitter will be at positive voltage potential half the time instead of always at ground potential like in a single transistor topology, so if you didn't have a GDT in there you would be putting the positive DC high voltage rail straight in to the low voltage output of your gate drive chips and instantly blow them. The GDT also functions like the primary in a royer oscillator, where placing a pulsing DC positive signal across a coil in different directions produces an AC squarewave which turns what was a DC signal to an AC signal on the secondary of the transformer. This is crucual for multiple reasons, especially as you reach higher frequencies or use transistors with higher gate charges. The Core material for the GDT is VERY IMPORTANT and a bad or incorrect core can destabilize and even destroy the circuit. EasternVoltageResearch sells cores for GDTs which have been specially hand-picked. Also, I can give you the part numbers for the cores that I use from EPCOS if you need. Each secondary winding on the GDT will see the full voltage applied to the high voltage rails of the half bridge and needs to be insulated accordingly. NEVER use bare wire or magnet wire.

Actually I was wondering about the 1:1 transformer on the high voltage line just before rectifying but thnks for the info on GDTs, I didn't know that stuff either :)
I think I've seen a design without GDTs somewhere...
As for the core i'll probably get it from Eastern together with the gate drivers. Please post the part numbers, there's always the slight chance I can buy it here.

The Zeners are for Gate Protection, because we are applying an AC signal to the gates to quickly turn off and remove the charge stored at the transistor's gates. If leakeage or parasitic inductance in the secondary side of the GDT is too high (which is a common condition) the voltage across the gates can spike well over the 20V limit where the gate will die explosively upon applying power to the Drain.

The MUR diodes serve several purposes;
1) The anti-parallel ones across the DS of the fets are called "freewheeling diodes" which removes and blocks the reverse polarity voltage developed by the primary when current stops flowing through it at each half cycle. Without these, that voltage/current is forced to go through the body diode which is either not fast enough to handle it or not robust enough to handle it for long without adding stress to the actual transistor.
2) the series forward biased ones after the MOSFETs' sources are to completely isolate the body diode in order to make it inactive entirely. This migrates heat away from the transistor which will generate its own heat and doesn't need any more. This also doubles the reverse blocking voltage of the transistor further protecting it from killer spikes.
Without these 4 diodes per half-bridge there is about 25% more heating in each MOSFET package, and any sudden stop of current flow to the primary such as when a breaker trips or fuse blows will cause a VERY high voltage Back-EMF (inductive kick) to form across the MOSFETs which will blow them out creating a dead short across both. I've had this happen with even the beefy 500V 100A FDL100N50F's WITH just the anti-parallel MURs on. Adding the series MURs solved the problem. Talk about $4 of diodes saving $50 of MOSFETs.

I'll make sure to include them all, thanks :)

I get the 100N50F's as samples mostly. Remember with the IRFP260s you'll need to limit input AC voltage to the rectifier bridge to less than 120Vac.

Samples? how do I get some?

Voltage won't be a problem, we use 110Vac around here.


Edit: here's a *very* simple design I found with some decent streamers:
http://www.energylabs.com.br/project/?dir=Projetos/DLSSTC
It lacks pretty much all those safety components.. I even asked the guy if this design fries the MOSFETs and he said it doesn't.
What do you guys think?
 
Last edited:
Joined
Dec 11, 2011
Messages
4,364
Points
83
Hah, see the smoke at the end of the video rising up? That is the bridge overheating! There is a reason he is only doing 5 second or so bursts. You can get those results from about 0.5kW of power using 240V input without DC filtering. My design gets about the same length of streamers running CW with filtering @ 0.75kW running off of 90Vac with only passive cooling from small 2" x 3" "brick" heatsinks and can run for up to 5 min continuous at that power.

Fairchildsemi.com I think is the website, they have free samples for most of their parts.

Ohh, you meant the isolation transformer powering the HV side of things. It isn't neccessary at all, just good to design it in there. It would prevent RF from getting back in to the power lines and reduces electrocution risk. I'll edit my post for clarity.

Re: Steve's results... Mr. Ward is the man with the golden touch... we mortals can only hope to achieve results close to his. I've yet to see a replication of his designs by someone other than himself and his close colleagues which measures up. His Micro sstc usually blows itself apart when anyone else makes it, lol.

Also, while the chip I used for the schmitt trigger inverter can take full Vcc at an input, most can't, so what's $0.20 of resistors when making an overall design. I didn't design the circuit with the expectation that users would rebuild it without substitutions, as I know finding parts can be difficult, so I left in as many safety features and work arounds as I could. The divider also helps to pull the enable pins to ground when output is supposed to be LOW, this adds a bit of noise immunity. After all, the schmitt trigger is there for two reasons: one to square up a sine wave input, and two to add noise immunity. If all the noise gets in after the schmitt trigger then you're losing half the reason for having one!

One thing to note; you may have noticed my design is the first driver with antenna feedback which doesn't require a 5V rail. I forgot to draw in the switch and 1kOhm pull up on the Pin 3 of UCC chips for CW mode, but I think I wrote about it.


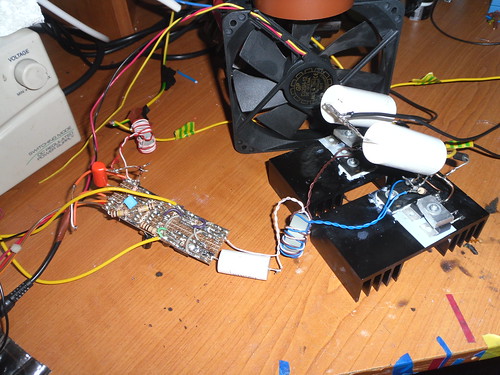
Oh, and you wanted pictures of my Harmonic SSTC:
photo1boa.jpg


Secondary output: 2uS/div @ 2V/div
photo2nxf.jpg
 
Last edited:
Joined
Jun 22, 2011
Messages
2,431
Points
83
Hah, see the smoke at the end of the video rising up? That is the bridge overheating! There is a reason he is only doing 5 second or so bursts. You can get those results from about 0.5kW of power using 240V input without DC filtering. My design gets about the same length of streamers running CW with filtering @ 0.75kW running off of 90Vac with only passive cooling from small 2" x 3" "brick" heatsinks and can run for up to 5 min continuous at that power.

He said the smoke is due to thin wire but I'm suspicious as well. Your design is great, the only problem is cost, that's why I'm still looking at simpler options. I'm estimating I'll spend about 100 bucks to get it done, maybe more.

Fairchildsemi.com I think is the website, they have free samples for most of their parts.

As usual they don't ship samples to Brazil :/

Re: Steve's results... Mr. Ward is the man with the golden touch... we mortals can only hope to achieve results close to his. I've yet to see a replication of his designs by someone other than himself and his close colleagues which measures up. His Micro sstc usually blows itself apart when anyone else makes it, lol.

o.ô

Also, while the chip I used for the schmitt trigger inverter can take full Vcc at an input, most can't, so what's $0.20 of resistors when making an overall design. I didn't design the circuit with the expectation that users would rebuild it without substitutions, as I know finding parts can be difficult, so I left in as many safety features and work arounds as I could. The divider also helps to pull the enable pins to ground when output is supposed to be LOW, this adds a bit of noise immunity. After all, the schmitt trigger is there for two reasons: one to square up a sine wave input, and two to add noise immunity. If all the noise gets in after the schmitt trigger then you're losing half the reason for having one!

Gotcha, just me being curious.

One thing to note; you may have noticed my design is the first driver with antenna feedback which doesn't require a 5V rail. I forgot to draw in the switch and 1kOhm pull up on the Pin 3 of UCC chips for CW mode, but I think I wrote about it.

Yeah, that's cool indeed. Hey, do you think I could reuse the xfmr from an old ATX PSU for the 12V supply?

Oh, and you wanted pictures of my Harmonic SSTC

Cool, do you have an action video?
Does it sound different?


Oh, another thing - I should use separate heatsinks for the MOSFETs, right?
 
Joined
Jan 14, 2009
Messages
1,452
Points
83
Hey ,

Id recomend seperate heatsinks , if you have one heatink you will have to isolate each fet from it :p

Here is my latest update on mine

Secondary is now 4" diamiter , 5.5" High , And with 230V in rectified and smoothed with 1500uF the output is 5.5 - 6 " firey hot arcs :D , With Music :D

( arc looks smaller in video than in person )

Audio SSTC V2.3456 , Tesla coil - YouTube

Bridge and driver board ; 4046 PLL / UCC Chips , Enables tied to 12 Volt rail .


SAM_0921 by TwirlyWhirly555, on Flickr

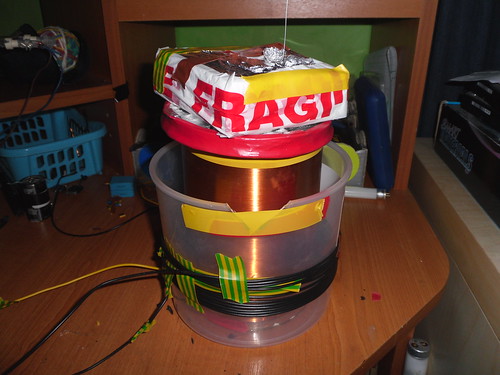
Secondary / Primary ;


SAM_0918 by TwirlyWhirly555, on Flickr

:D
 
Last edited:
Joined
Dec 11, 2011
Messages
4,364
Points
83
Yeah, that's cool indeed. Hey, do you think I could reuse the xfmr from an old ATX PSU for the 12V supply?


Cool, do you have an action video?
Does it sound different?


Oh, another thing - I should use separate heatsinks for the MOSFETs, right?

You can use a PSU power supply for a 12V source, just make sure to load down the 3v and 5v rails with the right resistors to keep the psu in regulation. There are how to's for this kind of thing,

No video as of yet, my variac can't handle the 1250W draw at full power, so I have to run it at <500VA. It looks about the same as normal and sounds identical. It runs at ~180KHz and there are two harmonics at non f/n intervals. One is approximately 3f and the other is somewhere around 10f.


Top