- Joined
- Feb 18, 2013
- Messages
- 744
- Points
- 28
Hey guys, I'm finally reviewing one of the many builds I have recently plowed through.
Technically, this is my third build, but I have more complete data on this one. Plus, it's a more "professional" version of the very first laser I built.")
Parts (with links) in this build:
1 - 650nm 300mW diode in copper module with acrylic lens > DTR
1 - Mohgasm round linear driver preset to 378mA > Mohrenburg
1 - Survival Laser DIY unmarked host > Survival Lasers USA
1 - Black anodized aluminium C6 heat sink > Cajunlasers
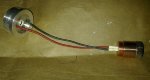
First, I ran the leads from the diode through the top of the pill, and soldered them to the D- and D+ on the driver.

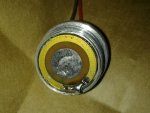
I then attached a piece of copper to the IC of the driver with some thermal paste, and pressed it into the pill. I wanted to try to sink the driver to the pill, and thus the body.

I ran into a small problem here, as the driver was now too tall for the brass ring to be pressed in. To get a negative contact, i put a blob of solder connecting the driver edge to the pill wall.

After this was done, I ran a quick test with two 16340s and a paper clip to jump the negative of the batts to the pill. So far, all good.
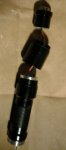
Next I screwed the pill into the body, placed the heatsink into the holder, and pushed the diode into the sink from the bottom. Then i slid the holder down and tightened the lock screw.

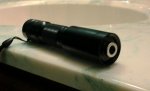
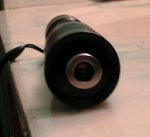
At this point I noticed that the heatsink was a little loose, even with the retainer on. So i pulled the sink back out and smeared some thermal compound on the heatsink. Then I let the sink sit and pulled the sink holder up to the body and screwed it together. Next i pushed the sink, much more snug, into the holder and screwed down the retainer. Now complete, this is the finished laser.


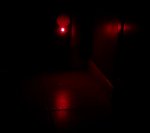
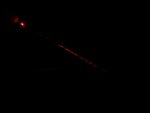
I tried to get beam shots, but this guy is hard to capture (at least for me).


However, I also got vids.
Here is the finished lasers LPM measurment. This is with the stock acrylic lens.
This turned out to be the best of any of my lasers for optical trapping.
Thanks for looking! I also want to thank Jordan, Matt, Cliff, and Gary. I also want to thank Johan, again, for the work he put in on a custom LPM.
ATB,
John
Technically, this is my third build, but I have more complete data on this one. Plus, it's a more "professional" version of the very first laser I built.
Parts (with links) in this build:
1 - 650nm 300mW diode in copper module with acrylic lens > DTR
1 - Mohgasm round linear driver preset to 378mA > Mohrenburg
1 - Survival Laser DIY unmarked host > Survival Lasers USA
1 - Black anodized aluminium C6 heat sink > Cajunlasers
First, I ran the leads from the diode through the top of the pill, and soldered them to the D- and D+ on the driver.
I then attached a piece of copper to the IC of the driver with some thermal paste, and pressed it into the pill. I wanted to try to sink the driver to the pill, and thus the body.
I ran into a small problem here, as the driver was now too tall for the brass ring to be pressed in. To get a negative contact, i put a blob of solder connecting the driver edge to the pill wall.
After this was done, I ran a quick test with two 16340s and a paper clip to jump the negative of the batts to the pill. So far, all good
.Next I screwed the pill into the body, placed the heatsink into the holder, and pushed the diode into the sink from the bottom. Then i slid the holder down and tightened the lock screw.
At this point I noticed that the heatsink was a little loose, even with the retainer on. So i pulled the sink back out and smeared some thermal compound on the heatsink. Then I let the sink sit and pulled the sink holder up to the body and screwed it together. Next i pushed the sink, much more snug, into the holder and screwed down the retainer. Now complete, this is the finished laser.
I tried to get beam shots, but this guy is hard to capture (at least for me).
However, I also got vids.
Here is the finished lasers LPM measurment. This is with the stock acrylic lens.
This turned out to be the best of any of my lasers for optical trapping.
Thanks for looking! I also want to thank Jordan, Matt, Cliff, and Gary. I also want to thank Johan, again
, for the work he put in on a custom LPM.ATB,
John