

- Joined
- Jun 24, 2010
- Messages
- 5,705
- Points
- 113
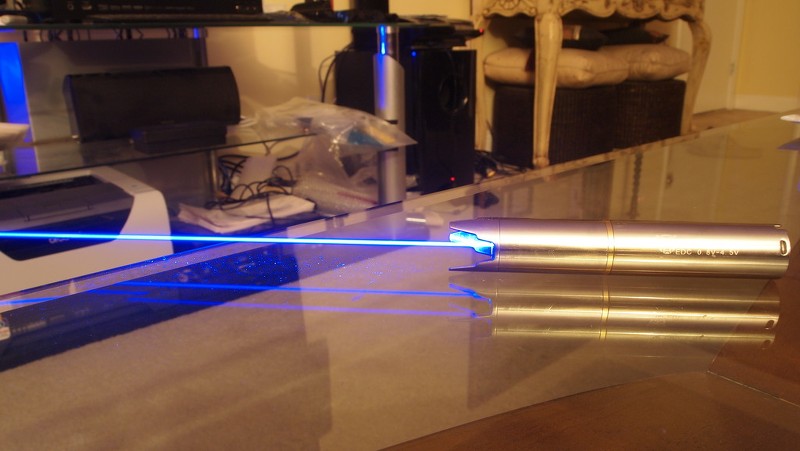
1.5W Stainless Steel 14500 Ultrafire F22
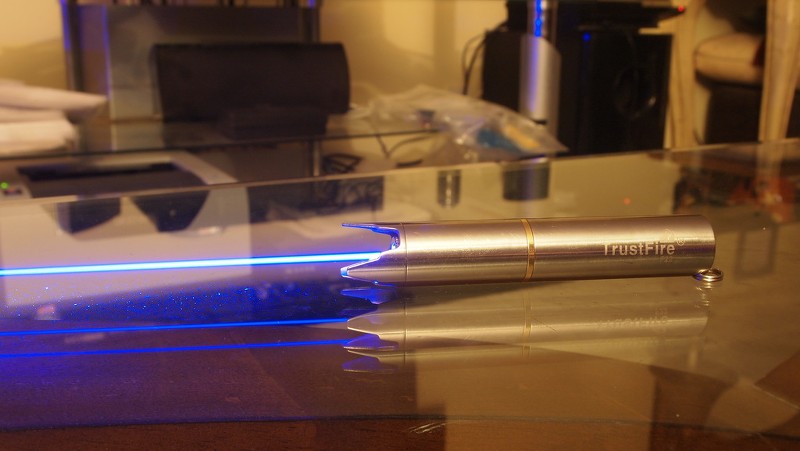
Here is a sweet little host that I have been wanting to review here for a while. I have had this host for almost 3 months but have not had the time to put it together. It is a fairly compact 14500 stainless steel host with a very aggressive tactical retaining ring. It even sports a stainless steel clicky button.:drool:
I sent the host to Flaminpyro and he made a great fitting heatsink for it. Thanks Jeff.:beer:
It does have a Transformers logo on it that I am kind of up in the air about. But it does not stand out that much anyway and if you like the logo it is all good.
The unit is powered by a single sinked Flexdrive set to 1350mA and coupled with a G-1 lens that produces 1.5W of optical power.:eg:
Here are some pictures of the host.

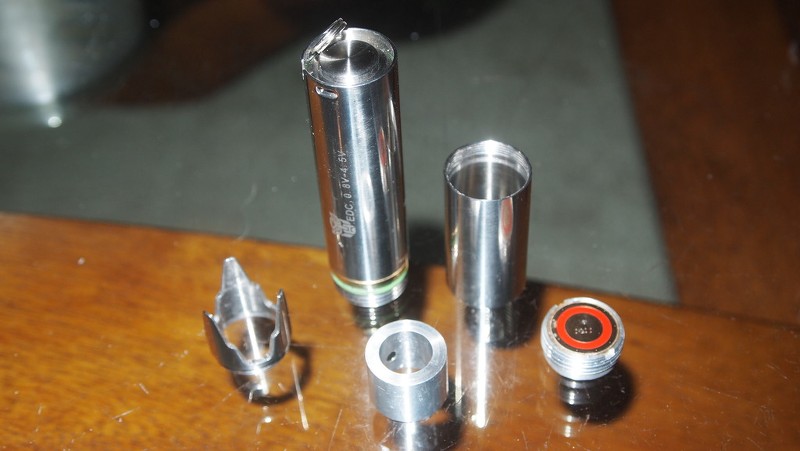
Assembly
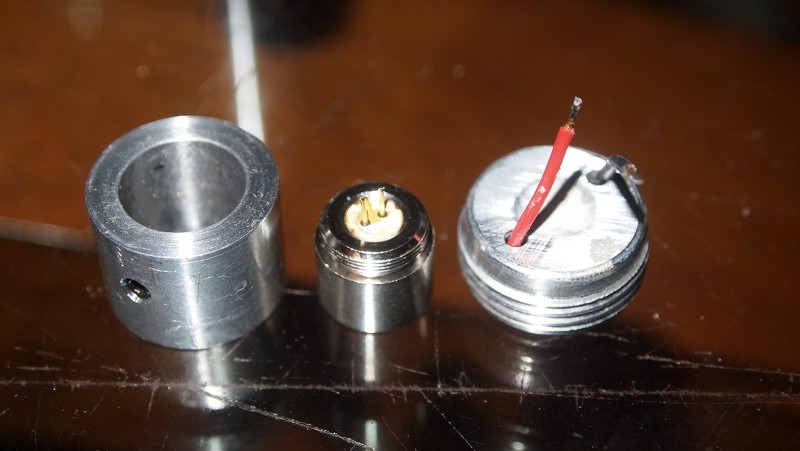
Here is how this host breaks down. Host body, host head, pill, heatsink and one mean looking retaining ring.
First I start out by setting up the pill with the driver.
It comes with a battery contact board pressed into it which we will modify slightly.
Using a small eyeglass sized flat head screwdriver I pry it out.
Once out I set up a flexdrive with a small aluminum sink on the bottom for easy attaching inside the pill. It also gives a little extra heatsinking as the pill is kind of thin.
Next I spread a little thermal adhesive inside the pill as the flexdrive will be mounted upside down on the inside as apposed to some of my previous tutorials as this host needs all the room on tom of the pill for the heatsink.
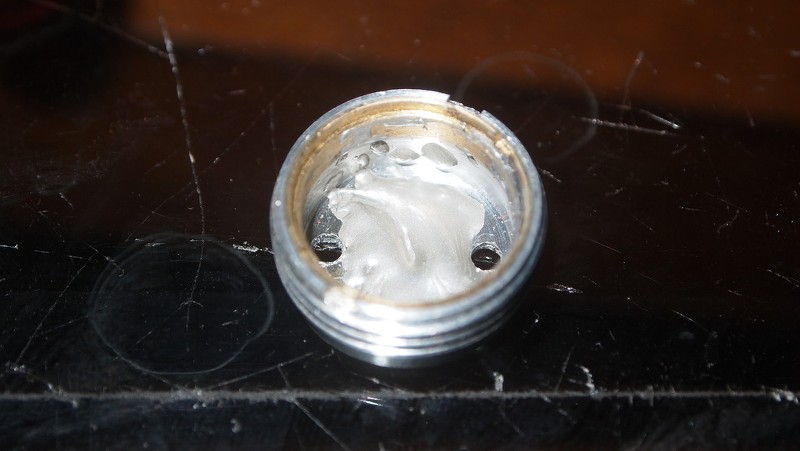
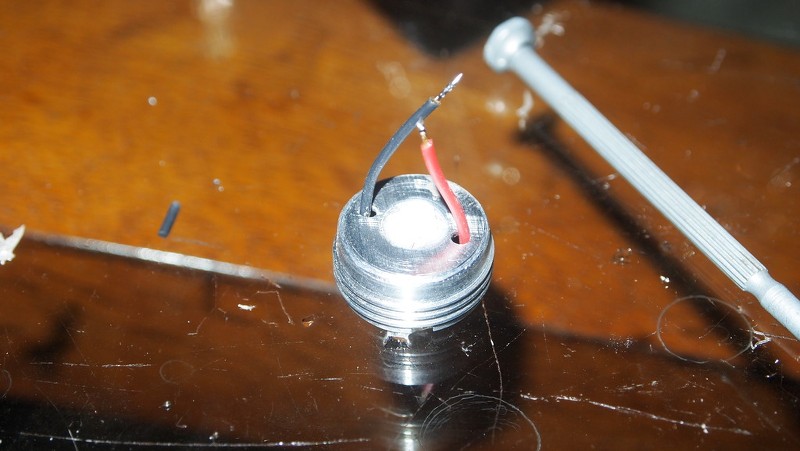
Next I ran the output wires through the holes and set the flexdrive in the pill and let it set for 5 minutes.

Now that it is set you can see I have two very nice clean looking wires coming out of the pill to connect to the diode.
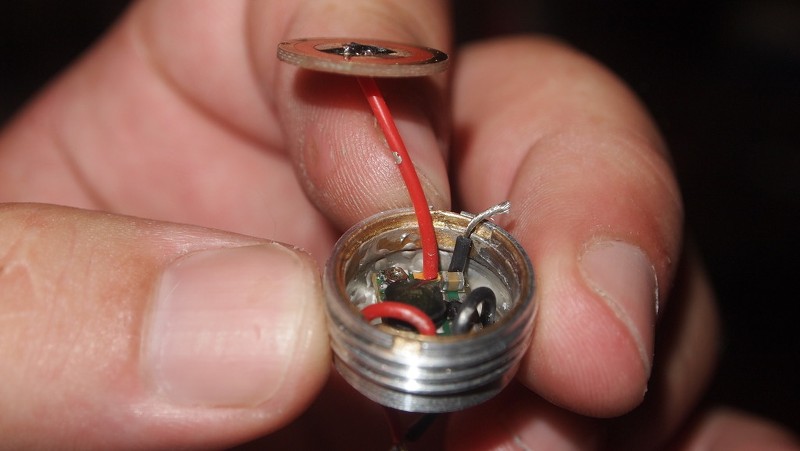
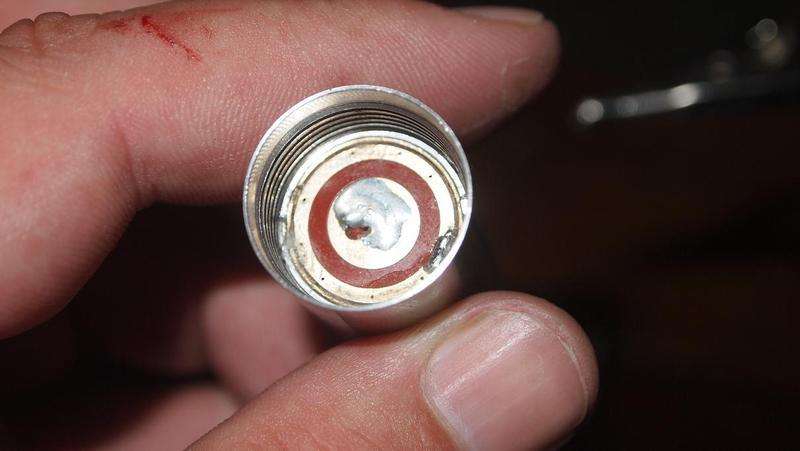
Next I am going to work on the driver inputs and modding the battery contact board. So I drilled a hole in the very center of the board for the positive lead.
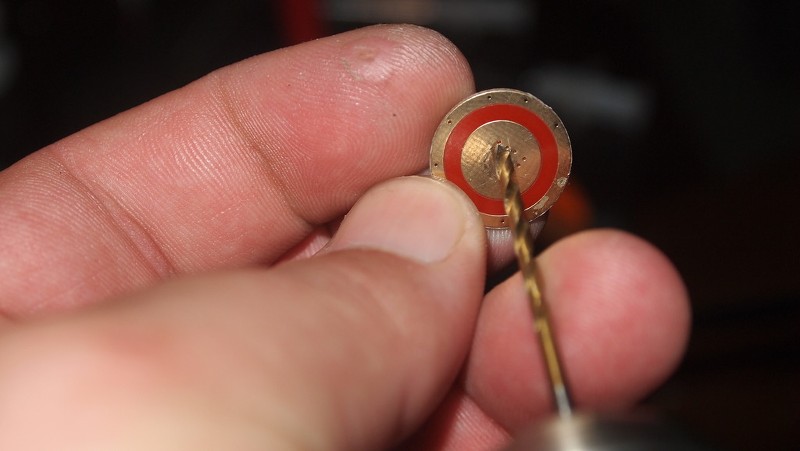
Once I have a hole I run the wire though and fold it over a tad. Then I put a dab of solder on there and let it heat it up so it spreads nicely and has a good solid connection with the lead.
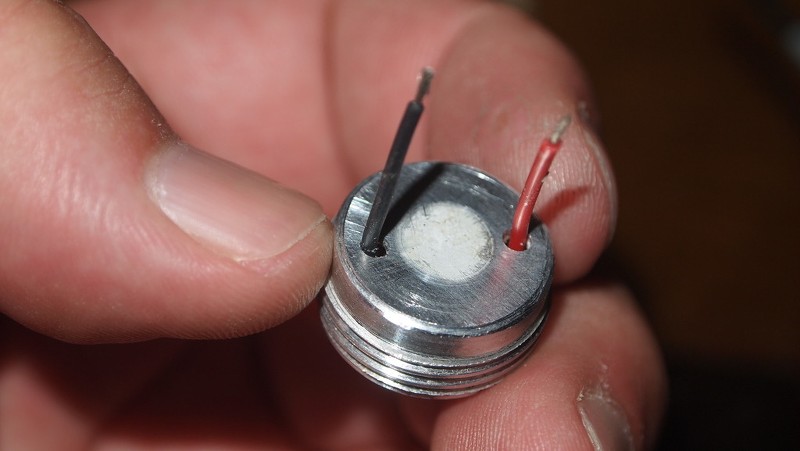
Next I strip the negative lead as it will be sandwiched between the contact board and the pill.
Then I press the driver board in and put a little thermal adhesive to seal the compartment.
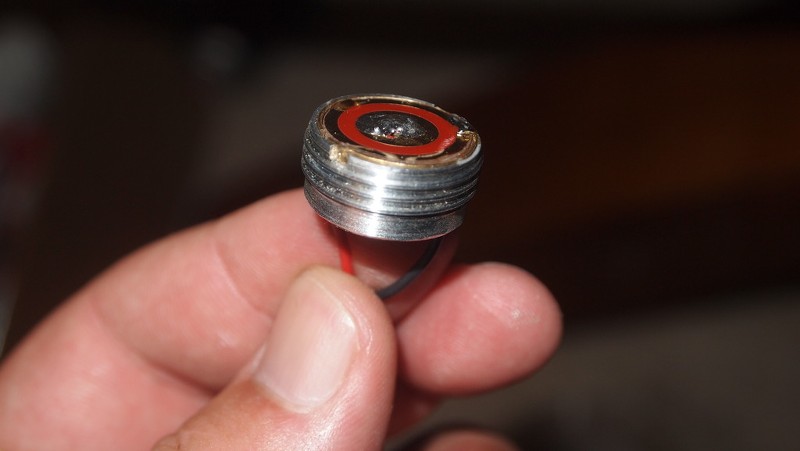
Now we have a nice little driver pocket.
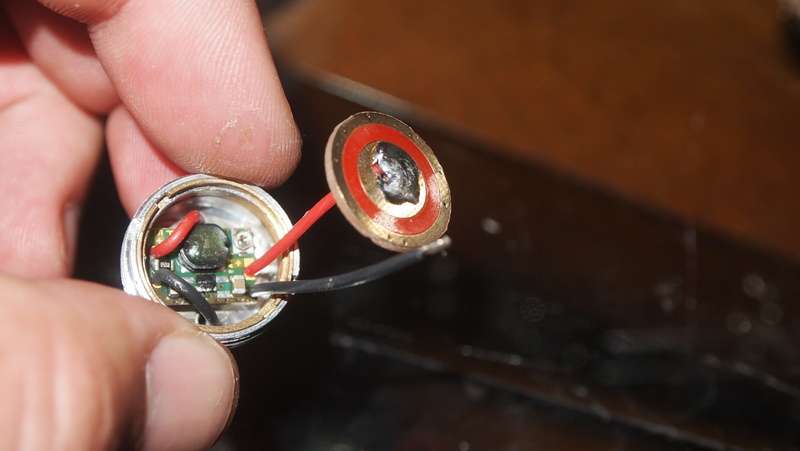
And it is on to connecting the diode to it. I have pressed a diode in a module and I can prepare the leads.
I shortened the leads to keep them from bunching up in when the unit is assembled and pretinned them.
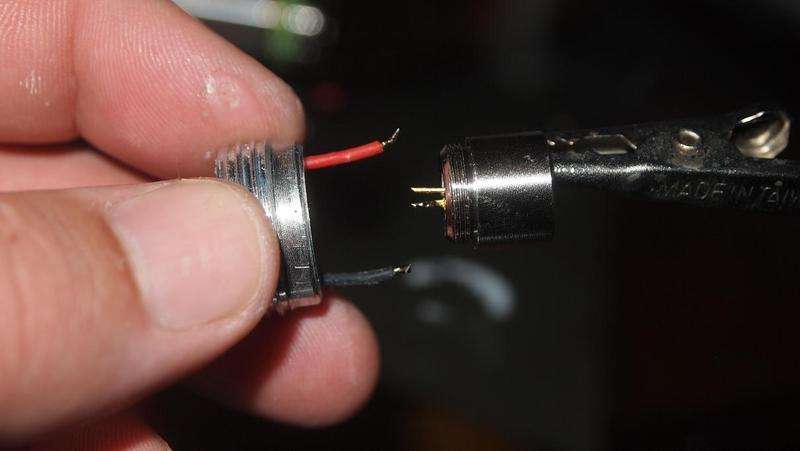
I put a little shrink tubing on the leads and soldered them to the diode.
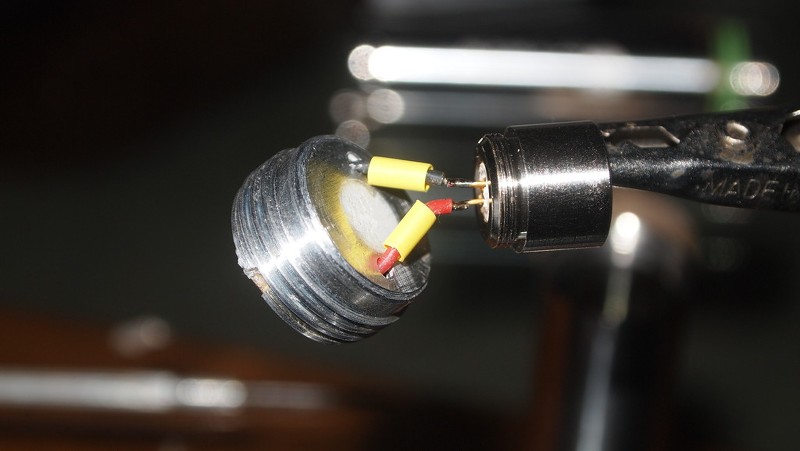
And here it is with all the soldering done.
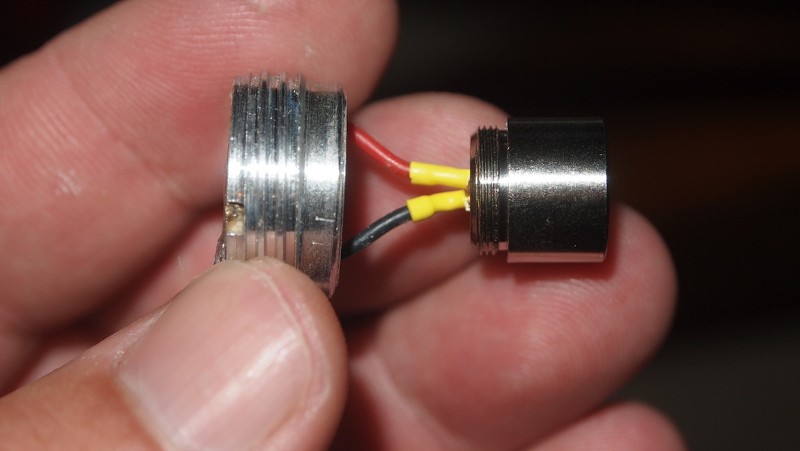
Next I put the module in the heatsink and added a little thermal adhesive to keep the pill and the heatsink as one unit keeping them from being able to turn independently as I screw it into the host. Make sure you center the heatsink on the pill as best you can or it will be difficult to get it in.
Next I screwed it all the way into the head of the host using that small sunglasses flat head screwdriver.
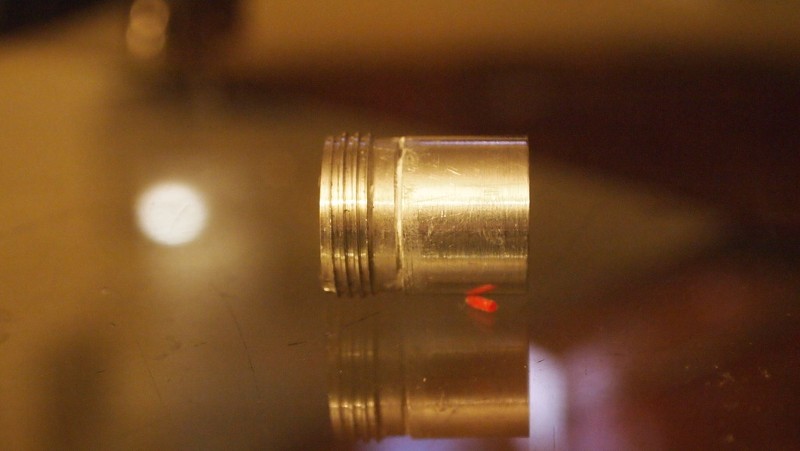
Then I screw on the retaining ring, add a lens and throw in a battery and I am ready to go.:san:
I busted out my new Ophir head 5W meeter and did a test of this sweet little guy with a G-1 lens. Peak just over 1.5W.:evil:
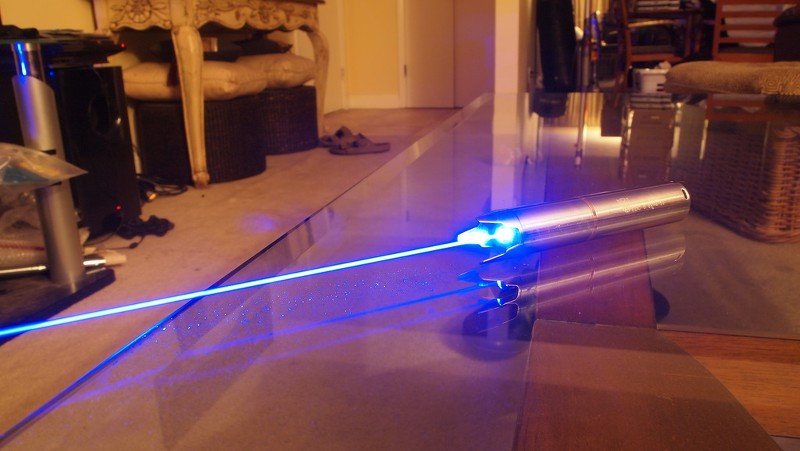
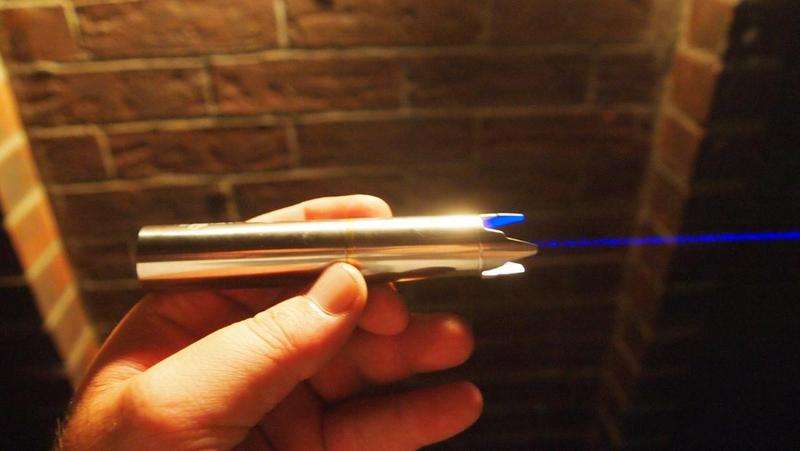
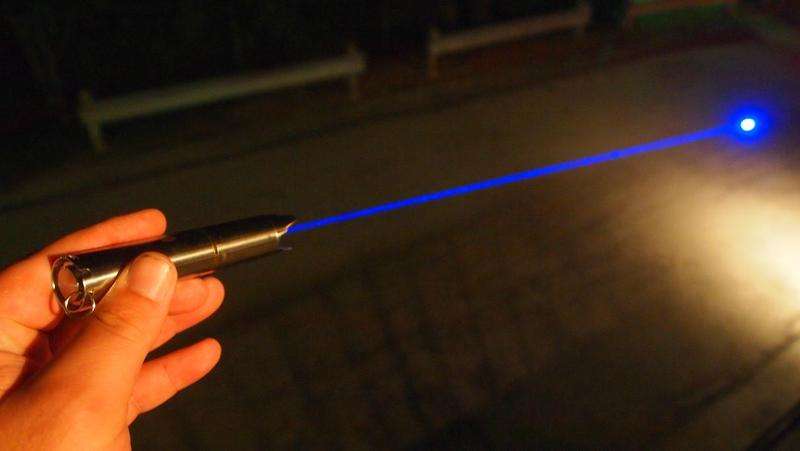
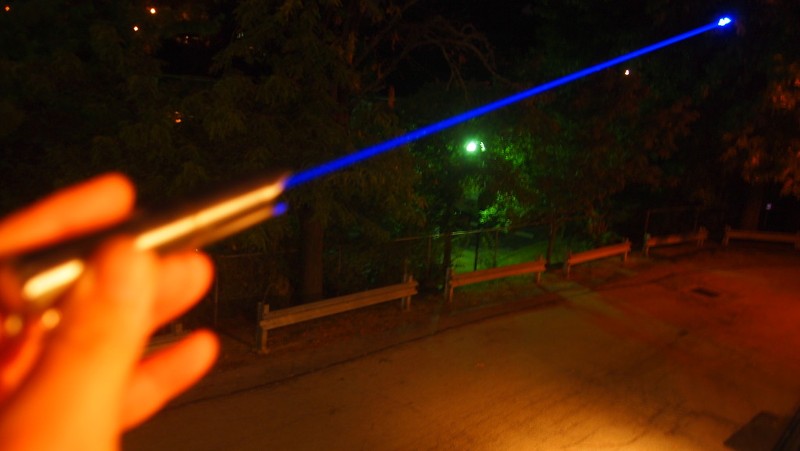
Beamshots

This is a great pocket host. The only things that I did not like about the host is it can be difficult to adjust the focus with the tactical retaining ring but it does come with a standard one as well which I lost:yabbem: and the clicky can get stuck if you press it at an odd angle. It has only happened a few times and other than the first time it happened which took me by surprise I was trying to make it do it with little success to test it. Not a big deal to me.
This is a really sweet little pocket laser that to me iis really an aggressive and great looking host and I really am a big fan of the stainless steel finish. Plus it packs a good punch for such a small host.:eg:
Thanks for reading my review/tutorial. Hope you like it.:beer:
Here is a sweet little host that I have been wanting to review here for a while. I have had this host for almost 3 months but have not had the time to put it together. It is a fairly compact 14500 stainless steel host with a very aggressive tactical retaining ring. It even sports a stainless steel clicky button.:drool:
I sent the host to Flaminpyro and he made a great fitting heatsink for it. Thanks Jeff.:beer:
It does have a Transformers logo on it that I am kind of up in the air about. But it does not stand out that much anyway and if you like the logo it is all good.
The unit is powered by a single sinked Flexdrive set to 1350mA and coupled with a G-1 lens that produces 1.5W of optical power.:eg:
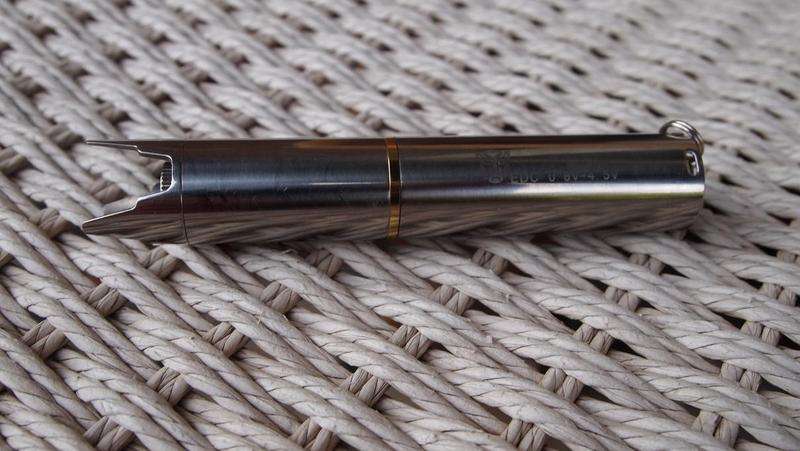
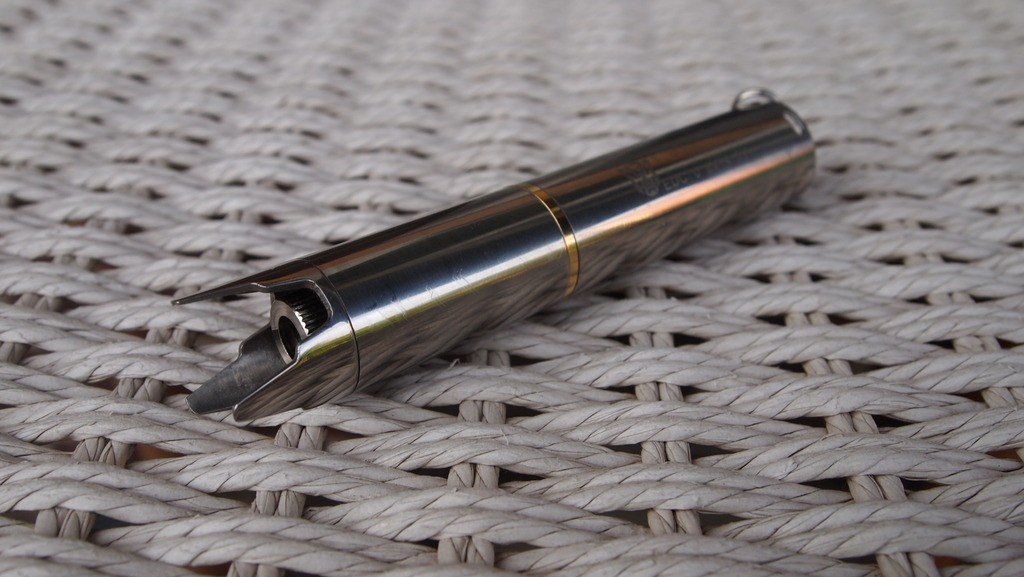
Host
Here are some pictures of the host.
Assembly
Here is how this host breaks down. Host body, host head, pill, heatsink and one mean looking retaining ring.
First I start out by setting up the pill with the driver.
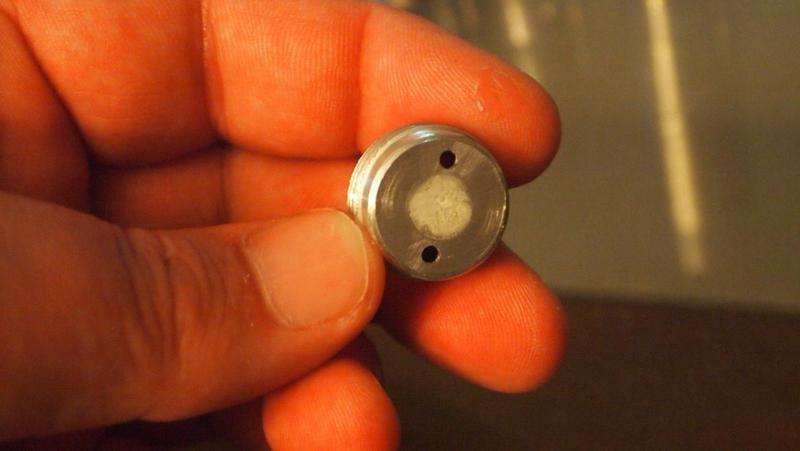
It comes with a battery contact board pressed into it which we will modify slightly.
Using a small eyeglass sized flat head screwdriver I pry it out.
Once out I set up a flexdrive with a small aluminum sink on the bottom for easy attaching inside the pill. It also gives a little extra heatsinking as the pill is kind of thin.
Next I spread a little thermal adhesive inside the pill as the flexdrive will be mounted upside down on the inside as apposed to some of my previous tutorials as this host needs all the room on tom of the pill for the heatsink.
Next I ran the output wires through the holes and set the flexdrive in the pill and let it set for 5 minutes.
Now that it is set you can see I have two very nice clean looking wires coming out of the pill to connect to the diode.
Next I am going to work on the driver inputs and modding the battery contact board. So I drilled a hole in the very center of the board for the positive lead.
Once I have a hole I run the wire though and fold it over a tad. Then I put a dab of solder on there and let it heat it up so it spreads nicely and has a good solid connection with the lead.
Next I strip the negative lead as it will be sandwiched between the contact board and the pill.
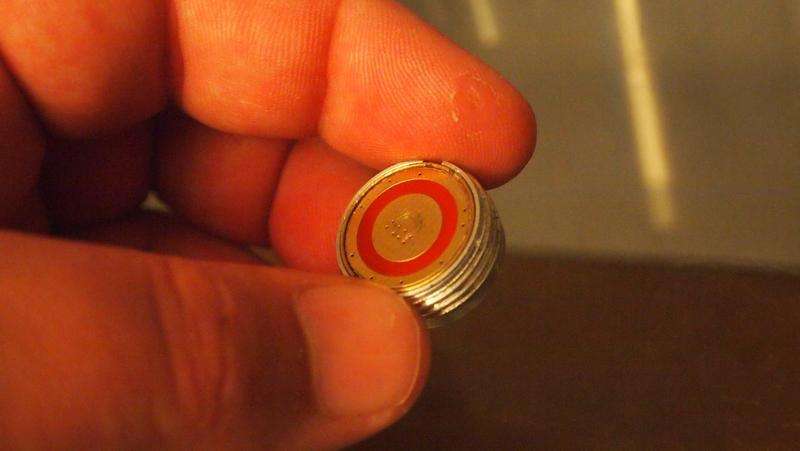
Then I press the driver board in and put a little thermal adhesive to seal the compartment.
Now we have a nice little driver pocket.
And it is on to connecting the diode to it. I have pressed a diode in a module and I can prepare the leads.
I shortened the leads to keep them from bunching up in when the unit is assembled and pretinned them.
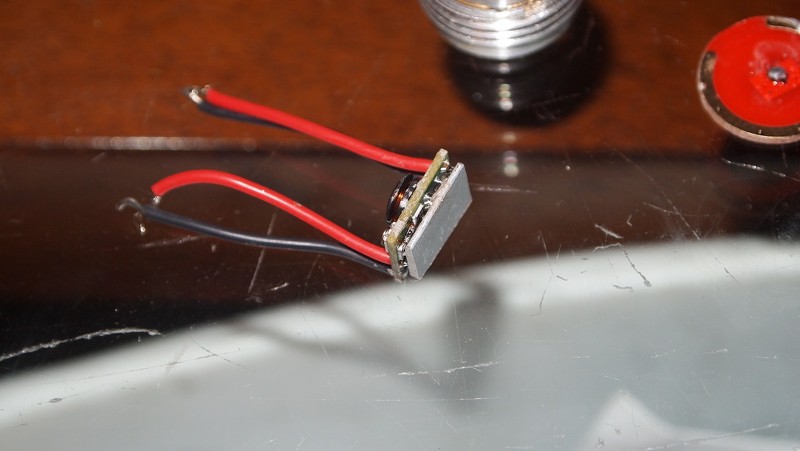
I put a little shrink tubing on the leads and soldered them to the diode.
And here it is with all the soldering done.
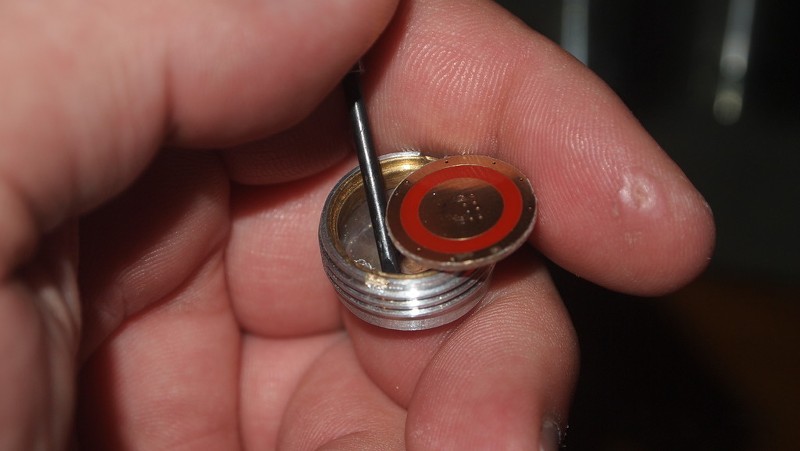
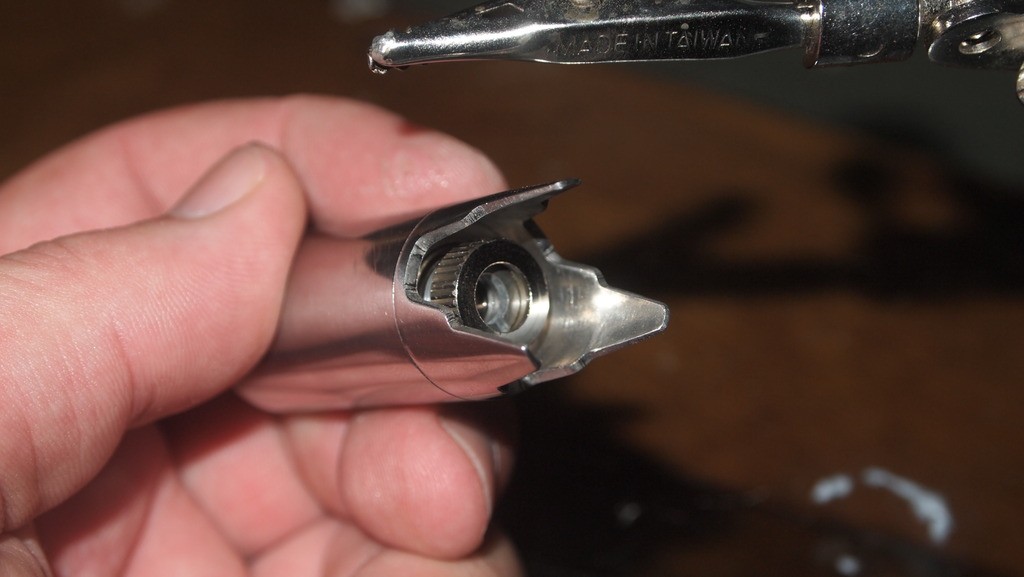
Next I put the module in the heatsink and added a little thermal adhesive to keep the pill and the heatsink as one unit keeping them from being able to turn independently as I screw it into the host. Make sure you center the heatsink on the pill as best you can or it will be difficult to get it in.
Next I screwed it all the way into the head of the host using that small sunglasses flat head screwdriver.
Then I screw on the retaining ring, add a lens and throw in a battery and I am ready to go.:san:
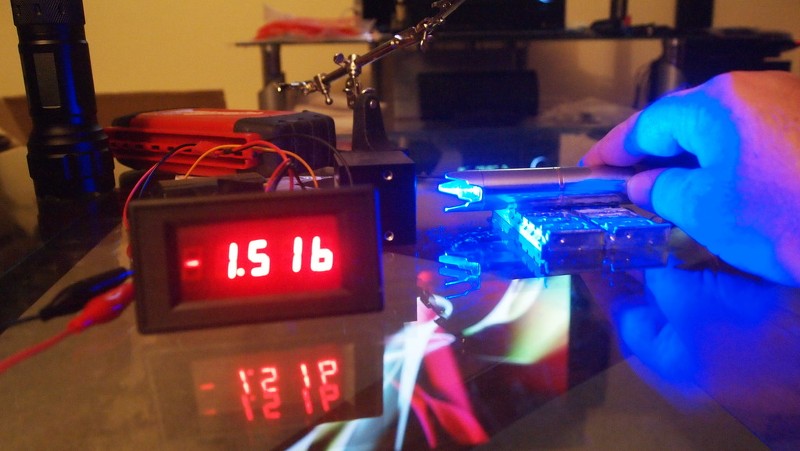
LPM Test
I busted out my new Ophir head 5W meeter and did a test of this sweet little guy with a G-1 lens. Peak just over 1.5W.:evil:
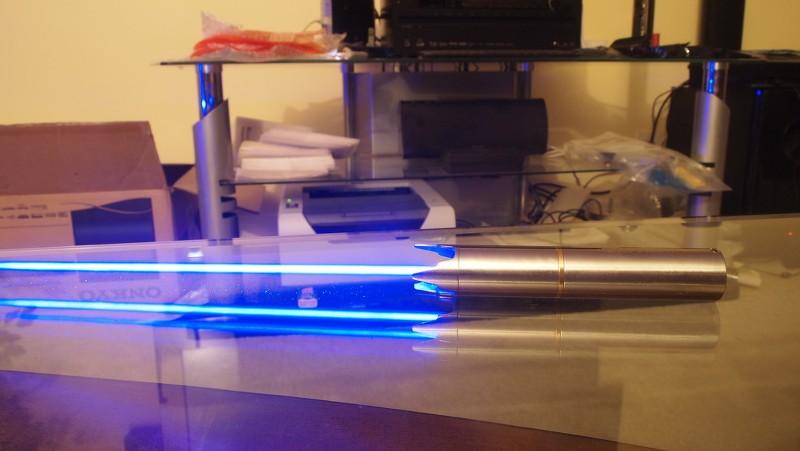
Beamshots
Conclusion
This is a great pocket host. The only things that I did not like about the host is it can be difficult to adjust the focus with the tactical retaining ring but it does come with a standard one as well which I lost:yabbem: and the clicky can get stuck if you press it at an odd angle. It has only happened a few times and other than the first time it happened which took me by surprise I was trying to make it do it with little success to test it. Not a big deal to me.
This is a really sweet little pocket laser that to me iis really an aggressive and great looking host and I really am a big fan of the stainless steel finish. Plus it packs a good punch for such a small host.:eg:
Thanks for reading my review/tutorial. Hope you like it.:beer:
Last edited:


")
