

IsaacT
0
- Joined
- Aug 25, 2010
- Messages
- 5,947
- Points
- 83
Introduction:
Okay, I have had the parts for a new Leadlight build sitting on my desk for a few weeks now, and I really thought it would be nice to do a little tutorial and build thread all wrapped up in one. So, first let me start by introducing the objective. I will then talk briefly about all the necessary materials. Third, I will break down each required step and show pictures to illustrate what was done whenever possible. I will close the tutorial portion there and begin discussing the stats of this particular laser, a la build thread. Lastly, I plan to close with beamshots and video(when available).
Section 1: Objectives
My objectives in building a fixed focus Leadlight Laser is to assemble a quality oriented laser with better than average divergence; packaged in such a way that everyday carry is possible without compromising the best possible lens position.
Section 2: Materials
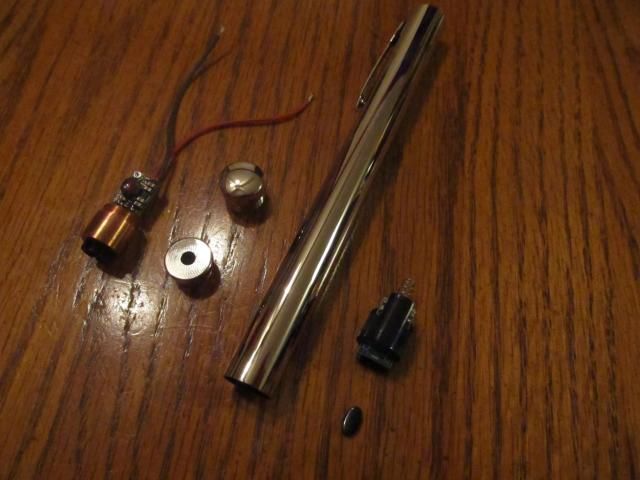
There are relatively few materials needed to create a Leadlight build, although going for fixed focus raises some problems. Here are the standard materials one would need for any Leadlight Build:
1. Leadlight Host - I went with the switch option from Jayrob to simplify production. For only 3 dollars extra, it is one of those upgrades that one would be foolish not to take advantage of.
2. Diode w/ Module - For this build, I went with one of DTR's Low Divergence Single Mode 650nm 3.8mm Diodes, but honestly any of the Single Mode diodes offered by DTR lend themselves exceedingly well to the Leadlight host; especially with fixed focus.
3. Driver - For these, you really always want to go with a micro driver. For this particular build, a flex-drive was used.
4. Battery and Dummy Battery - For these lasers, since a micro driver is needed, one will most likely end up with a one battery build in a two battery host. I do not like using primaries, so I picked up some 10440 Li-Ion batteries and some battery dummies from Fasttech.
Section 3: Required Steps
1. How to achieve a great Fixed Focus:
First, you must affix your micro driver to your diode(if it id not come preinstalled), and then you must go outside at night and use a battery to power it for brief intervals. You want to focus it as far away as you can see it, and then slowly adjust the lens(no focus adapter!!!) until the beam is at its most precise, pinpoint setting. At that point you have essentially found its best fixed focus point. Then all that is left is adhesing the lens to the module in that position.
One of the hurdles I had to go through was finding an appropriate adhesive to hold the lens assembly in place with. At first I used Krazy Glue, but even a dab or two would produce adhesive vapors which would cause the lens to develop what I call "Beam Fuzz". Beam fuzz makes a halo of light around the dot due to light being diffracted through the vapors.
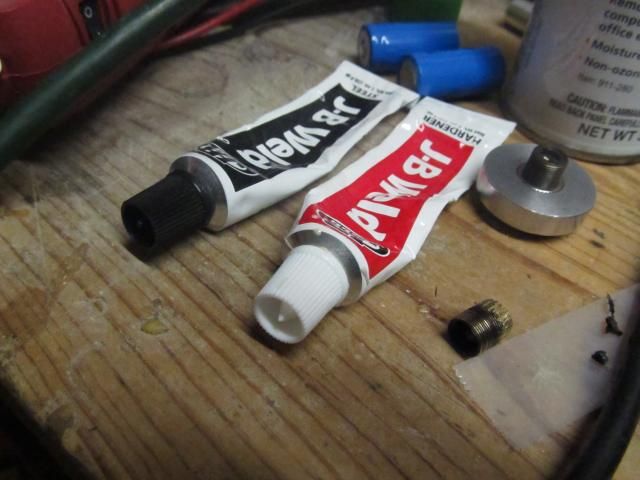
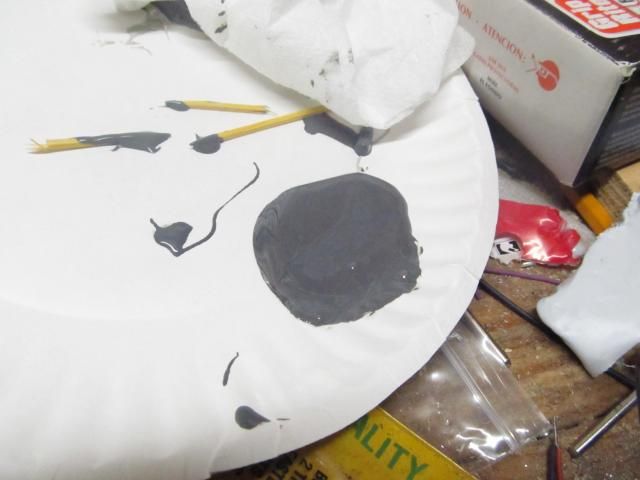
After using J-B Weld to work on my MS-SSW build, however, I decided to ditch the Krazy Glue and try something new. I had to be careful with the 2 part epoxy, as I was afraid of dripping any on the lens. So I used a toothpick, and slowly and carefully traced where the lens assembly and module met until there was a thin layer of two part epoxy going all the way around. Like so:
2. Assemble the Laser
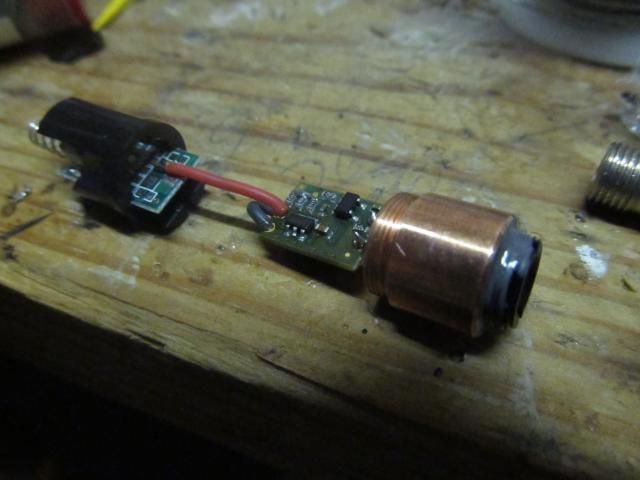
The key here is getting the leads shortened down to their minimum length. I pull the negative lead wire to the case pin of the diode to judge the length and then cut the wire off just past that. I then strip the wire, tin the lead, and solder it to the case pin as cleanly as possible.
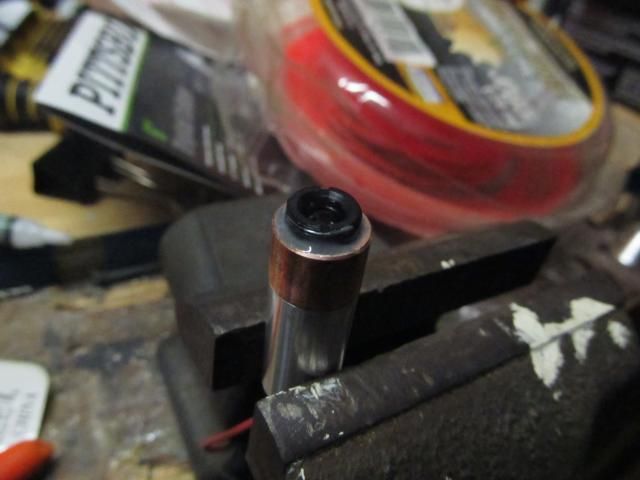
Next, you want to take the switch board setup and tin the output pad with solder. You can see it in the following photo:
After that, you want to make sure and cut the positive lead wire fairly short and tin it.
Then you want to place the positive lead on top of the pad and quickly solder them together. This should be very easy if you remembered to tin the pad. The krazy glue will come in handy on the next part, as gluing the sides of the circuit board to the spacer will keep it from sliding from pressure.
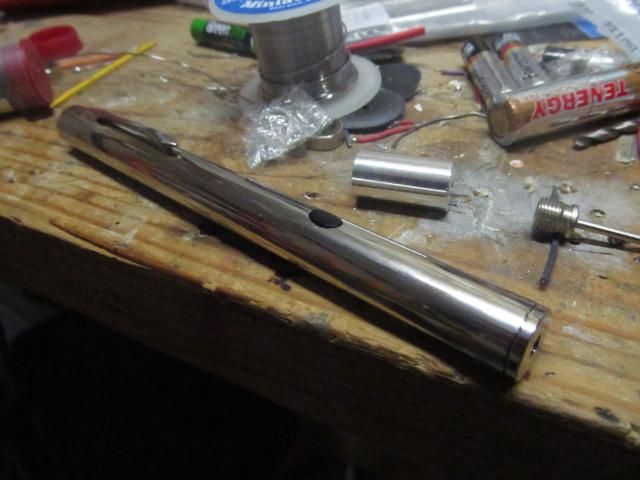
The rest is mostly easy. The entire assembly is inserted into the laser. During this process you must take care to keep the black spacer aligned such that when you affix the button the switch will easily depress(if it is diagonal it will not work well. If it is too far back it will not work well. If it is too forward you assembly will not fit in the laser.). What I usually do is scratch the place where I want to apply the button so that I can see it under the hole and center it. Then it is just a patience game.
After the button is adhered to the black plastic spacer, you must insert the module as far as it will go....it will go farther than you think. One thing that helps here is to hold the button down. That will apply a holding force to the assembly to keep it where you want it.
Once everything is inside the laser, you must press the aperture cap onto the front. This is probably the hardest part as it is a nearly pressfit design and does NOT like playing well with others. Just use as much force as you are comfortable with. DO NOT use the button as leverage as it will pop off. And there you have it, one put together leadlight laser!
But the 100 dollar question is: Does it lase?
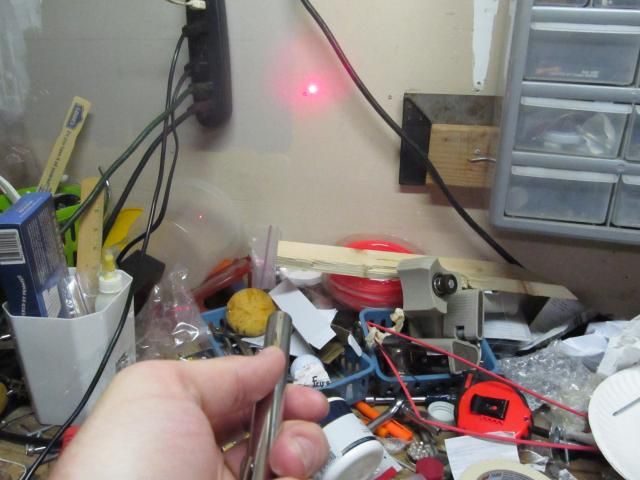
YES!!! If you have followed all of these steps then you should have a well put together laser. It is not an easy build, but with a little patience you can turn this somewhat frustrating thing into a very nice laser.
Section 4: This Build - Stats, Beamshots, and Video!!!
Stats:
Wavelength: 650nm
Package Type: TO38
Beam Mode: TEM00
Output: 190mW
Duty Cycle: Coming Soon
Battery Configuration: 1 x 10440 Li-ion
Divergence: .162mRad
Diameter at Aperture: 4.07mm
Diameter at 9.5 Meters: 5.61mm
Measurements were taken with calibrated Calipers. Safety glasses were used to allow easy view of the dot at stated distances.
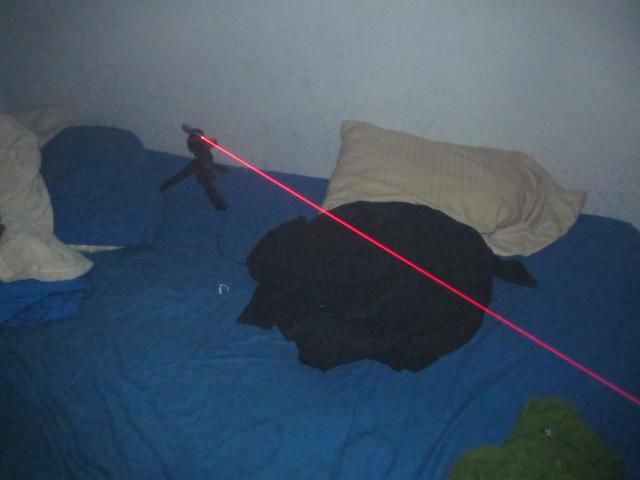
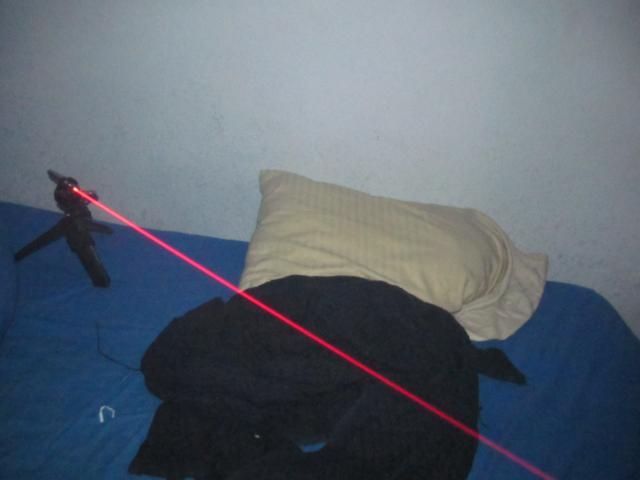
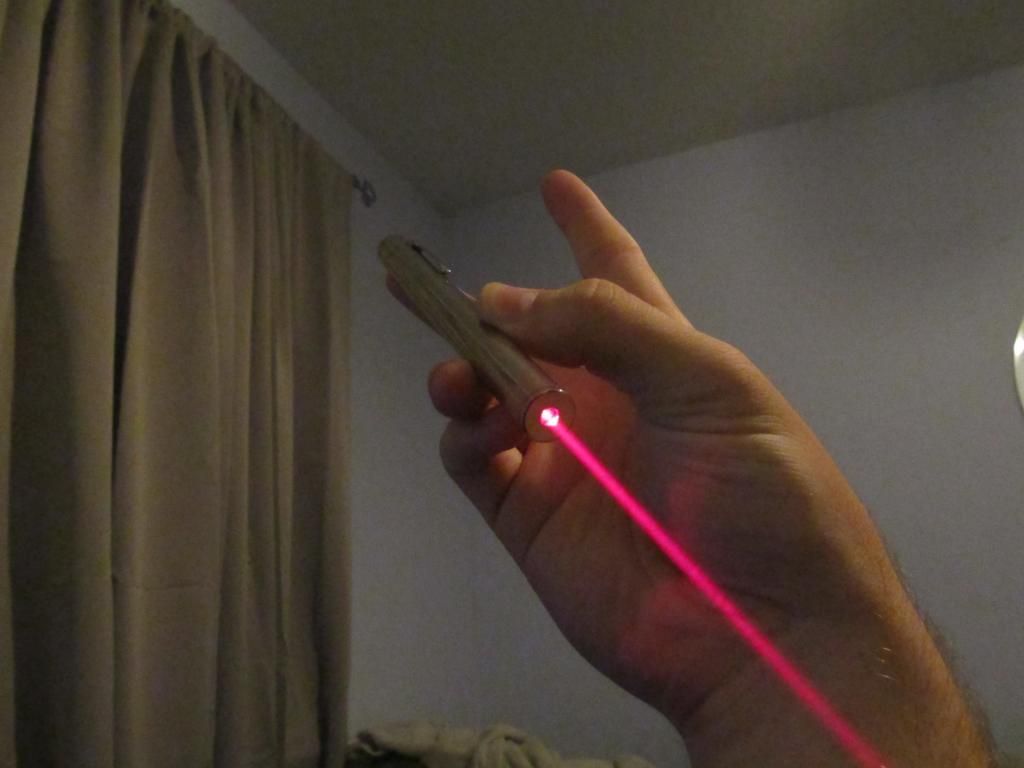
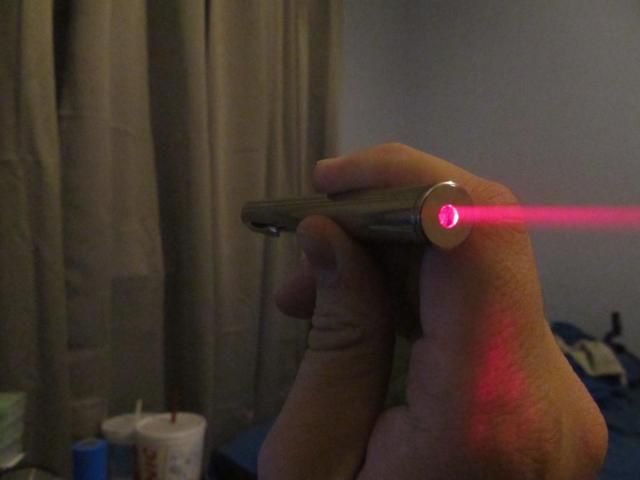
Beamshots: These are going to have to do for now as I am exhausted. I did not put much smoke out, although the pics look a little hazy. I will see what I can do tomorrow.
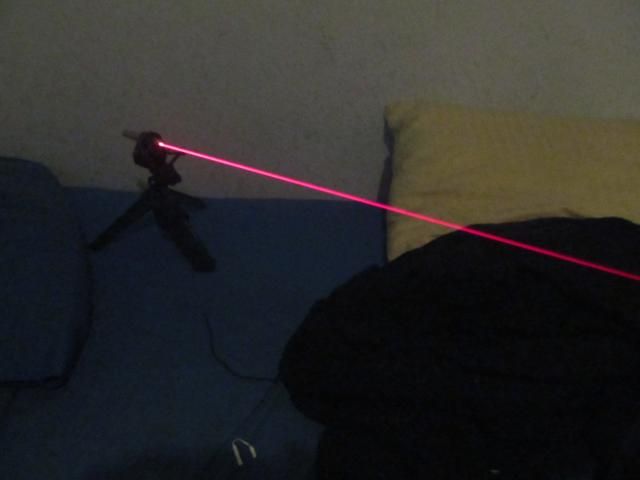
Video: I am going to try to get a balloon popping video up soon, we will see how busy I get next couple of days.
Closing Remarks
I hope that at the very least this was a good read, and maybe at the best a nice option for those of you who may want to build a fixed focus laser. The J-B Weld worked perfectly, as I am experiencing NO halo around the dot. It is my first perfectly clean Fixed Focus build. Make sure to let it sit for a good 5 hours though. Thanks for reading, rest assured any and all questions or comments left will be read and, to the best of my ability, responded to.
Thanks,
Isaac
Okay, I have had the parts for a new Leadlight build sitting on my desk for a few weeks now, and I really thought it would be nice to do a little tutorial and build thread all wrapped up in one. So, first let me start by introducing the objective. I will then talk briefly about all the necessary materials. Third, I will break down each required step and show pictures to illustrate what was done whenever possible. I will close the tutorial portion there and begin discussing the stats of this particular laser, a la build thread. Lastly, I plan to close with beamshots and video(when available).
Section 1: Objectives
My objectives in building a fixed focus Leadlight Laser is to assemble a quality oriented laser with better than average divergence; packaged in such a way that everyday carry is possible without compromising the best possible lens position.
Section 2: Materials

There are relatively few materials needed to create a Leadlight build, although going for fixed focus raises some problems. Here are the standard materials one would need for any Leadlight Build:
1. Leadlight Host - I went with the switch option from Jayrob to simplify production. For only 3 dollars extra, it is one of those upgrades that one would be foolish not to take advantage of.
2. Diode w/ Module - For this build, I went with one of DTR's Low Divergence Single Mode 650nm 3.8mm Diodes, but honestly any of the Single Mode diodes offered by DTR lend themselves exceedingly well to the Leadlight host; especially with fixed focus.
3. Driver - For these, you really always want to go with a micro driver. For this particular build, a flex-drive was used.
4. Battery and Dummy Battery - For these lasers, since a micro driver is needed, one will most likely end up with a one battery build in a two battery host. I do not like using primaries, so I picked up some 10440 Li-Ion batteries and some battery dummies from Fasttech.
Section 3: Required Steps
1. How to achieve a great Fixed Focus:
First, you must affix your micro driver to your diode(if it id not come preinstalled), and then you must go outside at night and use a battery to power it for brief intervals. You want to focus it as far away as you can see it, and then slowly adjust the lens(no focus adapter!!!) until the beam is at its most precise, pinpoint setting. At that point you have essentially found its best fixed focus point. Then all that is left is adhesing the lens to the module in that position.
One of the hurdles I had to go through was finding an appropriate adhesive to hold the lens assembly in place with. At first I used Krazy Glue, but even a dab or two would produce adhesive vapors which would cause the lens to develop what I call "Beam Fuzz". Beam fuzz makes a halo of light around the dot due to light being diffracted through the vapors.
After using J-B Weld to work on my MS-SSW build, however, I decided to ditch the Krazy Glue and try something new. I had to be careful with the 2 part epoxy, as I was afraid of dripping any on the lens. So I used a toothpick, and slowly and carefully traced where the lens assembly and module met until there was a thin layer of two part epoxy going all the way around. Like so:


2. Assemble the Laser
The key here is getting the leads shortened down to their minimum length. I pull the negative lead wire to the case pin of the diode to judge the length and then cut the wire off just past that. I then strip the wire, tin the lead, and solder it to the case pin as cleanly as possible.


Next, you want to take the switch board setup and tin the output pad with solder. You can see it in the following photo:

After that, you want to make sure and cut the positive lead wire fairly short and tin it.

Then you want to place the positive lead on top of the pad and quickly solder them together. This should be very easy if you remembered to tin the pad. The krazy glue will come in handy on the next part, as gluing the sides of the circuit board to the spacer will keep it from sliding from pressure.

The rest is mostly easy. The entire assembly is inserted into the laser. During this process you must take care to keep the black spacer aligned such that when you affix the button the switch will easily depress(if it is diagonal it will not work well. If it is too far back it will not work well. If it is too forward you assembly will not fit in the laser.). What I usually do is scratch the place where I want to apply the button so that I can see it under the hole and center it. Then it is just a patience game.
After the button is adhered to the black plastic spacer, you must insert the module as far as it will go....it will go farther than you think. One thing that helps here is to hold the button down. That will apply a holding force to the assembly to keep it where you want it.
Once everything is inside the laser, you must press the aperture cap onto the front. This is probably the hardest part as it is a nearly pressfit design and does NOT like playing well with others. Just use as much force as you are comfortable with. DO NOT use the button as leverage as it will pop off. And there you have it, one put together leadlight laser!

But the 100 dollar question is: Does it lase?

YES!!! If you have followed all of these steps then you should have a well put together laser. It is not an easy build, but with a little patience you can turn this somewhat frustrating thing into a very nice laser.
Section 4: This Build - Stats, Beamshots, and Video!!!
Stats:
Wavelength: 650nm
Package Type: TO38
Beam Mode: TEM00
Output: 190mW
Duty Cycle: Coming Soon
Battery Configuration: 1 x 10440 Li-ion
Divergence: .162mRad
Diameter at Aperture: 4.07mm
Diameter at 9.5 Meters: 5.61mm
Measurements were taken with calibrated Calipers. Safety glasses were used to allow easy view of the dot at stated distances.
Beamshots: These are going to have to do for now as I am exhausted. I did not put much smoke out, although the pics look a little hazy. I will see what I can do tomorrow.


Video: I am going to try to get a balloon popping video up soon, we will see how busy I get next couple of days.
Closing Remarks
I hope that at the very least this was a good read, and maybe at the best a nice option for those of you who may want to build a fixed focus laser. The J-B Weld worked perfectly, as I am experiencing NO halo around the dot. It is my first perfectly clean Fixed Focus build. Make sure to let it sit for a good 5 hours though. Thanks for reading, rest assured any and all questions or comments left will be read and, to the best of my ability, responded to.
Thanks,
Isaac


")
