Welcome to Laser Pointer Forums - discuss green laser pointers, blue laser pointers, and all types of lasers

LPF Donation via Stripe | LPF Donation - Other Methods

Links below open in new window

ArcticMyst Security by Avery

Pen Laser Building Questions.

Joined
Oct 2, 2015
Messages
177
Points
0
Hello all,

SPECS of the build.
-I'm building a 1.5W 445nm (M140)laser w/X-Drive/SXD
-8V with 2 10440

HOST I'm building laser into.


First of all.
Do anyone here know what a "case" wire means?
I followed the styropyro tutorial on these kind of pen build and it's saying the "case" wire is touching the "case" or "the host". Not sure what that meant.:wtf:


(A picture to a better understanding)


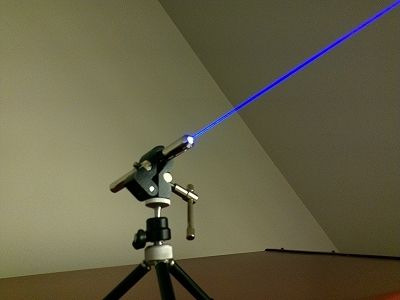
Also, if anyone can show me how to add a led indicator as shown below.


Thanks
 
Last edited:


Joined
May 14, 2013
Messages
3,438
Points
0
So does it work ok? That is a lot of power for a pen host, I predict a duty cycle of 5-10 seconds. A case wire can mean two different things, in this case it means a wire that makes contact with the host, the host makes the connection to one side of the battery, it looks like yours is wired host positive, +side of the battery to the tailcap, unless you got your wires backwards, unusual for a blue laser but ok, all the blue diodes are case neutral. A case wire can also refer to a wire connected to the case pin of the diode, not all diodes have a case pin but most do including the M140 although it isn't being used here. Most of the diodes we use are case neutral but some red diodes are case negative, and IR diodes as well as the DPSS modules that use them are case positive, so with anything case+ or case- extra care must be taken to be sure you don't make a mistake or it will go up in a puff of smoke.

Alan
 
Joined
Oct 2, 2015
Messages
177
Points
0
So does it work ok? That is a lot of power for a pen host, I predict a duty cycle of 5-10 seconds. A case wire can mean two different things, in this case it means a wire that makes contact with the host, the host makes the connection to one side of the battery, it looks like yours is wired host positive, +side of the battery to the tailcap, unless you got your wires backwards, unusual for a blue laser but ok, all the blue diodes are case neutral. A case wire can also refer to a wire connected to the case pin of the diode, not all diodes have a case pin but most do including the M140 although it isn't being used here. Most of the diodes we use are case neutral but some red diodes are case negative, and IR diodes as well as the DPSS modules that use them are case positive, so with anything case+ or case- extra care must be taken to be sure you don't make a mistake or it will go up in a puff of smoke.

Alan

Thanks for the advice here. Do you mean the M140 is a different setup? I am using an "A" Type M140 with a 1-1.5A X-Drive so which the power is around 1-1.4W Maximum. Duty cycle Should be 30sec at least but with just pointing it won't do too much heat.

If there's a better diode for Visibility and less heat, please tell me which I should go with, visibility is the purpose for this build.

For the build. I'll make a picture of what I think should go and you decide, I'll upload it in a moment,

Thanks
 
Last edited:
Joined
May 14, 2013
Messages
3,438
Points
0
I am very skeptical of 30 seconds in a pen host but for visibility it should be good.

Alan
 
Joined
Oct 2, 2015
Messages
177
Points
0
^^ OK. I added some pics I drew.
So basically, all it left to do it put it in the host? If Yes- I'll solder it like that.
And, How can you make the red wire "Touch" the host?
It would be also better if you can tell me how to add an led indicator.
Important: Is the white wire needed for this build?


Last edited:
Joined
May 14, 2013
Messages
3,438
Points
0
The white wire would be to the case pin, no it's not needed, although there is another way. It looks right to me. It's difficult for me to advise you, I have built a few lasers but never in a pen host so it's not easy without seeing it in person. For connecting the red wire to the host my first thought is to see if the end of the wire will fit between the module and the host, is it a tight fit? Do you have a DMM? I am assuming the host is bare metal and doesn't have clear anodizing on it. In any case if it doesn't turn on the first time don't continue to try or you will fry your x-drive after a few seconds. Sorry if that doesn't sound encouraging, I myself haven't fried a driver or diode yet.

Where is Pman? He should be commenting here. He can do pen builds blindfolded with one hand.

Alan
 
Joined
Oct 2, 2015
Messages
177
Points
0
The module and wire will not fit in the middle. It's a tight fit even for the module itself but not like you can't get it out after you press it in. Also, what's a DMM?

The host is bare metal inside I think, have to find someone who built one of theses before to know, I'll see tomorrow.

Also, it would be nice to have an led indicator and would look cool matching the laser color.
 
Last edited:
Joined
May 14, 2013
Messages
3,438
Points
0
The module and wire will not fit in the middle. It's a tight fit even for the module itself but not like you can't get it out after you press it in. Also, what's a DMM?

The host is bare metal inside I think, have to find someone who built one of theses before to know, I'll see tomorrow.

Also, it would be nice to have an led indicator and would look cool matching the laser color.

A DMM is a digital multimeter, I highly recommended you have one and know how to use it. If you could test from the tailcap threads to the copper module and see if it's making good contact then you could solder the red wire to the white one and that will work. Be sure to never put the batteries in backwards.

By the way, if you're going for visibility I recommend you go for an overdriven PLP520-B1 diode, should give you max 200-250mW and a lot of brightness, or an under driven NDG700 diode, under driven as to not produce too much heat. https://sites.google.com/site/dtrlpf/home/diodes

Yes the NDG700 would be way brighter, also very expensive, the PLP520-B1 would be a better choice for a pen, not sure if it would be brighter or not.

Alan
 

Gabe

0
Joined
Jan 10, 2015
Messages
1,147
Points
83
Yes the NDG700 would be way brighter, also very expensive, the PLP520-B1 would be a better choice for a pen, not sure if it would be brighter or not.

Alan

That's right, more expensive too. According to the good ol brightness calculator, 220mW of 520 is brighter still than 1.6W of 445. So Jersagfast, you would want to buy the PLP520-B1 diode instead, it's brighter and outputs less heat.
 
Joined
May 14, 2013
Messages
3,438
Points
0
That's right, more expensive too. According to the good ol brightness calculator, 220mW of 520 is brighter still than 1.6W of 445. So Jersagfast, you would want to buy the PLP520-B1 diode instead, it's brighter and outputs less heat.

Am not sure I trust that brightness calculator, but even my 82mW PL520 has a very visible beam but my 1.5W M140 is several times brighter, but at 220mW or so of 520nm that may make the difference, maybe someone with both will comment on this. Another thing though if he buys the PLP520-B1 complete module with driver from DTR, it will have a boost driver, then he needs a dummy battery or he can use two AAA and get very short battery life.

Alan
 
Joined
Oct 2, 2015
Messages
177
Points
0
Apparently, the "A" Type M140 is much cheaper than an Plp520b1. It's not worth the first try, if I fail.

I'd consider getting it after I finishing this build, then buy a bunch of these hosts for future builds.
 
Last edited:

BowtieGuy

0
LPF Site Supporter
Joined
Oct 14, 2012
Messages
6,090
Points
113
I am very skeptical of 30 seconds in a pen host but for visibility it should be good.

Alan

I've got a chrome pen host like this with the same diode, and an output of 1.4W, and I would have to agree with Pi on this, I wouldn't go more than 10~15 secs tops with this at 1.5W.
I would also allow plenty of time between "on" cycles, as these don't cool off very rapidly.

With that being said, this is a fun pen to have, it definitely has that "Wow" factor, just be sure and watch your duty cycles! :D

Here's a pic of mine.

8a29fe88-19e1-4563-baec-3d7e683dd44a_zpsciryl8hs.jpg
 
Last edited:
Joined
Jul 4, 2012
Messages
2,834
Points
63
>1W pens are great, don't be hatin! :D

Instead of running that case wire down the host, just solder it to the case pin of the diode. I would suggest soldering the positive driver input to the case pin of your diode, that way your batteries will go in with the positive side towards the tailcap. Then the "button" top of the battery will contact the rear cap, instead of the flat side, which wouldn't work because it's flat (well it may work, but not very well).

And if you want to use an LED like I did in the picture....don't. It's a massive pain to do, you hav to for an LED and a resistor in the space between the switch and the diode....which is where the driver is. It makes everything much more complicated and much harder to squeeze in.
 
Joined
Oct 2, 2015
Messages
177
Points
0
>1W pens are great, don't be hatin! :D

Instead of running that case wire down the host, just solder it to the case pin of the diode. I would suggest soldering the positive driver input to the case pin of your diode, that way your batteries will go in with the positive side towards the tailcap. Then the "button" top of the battery will contact the rear cap, instead of the flat side, which wouldn't work because it's flat (well it may work, but not very well).

And if you want to use an LED like I did in the picture....don't. It's a massive pain to do, you hav to for an LED and a resistor in the space between the switch and the diode....which is where the driver is. It makes everything much more complicated and much harder to squeeze in.

Right now I'm thinking this,
Lens>Module(Diode) Pos(+) To Host /Neg(-) To Spring> All gets pressed inside.
The reason i can't solder the case wire to the 'diode' is because my soldering iron do not have temp control.
I might screw up and burn the diode due to heat sensitive components inside.
I'll leave this up for disscussion, I'll buy my M140 now as of getting ready for the build and will post a review up when finished.

For the led. I won't be doing that until I get the hang of these pen builds but they are so useful when they tell how much batt you have left. (Green 100% yellow 50% red 20%)

And also, where's Pman? Anyone have contact with him?

Thanks
 
Last edited:

Pman

0
Joined
Nov 28, 2012
Messages
4,447
Points
113
I'm here:)
The advice given so far all seems right to me. I haven't even tackled the "adding of an led indicator as it just seems like a huge pain. Yes I could make it work but I would have to feel really good that day to tackle it and I just seem to be feeling worse and worse. I'm 5'5" and Used to have a very good build but my weight has gone down to 124 lbs as I'm just not hungry or very interested in food. That being said, I did just build a bunch of one off type lasers with all the LPC-826, 685nm, blu-ray 405nm and 532nm modules I had left and will put up a thread after I get some beam shots on them;)
Anyways, you ask about a white wire and I'm not sure what you mean by this as I don't see a white wire in your pics. I'm assuming you mean if you had a case wire it would be white? From what I can tell you just need to solder the red wire to the case pin or squeeze it between the host and the module. Do what Crazy says. Your pics look correct to me with the battery + to the cap end. Unless you used something like a small magnet you wont get a negative connection with a battery to touch the end of the host and in this case it would be wrong to have the negative to the end anyways. The only thing I see that needs to be done is attach the red wire to the case pin or strip a bit of the wire insulation off (maybe 1/4-1/2 inch) and get it between the module and host. I know that that module will have a slight space between it and the host wall and it needs to make good contact with it. One of the ways you can make up that space is just take some thin stranded wire and spin it to make a really thin "rope" and then use something really thin to try and push it down in between the module and host. Need to be careful though as it is easy to push the module down out of place of the side button. Module has to be tight or the batteries will push the module out.
Just practice tinning a piece of wire with solder and then when you are ready tin the case wire and the red wire before trying to quickly solder them together. If you put a tiny bit of flux on the wire and case pin before any soldering you can very quickly solder them together.
I can't imagine how many diodes I've soldered but it's not like you can't touch the iron to the pins for a moment and the diode is fried. Don't try to do it with one of those big grip soldering guns. Need to use a regular stick type one as it will likely have a much smaller tip on it.
You are finding out how good tools make all the difference when working on things you care about. As you get into the hobby you will quickly realize how much easier it is to just buy the good stuff when you can rather than messing with junk.
My recommendation for a good iron is a Hakko FX-888D;)
 
Last edited:


Top