Trevor
0
- Joined
- Jul 17, 2009
- Messages
- 4,386
- Points
- 113
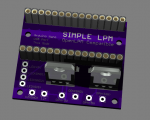
OpenLPM Mk. I
I've put in a lot of work over the last couple weeks to get OpenLPM Mk. I into a releasable, beta format. The goal of this project is to provide - free of charge - laser power meter firmware and circuit designs licensed under the GNU GPL v3. I hope that this will allow more people to create better laser power meters for less money (both in development costs and final cost to the consumer). I hope that at least a few people base a project on OpenLPM and enter the market with it.
Features
The Benefits
OpenLPM gives you the flexibility to add highly configurable datalogging to any laser power meter. So, you can take your Radiant Alpha, LaserBee A, LaserBee 5W, original Kenometer, whatever – and allow USB connectivity to the PC for ONLY the cost of an Arduino (or a stripped-down ATMega328 circuit!). Then you can use a datalogging program like Luminosity, EagleEye, StampPlot Pro, or one of the many other available programs.
All you’d have to do is hook up power and ground to the Arduino then run your signal voltage into your configured pin. Then you just need to put a small hole in your enclosure and mount the Arduino so that the USB port is accessible.
Moreover, OpenLPM could be integrated into a brand new LPM that you’ve developed – adding high-value datalogging capability without the cost of developing it.
That’s $35… or less!
Even more importantly, OpenLPM is free and open-source. You can download the source code for no cost for modification to suit your needs. The fact that it is open-source allows OpenLPM to both be highly customizable and be used as a learning tool – with the added benefit of more than one developer contributing to the progress of the project.
What You Need
Getting Started
Download OpenLPM and extract the files to whatever location you see fit. Also download and extract the Arduino development environment. Install the drivers as instructed on their respective download pages.
Now you’re ready to dive into the project!
Configuration
Start the Arduino IDE and open up the file titled “OpenLPM_Mk_I.pde.” This will bring up the entire project. You will see three tabs:
Uploading
Once you’ve configured it to your liking, now you can compile and upload. First, drop down the “Tools” menu and click the “Board” option. Choose the board you are using from the menu. You will most likely be using an Uno or a Nano with an ATMega828 – these are the first two options. After doing that, select “Serial Port” from the “Tools” menu and choose the proper serial port that your Arduino is residing on. Once you do that, drop down the “File” menu and select “Upload to I/O Board” (or click the upload button at the top of the IDE).
After you upload, go to the “Tools” menu and choose the “Serial Monitor” option. Ensure that the proper baud rate is chosen, and confirm that your Arduino is streaming data as you expected.
Application
Once you’ve got your Arduino with OpenLPM flashed onto it, then you can drop it into your circuit. Just make sure you’re running the signal voltage from your sensor circuit into the right Arduino pin and that you’re powering it according to the pages found on arduino.cc.
Recommended Hardware
I recommend getting first-party hardware for OpenLPM. There are knockoff Arduinos on eBay from Chinese sources for ~$10, but the quality is questionable and I personally stay away from them.
To Do
Known Issues
Licensing
OpenLPM is under the GNU GPLv3. The simple English version of Wikipedia gives a rather nice, concise explanation of what this license means.
If you’re selling a product, any recipient of the product must be given the source code, because a compiled binary must always be accompanied by its source code.
Any derivative of OpenLPM must be under GNU GPLv3.
This licensing model is extremely important to the goal of OpenLPM. There are three main goals here:
OpenLPM being under GNU GPLv3 goes a long way toward achieving these goals.
Downloads
Current version: https://dl.dropboxusercontent.com/u/6083542/OpenLPM/OpenLPM_Mk_I_2_1_1_5B.zip
Old version: https://dl.dropboxusercontent.com/u/6083542/OpenLPM/OpenLPM_Mk_I_1_0_2_1.zip
Support
I am currently paying for all of the costs of this project out-of-pocket. If you'd like to support the ongoing development of OpenLPM monetarily, I very much appreciate the support.

Supporters
Conclusion
I’m really excited to see where this goes. I know at least a couple people are excited to work with it; I’m hoping we start to see OpenLPM-compatible hardware start to crop up.
I’ll be personally supporting this project and am happy to help anyone who needs help with the code.
Criticism and changes from outside developers are welcome – collaboration is one of the readings this project is open-source.
And there's my 3,000th post. Happy building!
-Trevor
I've put in a lot of work over the last couple weeks to get OpenLPM Mk. I into a releasable, beta format. The goal of this project is to provide - free of charge - laser power meter firmware and circuit designs licensed under the GNU GPL v3. I hope that this will allow more people to create better laser power meters for less money (both in development costs and final cost to the consumer). I hope that at least a few people base a project on OpenLPM and enter the market with it.
Features
- OpenLPM is free and open-source.
- It is a developer's platform. Anything that the user of OpenLPM wants to modify can be modified - be it in the configuration files or in the source itself.
- Right out of the box, it offers a high level of configurability and adaptability for diverse applications.
- Compatible with all currently available LPM datalogging software!
- Designed to run on open-source hardware, but can be adapted to run on a standalone microcontroller.
The Benefits
OpenLPM gives you the flexibility to add highly configurable datalogging to any laser power meter. So, you can take your Radiant Alpha, LaserBee A, LaserBee 5W, original Kenometer, whatever – and allow USB connectivity to the PC for ONLY the cost of an Arduino (or a stripped-down ATMega328 circuit!). Then you can use a datalogging program like Luminosity, EagleEye, StampPlot Pro, or one of the many other available programs.
All you’d have to do is hook up power and ground to the Arduino then run your signal voltage into your configured pin. Then you just need to put a small hole in your enclosure and mount the Arduino so that the USB port is accessible.
Moreover, OpenLPM could be integrated into a brand new LPM that you’ve developed – adding high-value datalogging capability without the cost of developing it.
That’s $35… or less!
Even more importantly, OpenLPM is free and open-source. You can download the source code for no cost for modification to suit your needs. The fact that it is open-source allows OpenLPM to both be highly customizable and be used as a learning tool – with the added benefit of more than one developer contributing to the progress of the project.
What You Need
- OpenLPM Files (download link further down the post)
- Arduino IDE ( Arduino - Software )
- Drivers for your operating system
- Arduino (Nano or Uno) – or an ATMega328P and the ability to do standalone programming
Getting Started
Download OpenLPM and extract the files to whatever location you see fit. Also download and extract the Arduino development environment. Install the drivers as instructed on their respective download pages.
Now you’re ready to dive into the project!
Configuration
Start the Arduino IDE and open up the file titled “OpenLPM_Mk_I.pde.” This will bring up the entire project. You will see three tabs:
- OpenLPM_Mk_I – This contains all of the configuration options for OpenLPM.
- VALIDATION – Don’t modify this. This file contains checks on the configuration options. This file protects your solution from known issues when deployed – such as variable overflow.
- main – This tab contains all the source code.
- OVERSAMPLE – The number of samples to take per reading output. The Arduino has an effective limit of 10,000 samples per second. The more you oversample, the better resolution you’ll generally get. 1024 is a pretty good value in terms of balance between resolution and sample rate.
- BAUD – The baud rate for RS232 communication. Default is 9600, but settings up to 115200 are supported.
- REFERENCE_OVERRIDE – This is for overriding the Arduino’s standard voltage reference (and OpenLPM’s autoranging) with an external voltage reference. Making a mistake with external voltage reference can damage your board. Required reading: Arduino - AnalogReference
- Vref – If you’re using an external voltage reference, set its value here in millivolts. If you are using the internal reference, then just leaving this at 1100 is fine.
- VoltsPerWatt – The output of your sensor, in volts per watt. The surplus Ophir heads output 1V/W. However, particularly high or low power systems could vary.
- SENSOR – The analog pin to which your signal will be fed. Default is 1, but any analog pin on the Arduino will work.
- BUFFER_SIZE – This is the defined buffer size for all the buffers that are used in OpenLPM. This value is conservatively set at 64 and should never need to change, but it’s here for standardization purposes and to ease the modification of OpenLPM.
- STREAM_MODE – The method used for formatting the output of OpenLPM. If this is set to 0, the standard output format will be used (1234.56\n). If this is set to 1, the custom format will be used.
- DATASTREAM_FORMAT – User-defined custom datastream formatting. The whole number component of the readings is “$w” and the fractional value is “$f.” For example, the format that is used by default would be defined as “$w.$f\n” for compatibility with most programs. By using this setting, you can make your solution compatible with any datalogger available as long as it does not use a handshake. So, if you have purchased any other laser power meter, you would be able to used its bundled logging software with your custom LPM.
- PRECISION – The number of decimal places to display. Up to 6 are supported (8 if you really want to, but you’ll have to change the config validation), but any more than 1 or 2 will just make your datastream look messy and not give you any meaningful data.
- EU – If this setting is set to 1, then a “,” will be used instead of a “.” In the default datastream format.
Uploading
Once you’ve configured it to your liking, now you can compile and upload. First, drop down the “Tools” menu and click the “Board” option. Choose the board you are using from the menu. You will most likely be using an Uno or a Nano with an ATMega828 – these are the first two options. After doing that, select “Serial Port” from the “Tools” menu and choose the proper serial port that your Arduino is residing on. Once you do that, drop down the “File” menu and select “Upload to I/O Board” (or click the upload button at the top of the IDE).
After you upload, go to the “Tools” menu and choose the “Serial Monitor” option. Ensure that the proper baud rate is chosen, and confirm that your Arduino is streaming data as you expected.
Application
Once you’ve got your Arduino with OpenLPM flashed onto it, then you can drop it into your circuit. Just make sure you’re running the signal voltage from your sensor circuit into the right Arduino pin and that you’re powering it according to the pages found on arduino.cc.
Recommended Hardware
I recommend getting first-party hardware for OpenLPM. There are knockoff Arduinos on eBay from Chinese sources for ~$10, but the quality is questionable and I personally stay away from them.
- Arduino Nano - Excellent form factor, though there is a potential power issue that I'm waiting to hear back from Gravitech about.
- Arduino Uno - The standard form factor Arduino.
To Do
- Modify a version of Luminosity to serve as a default datalogger for OpenLPM.
- Add an option for setting voltage reference in case of USB-only power.
- Photograph, diagram, and upload information on my sample OpenLPM circuit.
Known Issues
- When powering from USB, the voltage reference will sag, skewing readings high. When possible, be sure to power through the Vin pin with 6-12V or with a 5V regulated supply via the 5V pin.
- When using external power, if the device is then connected to USB, Windows will sometimes will flag the USB device as malfunctioning. This is a known issue with the Arduino Nano, and I am currently waiting to hear back from Gravitech regarding a fix.
Licensing
OpenLPM is under the GNU GPLv3. The simple English version of Wikipedia gives a rather nice, concise explanation of what this license means.
So, even if you’re giving it away a modified copy of OpenLPM, the recipient must be given the source code or instructions on where to download it – and it also must carry the GPL license.There are two main terms to the license. Both apply to giving the program away or selling it.
If the user does not agree to follow the GPL, they can still use the software under copyright laws. They can use it and make copies or changes to it for themselves, but they cannot give it away or sell it. They also cannot change the license.
- A copy of the source code or written instructions about how to get a copy must be included with the software. If the software is able to be downloaded from the internet, the source code must also be available for downloading.
- The license of the software cannot be changed or removed. It must always use the GPL.
If you’re selling a product, any recipient of the product must be given the source code, because a compiled binary must always be accompanied by its source code.
Any derivative of OpenLPM must be under GNU GPLv3.
This licensing model is extremely important to the goal of OpenLPM. There are three main goals here:
- Give hobbyists access to a DIY datalogging LPM for only the cost of hardware.
- Remove a barrier to entry (programming) to the hobbyist LPM market in an effort to turn it into more of a buyers’ market.
- Give interested parties a laser-related embedded source so that they can go on to develop a brand new, advanced hobbyist LPM.
OpenLPM being under GNU GPLv3 goes a long way toward achieving these goals.
Downloads
Current version: https://dl.dropboxusercontent.com/u/6083542/OpenLPM/OpenLPM_Mk_I_2_1_1_5B.zip
Old version: https://dl.dropboxusercontent.com/u/6083542/OpenLPM/OpenLPM_Mk_I_1_0_2_1.zip
Support
I am currently paying for all of the costs of this project out-of-pocket. If you'd like to support the ongoing development of OpenLPM monetarily, I very much appreciate the support.
Supporters
- Me!
- ddewees
- lazeerer
- rhd
Conclusion
I’m really excited to see where this goes. I know at least a couple people are excited to work with it; I’m hoping we start to see OpenLPM-compatible hardware start to crop up.
I’ll be personally supporting this project and am happy to help anyone who needs help with the code.
Criticism and changes from outside developers are welcome – collaboration is one of the readings this project is open-source.
And there's my 3,000th post. Happy building!
-Trevor
Last edited:


")