

Kevlar
0
- Joined
- Apr 26, 2010
- Messages
- 1,353
- Points
- 48
I want to share the progress on my first build to both get the opinions of the veterans of the LPF and to give some tips I’ve learned. Everything I have learned is directly from reading LPF. I have no training in electronics or soldering. In fact, the most soldering I have ever done was over 20 years ago in my grandfather’s basement making stick figures. So without LPF none of it would be possible and I can’t thank you enough.
Two of the most important links I can provide is 1st, mfo made a laser guide for newbies, I would have been lost without it!! Thanks mfo!
http://laserpointerforums.com/f36/looking-build-laser-read-me-47684.html
And here is a helpful link I found in a LPF post (sorry I can’t remember which) for soldering
http://www.curiousinventor.com/guides/How_To_Solder
There are many VERY knowledgeable members here so READ as much as you can and use the SEARCH function! Almost every question out there has most likely been answered already.
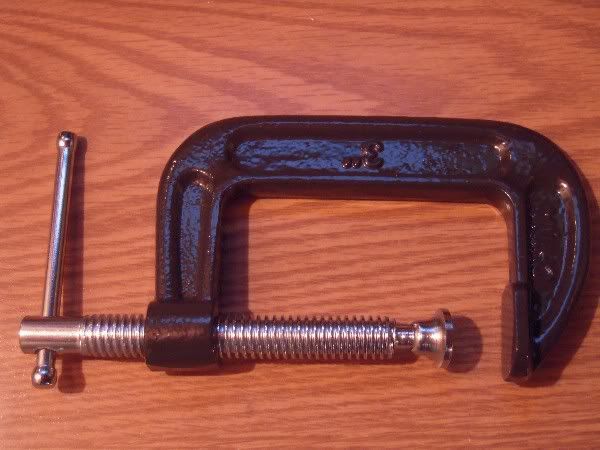
My first build was going to be a PHR-803T. I got the diode, followed the YouTube video on how to extract it and that went well. Getting the PCB off isn’t that easy and I was afraid to fry the diode using the blob method so I used some thin flush-cut snips and that worked for me. I didn’t have vise and was impatient, I want to see it laze! So I used a c-clamp. That’s a no-no I’ve read here but did it anyway.
I managed to get it in there straight fixing it with a pair of channel locks. I was testing with my rckstr driver with a partially discharged 9V battery and wasn’t very impressed. I put it away for another day and forgot I had the POT cranked up and hooked up a 12V source and POP! Off it went to diode heaven.
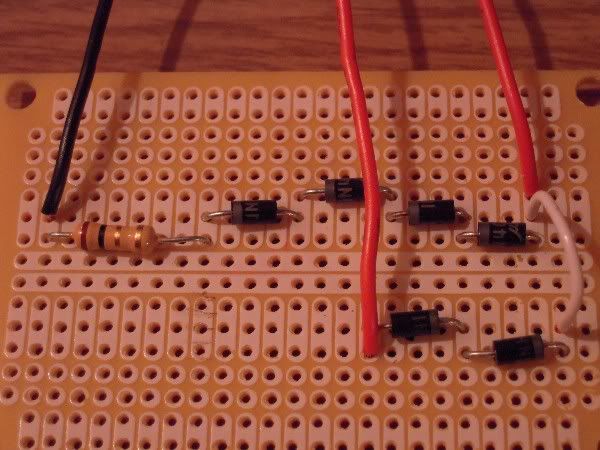
So I obeyed mfo’s laser guide for newbies and built a test load with the help of lasersbee and his fantastic FREE 1 ohm resistors (thank you). So here it is, wired up for red and blu-ray diodes. I was able to pick up the breadboard and the 1N4001 diodes from Radio Shack. It’s not the prettiest but it works!
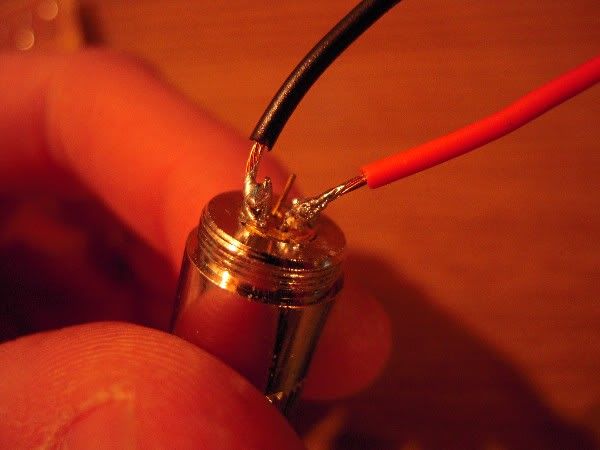
So I’m doing a red build (LPC-815) right now (I’ll do a GGW-H20L next with a flexdrive in a jayrob pocket-mini) and I got the diode in the mail and the pins were bent. Trying to carefully straighten them out one of them broke ¾ of the way down, of course it was the positive but I managed to save it by attaching a lead wire.
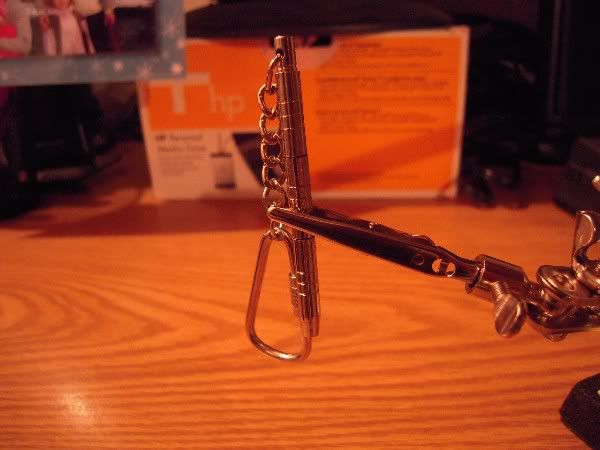
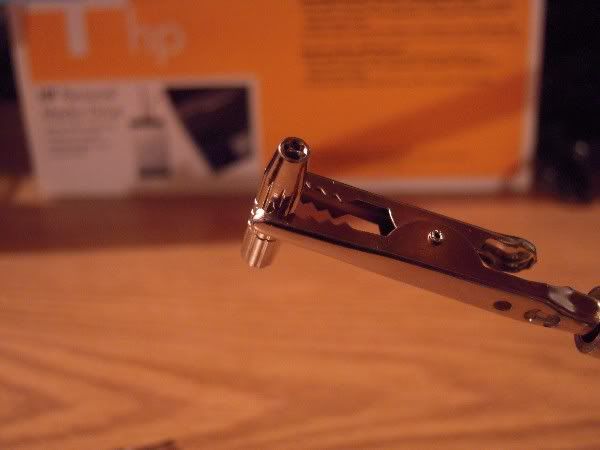
I ordered it from http://stonetek.org/shop/index.php?main_page=product_info&products_id=252 and on the webpage there is a link to a video showing how to extract it from the heat sink that work great. I’m waiting for my diode press from Flaminpyro but I had this laying around. It’s one of those little screwdrivers that come in the $2.00 eyeglass repair kit. I found if you unscrew the top the pins fit in there perfect and worked great for pressing the diode in the aixiz module. It’s even small enough to countersink it.
So that’s where I am right now, waiting for my MXDL 3405 host, heat sink from jayrob, and the 10440 batteries. Waiting sucks!
Two of the most important links I can provide is 1st, mfo made a laser guide for newbies, I would have been lost without it!! Thanks mfo!
http://laserpointerforums.com/f36/looking-build-laser-read-me-47684.html
And here is a helpful link I found in a LPF post (sorry I can’t remember which) for soldering
http://www.curiousinventor.com/guides/How_To_Solder
There are many VERY knowledgeable members here so READ as much as you can and use the SEARCH function! Almost every question out there has most likely been answered already.
My first build was going to be a PHR-803T. I got the diode, followed the YouTube video on how to extract it and that went well. Getting the PCB off isn’t that easy and I was afraid to fry the diode using the blob method so I used some thin flush-cut snips and that worked for me. I didn’t have vise and was impatient, I want to see it laze! So I used a c-clamp. That’s a no-no I’ve read here but did it anyway.
I managed to get it in there straight fixing it with a pair of channel locks. I was testing with my rckstr driver with a partially discharged 9V battery and wasn’t very impressed. I put it away for another day and forgot I had the POT cranked up and hooked up a 12V source and POP! Off it went to diode heaven.
So I obeyed mfo’s laser guide for newbies and built a test load with the help of lasersbee and his fantastic FREE 1 ohm resistors (thank you). So here it is, wired up for red and blu-ray diodes. I was able to pick up the breadboard and the 1N4001 diodes from Radio Shack. It’s not the prettiest but it works!
So I’m doing a red build (LPC-815) right now (I’ll do a GGW-H20L next with a flexdrive in a jayrob pocket-mini) and I got the diode in the mail and the pins were bent. Trying to carefully straighten them out one of them broke ¾ of the way down, of course it was the positive but I managed to save it by attaching a lead wire.
I ordered it from http://stonetek.org/shop/index.php?main_page=product_info&products_id=252 and on the webpage there is a link to a video showing how to extract it from the heat sink that work great. I’m waiting for my diode press from Flaminpyro but I had this laying around. It’s one of those little screwdrivers that come in the $2.00 eyeglass repair kit. I found if you unscrew the top the pins fit in there perfect and worked great for pressing the diode in the aixiz module. It’s even small enough to countersink it.
So that’s where I am right now, waiting for my MXDL 3405 host, heat sink from jayrob, and the 10440 batteries. Waiting sucks!


") use what you can till you have better, that is the way I started and it led me to invent a few things along the way
use what you can till you have better, that is the way I started and it led me to invent a few things along the way 