Hi folks!
Today I got some tailclicky switches from DX in the mail.
Just what I needed to complete my Kryton groove 445nm build that
I got basically new and unassembled from someone who liquidated his hobby.
It had a nichia blue already pressed in its head, so I was kinda stuck
with that, not wanting to risk killing the diode by clumsily removing
it from it's press fit without proper tools.
The Kryton groove is a very slim and good looking host, but I needs some
fiddeling with to get it to work.
For one, mounting a spring for the positive battery contact needed some
macgyvering involving plastic, silicone rubber, springs and glue.
I guess I could have done it the quick way using a common flashlight-like
battery contact tab.
Also the tailspring needs some trimming and all-round support, lest it bends over
to the side, shorting against the barrel and thus turning the laser on all the time.
Now this was my first experience with a FlexDrive.
Pretty cool circuitry, might I add. Very compact, relatively easy to set
current, once I managed to solder blob those little SMD resistors.
So I set it at a relatively conservative 1A, hoping to get away without heatsinking the driver.
Now here's my "problem".
It lases like a winner, until after about one minute, when the laser starts
to slowly (1Hz) flash off and back on. This flashing becomes faster, until
I chicken out and turn off the laser altogether.
I read that this symptom is the FlexDrive thermal protection kicking in.
It's just as well because by that time the head where the diode sits
has gotten pretty warm, and you would have a bad feeling about
keeping that little diode going.
Hmmmmm.
I realize these hosts where designed at a time where the only >1W diodes where IR.
Still:
Is this 1 minute duty cycle considered "normal" for these hosts running a
445nm at 1A?
Am I just spoiled by my "porta-labby", which doesn't even know what a duty
cycle is in the first place, thanks to it's active cooling?
Mind you, this is my first HANDHELD 445nm.
Should I bother heatsinking the driver for a few extra seconds until the whole
thing has to cool down?
Should I better turn it down a notch to, say, 800ma?
:thinking::thinking::thinking:
EDIT: turns out the problem was two fold.
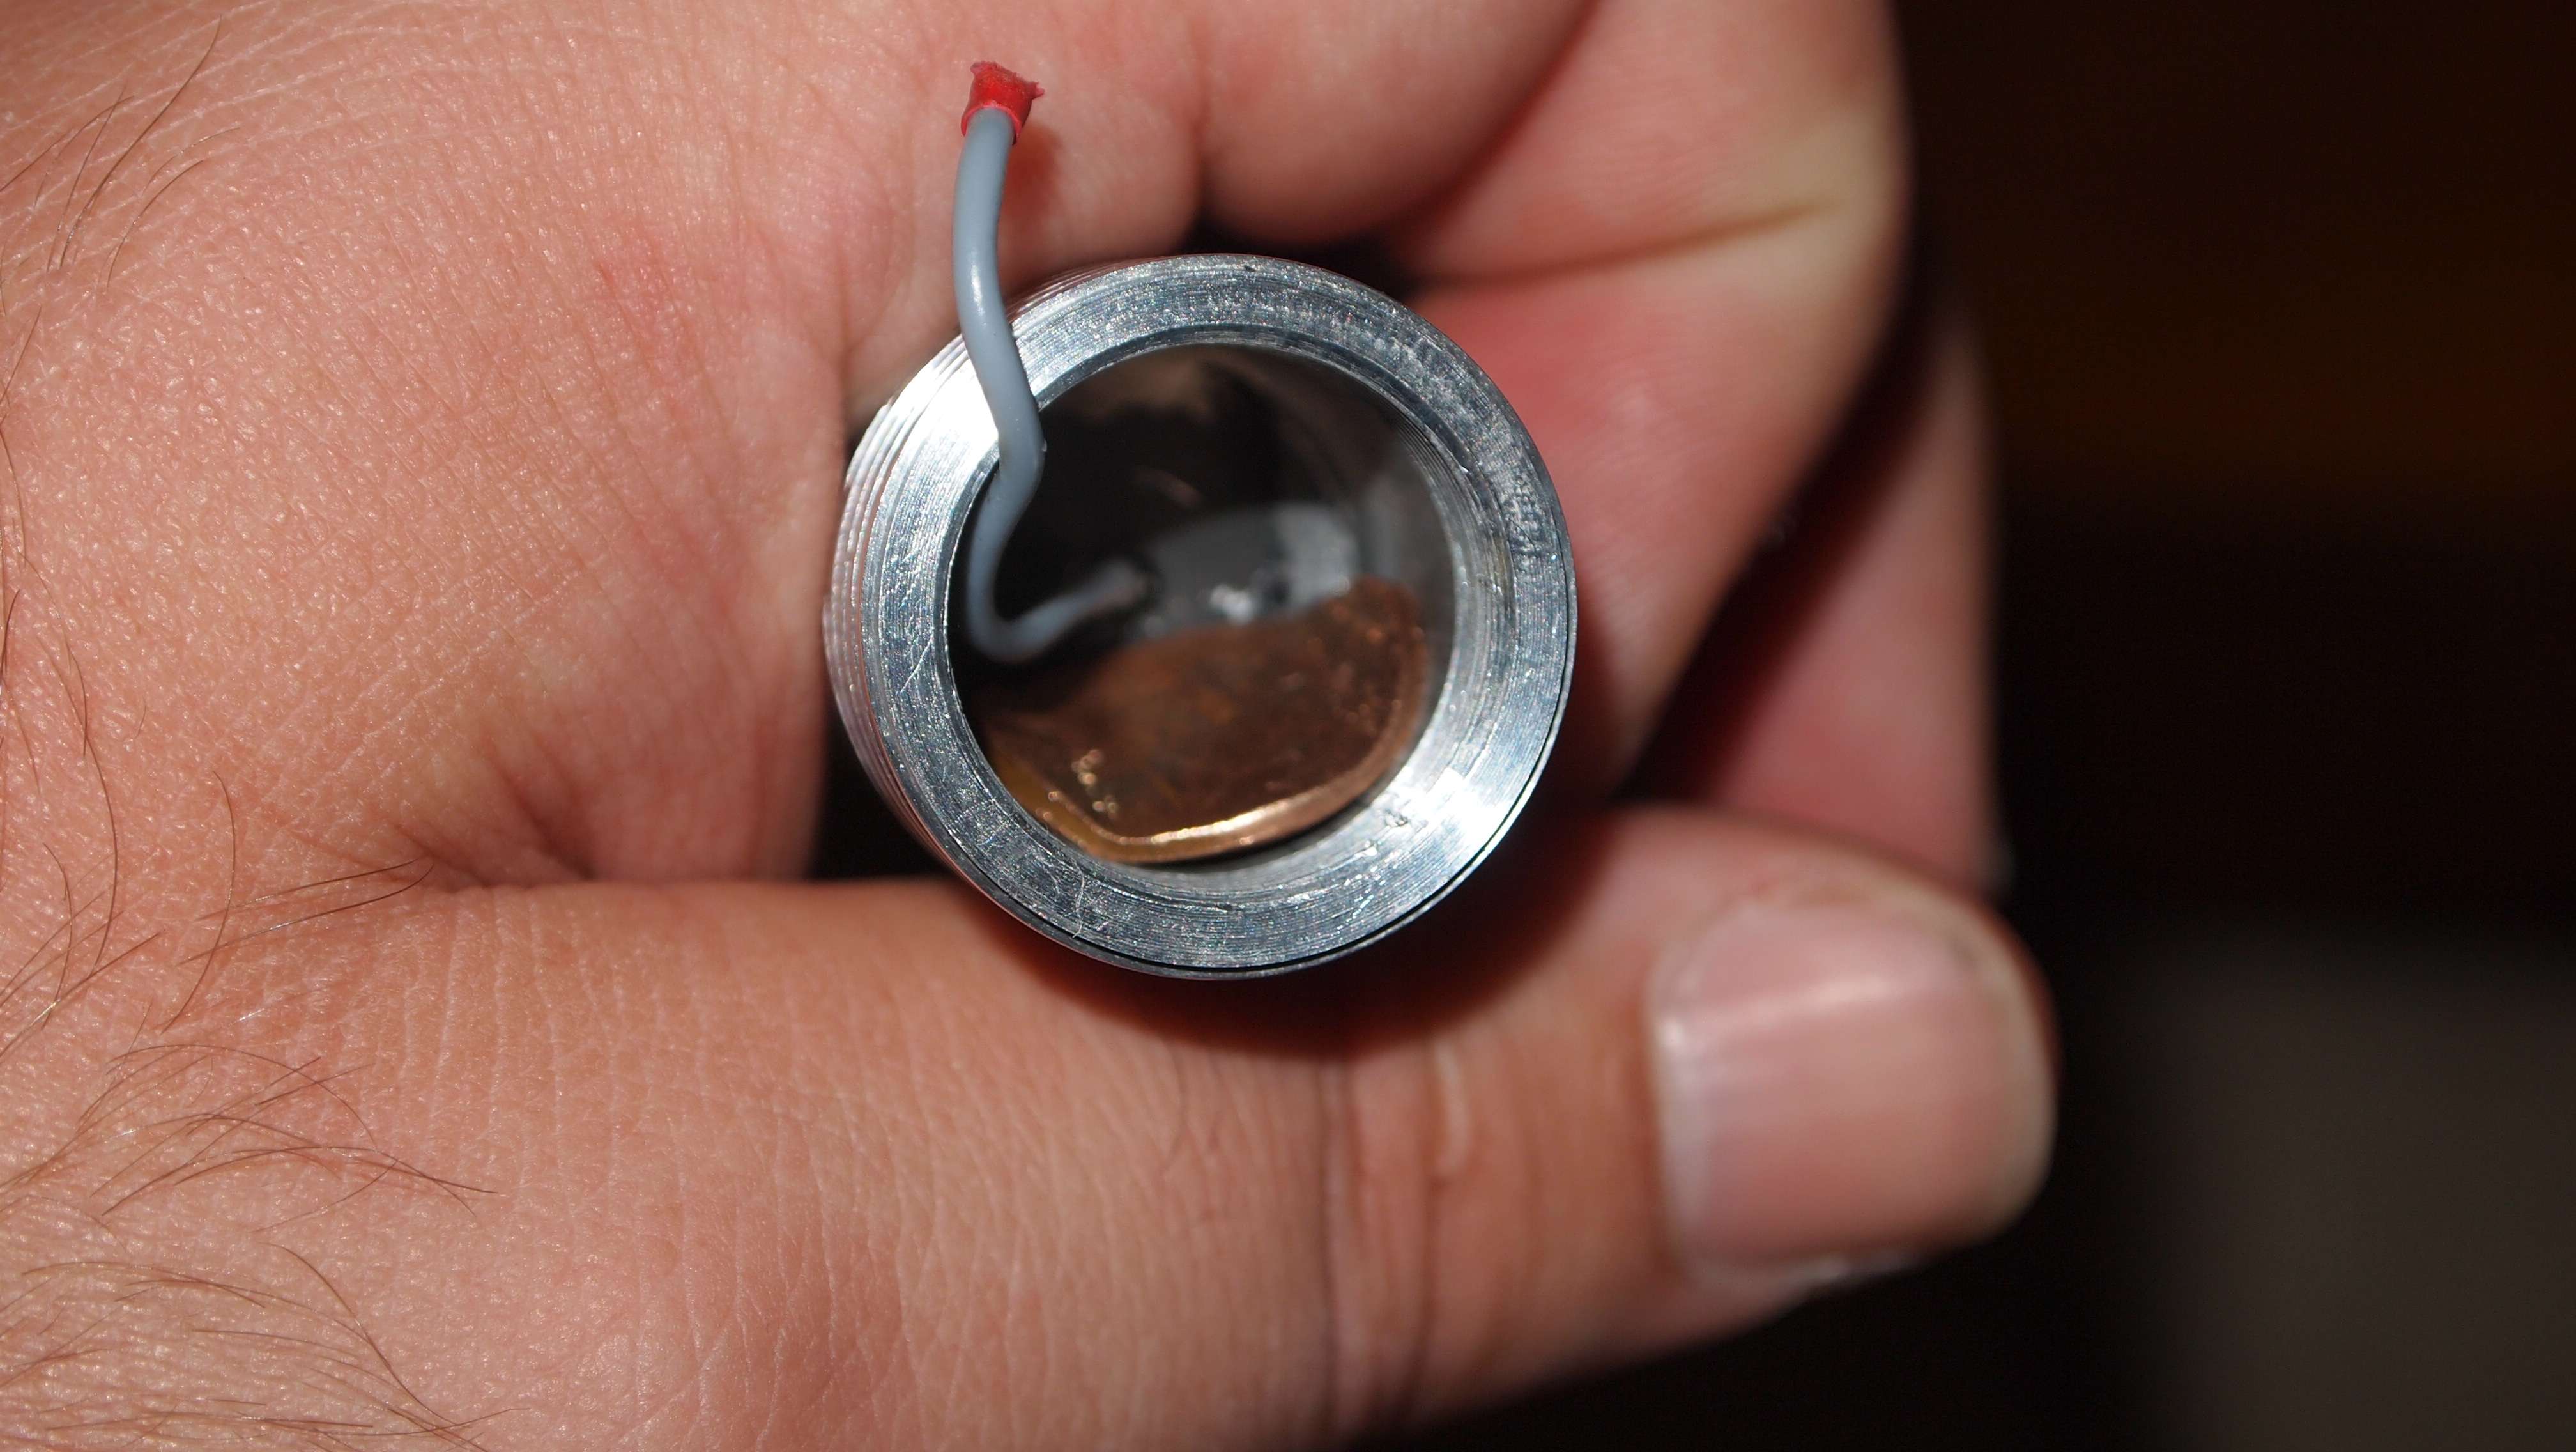
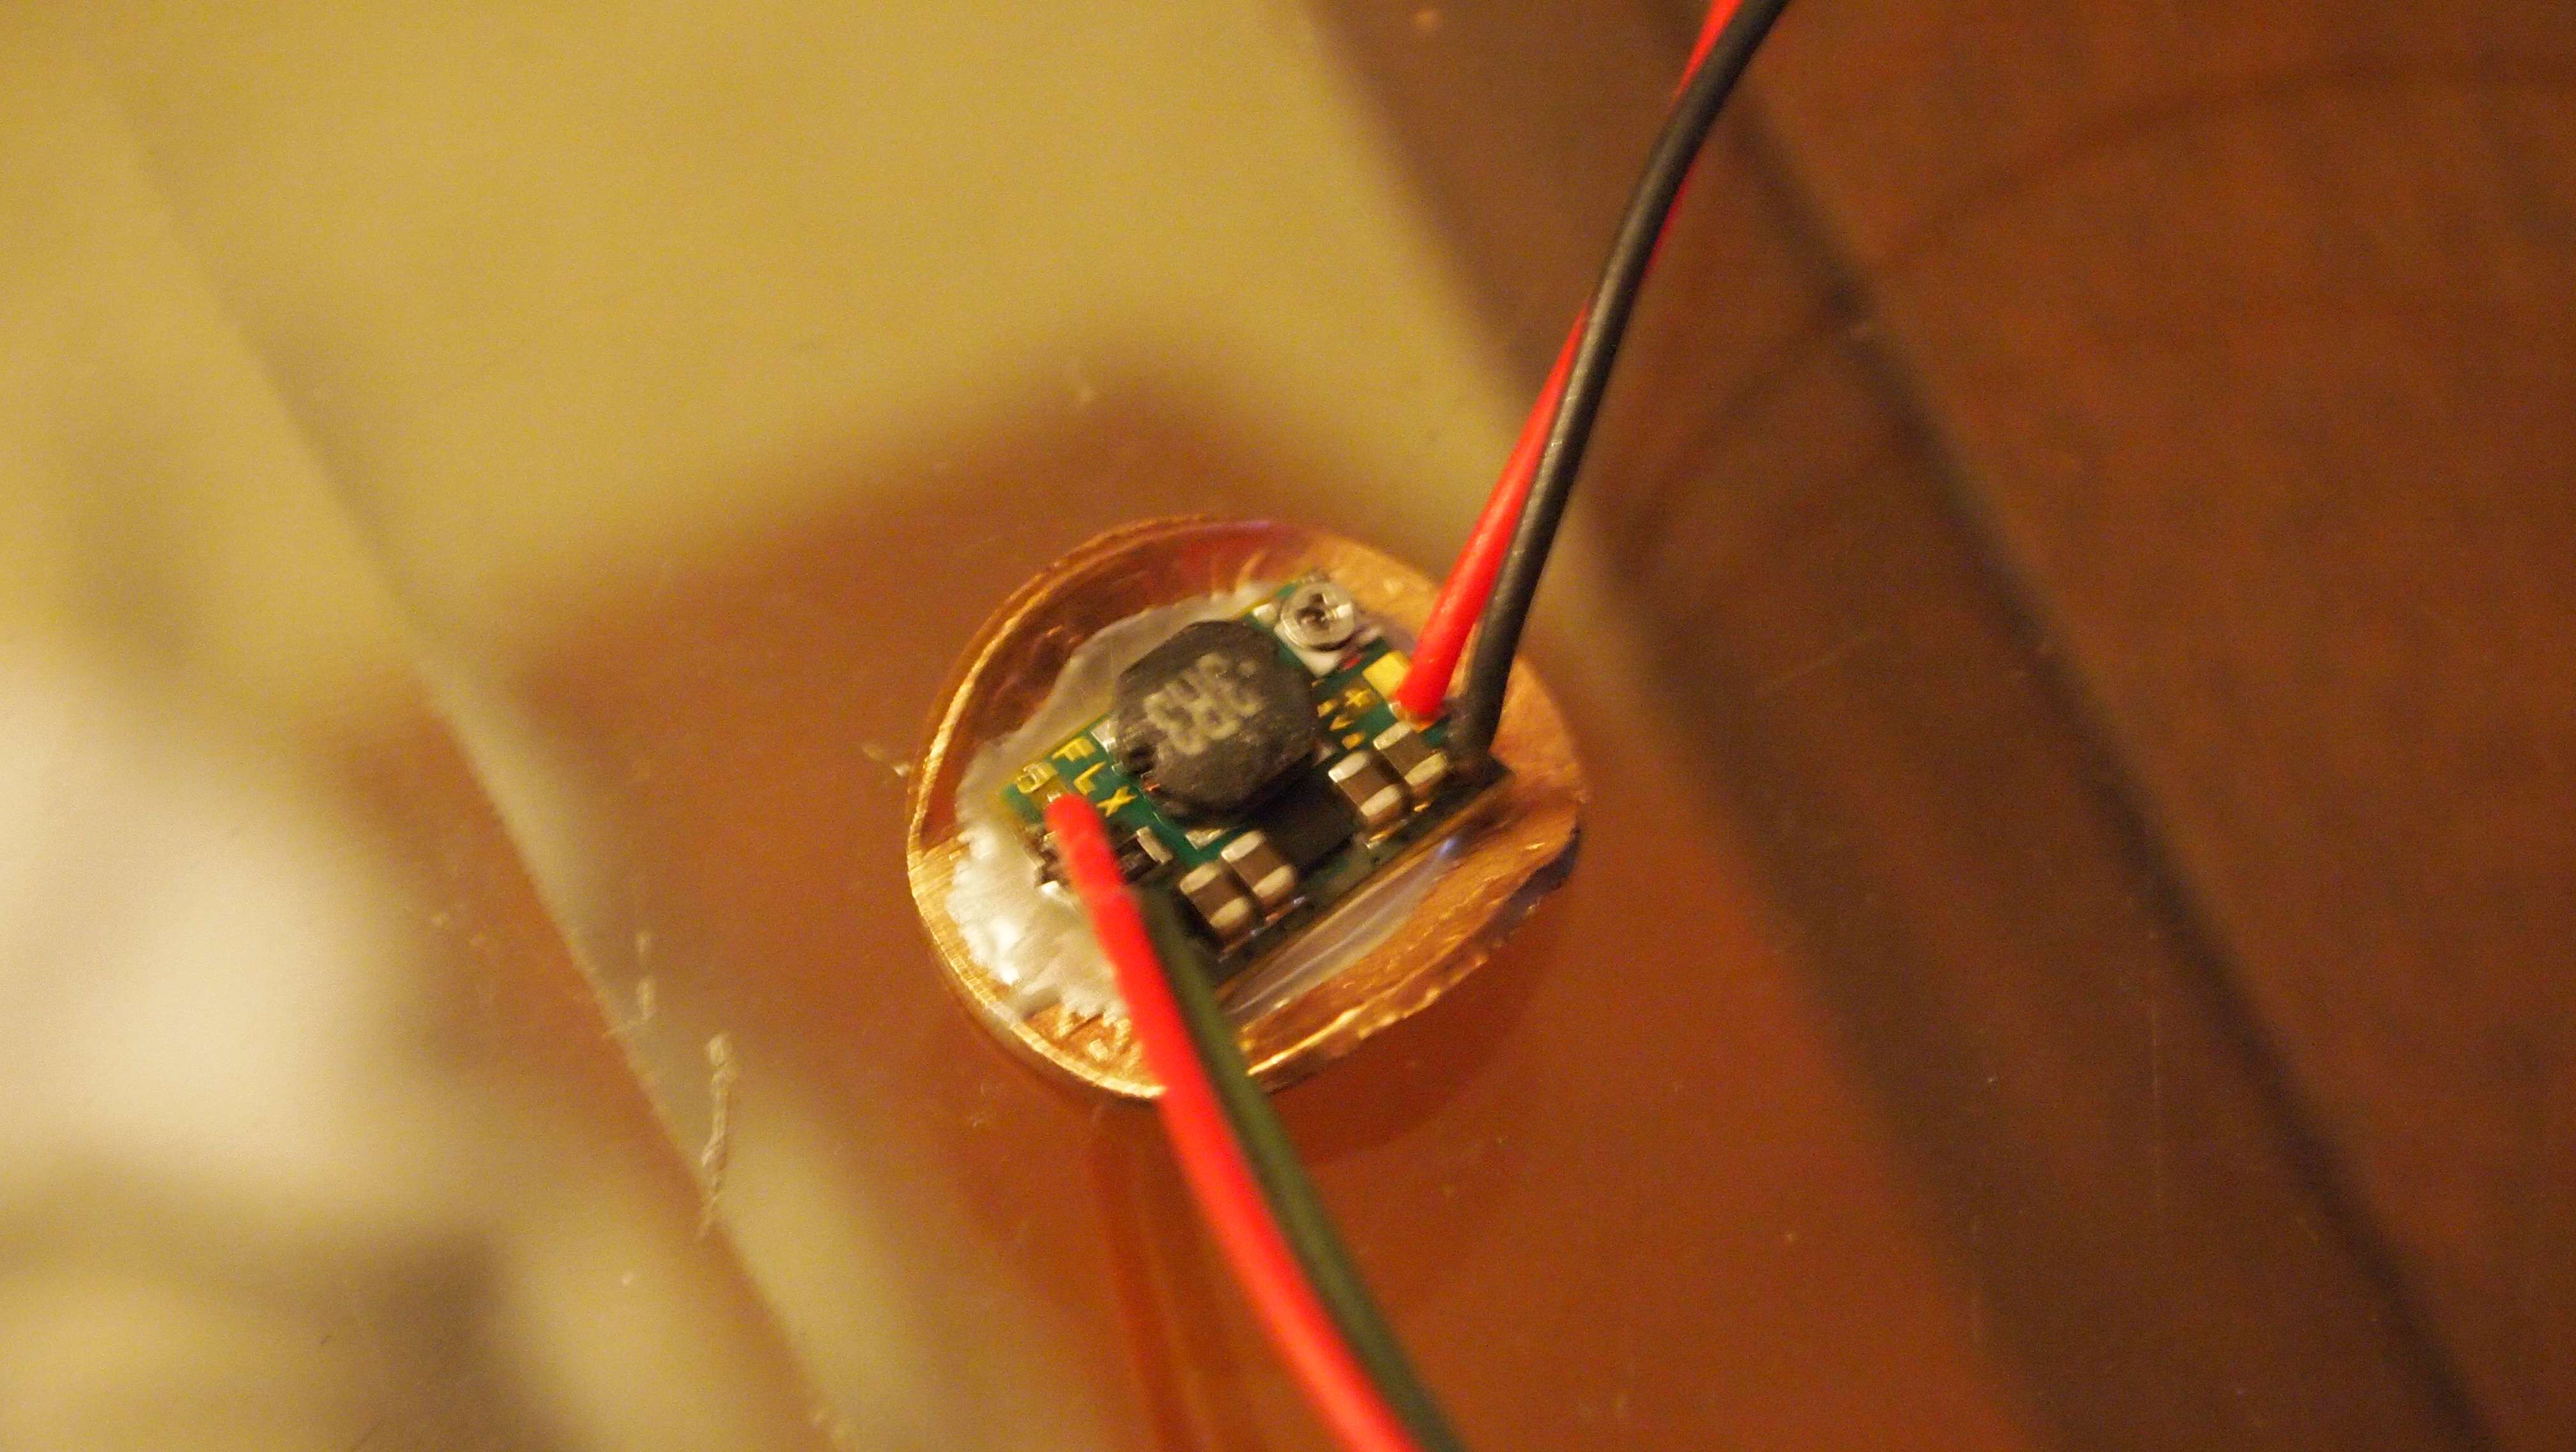
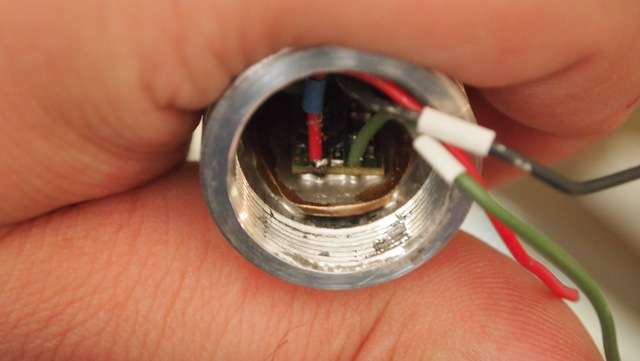
Heatsinking the driver with a coin, like in DTR pictures below, solved the blinking that started after a few seconds.
Then the switches kept failing, here's what I did about it. You can do it too.
To open the switch first pry each corner a bit via the "big" open slot on each side.
Next, slide a thin blade in each corner and cut through the 4 plastic poles.

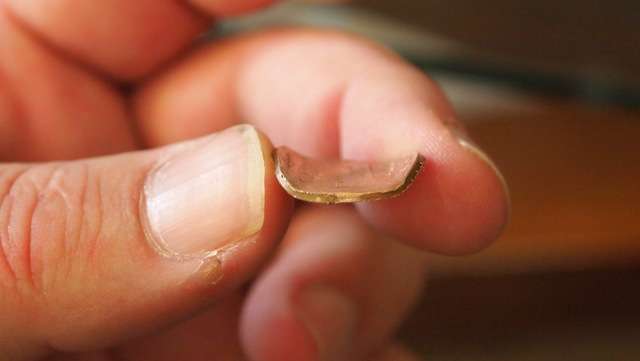
You can see how the spring deformed when it got hot from the high (1.5~2A) current.

Give the electricity an extra path or two to flow. I guess the spring itself
now sees only 1/2 or 1/3 the current it had to handle originally.
I removed the here unnecessary wire insulation to not obstruct the switches action.
When properly done, you don't notice a thing in the clicky's feel.
It works as smooth as original.

Glue it back together. I'm using Pattex Contact glue, cyanoacrylate isn't strong enough.
Even if the glue job isn't perfect, once the switch is
installed in the tailcap, it will be held firmly in place and together.

I also soldered the big external spring to it's little tabs for reliabilty,
and trimmed the spring down a few milimeters to avoid bending and shorting
against the inside of the barrel.
If you want your high current Kryton to work consistently but don't feel like
performing this mod, you can also get such a reworked switch from me for 5$.
Today I got some tailclicky switches from DX in the mail.
Just what I needed to complete my Kryton groove 445nm build that
I got basically new and unassembled from someone who liquidated his hobby.
It had a nichia blue already pressed in its head, so I was kinda stuck
with that, not wanting to risk killing the diode by clumsily removing
it from it's press fit without proper tools.
The Kryton groove is a very slim and good looking host, but I needs some
fiddeling with to get it to work.
For one, mounting a spring for the positive battery contact needed some
macgyvering involving plastic, silicone rubber, springs and glue.
I guess I could have done it the quick way using a common flashlight-like
battery contact tab.
Also the tailspring needs some trimming and all-round support, lest it bends over
to the side, shorting against the barrel and thus turning the laser on all the time.
Now this was my first experience with a FlexDrive.
Pretty cool circuitry, might I add. Very compact, relatively easy to set
current, once I managed to solder blob those little SMD resistors.
So I set it at a relatively conservative 1A, hoping to get away without heatsinking the driver.
Now here's my "problem".
It lases like a winner, until after about one minute, when the laser starts
to slowly (1Hz) flash off and back on. This flashing becomes faster, until
I chicken out and turn off the laser altogether.
I read that this symptom is the FlexDrive thermal protection kicking in.
It's just as well because by that time the head where the diode sits
has gotten pretty warm, and you would have a bad feeling about
keeping that little diode going.
Hmmmmm.
I realize these hosts where designed at a time where the only >1W diodes where IR.
Still:
Is this 1 minute duty cycle considered "normal" for these hosts running a
445nm at 1A?
Am I just spoiled by my "porta-labby", which doesn't even know what a duty
cycle is in the first place, thanks to it's active cooling?
Mind you, this is my first HANDHELD 445nm.
Should I bother heatsinking the driver for a few extra seconds until the whole
thing has to cool down?
Should I better turn it down a notch to, say, 800ma?
:thinking::thinking::thinking:
EDIT: turns out the problem was two fold.
Heatsinking the driver with a coin, like in DTR pictures below, solved the blinking that started after a few seconds.
Then the switches kept failing, here's what I did about it. You can do it too.
To open the switch first pry each corner a bit via the "big" open slot on each side.
Next, slide a thin blade in each corner and cut through the 4 plastic poles.

You can see how the spring deformed when it got hot from the high (1.5~2A) current.

Give the electricity an extra path or two to flow. I guess the spring itself
now sees only 1/2 or 1/3 the current it had to handle originally.
I removed the here unnecessary wire insulation to not obstruct the switches action.
When properly done, you don't notice a thing in the clicky's feel.
It works as smooth as original.

Glue it back together. I'm using Pattex Contact glue, cyanoacrylate isn't strong enough.
Even if the glue job isn't perfect, once the switch is
installed in the tailcap, it will be held firmly in place and together.

I also soldered the big external spring to it's little tabs for reliabilty,
and trimmed the spring down a few milimeters to avoid bending and shorting
against the inside of the barrel.
If you want your high current Kryton to work consistently but don't feel like
performing this mod, you can also get such a reworked switch from me for 5$.
Last edited:


