I have the 465nm in the same setup. When I moved it from the 22mm heatsink and installed it in a SL stainless steel host, I was getting thermal shut downs within 10 seconds. I added thermal adhesive into the driver cavity. That seemed to fix it. I would think a short would kill the driver. I have read some people call bullshit on filling voids with this stuff but it has worked for me so far. It has to be better than nothing. The next one I get will have an external driver.
LPF Donation via Stripe | LPF Donation - Other Methods
Links below open in new window
ArcticMyst Security by Avery


You are using an out of date browser. It may not display this or other websites correctly.
You should upgrade or use an alternative browser.
You should upgrade or use an alternative browser.
Help me decide what diode/module to put in my MX900 build.
- Thread starter RB astro
- Start date


- Joined
- Dec 15, 2014
- Messages
- 6,782
- Points
- 113
Hi,
With all driver set 1.8A and over need to be sinked to the pill or main heat sink. With Arctic Alumina thermal adhesive , sinking the small IC to the host.
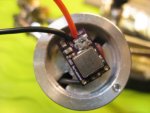
The first two pics are the driver sinked to the pill , the XM900's have a pill with a left hand thread and can be unscrewed to attach the driver when i dries you can screw it back in place.
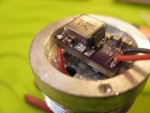
The second pic is a driver sinked to the main heat sink you just have to center it over the 12mm module hole so it clears the bell inside the host.
In your case RB Astro you would want the pill application of the driver. Notice in the pic what side of the driver gets sinked to the pill. Hope this helps..
If you ordered the diode with driver in the module that will be fine some drivers are more efficient than others, i have some builds where i didn't have to sink to the host. Take your time and don't rush it .
Rich")
With all driver set 1.8A and over need to be sinked to the pill or main heat sink. With Arctic Alumina thermal adhesive , sinking the small IC to the host.
The first two pics are the driver sinked to the pill , the XM900's have a pill with a left hand thread and can be unscrewed to attach the driver when i dries you can screw it back in place.
The second pic is a driver sinked to the main heat sink you just have to center it over the 12mm module hole so it clears the bell inside the host.
In your case RB Astro you would want the pill application of the driver. Notice in the pic what side of the driver gets sinked to the pill. Hope this helps..
If you ordered the diode with driver in the module that will be fine some drivers are more efficient than others, i have some builds where i didn't have to sink to the host. Take your time and don't rush it .
Rich
Attachments
Last edited:
RB astro
0
- Joined
- Apr 6, 2014
- Messages
- 2,436
- Points
- 113
So I should be ok with the driver in the module version?If you ordered the diode with driver in the module that will be fine some drivers are more efficient than others, i have some builds where i didn't have to sink to the host. Take your time and don't rush it .
Rich
That's what I ordered.
I assume I just need to use some Thermal paste on it before I slide it into the host body?
RB
- Joined
- Dec 15, 2014
- Messages
- 6,782
- Points
- 113
RB astro
0
- Joined
- Apr 6, 2014
- Messages
- 2,436
- Points
- 113
Thanks for the info Rich.
:beer:
:beer:
- Joined
- Dec 15, 2014
- Messages
- 6,782
- Points
- 113
Hi RBA,
Hey no problem anytime ..
Rich
Hey no problem anytime ..
Rich
RB astro
0
- Joined
- Apr 6, 2014
- Messages
- 2,436
- Points
- 113
Quick question.
I don't have Arctic Alumina thermal compound but I do have a Nano Diamond Thermal Compound that doesn't conduct electrically.
Will this be suitable?
I don't have Arctic Alumina thermal compound but I do have a Nano Diamond Thermal Compound that doesn't conduct electrically.
Will this be suitable?
RB, I think you are asking about the driver and being ok in the 12mm module?So I should be ok with the driver in the module version?
That's what I ordered.
I assume I just need to use some Thermal paste on it before I slide it into the host body?
RB
I would think it would be better thermal pasted to the bottom of the sink.
Maby a little miss communication on the driver part:thinking:
Last edited:
- Joined
- Dec 15, 2014
- Messages
- 6,782
- Points
- 113
Hi RB, Ok thermal compound is for the 12mm module when you slide it in the sink and set the screw, and the compound you have is fine.
And for the driver you will use Arctic Alumina thermal adhesive epoxy to secure and sink the driver to the pill. When you do the pill mix even amounts of part A and part B mix well and apply small amount to the little CU chip looks like a little square spider with eight legs, keep it pressed down tilt sets up about 5 minutes let it dry for an hour then finish you work. It will dry hard and keep the driver in place. Don't rush this part of the build Lookat the pics i posted for you on the pill .
Oh and ThankYou much GSS for your input on this issue buddy
Rich
Last edited:
He ordered the module with the driver soldered to the diode pins. He could try my suggestion to fill the cavity with thermal adhesive or go without and see if he has any issues. Or if he is brave enough, remove the driver and add some leads to the diode.
- Joined
- Dec 15, 2014
- Messages
- 6,782
- Points
- 113
Hi
Never install a module without compound it fill all the microscopic voids between the 12mm module and the sink. Always use it
If you have a driver already installed with the diode you can also epoxy a small piece or aluminum or copper to the cu chip and screw the aluminum back half on the piece doesn't need to be big just enough to fit in the aluminum back half
Rich
RB astro
0
- Joined
- Apr 6, 2014
- Messages
- 2,436
- Points
- 113
RB, I think you are asking about the driver and being ok in the 12mm module?
I would think it would be better thermal pasted to the bottom of the sink.
Maby a little miss communication on the driver part:thinking:
Hi RB, Ok thermal compound is for the 12mm module when you slide it in the sink and set the screw, and the compound you have is fine.
Rich
He ordered the module with the driver soldered to the diode pins. He could try my suggestion to fill the cavity with thermal adhesive or go without and see if he has any issues.
Thanks guys.
dden is right, I ordered the module with the driver soldered to the diode.
I wanted to keep it simple for the first build, since I've never seen the inside of these units.
Once I get the host, which BTW will be delivered today :wave:, I'll get a better idea of the whole setup and perhaps I'll be able to do a more advanced build next time.
So for this build, like Rich said, I'll be using the Nano Diamond Thermal Compound to slide the module into the sink and set the screw.
But as dden suggested do you think, if I have heat problems, that I could use the Nano Diamond Thermal Compound to fill in the driver board cavity as well or should I use Arctic Alumina thermal adhesive for this step?
RB
You really should get the thermal adhesive. I'm not sure about the diamond stuff. I have never handled it. As long as it is absolutely non conductive and non capacitive I suppose. But definitely get the basic supplies and tools you will need sorted out.
- Joined
- Sep 20, 2013
- Messages
- 17,414
- Points
- 113
I've actually made the diamond heat sink compound. It is 50% by weight of very fine grit diamond powder and silver heat sink compound. Diamonds have a thermal conductivity over five times that of copper without the electrical conductivity or stray capacitance.
- Joined
- Jul 10, 2015
- Messages
- 9,900
- Points
- 113
Well, how about that little jewel of wisdom.
RB astro
0
- Joined
- Apr 6, 2014
- Messages
- 2,436
- Points
- 113
Exactly Paul, that's what the blurb says about this compound.Diamonds have a thermal conductivity over five times that of copper without the electrical conductivity or stray capacitance.
Well the 'Plug'n'Play MX900 Host from Rich arrived today. :wave:
It was so well packed, layer upon layer of bubble wrap and paper in the box.
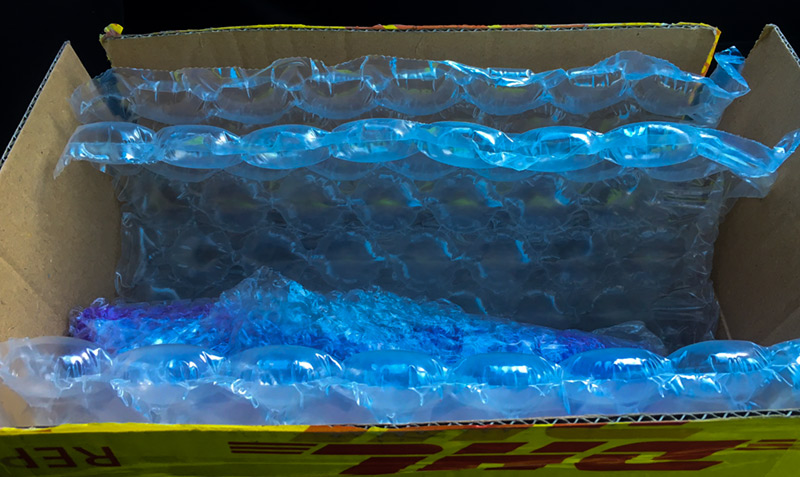
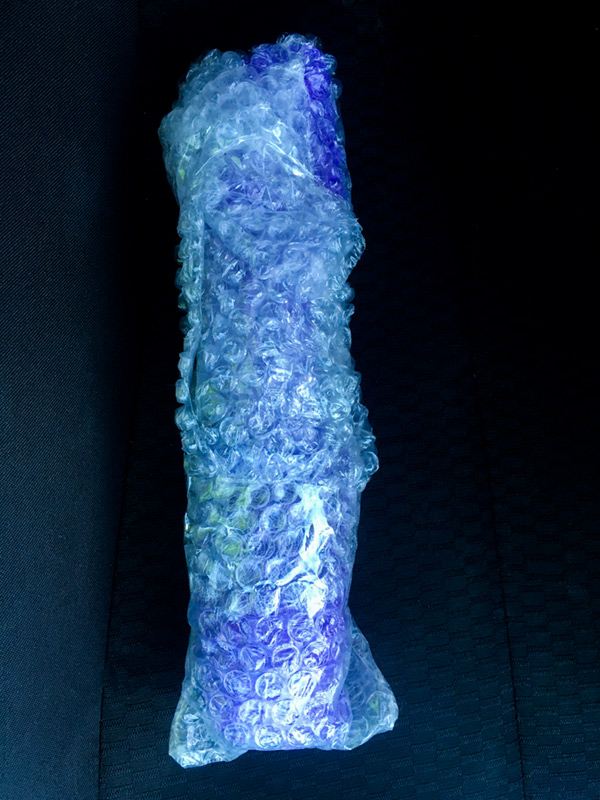
Rich included even the hex key for the sink and heat shrink wrap, indeed a complete 'Plug'n'Play' package !
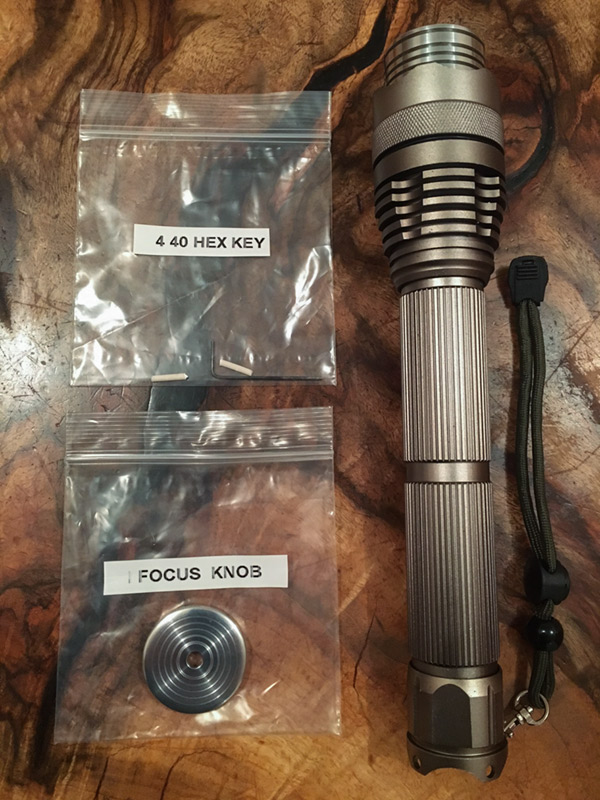
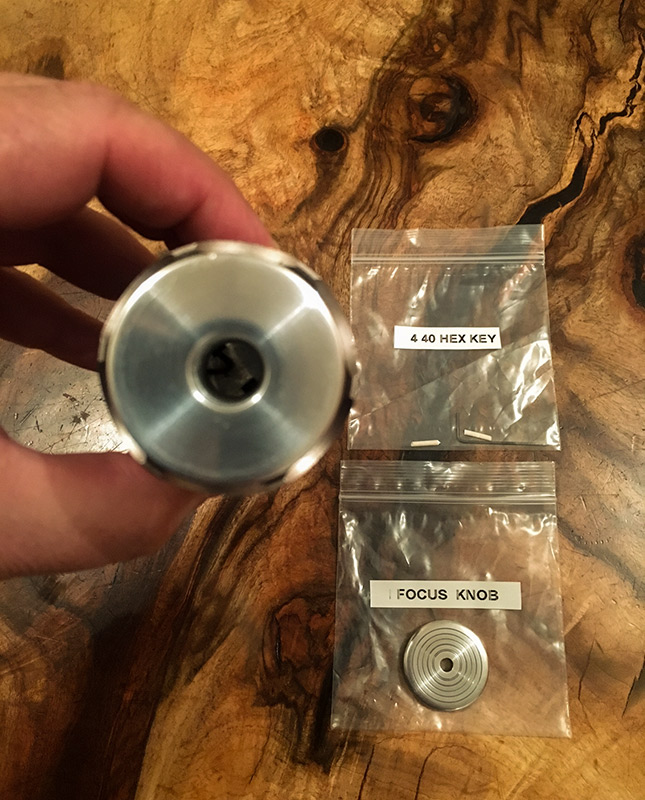
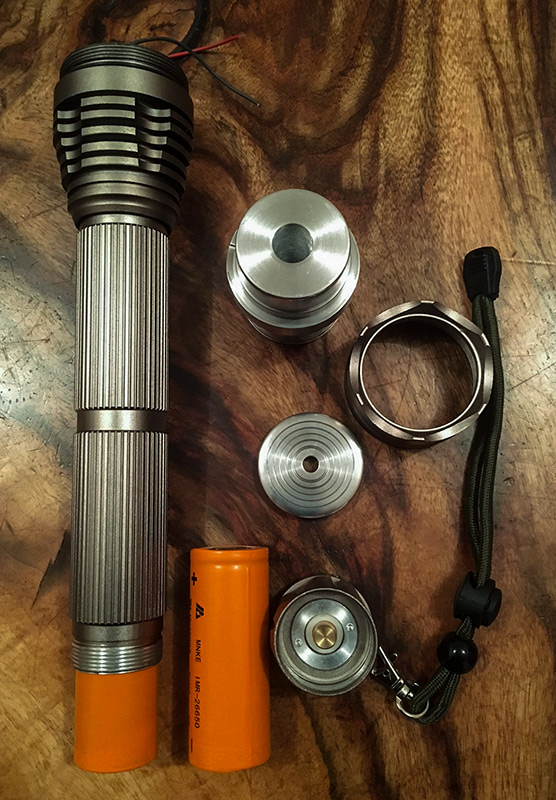
All the parts disassembled:

And now ready to do a preliminary power up test:
And yes, we have 8.3v !
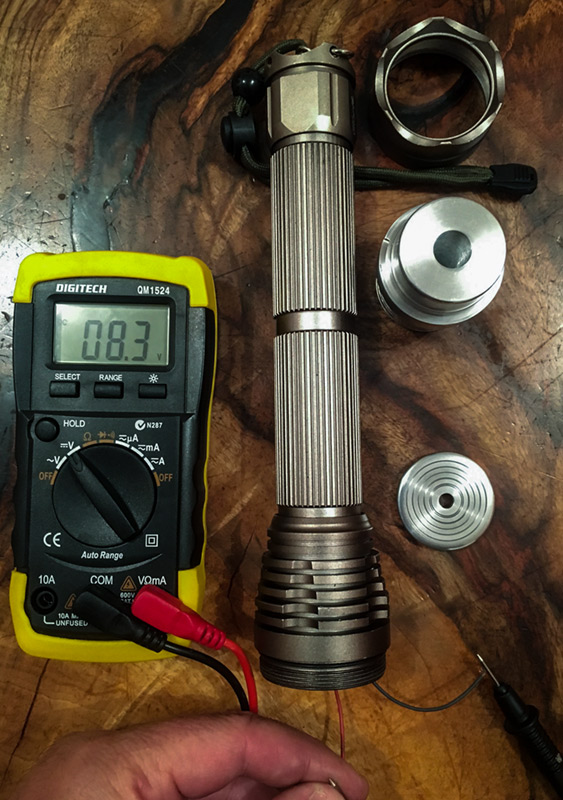
So now I'm ready for the arrival of the module from Jordan - DTR.
Thanks Rich for a wonderfully smooth transaction and super fast shipping.
Hope you've enjoyed the unpacking of my first 'Plug'n'Play' host build.
RB
:beer:
Last edited:
