Welcome to Laser Pointer Forums - discuss green laser pointers, blue laser pointers, and all types of lasers

Buy Site Supporter Role (remove some ads) | LPF Donations

Links below open in new window

FrozenGate by Avery

Best Way To Practice To Learn To Solder Leads On Diodes

Joined
Nov 19, 2011
Messages
294
Points
0
What would be the best way for me to practice to learn to solder leads to diodes before actually trying a real one? Is the wire for soldering leads to diodes stranded or solid?

I have read/watched many of the tutorials that are on this site and others, but really want to learn how to do leads to diodes and then drivers including leads and surface mount components.

I did some 24 gauge stranded end to end wrapped around each other and also side by side non-wrapped. Some joints were ok, some not. Just looking for more tips and suggestions for practice before I fry a diode. Of course I realize that frying a diode is a right of passage, but would like to keep it to a minimum.

Thanks for all the help guys.

Glenn Atkins


well extra flux never hurts.
A good way to practice is with cat 5 cable wire.
Its kinda just like diode pins.
And as far as wire i use 26ga audio wire the silver and gold kind.
Its very bendable and looks nice.
you ca pick 100ft up for only 10$ at homedepot.
just remember to tin the wire first.
Tinning is when you put solder on the wires before you try to attach them to the diode.
Now i add a bit extra solder when doing it so that when i go to connect it to the diode all i have to do is hold the wire on the pin and touch my iron to it for not even 2 seconds and the extra solder from the wires goes onto the diode pin and the joint is complete.
Also know again adding flux to the wires and the pins just a tiny bit makes every thing better.
 
Last edited:
This method is also used when making wire-to-wire solders with small wire
Soldering diode pins takes a fraction of a second

Pre-tin BOTH the pins and the wire or solder pads

Use a small bit of flux on BOTH the pins and the wires/pads BOTH for the pre-tin and the final solder joint

I don't care if you use rosin core solder. USE THE FLUX!

Use a set of "extra hands" to align the pin with the wire/pad.

Make sure that they are side-by-side, touching, and secure

Get a small bit of solder on the tip of your soldering iron

"Touch" the melted solder on your iron to the pin to wire/pad joint

The solder will all flow together in a fraction of a second.

I recommend that you also use some shrink tubing to protect and reinforce the joint


You DO NOT "heat the joint" as with other solder jobs
You DO NOT place the solder source anywhere near the solder job

Only the melted solder on the tip of your iron should approach the pin to wire/pad joint

If you are new to soldering, I recommend that you get yourself an old PCB and some scrap wire (etc.). Practice the above procedure until you can get a good solder in a fraction of a second.

Peace,
dave
Excellent... and right on the money for soldering LD pins
with the least amount of thermal stress.

Jerry
 
It it important not to heat the diode too long. If the joint don't connect quick just halt and pause, let the diode cool down. I just fried my A140 diode. Just another lesson learned !
 
Practice Practice Practice this is what will make you better.

Get some copper wire like phone wire and pretend it's the diode leads,
then get some stranded wire and solder to the solid wire.

mount your wire in a helping hands or something to hold it.

Solder flux will make the job a lot easier and give you a better solder joint.

You need a good iron with a clean tip so the solder will stick to it and transfer the heat to the work so get a sponge and cut some slits in it and wet it so you can drag your iron tip through the cut's in the sponge to clean the tip from old flux and oxidized solder, the wet makes steam which cleans the tip !

A good solder brand is key to success, if you have poor components your going to have a poor result.

I use a 5 core flux solder from Amerway inc. I use CW SN63 PB37 it's probably the best out there.
See post #18 that is a good description of how solder works ;)

Happy Soldering...
 
Last edited:
You DO NOT place the solder source anywhere near the solder job

Only the melted solder on the tip of your iron should approach the pin to wire/pad joint

I have been soldering for years, though usually not with such thermally sensitive devices, and I agree 100% with you on everything, except the one point above that I quoted...

Why would you not use both pre-melted solder on the tip (for increased heat transfer) and a very small touch of very thin gauge solder? Surely adding more cold mass (the solder) to the pin once the initial flow has begun would not worsen the thermal load any. Just to be clear, the solder is added in a very small amount, and in a fraction of a second after the initial flow is made by the premelted solder on the tip.

I found this way you ensure a proper bond and you don't use too little solder. My small chisel tip doesn't let go of solder on it easily unless you add a tiny bit more, which is why I've been doing it this way.

Also, for every thermally sensitive component I use clip-on aluminum heatsinks between the solder joint and the component.
 
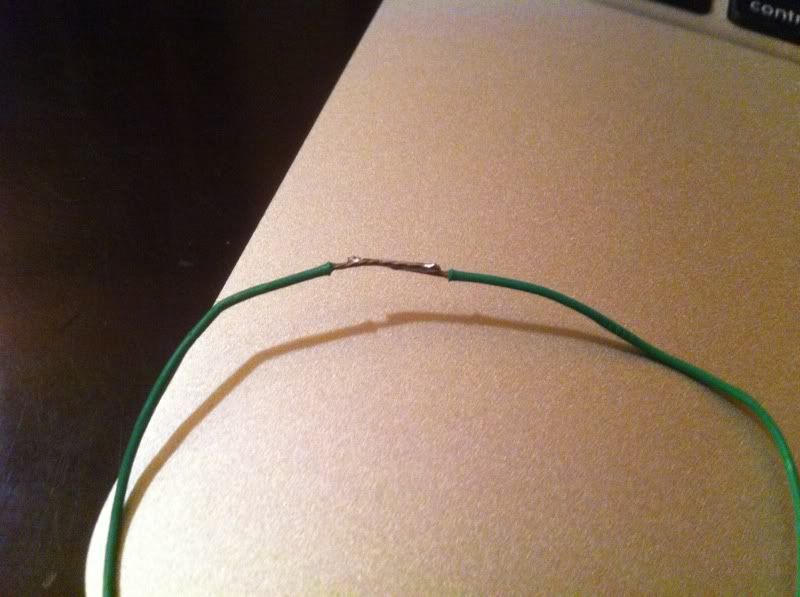
How's this for a first try? This is one strand from the inside of a CAT 5 cable as kiyoukan suggested above. The wire is side-by-side and not twisted. Focus is hard on an iPhone.

The distance of the connection is ~ 11mm.


4f32f751.jpg


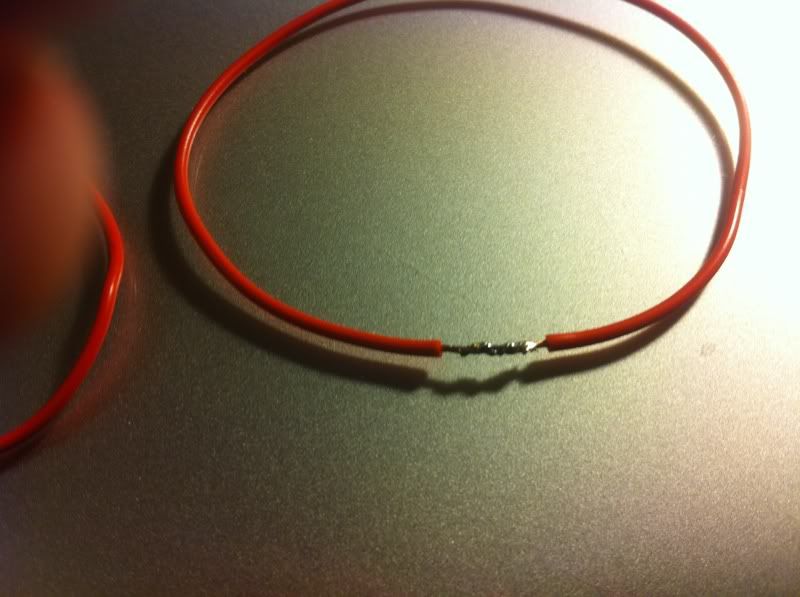
Here's one I did on 24 gauge wire with the wire twisted together.

ea755daf.jpg


Glenn
 
Last edited:
looks good and shiny.
Just make sure your contact time with your soldering iron is less than 2 seconds max.
 
Last edited:
Contact was way less than 2 seconds, but there still seems to be some melt-back on the green, but not on the red. Both are PVC coated, but I've got some silicon stuff coming from Flaminpyro.

Thanks for the tips guys.

Glenn
 
That green side by side looks really good, that is how you will be soldering the leads
to the diode pins and then covering them with some heat shrink to insulate them.

it will be easier with the silicone insulated wire and a little flux.

BTW I'll put some different sizes of heat shrink in your package ;)
 
Last edited:
There was another similiar thread out there and someone made a good video on how to solder diodes to wire... Does anybody have it? I'm about to do my first solder job in my life and I really want to see it visually..

Would be nice and thankful. Thanks.


Back
Top