- Joined
- Mar 22, 2011
- Messages
- 791
- Points
- 0
Hey all, just wanted to share my recent build with you all!
Introducing the awesome budget built 16x Small Open Can Fan-Cooled Labby... SOCFCL for short...
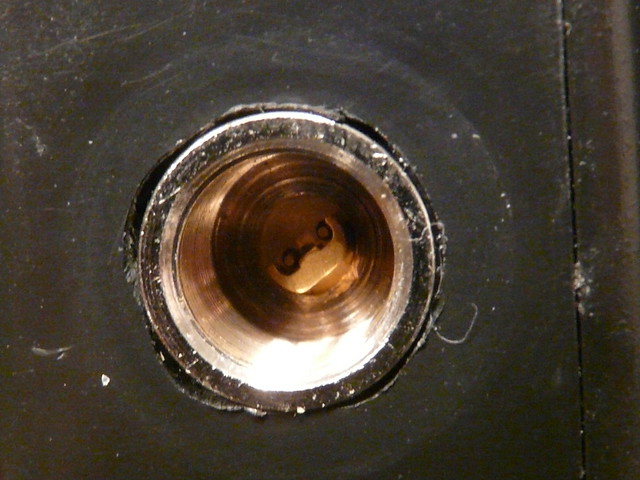
There's a picture of the module hole and the diode inside it
This is a pretty compact laser! I have been meaning to put some of these 40mm fans I have to use, and I figured I may as well make a small laser!
It's build process was not as tough as I thought it would be, but was a little tricky. First, I had to plan the build in such a way to layer switches, leave room for the DC Jack, and give the laser and its driver sufficient space.
I did not have my Dremel present, so I had to drill a 3/8" hole and file it to ~12mm. It wasn't a perfect filing job, but it got the job done and I was able to offset the box's angled sides and allow for a straight alignment of the beam.
The hole for the fan took the longest to prepare. I first found the diameter of the hole needed and then drilled as many decent sized holes within the circle's insides. I cut the remaining "spider web" of plastic with wire cutters and filed the hole as best as I could and it came out pretty well. Then I epoxied the fan over the hole after it was all closed up.
Overall, this laser is 4cm tall, 6cm wide, and 8.5cm long! Not bad! Especially considering it has a fan mounted to it and two long switches!
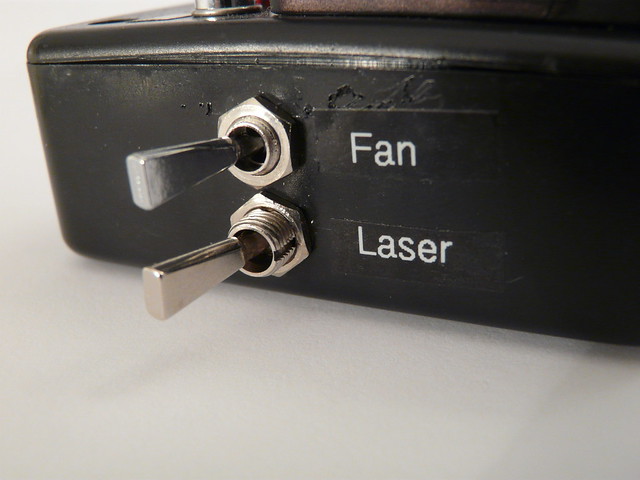
The project box had been slightly used... By that I mean I used to use it to test the burning capabilities of various lasers. So there are some tracks of melted plastic, but I don't mind. It was a cheap build and I'm not too picky with it for the price of the parts. Also it's bulging a little on one side. I either caught a wire just barely or there's a bit of epoxy on it. But again, totally happy with the build
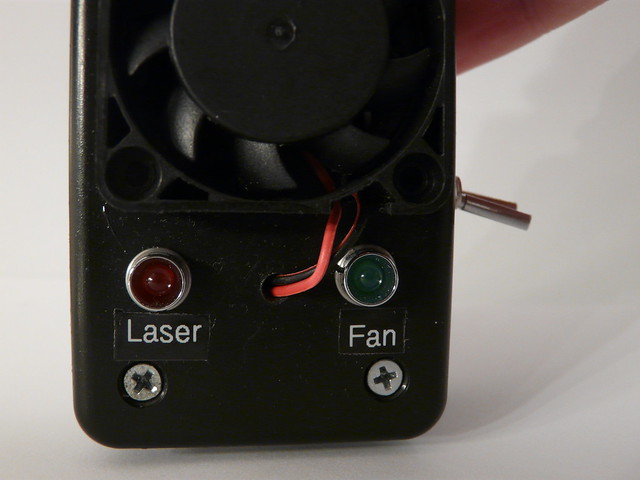
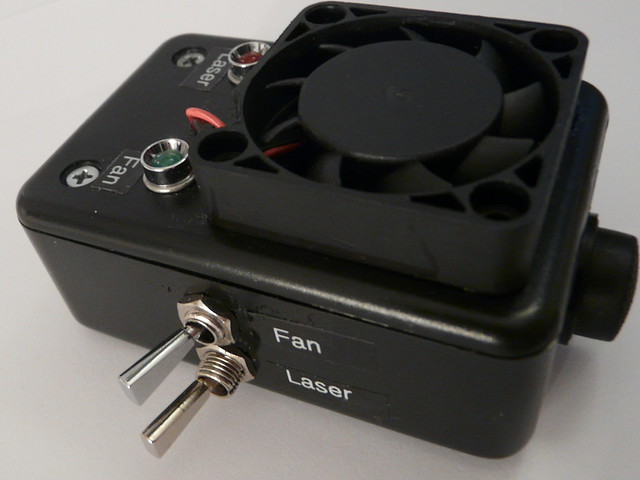
There's the indication system on the top of the laser.
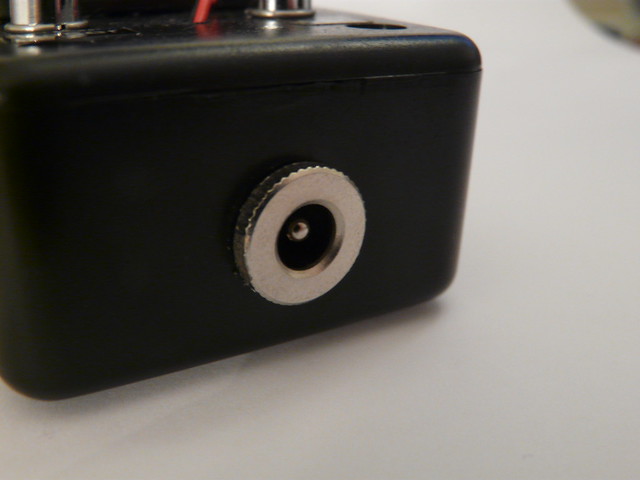
As you can see, this laser has some neat features to it! I think they add a little bit more function and class to the overall build.
Features
Fan Cooled: To help with keeping the laser at an operable temperature and to improve duty cycle.
LED Indicators: This way I can tell of I left something on if the dust cap is over the focus ring. Also I like the look They each have labels under them to show what they represent when lit.
Switches: I wanted to make this build able to run the laser and fan independently. That way I can keep the fan running while the laser is off so it's "off" cycle is shortened when it needs to be turned off. Like the LED indicators, the switches are labeled with the circuits they control.
External Power Supply: This way I don't have to open it up to change out batteries and I have the option to connect it to a wall supply! The fan is rated for 12V, but works just fine at 6V or 9V. And obviously the LM317 Driver can handle the excess voltage for the fan.
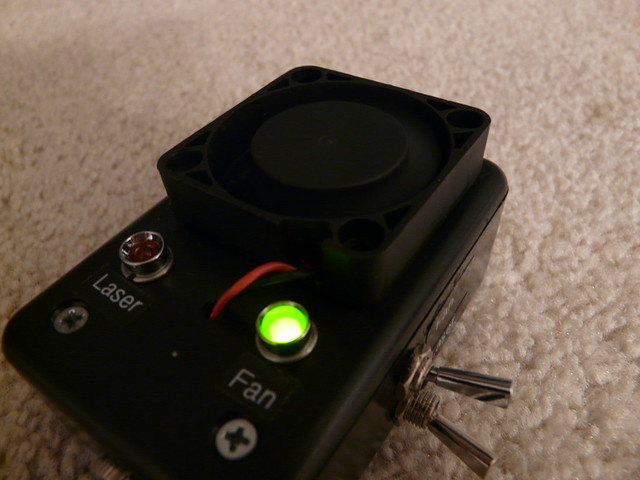
There's a photo of the fan in use and it's LED indicator... indicating.. that
Specs
Driver Output: 250mA
Estimated Output: 180mW
Power Source: >6V
Let me know what you think!
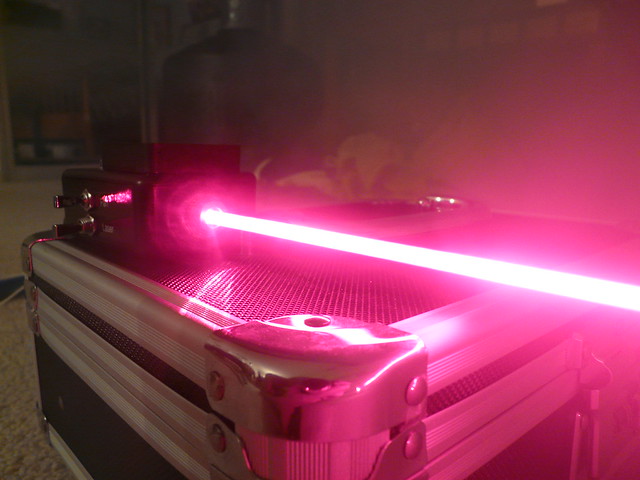
BEAMSHOTS!!!

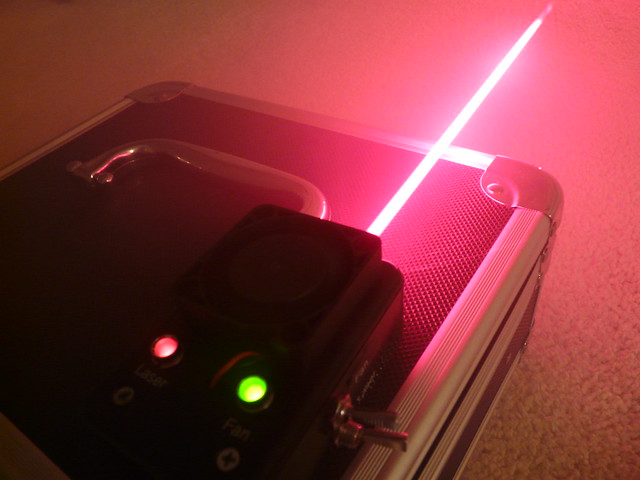
Here you can see both the LEDs doing their jobs

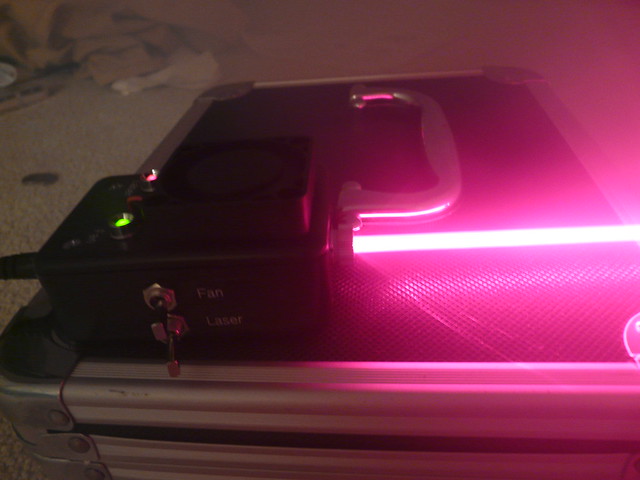
Introducing the awesome budget built 16x Small Open Can Fan-Cooled Labby... SOCFCL for short...

Price Breakown
Aixiz Module: $2.00 (10 for $20 deal)
Diode: Free! My friend gave me an old 16x Drive!
Project Box: $2.69 @ Radioshack
Fan: ~$2.00 from eBay
Switches: ~$2.00 from Jameco, (I already had one laying in my parts bin)
DC Jack:~$1.00 from Jameco
LM317 and Parts: ~$1.50
LED Indicators: $0.25 each from Jameco
Total: ~$11.69
Totally classifiable as a budget build!

There's a picture of the module hole and the diode inside it
This is a pretty compact laser! I have been meaning to put some of these 40mm fans I have to use, and I figured I may as well make a small laser!
It's build process was not as tough as I thought it would be, but was a little tricky. First, I had to plan the build in such a way to layer switches, leave room for the DC Jack, and give the laser and its driver sufficient space.
I did not have my Dremel present, so I had to drill a 3/8" hole and file it to ~12mm. It wasn't a perfect filing job, but it got the job done and I was able to offset the box's angled sides and allow for a straight alignment of the beam.
The hole for the fan took the longest to prepare. I first found the diameter of the hole needed and then drilled as many decent sized holes within the circle's insides. I cut the remaining "spider web" of plastic with wire cutters and filed the hole as best as I could and it came out pretty well. Then I epoxied the fan over the hole after it was all closed up.
Overall, this laser is 4cm tall, 6cm wide, and 8.5cm long! Not bad! Especially considering it has a fan mounted to it and two long switches!

The project box had been slightly used... By that I mean I used to use it to test the burning capabilities of various lasers. So there are some tracks of melted plastic, but I don't mind. It was a cheap build and I'm not too picky with it for the price of the parts. Also it's bulging a little on one side. I either caught a wire just barely or there's a bit of epoxy on it. But again, totally happy with the build

There's the indication system on the top of the laser.

As you can see, this laser has some neat features to it! I think they add a little bit more function and class to the overall build.
Features
Fan Cooled: To help with keeping the laser at an operable temperature and to improve duty cycle.
LED Indicators: This way I can tell of I left something on if the dust cap is over the focus ring. Also I like the look
Switches: I wanted to make this build able to run the laser and fan independently. That way I can keep the fan running while the laser is off so it's "off" cycle is shortened when it needs to be turned off. Like the LED indicators, the switches are labeled with the circuits they control.
External Power Supply: This way I don't have to open it up to change out batteries and I have the option to connect it to a wall supply! The fan is rated for 12V, but works just fine at 6V or 9V. And obviously the LM317 Driver can handle the excess voltage for the fan.

There's a photo of the fan in use and it's LED indicator... indicating.. that
Specs
Driver Output: 250mA
Estimated Output: 180mW
Power Source: >6V
Let me know what you think!
BEAMSHOTS!!!


Here you can see both the LEDs doing their jobs


Last edited:


