

IsaacT
0
- Joined
- Aug 25, 2010
- Messages
- 5,947
- Points
- 83
638nm Aurora SH-032 Build - 450mW!!!
So I have had so many parts coming recently but the diodes get here but the hosts don't,
or the hosts get here but the diodes don't. But today, I got everything I wanted for a build.
I had been planning a 1W 638nm Build for a good long while now, and I finally pulled the trigger and
bought the diode and driver. In the meantime I bought a host from Cheech226, planning
to do a single mode build in it or something. But both packages came today and I was inspired.
So without further ado, here is my most recent build. I will begin with a walkthrough of how
I built the laser, followed by a lot of pictures for you fine folks!
The Build!!!
Parts List:
500mW Mitsubishi Diode via DTR
Iron4D Driver @ 1050mA via CajunLasers
Aurora Flashlight + Gold Plated Copper Heatsink + Focus Adapter via Cheech226
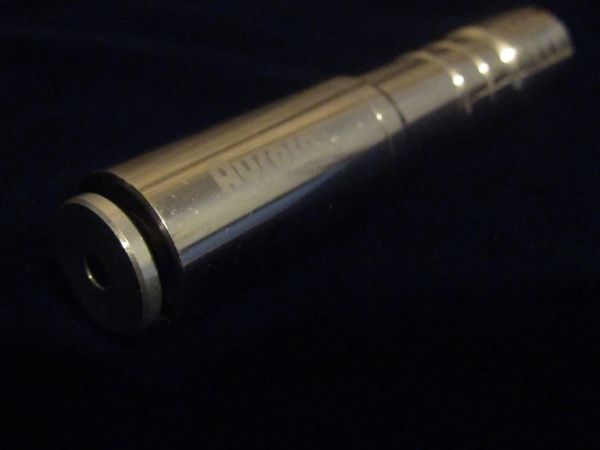
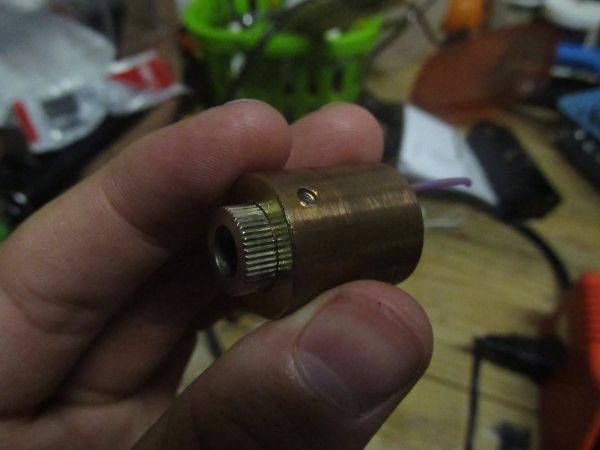
First things first, I had to empty the flashlight of its components so I can put mine inside!
The flashlight Module was a bit difficult to remove, but you really just have to find the right
angle for the torque. Once opened, I unsoldered the Cree Emitter from the Flashlight Pill,
paying attention to which wire was which. Although I had expected some manner of difficulty,
the pill was the easiest part of this build, as a contact point was already installed(thanks china!!!)
and the wires already protruding from the holes in the pill.
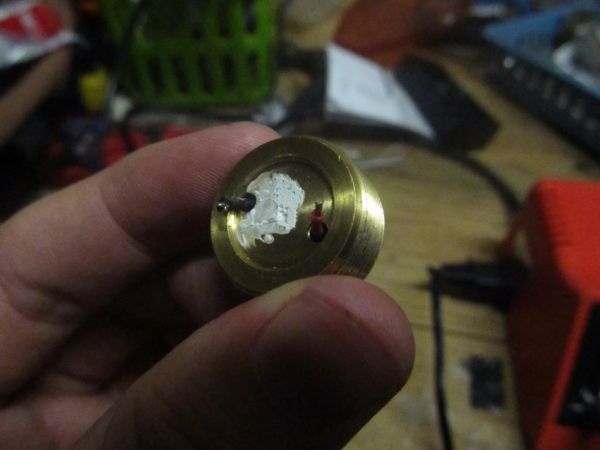
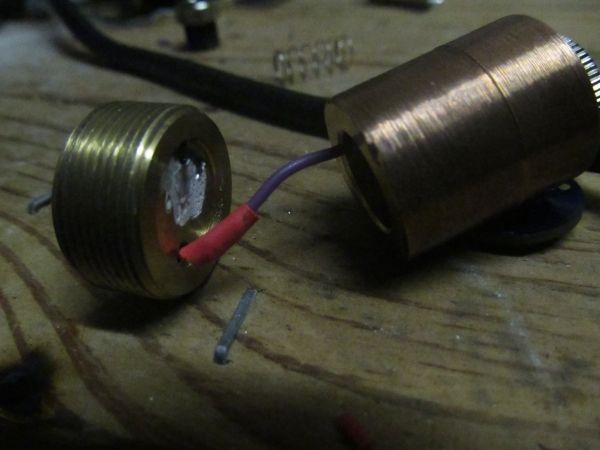
Next, I removed the Diode purchased from DTR and used my Diode Press tool for the first time
EVER in the years I have owned it to press the Mitsu500 into the 5.6mm Copper Module from DTR.
I had separated all the parts in this build for a couple of reasons:
1. I want to feel like I had a larger part to play.
2. I am using the Iron4D driver, so I need clean, fresh pins.
After pressing the diode in I used my Weller Soldering station to solder the Iron4D driver
onto the pins, making sure to push the driver flush with the module for best heat dissipation.
Unlike my previous experience with this driver, soldering was easy and fun! It is amazing what a
difference having the right tools can make!!!
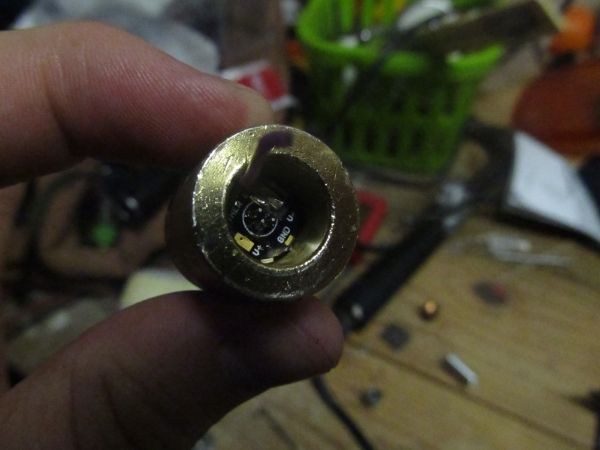
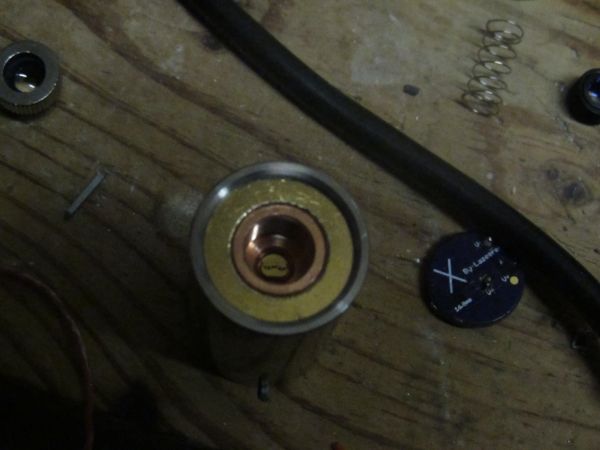
After soldering the driver onto the pins and adding a lead wire for my positive contact point, I set
the module into the Heatsink via the setscrew, being sure to keep an acrylic lens to cover up the open can diode.
After setting the module into the heatsink I hooked up the positive lead to the positive input
from the pill and tested everything to make sure the circuit was working. Seeing that it was,
I sealed the connection with heatshrink tubing to ward off any shorts. Thems bad! :tsk:
Note: Due to how this particular driver works, I did not need to hook anything up to
the negative input from the pill. This driver takes the negative input directly from the case
pin of the diode it is soldered onto.
Lastly, I inserted the battery, crossed my fingers, said a prayer to the Photon Gods, and fired her up.....
SHE LASES!!!! :drool:
All in all it was an enjoyable build! Would not be difficult for a first timer as long as you
have read up on the build before. If you haven't, and you are considering building with
an Aurora SH032, I highly recommend reading over Jayrob's Build Tutorial as it was crucial
to my success in installing the heatsink.
PICS!!!!!!
Okay, here is the part that everyone loves....MULTIMEDIA!!!!! First I am going to post
all the pics, but stay tuned at the end for an LPM video and a short video of my wavelength collection!
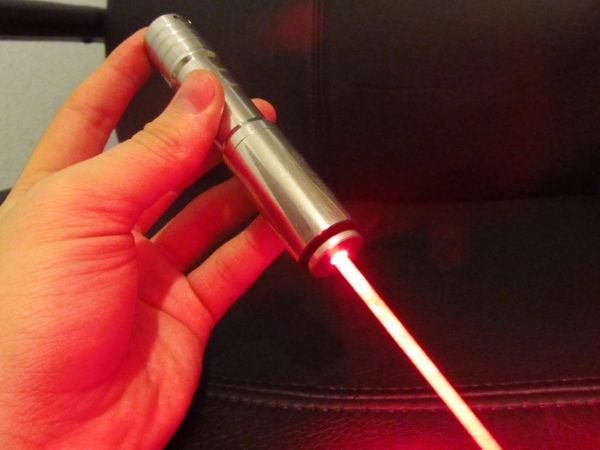
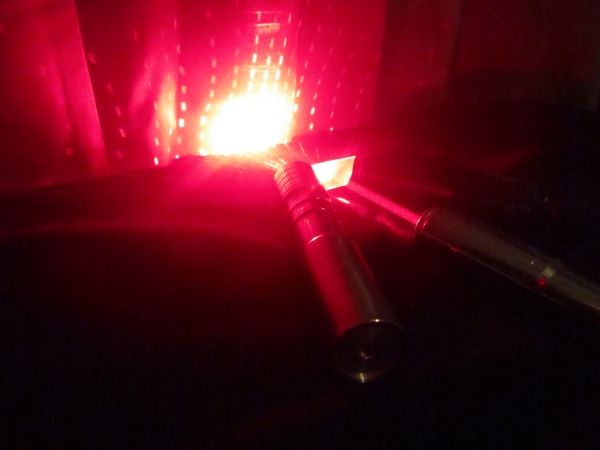
Not the best picture, but certainly shows off the orangish hue....
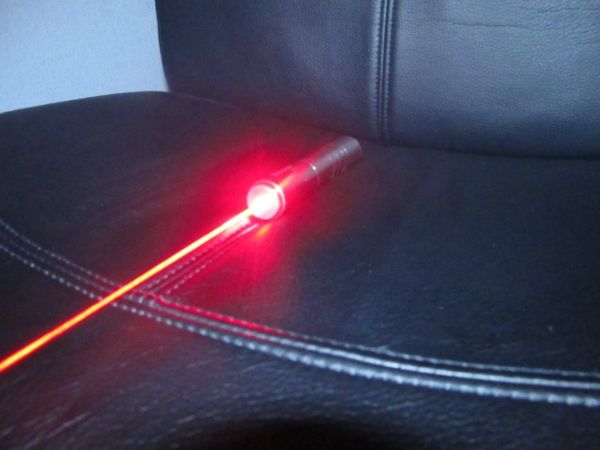
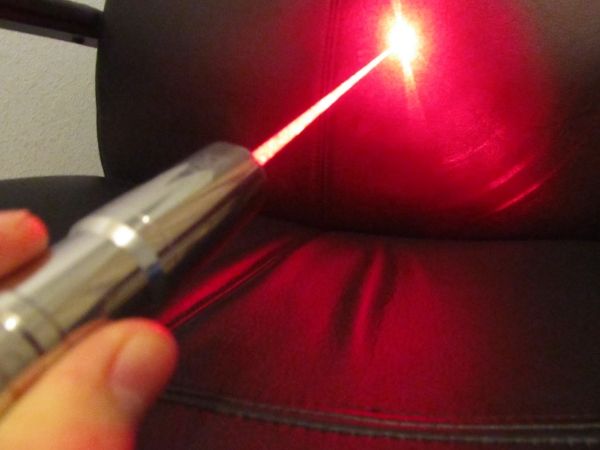
This is one of my favorites! The lack of camera flare makes for a lovely display of
this wavelength and the thick beam!
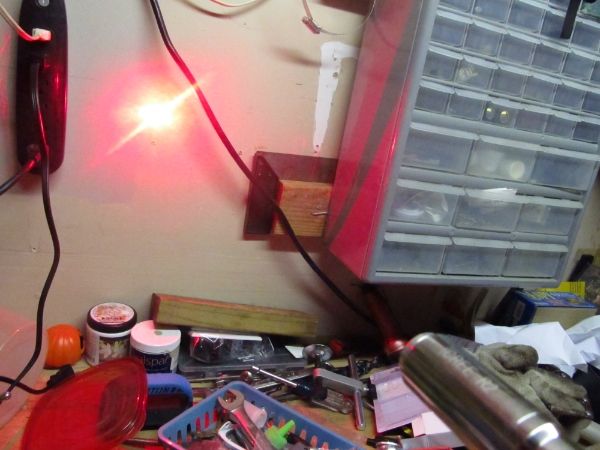
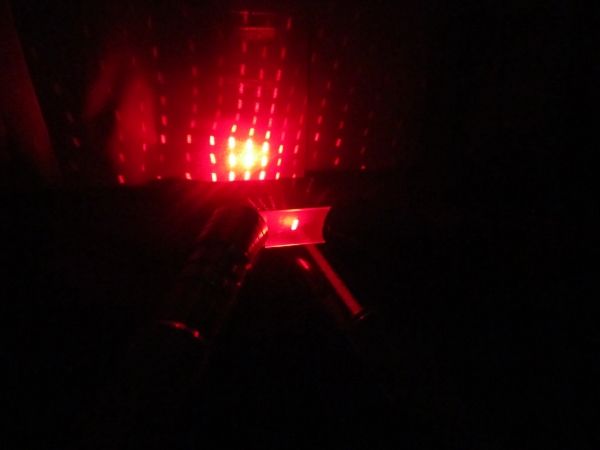
In this photo my Chair was smoking pretty rapidly....")
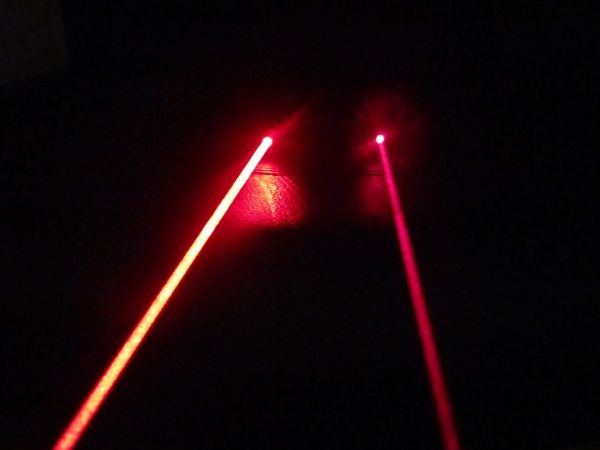
A Comparison Shot of 638nm(left) and 650nm(right)
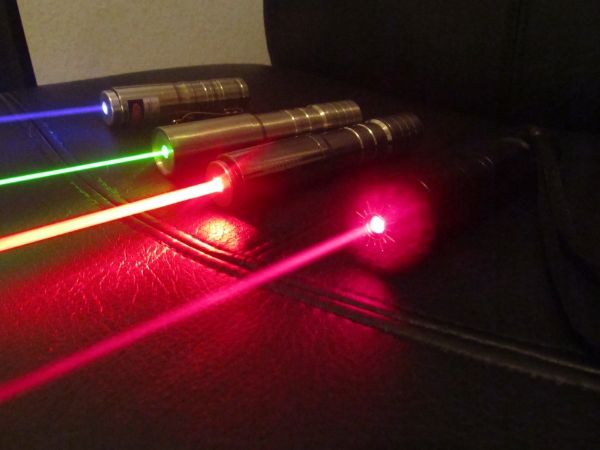
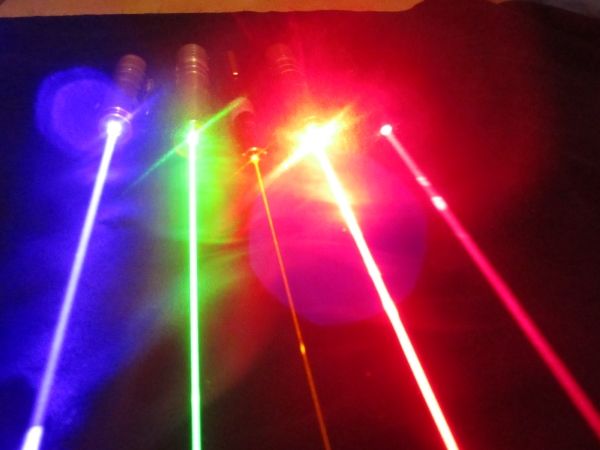
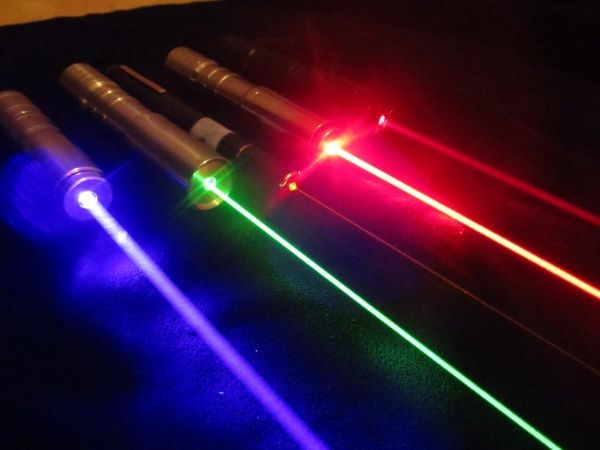
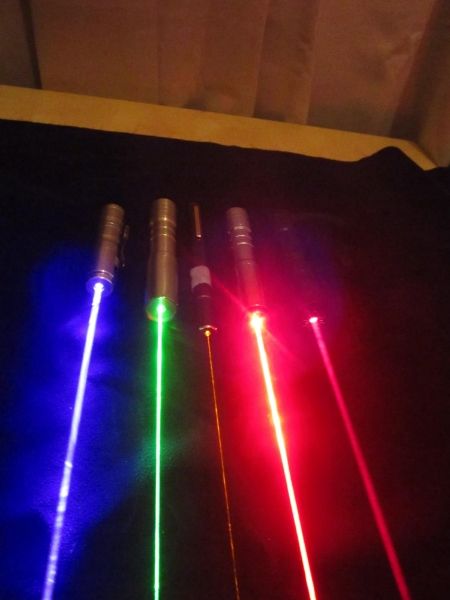
Most of my Lasers....
Some diffraction grating pictures....
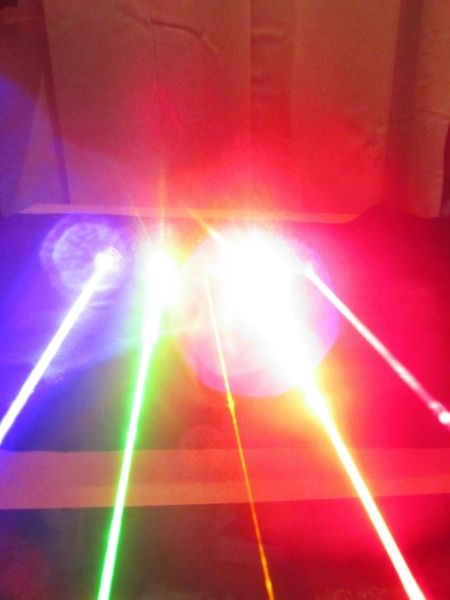
More Wavelength Pictures! All my Wavelengths in these!!!! You will notice the lack of 445nm....
....will be remedied soon.

That is all for wavelength pictures for now.....but how about a video?! I am uploading
them to youtube now! Should be up shortly!
VIDEOS!!!!!
Overall Power Output is ~450mW. I had originally planned for a 1.4A build, but DTR pointed
out the shift in wavelength would be a bit much so i went for a more conservative 1050mA.
This is still a great laser, and I am very happy with it!!!
Thanks for looking!
Isaac
So I have had so many parts coming recently but the diodes get here but the hosts don't,
or the hosts get here but the diodes don't. But today, I got everything I wanted for a build.
I had been planning a 1W 638nm Build for a good long while now, and I finally pulled the trigger and
bought the diode and driver. In the meantime I bought a host from Cheech226, planning
to do a single mode build in it or something. But both packages came today and I was inspired.
So without further ado, here is my most recent build. I will begin with a walkthrough of how
I built the laser, followed by a lot of pictures for you fine folks!
The Build!!!
Parts List:
500mW Mitsubishi Diode via DTR
Iron4D Driver @ 1050mA via CajunLasers
Aurora Flashlight + Gold Plated Copper Heatsink + Focus Adapter via Cheech226
First things first, I had to empty the flashlight of its components so I can put mine inside!
The flashlight Module was a bit difficult to remove, but you really just have to find the right
angle for the torque. Once opened, I unsoldered the Cree Emitter from the Flashlight Pill,
paying attention to which wire was which. Although I had expected some manner of difficulty,
the pill was the easiest part of this build, as a contact point was already installed(thanks china!!!)
and the wires already protruding from the holes in the pill.
Next, I removed the Diode purchased from DTR and used my Diode Press tool for the first time
EVER in the years I have owned it to press the Mitsu500 into the 5.6mm Copper Module from DTR.
I had separated all the parts in this build for a couple of reasons:
1. I want to feel like I had a larger part to play.
2. I am using the Iron4D driver, so I need clean, fresh pins.
After pressing the diode in I used my Weller Soldering station to solder the Iron4D driver
onto the pins, making sure to push the driver flush with the module for best heat dissipation.
Unlike my previous experience with this driver, soldering was easy and fun! It is amazing what a
difference having the right tools can make!!!
After soldering the driver onto the pins and adding a lead wire for my positive contact point, I set
the module into the Heatsink via the setscrew, being sure to keep an acrylic lens to cover up the open can diode.
After setting the module into the heatsink I hooked up the positive lead to the positive input
from the pill and tested everything to make sure the circuit was working. Seeing that it was,
I sealed the connection with heatshrink tubing to ward off any shorts. Thems bad! :tsk:
Note: Due to how this particular driver works, I did not need to hook anything up to
the negative input from the pill. This driver takes the negative input directly from the case
pin of the diode it is soldered onto.
Lastly, I inserted the battery, crossed my fingers, said a prayer to the Photon Gods, and fired her up.....
SHE LASES!!!! :drool:
All in all it was an enjoyable build! Would not be difficult for a first timer as long as you
have read up on the build before. If you haven't, and you are considering building with
an Aurora SH032, I highly recommend reading over Jayrob's Build Tutorial as it was crucial
to my success in installing the heatsink.
PICS!!!!!!
Okay, here is the part that everyone loves....MULTIMEDIA!!!!! First I am going to post
all the pics, but stay tuned at the end for an LPM video and a short video of my wavelength collection!
Not the best picture, but certainly shows off the orangish hue....
This is one of my favorites! The lack of camera flare makes for a lovely display of
this wavelength and the thick beam!
In this photo my Chair was smoking pretty rapidly....
A Comparison Shot of 638nm(left) and 650nm(right)
Most of my Lasers....
Some diffraction grating pictures....
More Wavelength Pictures! All my Wavelengths in these!!!! You will notice the lack of 445nm....
....will be remedied soon.
That is all for wavelength pictures for now.....but how about a video?! I am uploading
them to youtube now! Should be up shortly!
VIDEOS!!!!!
Overall Power Output is ~450mW. I had originally planned for a 1.4A build, but DTR pointed
out the shift in wavelength would be a bit much so i went for a more conservative 1050mA.
This is still a great laser, and I am very happy with it!!!
Thanks for looking!
Isaac
Last edited:


