IsaacT
0
- Joined
- Aug 25, 2010
- Messages
- 5,950
- Points
- 83
FROST
By: Isaac(WBS)

Introduction:
About a week and a half ago I saw Jayrob's Clearance Thread where he was selling his
473nm Lasever modules for 310 dollars shipped. Knowing how good of a price that is, and
having been told that one of the modules performed at 125mW, I knew I had to have one.
So I paid him that same day and he shipped that same day. That is something you
don't see much and I really appreciate the level of expedience with which he shipped my module.
So the module arrives, and I have already been hard at work finding someone to make me a host.
Since Ehgemus already had me in the queue for a host, I asked that my host be changed from
the C-Mount I was planning on to a host for my 473nm module.
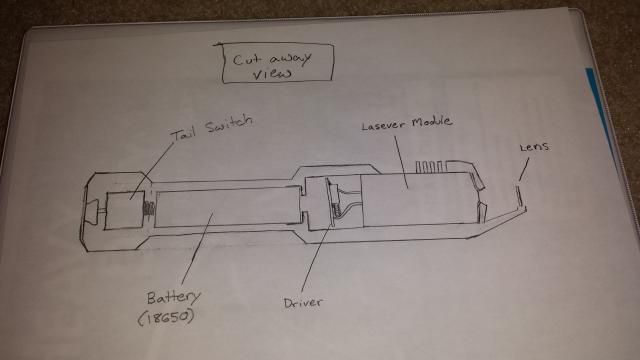
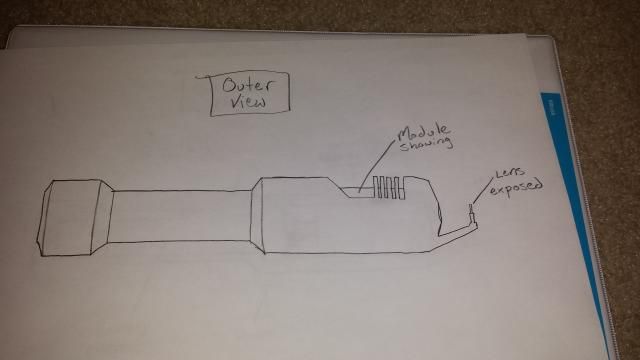
I went through some design changes, and here are pictures of my ideas. Although I eventually
discarded them in favor of a simpler host, I still like them and plan to have them made
some day soon
Exposed Lens Assembly Idea Diagram:
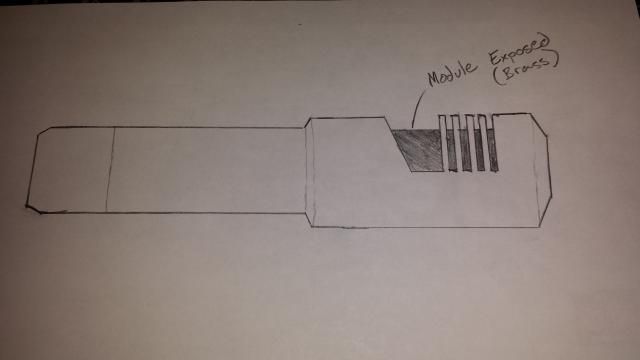
Simplified Idea, Exposed Brass. Inspired by the exposed barrel on my 1911 Springfield Armory Range Officer:
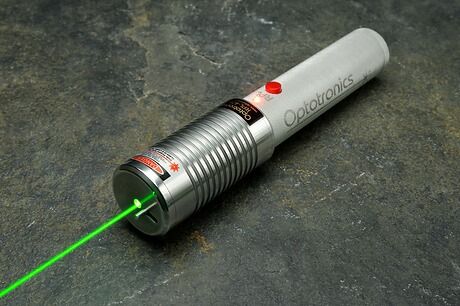
What I actually ended up asking him to make:
The Host:
After requesting that he pretty much replicate the RPL host, but do it with a Lasever module inside,
I was quite impressed when I received this:

All put together:


The custom Lens holder he made for it, I'll have more on this later.

Notice the beauty of the knurled tailcap with the angled edge.

Now that I have covered the host, let me move on to the build:
The Build:
This build, while seeming straightforward, actually required a number of modifications and a
lot of attention to detail to get right. There were a couple of issues. The inner diameter of
the barrel needed to be widened ever so slightly otherwise it would require that the module be
pressfit. The Lens holder also needed to be shortened so that the front of the laser could screw
on once the lens was at infinity. Here are the steps I took though:
1. Looks like the leads are way too long! Let's shorten them!


2. Attach the Driver's positive battery contact to the positive pin on the module. Because it is
case positive, I can do this. It is possible I didn't need this as it is somewhat redundant but
better safe than sorry.

3. Press in the button that is mounted on the driver and remove the blue switch cap. This will
allow the switch to fit in the host.

4. Attach the whole assembly to the battery negative lead in the host.

5. Test to make sure we have output. Yep!!!

6. Oh no! The inner diameter of the barrel was too small!!! After attempting to sand it down, I
eventually called some of the local machine shops in my area. Once I found one who could handle
it, I drove 30 minutes to downtown and had him remove a little bit on a HUGE lathe made for World War II.
It was a great time, and he was a nice guy. Here is the inside of the head after being widened some:

7. Resolder battery connection in preparation to get the module settled into its new home!
Notice the marks on the module...to get it to fit I spent over an hour using a dremel on a low
setting(too avoid unwanted vibrations) slimming that damn module. It is still just as functional
as it was before, but I wish I had gone to the machinist sooner.
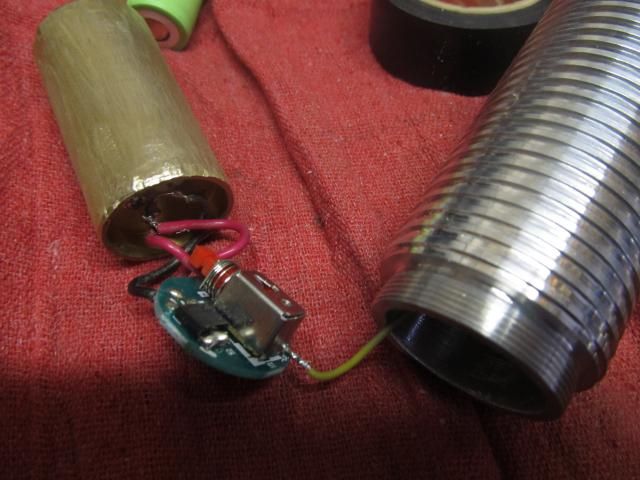
8. Wrap everything up in electrical tape so as to avoid shorts!

9. Praise Jesus it fits!!!! Here you can see the module nested down all comfy like! I ended up pushing
it farther back, as the focal length of the lens was going to mean my lens would have to be out
in front of the host but you get the idea.

10. Test output one more time

11. The damn lens mount wouldn't fit, so I trimmed it down. If only I could trim myself down a
little like this. Would make for a great weight loss plan Note: The dremel you see here is only
in my possession because I needed to trim down the module. Luckily I still needed it after the
machinist fixed my other issue.

12. View the handiwork of your labor, and look upon it in satisfaction. I managed a very clean
cut, which was wonderful for alignment later on.

13. Align and take a beamshot to prove you done did it!


14. Screw the front back on and you are done!!!

Okay, time for beamshots
Beamshots!!!!
I am still working on getting some really good quality beamshots since my camera is giving me
fits with the color balance but here is what I have so far. This host/laser is so much better looking
in person, I wish I could get the photos to come out perfectly. It is seriously a work of art!


Conclusion:
When I buy some batteries for my camera I can try to get up a video to really show this thing off.
I hope you all have enjoyed my writeup on this laser, it has certainly been an unexpected journey
Special Thanks to MarioMaster, Jayrob, Ehgemus, and all the guys on Laserchat for their
words of advice. I really appreciate you all helping me to make this build possible!
Thanks,
Isaac
By: Isaac(WBS)

Introduction:
About a week and a half ago I saw Jayrob's Clearance Thread where he was selling his
473nm Lasever modules for 310 dollars shipped. Knowing how good of a price that is, and
having been told that one of the modules performed at 125mW, I knew I had to have one.
So I paid him that same day and he shipped that same day. That is something you
don't see much and I really appreciate the level of expedience with which he shipped my module.
So the module arrives, and I have already been hard at work finding someone to make me a host.
Since Ehgemus already had me in the queue for a host, I asked that my host be changed from
the C-Mount I was planning on to a host for my 473nm module.
I went through some design changes, and here are pictures of my ideas. Although I eventually
discarded them in favor of a simpler host, I still like them and plan to have them made
some day soon
Exposed Lens Assembly Idea Diagram:


Simplified Idea, Exposed Brass. Inspired by the exposed barrel on my 1911 Springfield Armory Range Officer:

What I actually ended up asking him to make:

The Host:
After requesting that he pretty much replicate the RPL host, but do it with a Lasever module inside,
I was quite impressed when I received this:

All put together:


The custom Lens holder he made for it, I'll have more on this later.

Notice the beauty of the knurled tailcap with the angled edge.

Now that I have covered the host, let me move on to the build:
The Build:
This build, while seeming straightforward, actually required a number of modifications and a
lot of attention to detail to get right. There were a couple of issues. The inner diameter of
the barrel needed to be widened ever so slightly otherwise it would require that the module be
pressfit. The Lens holder also needed to be shortened so that the front of the laser could screw
on once the lens was at infinity. Here are the steps I took though:
1. Looks like the leads are way too long! Let's shorten them!


2. Attach the Driver's positive battery contact to the positive pin on the module. Because it is
case positive, I can do this. It is possible I didn't need this as it is somewhat redundant but
better safe than sorry.

3. Press in the button that is mounted on the driver and remove the blue switch cap. This will
allow the switch to fit in the host.

4. Attach the whole assembly to the battery negative lead in the host.

5. Test to make sure we have output. Yep!!!

6. Oh no! The inner diameter of the barrel was too small!!! After attempting to sand it down, I
eventually called some of the local machine shops in my area. Once I found one who could handle
it, I drove 30 minutes to downtown and had him remove a little bit on a HUGE lathe made for World War II.
It was a great time, and he was a nice guy. Here is the inside of the head after being widened some:

7. Resolder battery connection in preparation to get the module settled into its new home!
Notice the marks on the module...to get it to fit I spent over an hour using a dremel on a low
setting(too avoid unwanted vibrations) slimming that damn module. It is still just as functional
as it was before, but I wish I had gone to the machinist sooner.

8. Wrap everything up in electrical tape so as to avoid shorts!

9. Praise Jesus it fits!!!! Here you can see the module nested down all comfy like! I ended up pushing
it farther back, as the focal length of the lens was going to mean my lens would have to be out
in front of the host but you get the idea.

10. Test output one more time

11. The damn lens mount wouldn't fit, so I trimmed it down. If only I could trim myself down a
little like this. Would make for a great weight loss plan
in my possession because I needed to trim down the module. Luckily I still needed it after the
machinist fixed my other issue.

12. View the handiwork of your labor, and look upon it in satisfaction. I managed a very clean
cut, which was wonderful for alignment later on.

13. Align and take a beamshot to prove you done did it!


14. Screw the front back on and you are done!!!

Okay, time for beamshots
Beamshots!!!!
I am still working on getting some really good quality beamshots since my camera is giving me
fits with the color balance but here is what I have so far. This host/laser is so much better looking
in person, I wish I could get the photos to come out perfectly. It is seriously a work of art!


Conclusion:
When I buy some batteries for my camera I can try to get up a video to really show this thing off.
I hope you all have enjoyed my writeup on this laser, it has certainly been an unexpected journey
Special Thanks to MarioMaster, Jayrob, Ehgemus, and all the guys on Laserchat for their
words of advice. I really appreciate you all helping me to make this build possible!
Thanks,
Isaac
Last edited:


