- Joined
- Aug 25, 2010
- Messages
- 533
- Points
- 63
About 4 months ago I commissioned to CDBEAM777 a really hard-to-realize mod: adding corrective optics and Linos BE to a Zaser XL modified version.
In few words, a modify over a modify :na:
The childbirth was long, arduous, painful and expensive, but finally the little baby came to light!
CDBEAM fight various obstacles during its construction, obstacles that I avoid to list otherwise could clog the bandwidth
Some notes on the ZAser Correction Optics Project (ZACOP).
Start of Build goals:
1. Design/machine an assemble which will mount on to a Zaser head and which will contain a set of 6X Cylindrical optics ( Plano concave and Plano convex) and will incorporate into the build the ability to mount a Linos beam expander on the very front end.
2. The optics should correct the majority of the astigmatic output delivered by the NDG7475 diode. The goal is to achieve an X/Y aspect ratio as close to 1:1 as possible and therefore deliver a minimal divergence.
3. Design/machine a Cylindrical lens mount unit which incorporates a sliding/translating component (trobone) which allows adjustment between the Plano concave lens and the Plano convex lens. This will be labeled as the RBT unit and be machined from 6061 Aluminum.
4. Design/machine an adapter to function as the mounting platform for the RBT and to be positioned between the Zaser host head and the Linos beam expander. This will be labeled as the H-BE and be machined from 6061 Aluminum.
5. Design/machine the RBT and H-BE so as to deliver the corrected beam axis dead centre into Linos beam expander, with the functional goal being to not create any aberrations as the corrected beam is expanded by the Linos unit.
6. Utilize a clear Acrylic Tube to act as a exoskeleton/ framwork to mount the H-BE and RBT within the tube. The tube will act to align and clamp the H-BE and RBT and to display the internal optical corrections.
7. Assemble and align all components to achieve both a correct beam of minimal divergence and a centerized beam axis to present to the Linos first input lens.
Main Component identification:
1. Zaser host/build with a NDG 7475 LD
2. G2 Collimation lens
3. Aluminum RBT Cylindrical lens mount unit
4. Plano concave/Plane convex telescope set cylindrical lenses @ 6X
5. Aluminum H-BE adaptor for RBT mounting and Linos attachment
6. Acrylic cast tube @ 6.35mm wall thickness for framework and display.
And now ... let's start to dance !!
The original build:
http://laserpointerforums.com/f45/z...-3-elements-glass-lens-93923.html#post1362765
The ZACOP CAD designs:
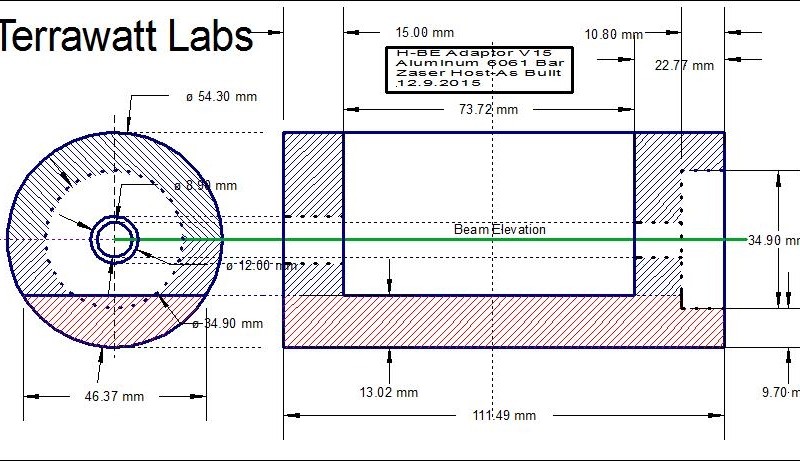
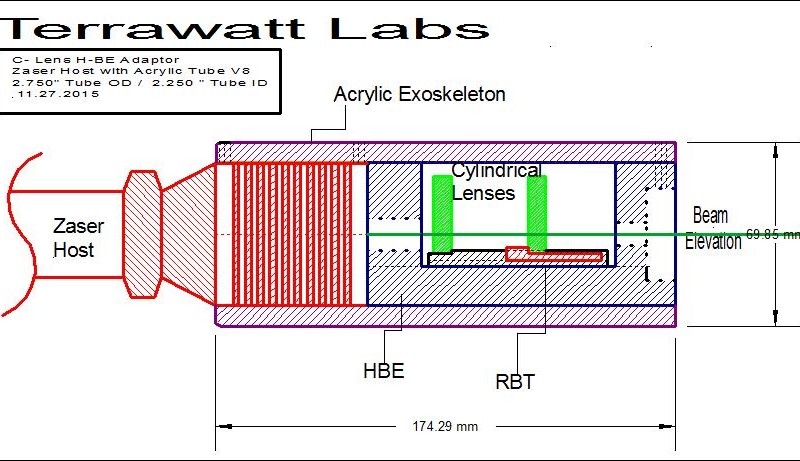
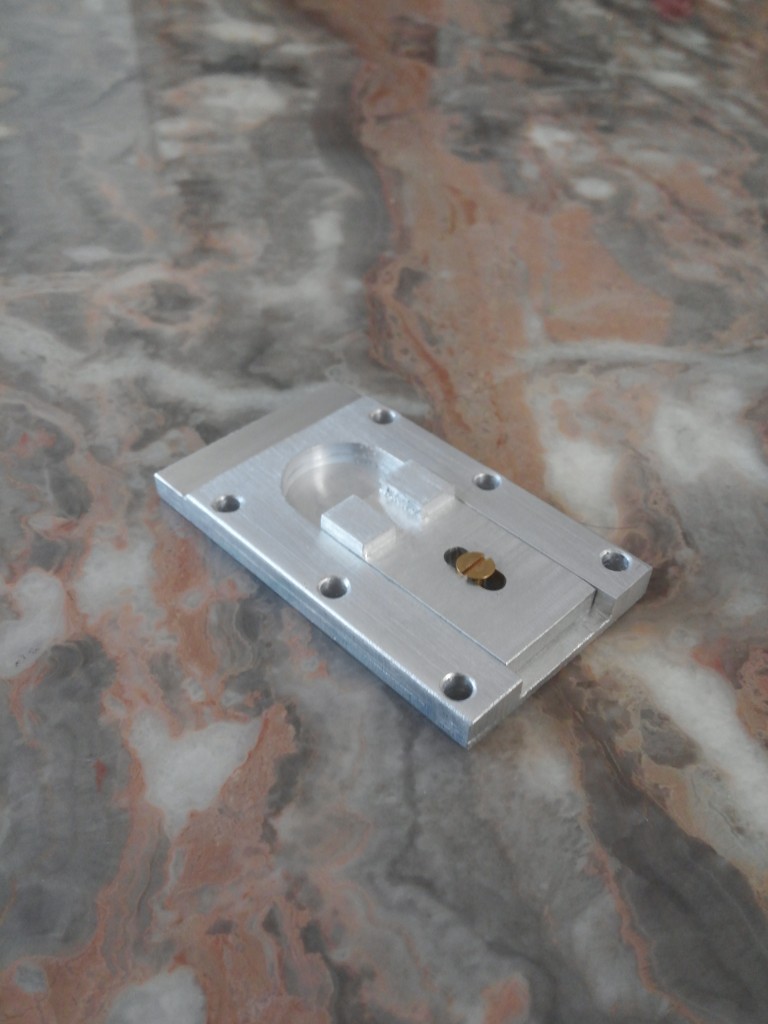
The "trombone" part (a CDBEAM idea, very useful to move back/forth one of the corrective optic lenses without the needs to unglue them):
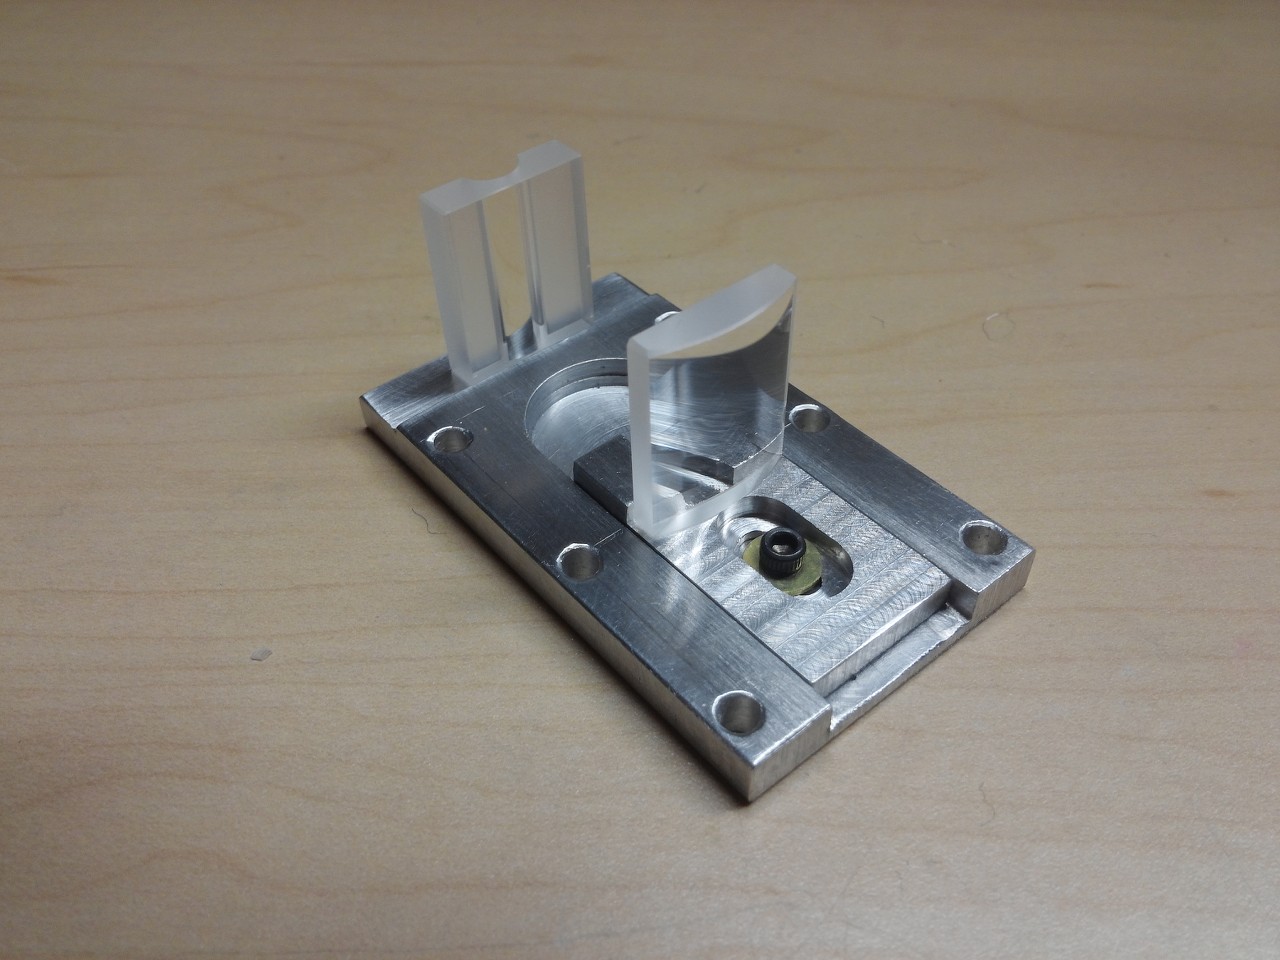
The corrective lenses glued over the trombone surface:
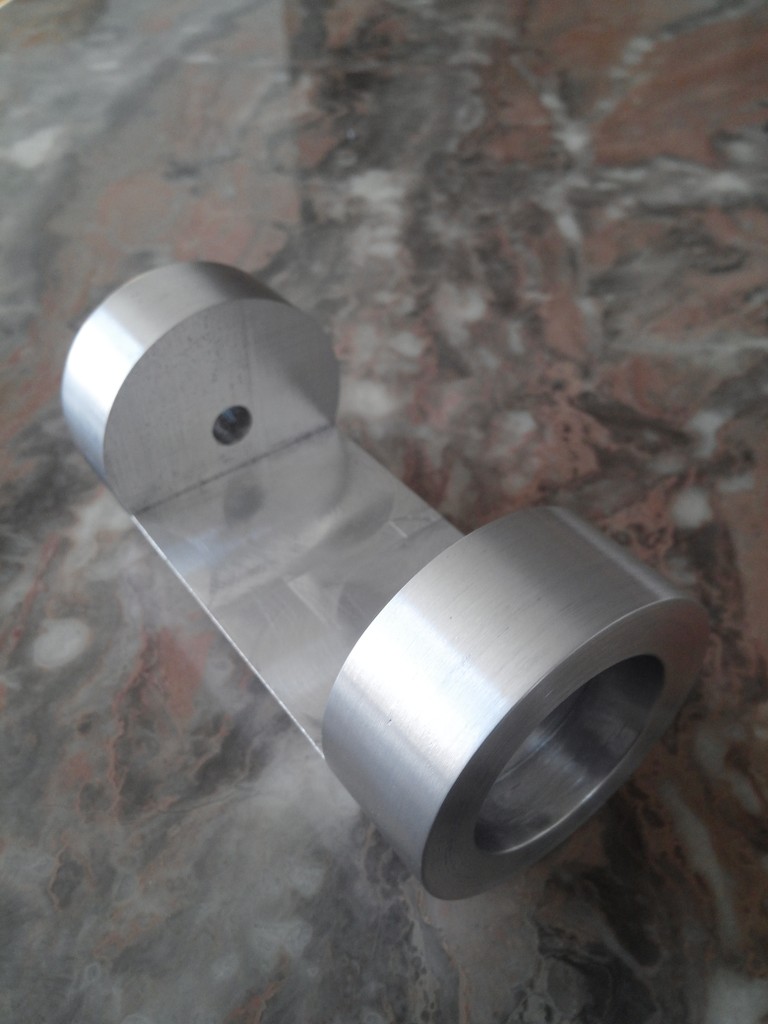
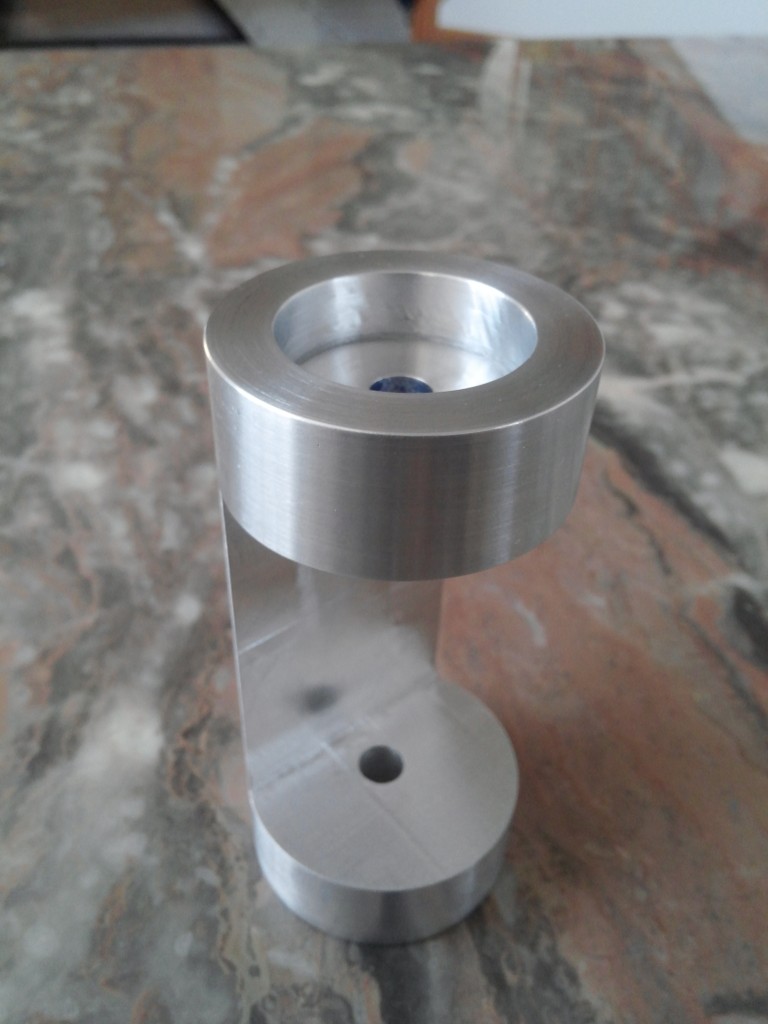
The add-on well-machined aluminum container where every part will be mounted:
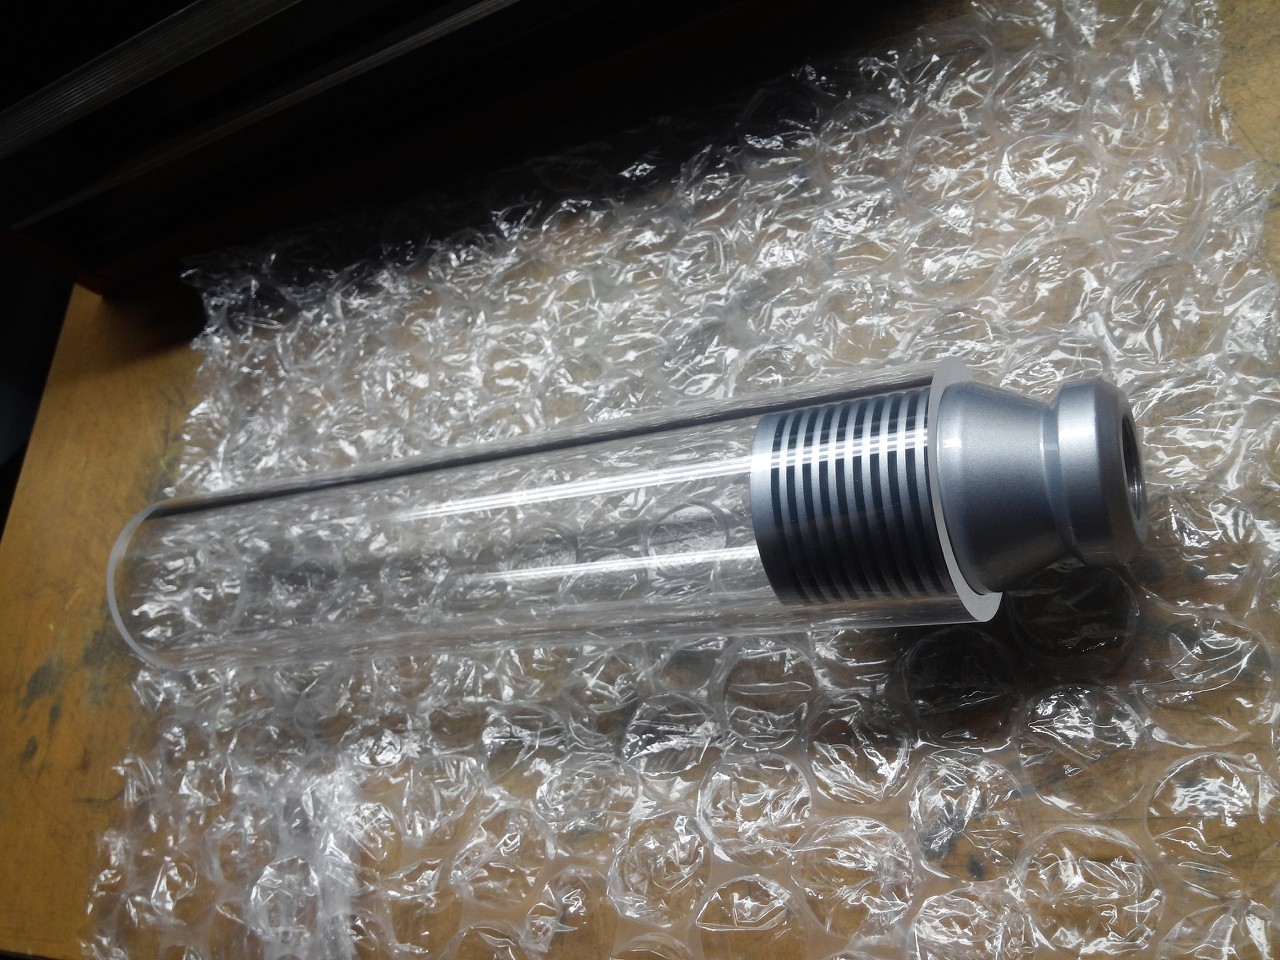
The acrylic tube ready to be machined:
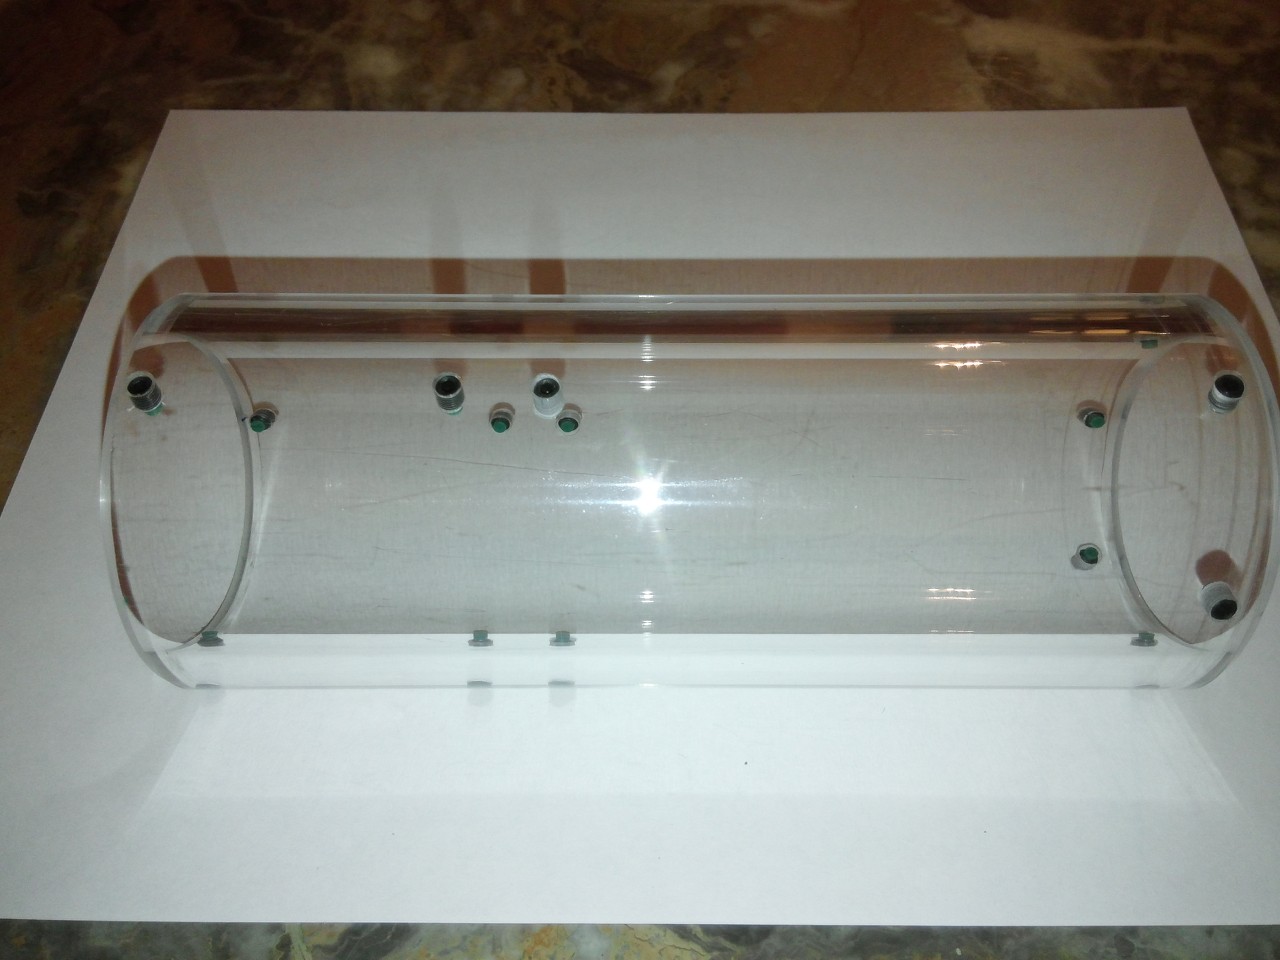
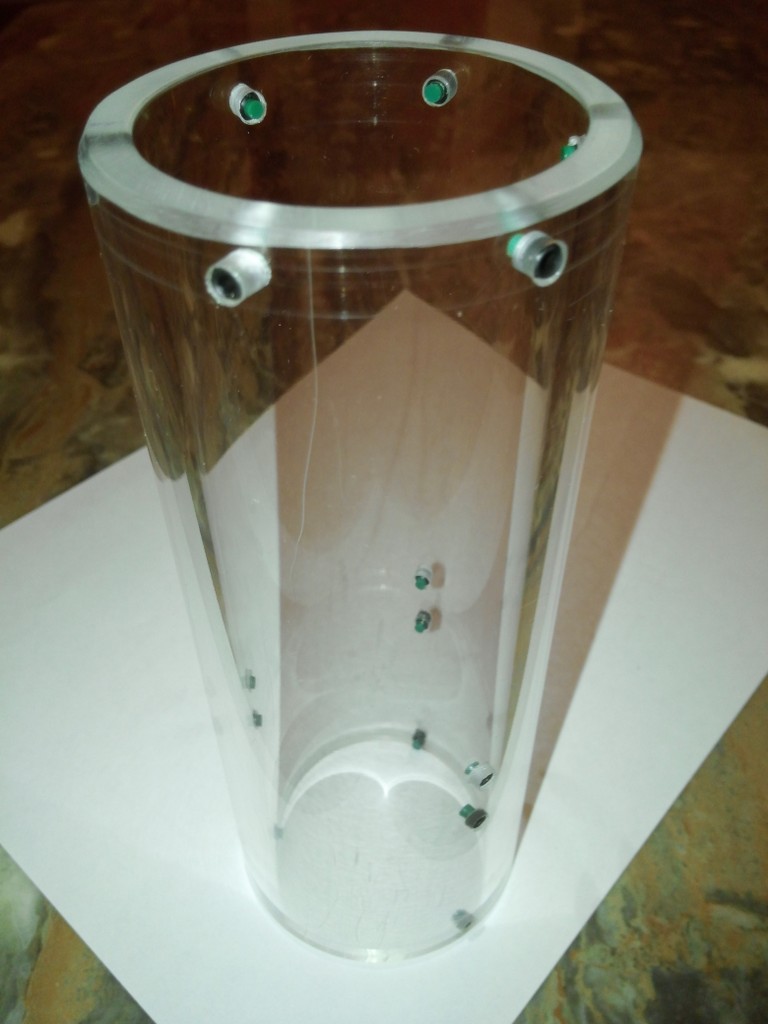
The shortened acrylic tube with chamfers, holes and nylon-tipped screws:
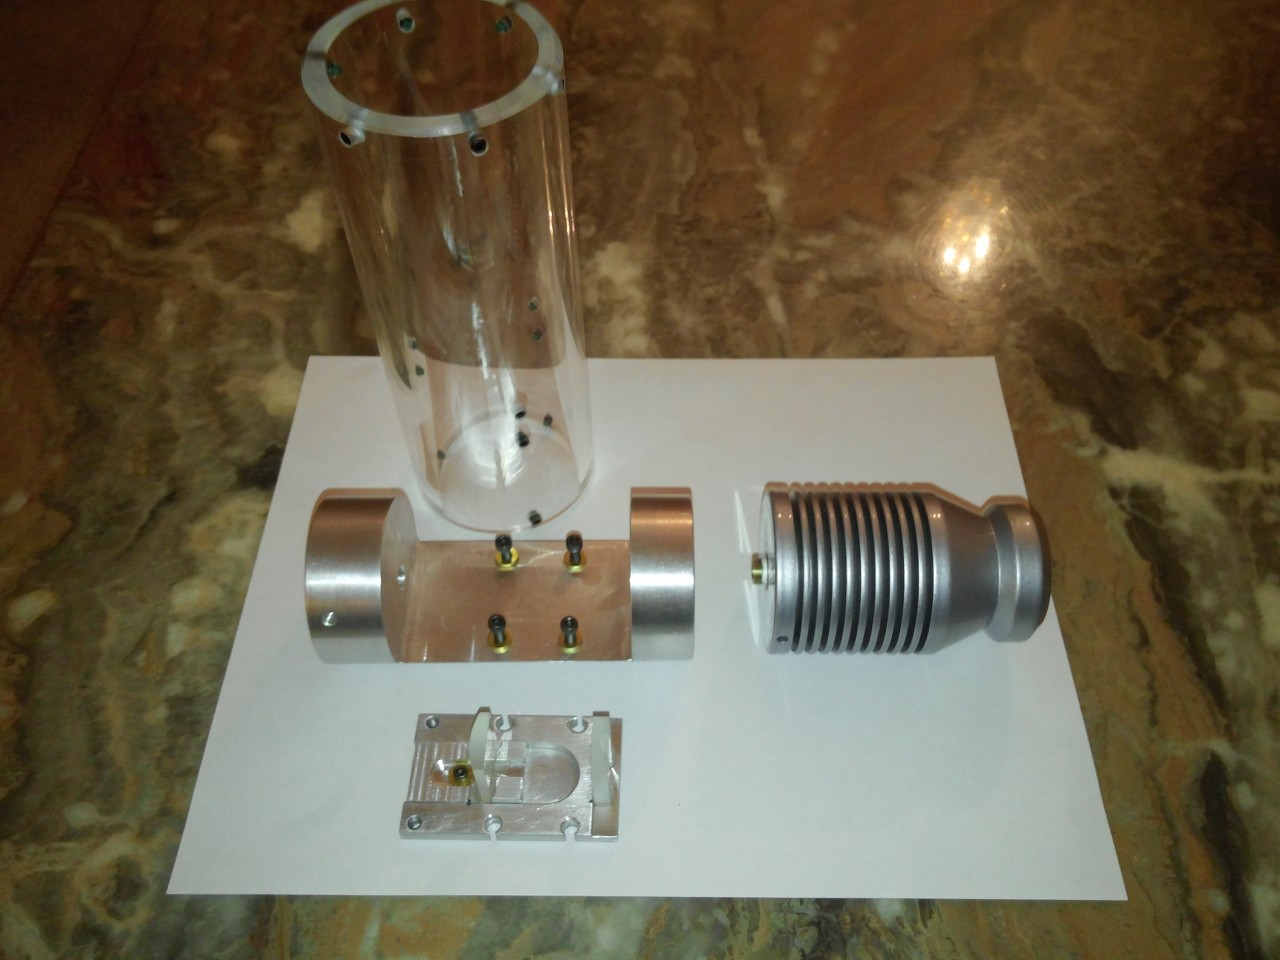
All the parts ready to be assembled:
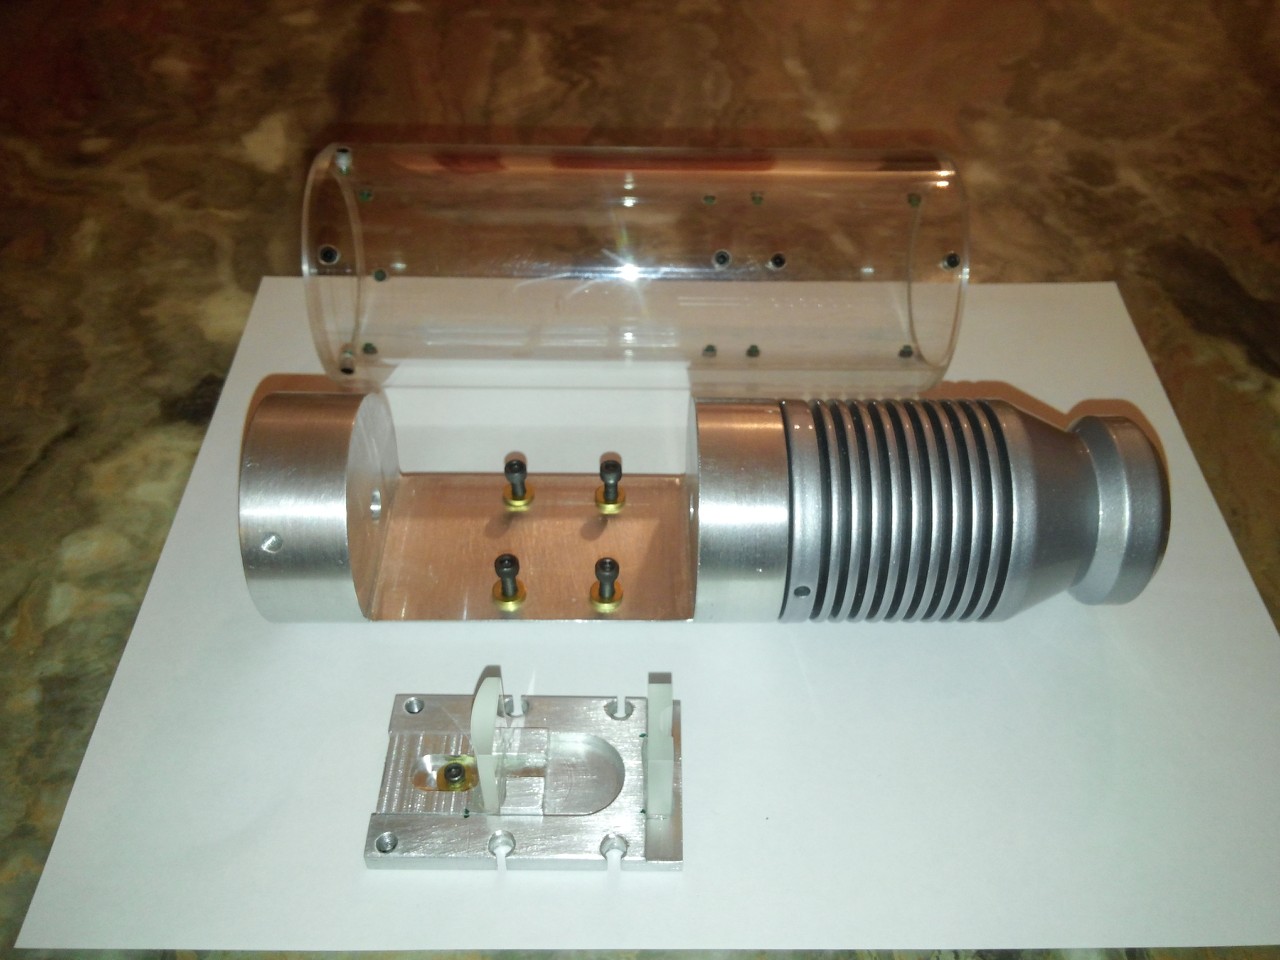
The "trombone" with correction lenses locked inside the aluminum adaptor:

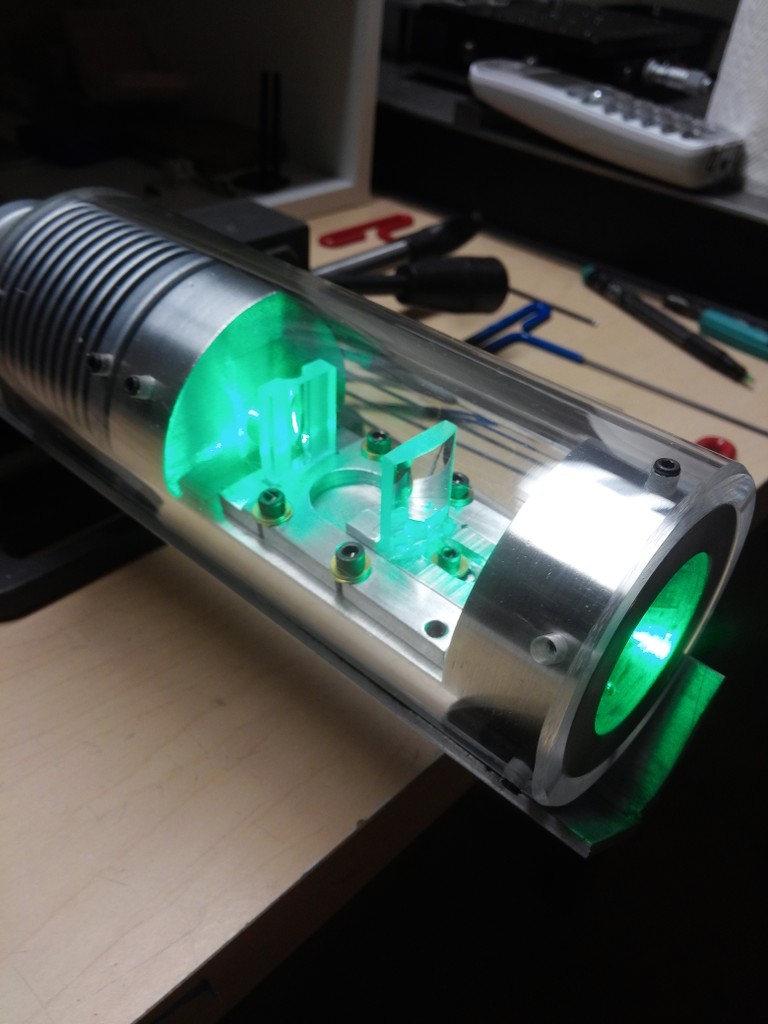
The head fully assembled:
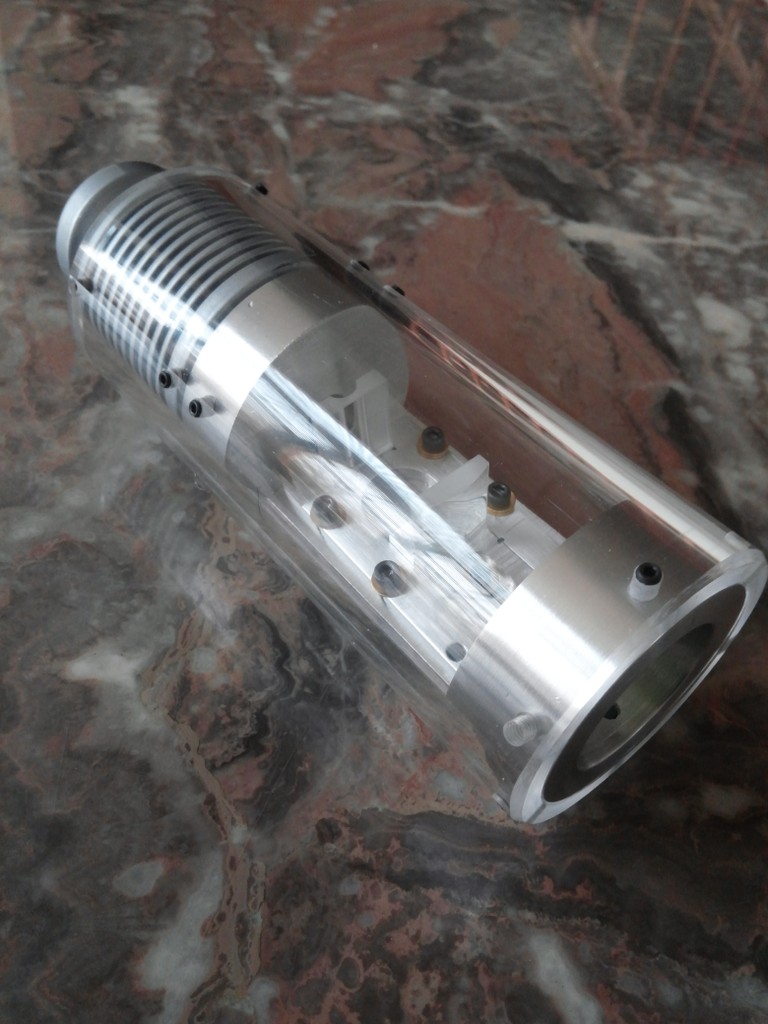
The head is alive:
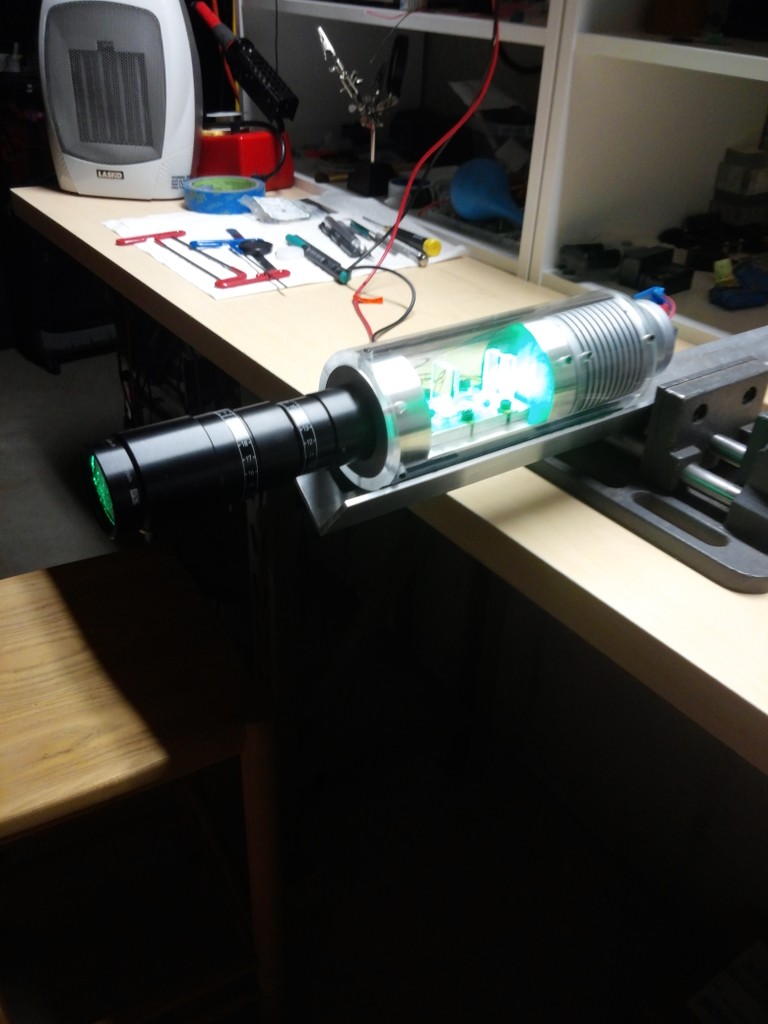
Linos BE attached:
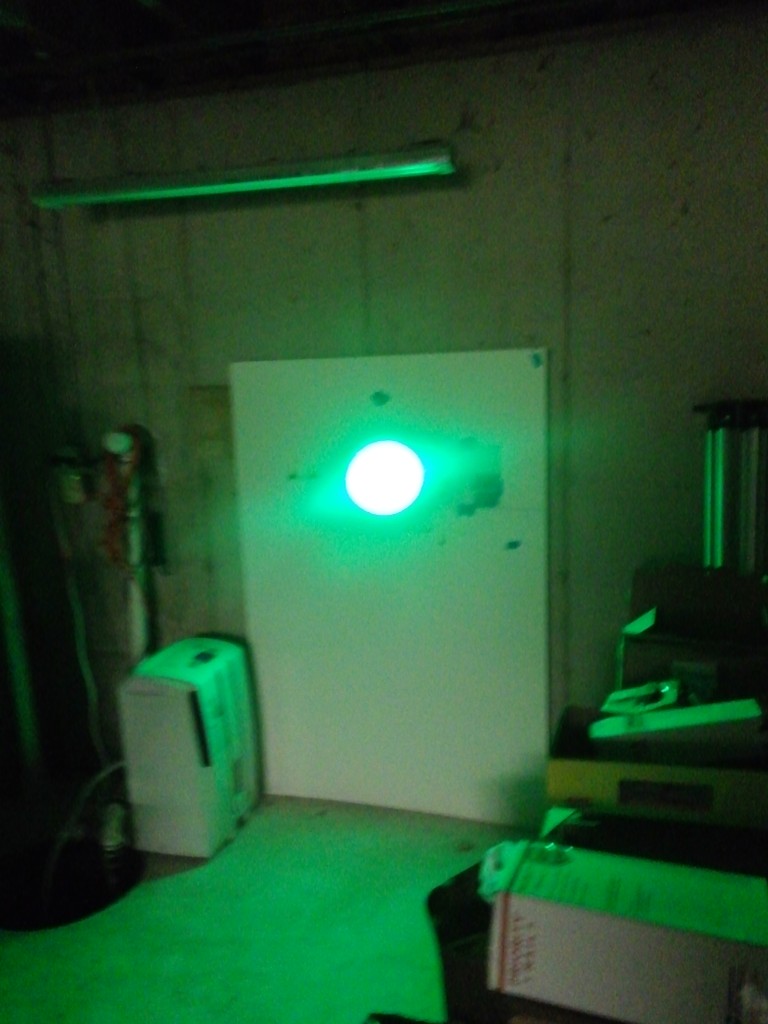
The perfect rounded dot:
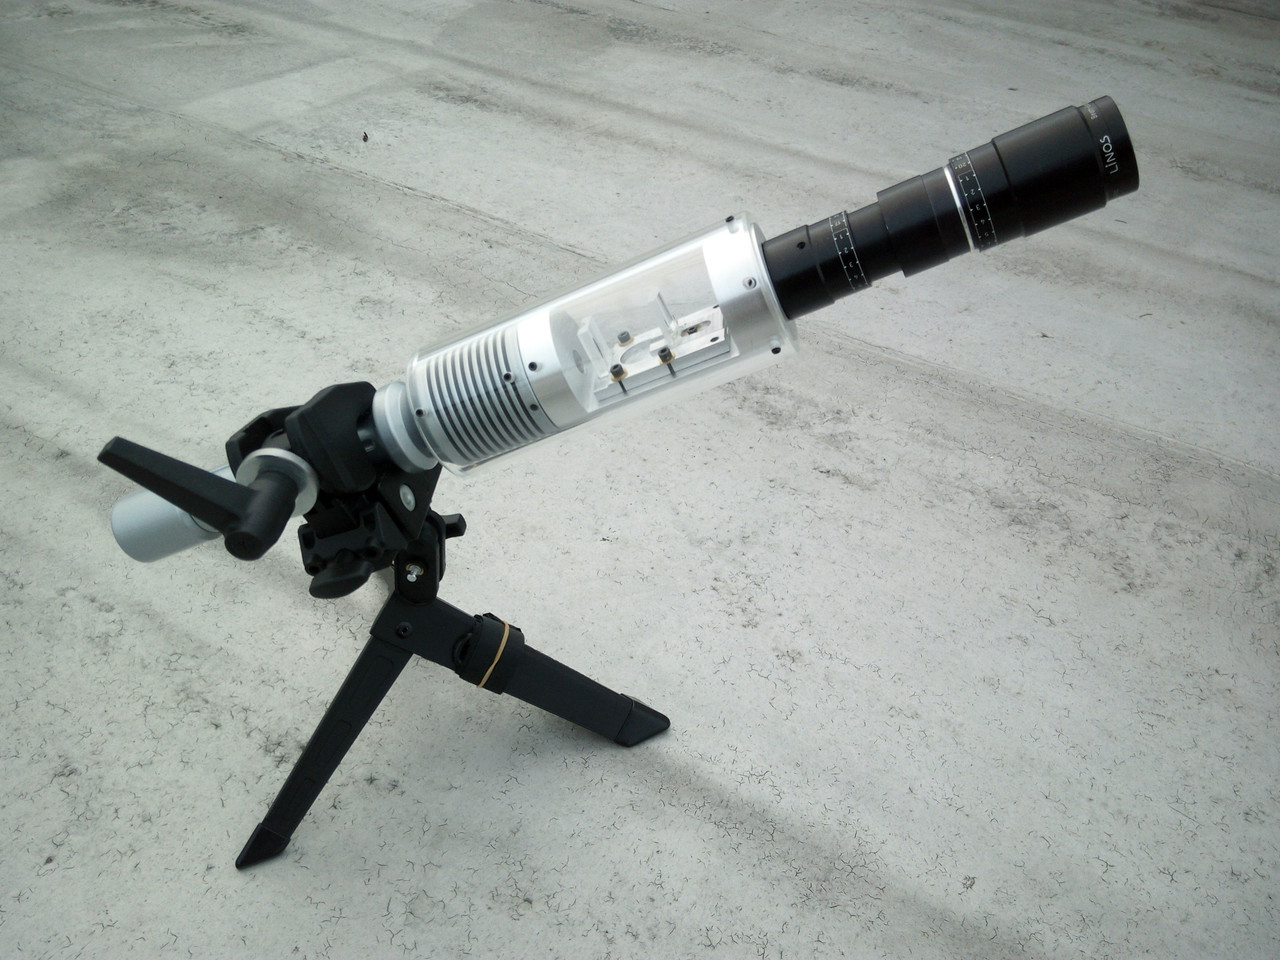
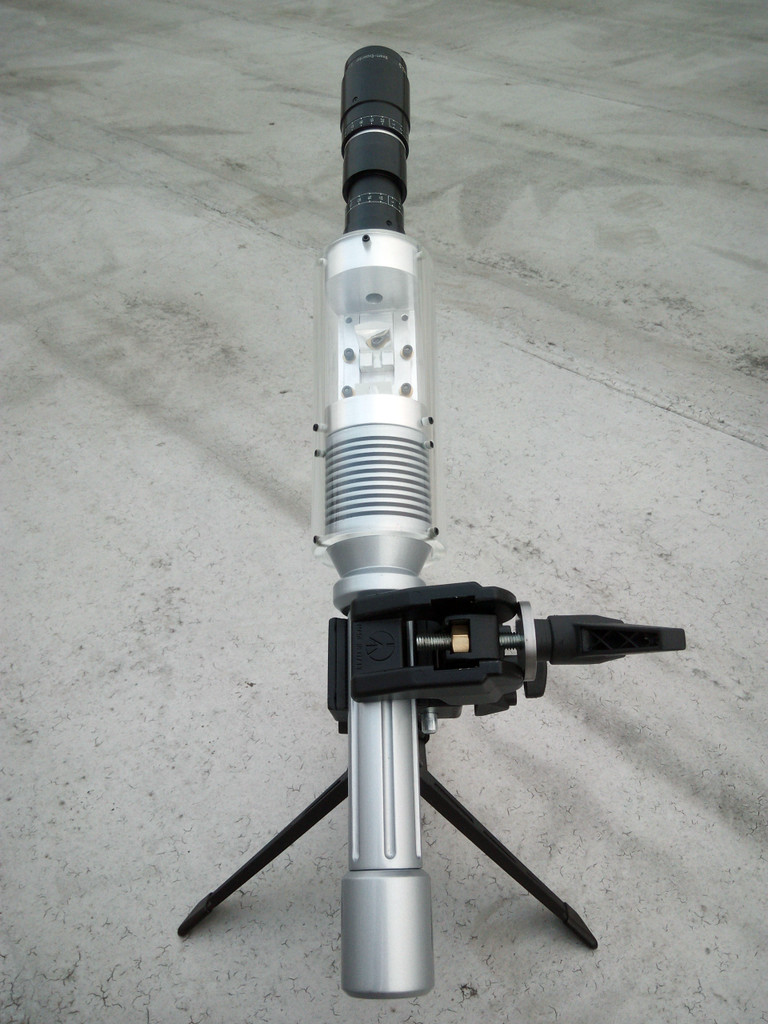
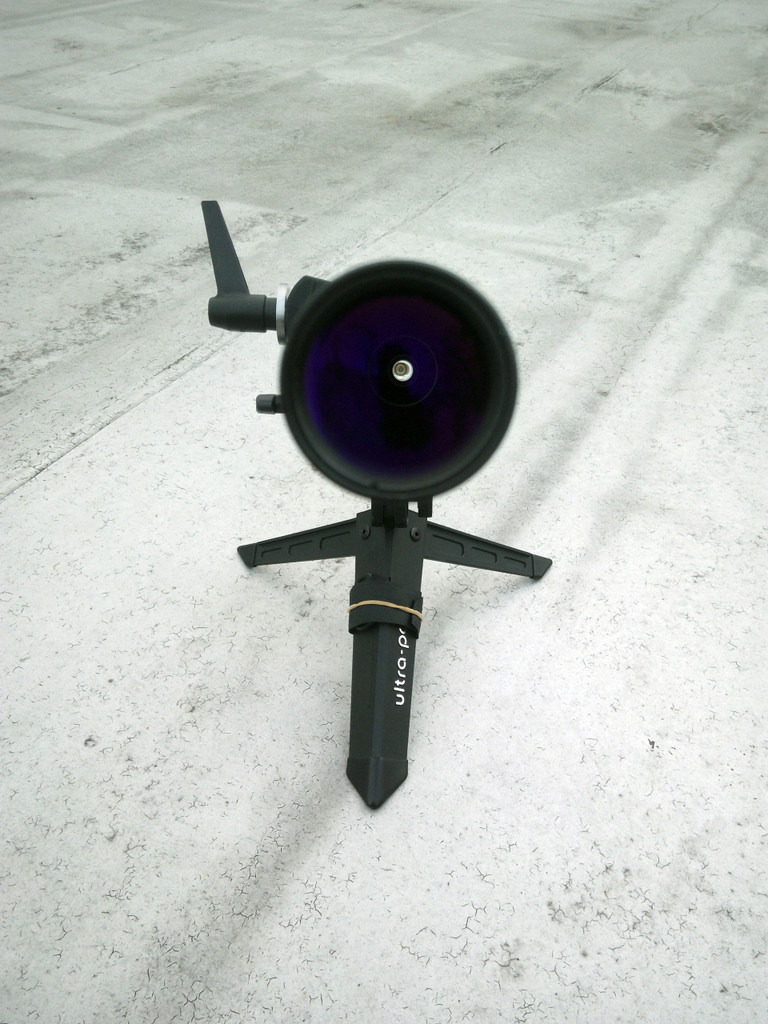
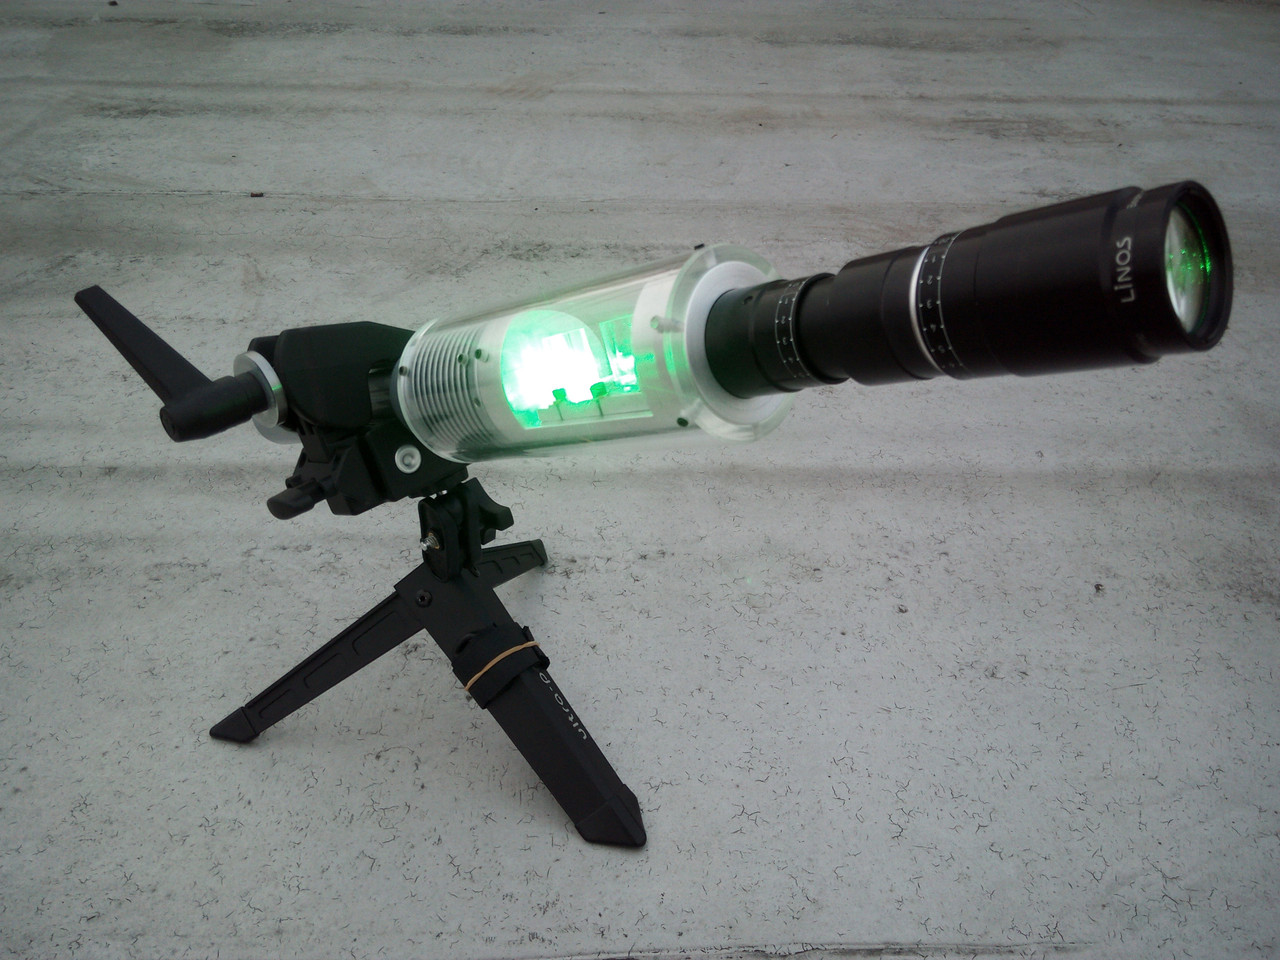
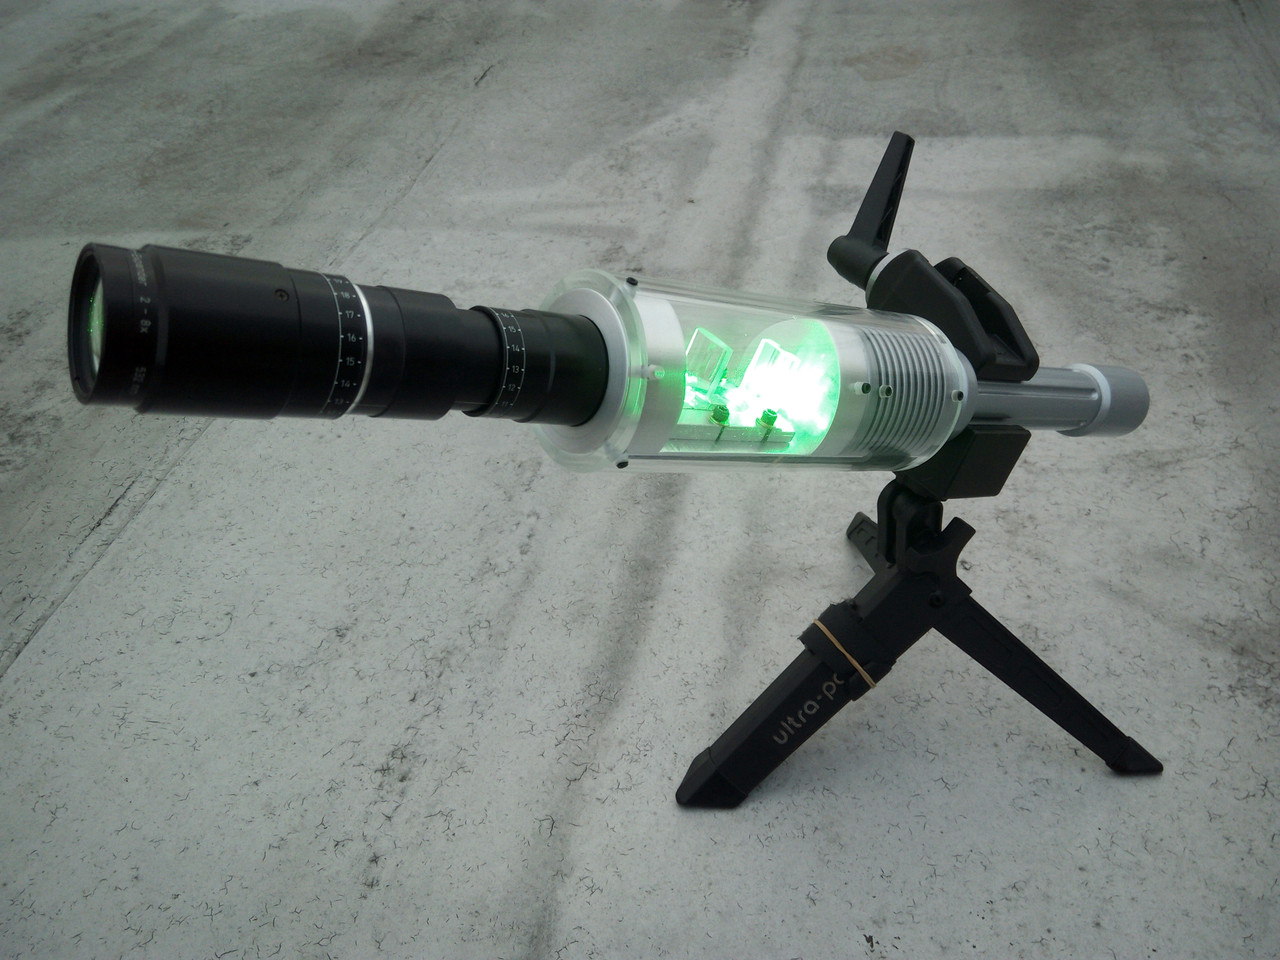
The ZACOP mounted on PEDCO ULTRAPOD II with Manfrotto superclamp:
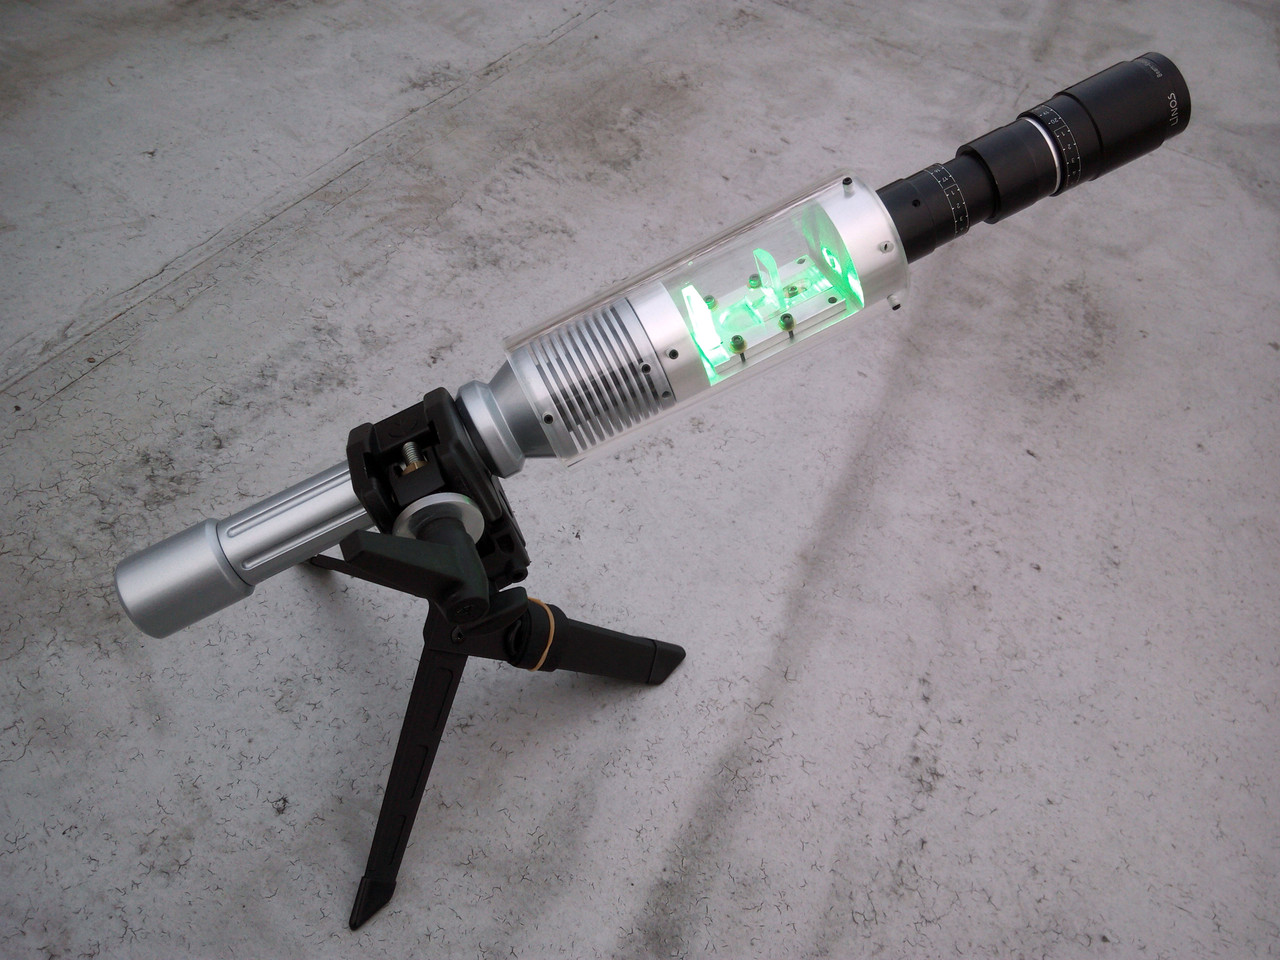
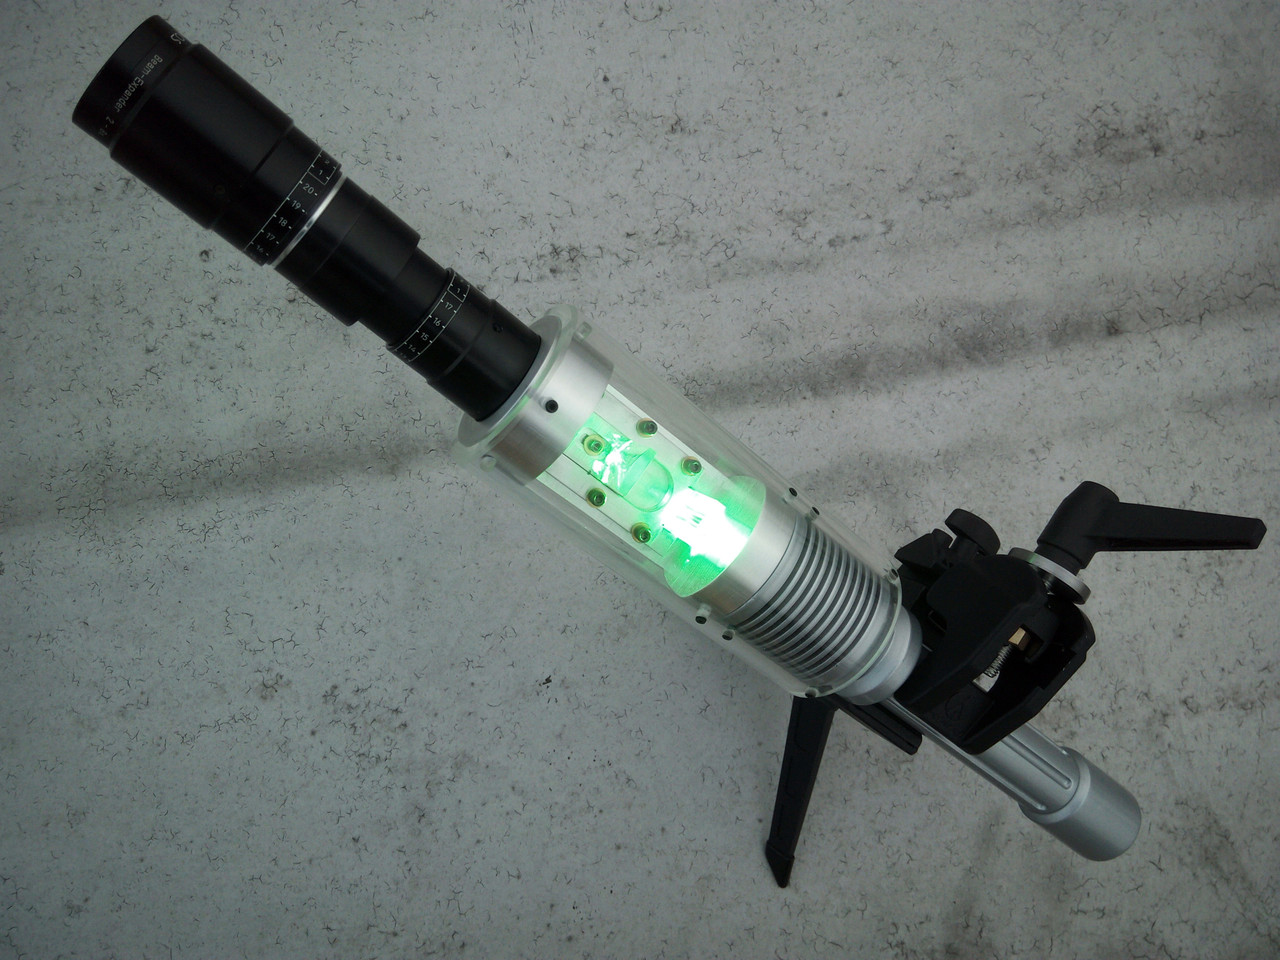
The most awesome beams ever seen:
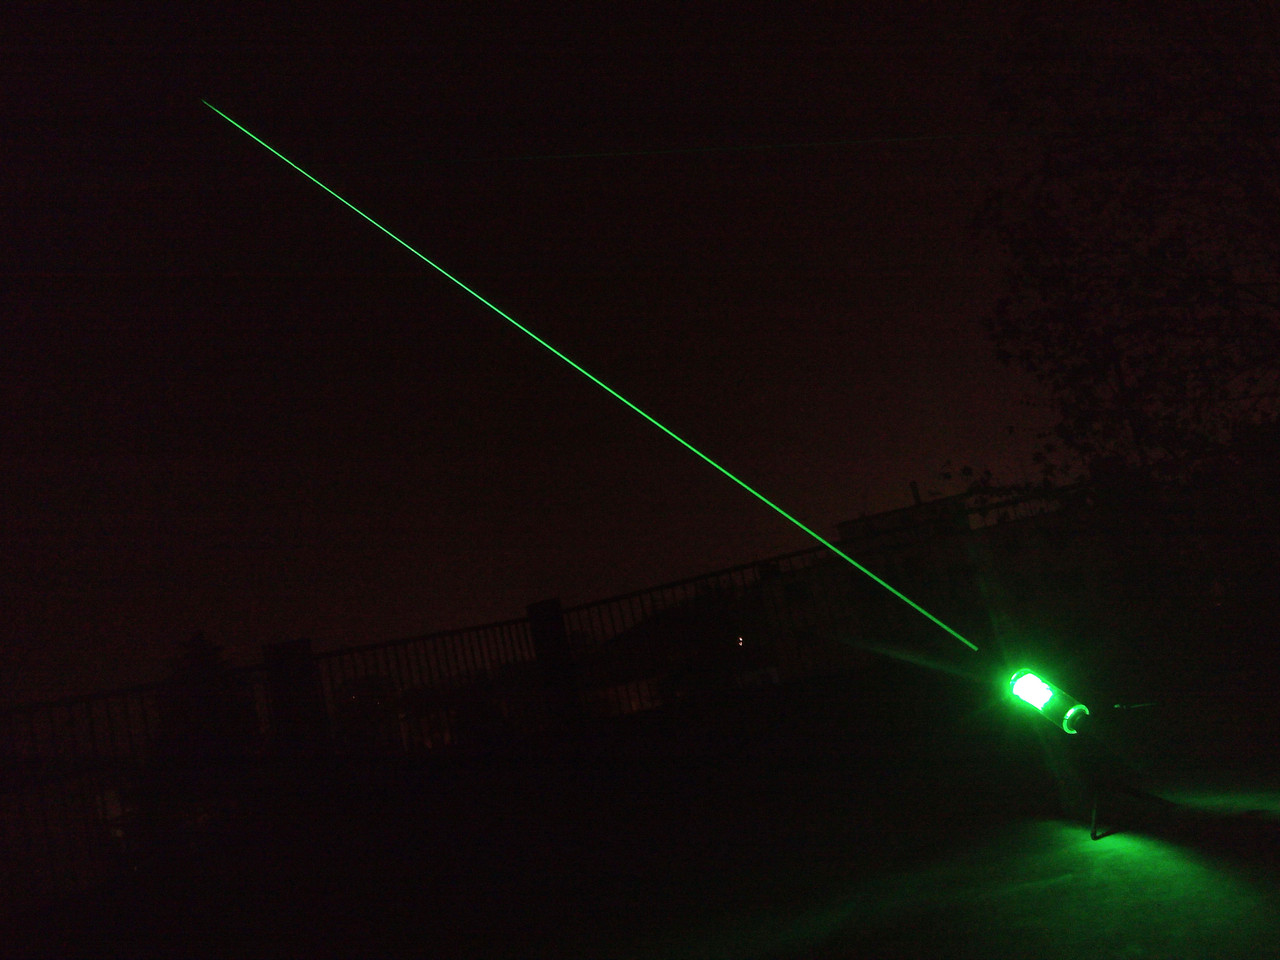
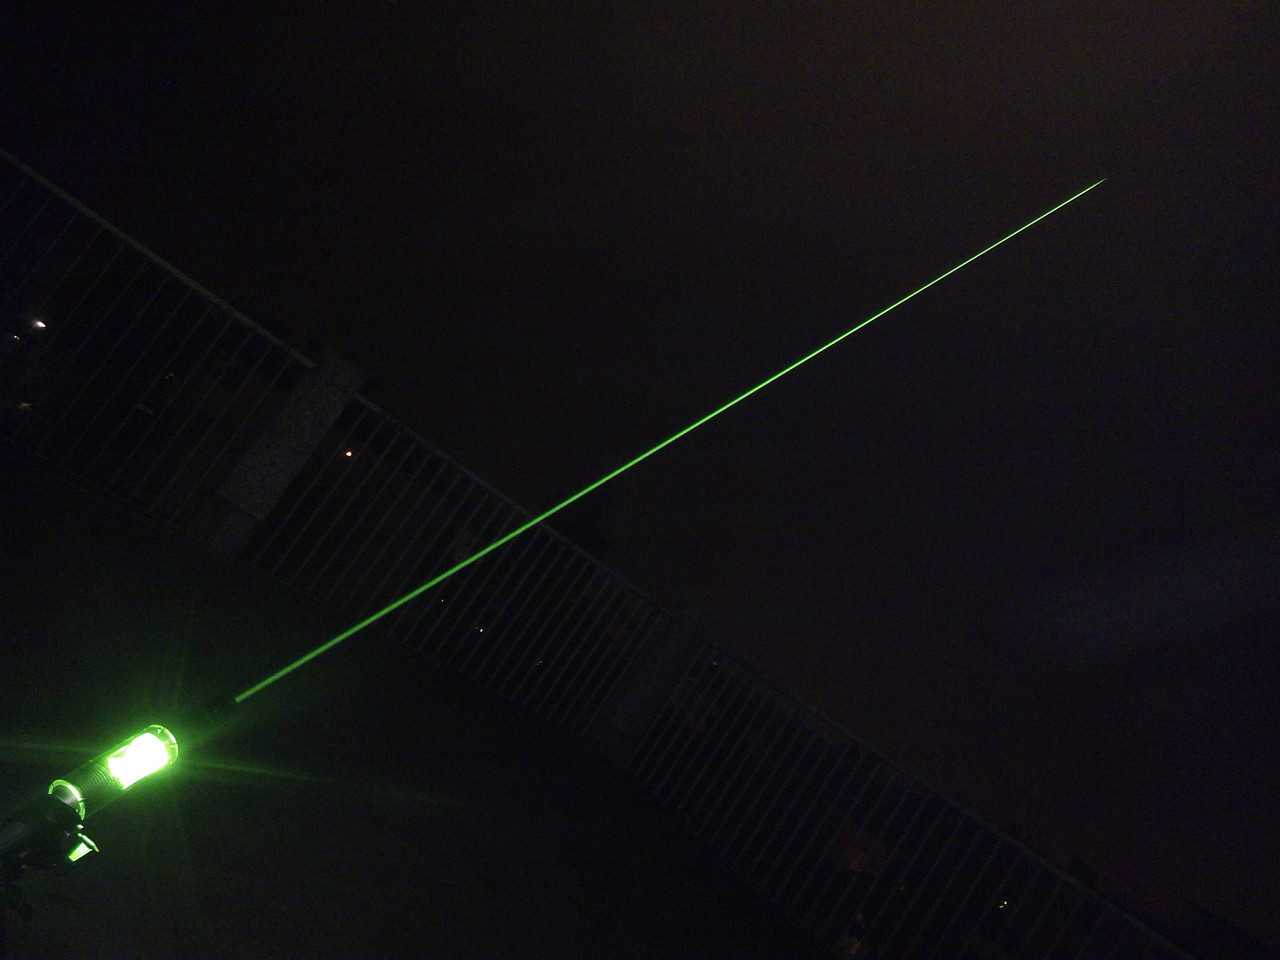
Those following shots shows the REAL color:
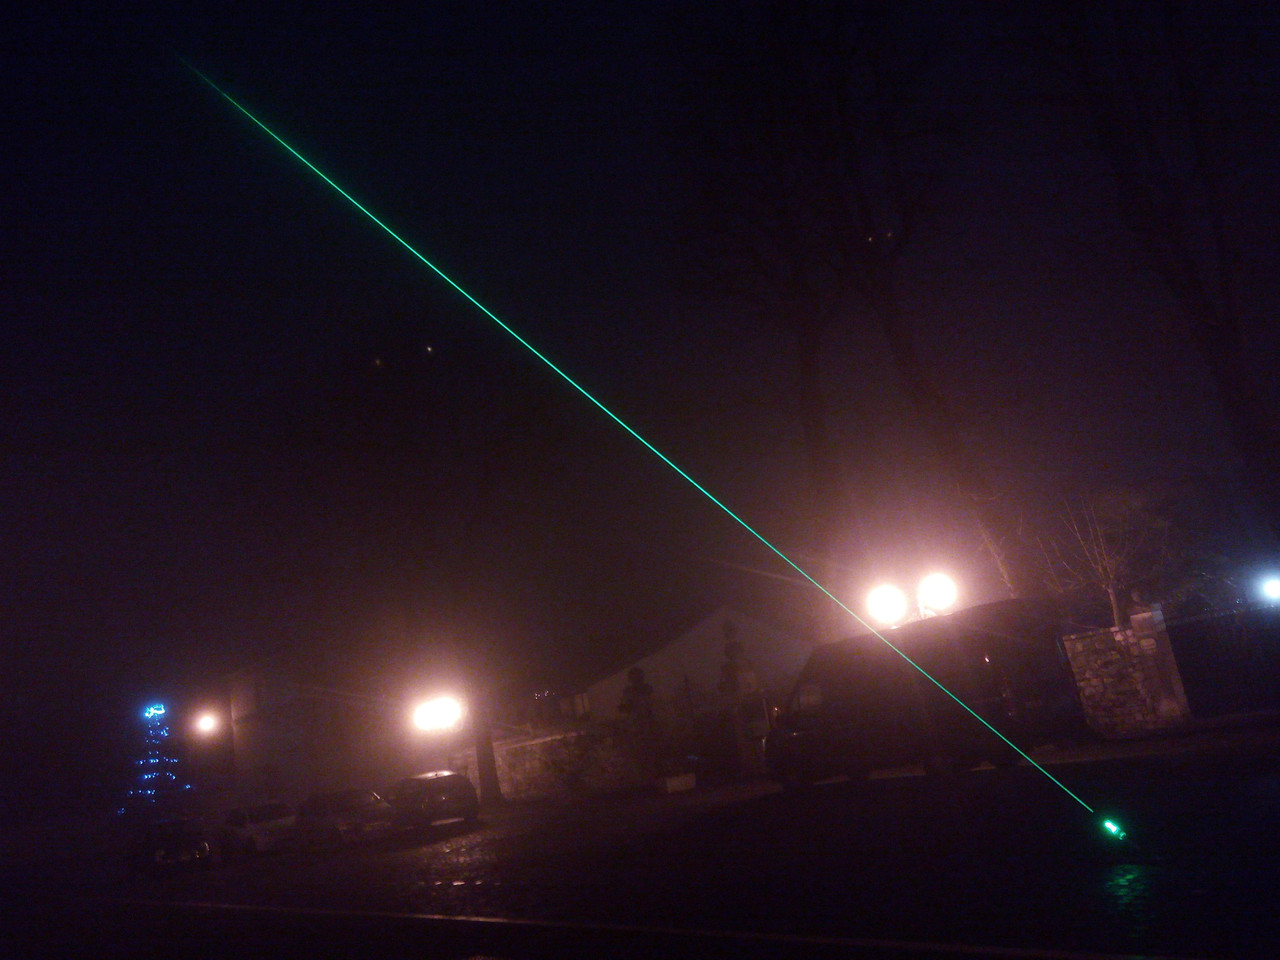
(full resolution pic here: http://imageshack.com/a/img911/7890/GUMWDf.jpg)
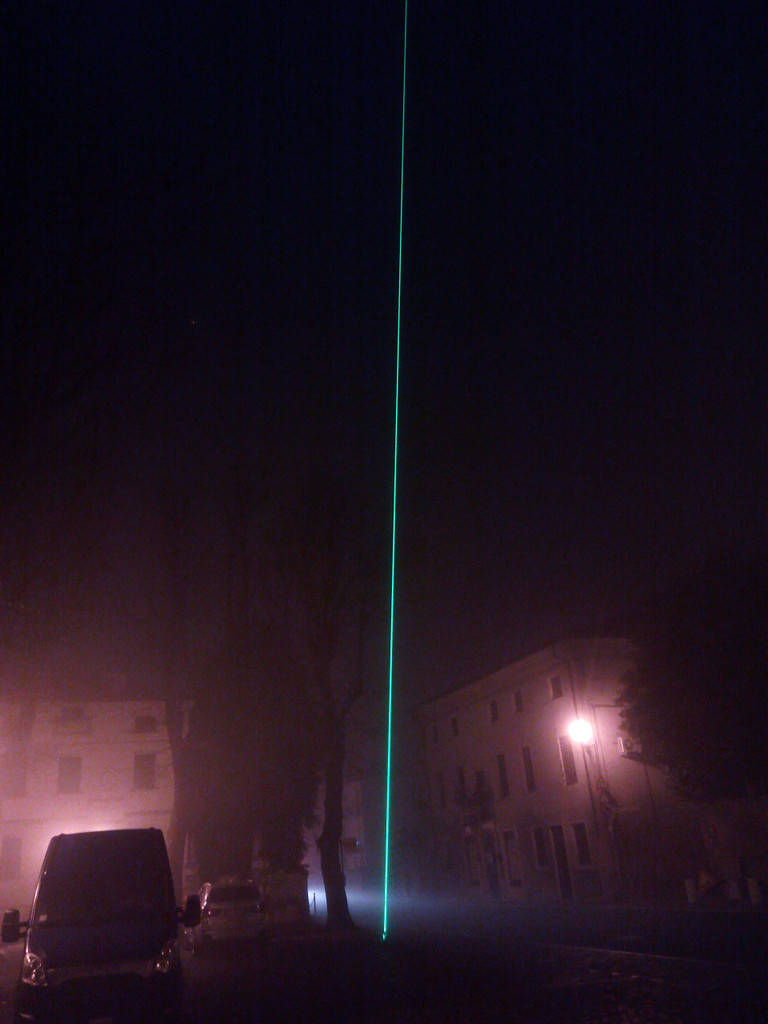
(full resolution pic here: http://imageshack.com/a/img908/3091/no5RN9.jpg)
What You can see is the real beam bright. No long exposure was used!
The precision of a tiny rounded and collimated dot at 300 meters from the source:
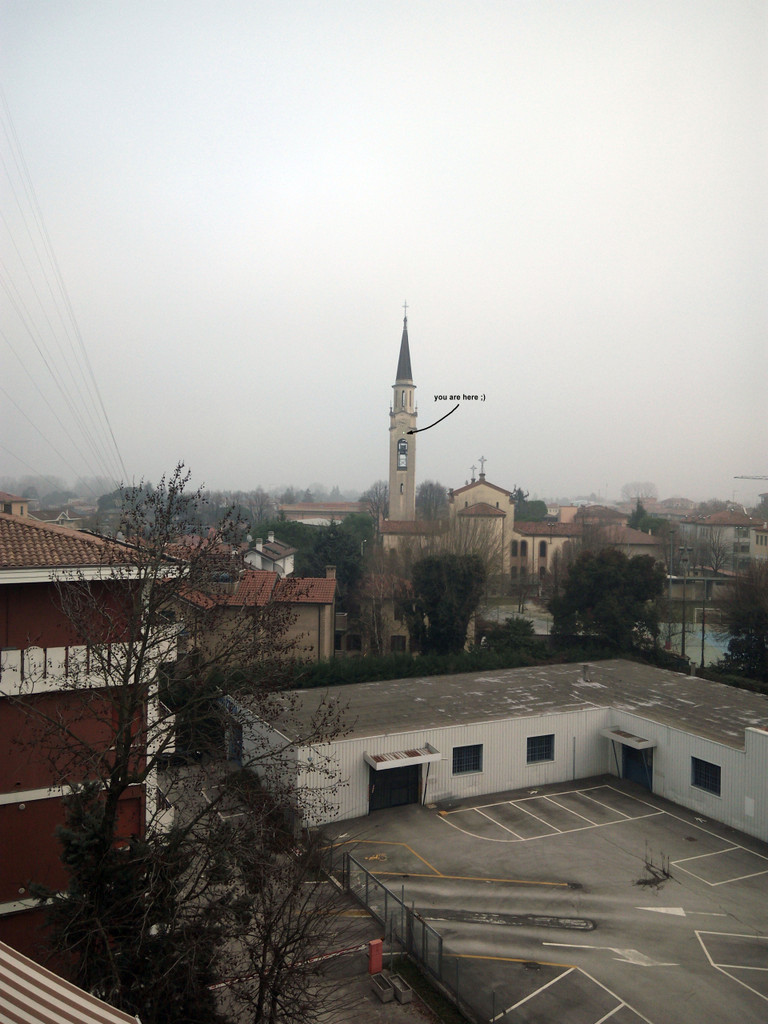
(full resolution pic here: http://imageshack.com/a/img910/405/QMyjz0.jpg)
The very good laser performance:
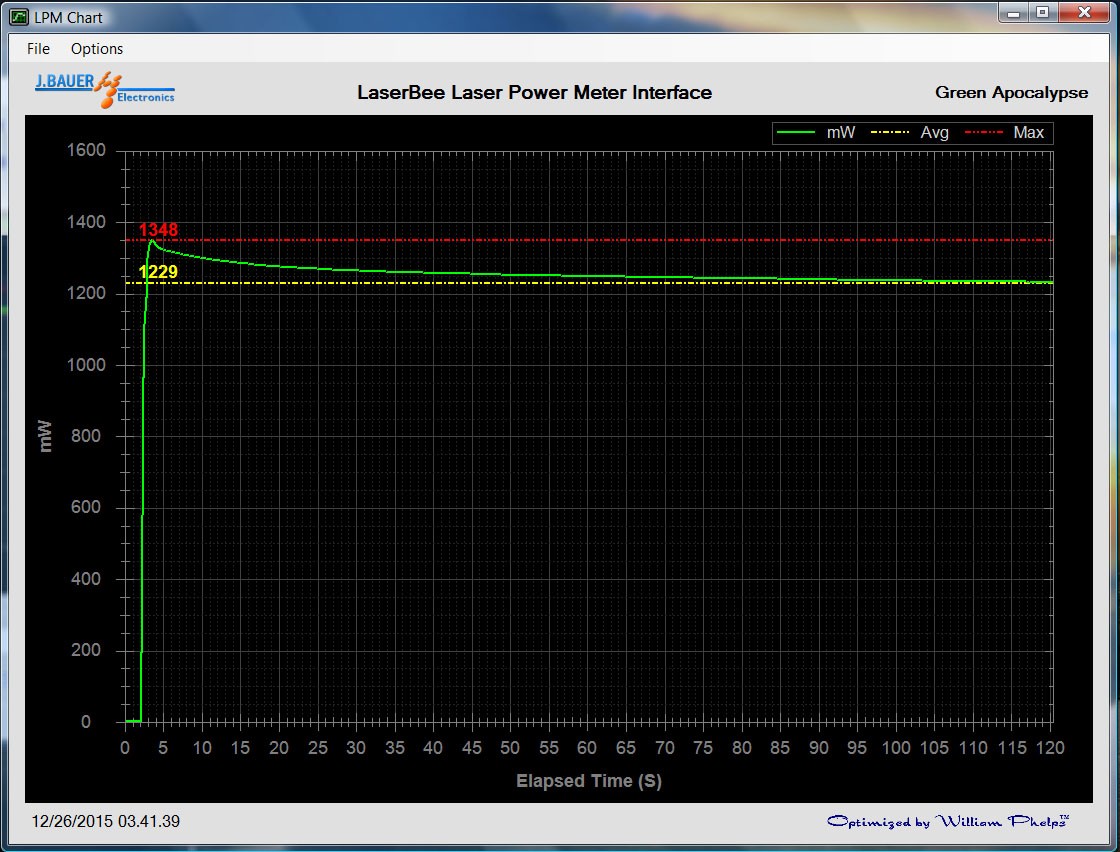
The power of a tiny rounded and collimated dot at 3 meters from the source:
The very bright green dot ignite a match also from the wooden part almost istantly!
Conclusions.
What I can say? The photos speak for themselves!
This is the most powerful, best corrected and best collimated green laser ever! This is surely the pearl of my entire collection!
This time I must to endless thanks CDBEAM777 for his incredible work.
Many thanks also to:
- CDBEAM777 (YES, again!!! );
);
- MrCrouse for his evergreen (modified) Zaser;
- Compagnin company for the silver metallized professional car paint;
- DTR for the diode and the driver;
- Linos company for the awesome beam expanders;
- Alaskan for his helps to found good Linos on eBay and to send them to me;
- Pedco and Manfrotto for the rock solid tripod and clamping mechanism
In few words, a modify over a modify :na:
The childbirth was long, arduous, painful and expensive, but finally the little baby came to light!
CDBEAM fight various obstacles during its construction, obstacles that I avoid to list otherwise could clog the bandwidth
Some notes on the ZAser Correction Optics Project (ZACOP).
Start of Build goals:
1. Design/machine an assemble which will mount on to a Zaser head and which will contain a set of 6X Cylindrical optics ( Plano concave and Plano convex) and will incorporate into the build the ability to mount a Linos beam expander on the very front end.
2. The optics should correct the majority of the astigmatic output delivered by the NDG7475 diode. The goal is to achieve an X/Y aspect ratio as close to 1:1 as possible and therefore deliver a minimal divergence.
3. Design/machine a Cylindrical lens mount unit which incorporates a sliding/translating component (trobone) which allows adjustment between the Plano concave lens and the Plano convex lens. This will be labeled as the RBT unit and be machined from 6061 Aluminum.
4. Design/machine an adapter to function as the mounting platform for the RBT and to be positioned between the Zaser host head and the Linos beam expander. This will be labeled as the H-BE and be machined from 6061 Aluminum.
5. Design/machine the RBT and H-BE so as to deliver the corrected beam axis dead centre into Linos beam expander, with the functional goal being to not create any aberrations as the corrected beam is expanded by the Linos unit.
6. Utilize a clear Acrylic Tube to act as a exoskeleton/ framwork to mount the H-BE and RBT within the tube. The tube will act to align and clamp the H-BE and RBT and to display the internal optical corrections.
7. Assemble and align all components to achieve both a correct beam of minimal divergence and a centerized beam axis to present to the Linos first input lens.
Main Component identification:
1. Zaser host/build with a NDG 7475 LD
2. G2 Collimation lens
3. Aluminum RBT Cylindrical lens mount unit
4. Plano concave/Plane convex telescope set cylindrical lenses @ 6X
5. Aluminum H-BE adaptor for RBT mounting and Linos attachment
6. Acrylic cast tube @ 6.35mm wall thickness for framework and display.
And now ... let's start to dance !!
The original build:
http://laserpointerforums.com/f45/z...-3-elements-glass-lens-93923.html#post1362765
The ZACOP CAD designs:


The "trombone" part (a CDBEAM idea, very useful to move back/forth one of the corrective optic lenses without the needs to unglue them):

The corrective lenses glued over the trombone surface:

The add-on well-machined aluminum container where every part will be mounted:


The acrylic tube ready to be machined:

The shortened acrylic tube with chamfers, holes and nylon-tipped screws:


All the parts ready to be assembled:


The "trombone" with correction lenses locked inside the aluminum adaptor:

The head fully assembled:

The head is alive:

Linos BE attached:

The perfect rounded dot:

The ZACOP mounted on PEDCO ULTRAPOD II with Manfrotto superclamp:


The most awesome beams ever seen:


Those following shots shows the REAL color:

(full resolution pic here: http://imageshack.com/a/img911/7890/GUMWDf.jpg)

(full resolution pic here: http://imageshack.com/a/img908/3091/no5RN9.jpg)
What You can see is the real beam bright. No long exposure was used!
The precision of a tiny rounded and collimated dot at 300 meters from the source:

(full resolution pic here: http://imageshack.com/a/img910/405/QMyjz0.jpg)
The very good laser performance:

The power of a tiny rounded and collimated dot at 3 meters from the source:
The very bright green dot ignite a match also from the wooden part almost istantly!
Conclusions.
What I can say? The photos speak for themselves!
This is the most powerful, best corrected and best collimated green laser ever! This is surely the pearl of my entire collection!
This time I must to endless thanks CDBEAM777 for his incredible work.
Many thanks also to:
- CDBEAM777 (YES, again!!!
- MrCrouse for his evergreen (modified) Zaser;
- Compagnin company for the silver metallized professional car paint;
- DTR for the diode and the driver;
- Linos company for the awesome beam expanders;
- Alaskan for his helps to found good Linos on eBay and to send them to me;
- Pedco and Manfrotto for the rock solid tripod and clamping mechanism
Last edited:


