

RB astro
0
- Joined
- Apr 6, 2014
- Messages
- 2,436
- Points
- 113
Yay !
My four copper 510 units arrived from Lifetime17 (Rich) and they look fantastic.
Check out Rich's thread in case you missed it:
http://laserpointerforums.com/f44/510-12mm-modules-99965.html
Well, what can I say about Rich and his handy work?
'Exquisite' comes to mind.")
As soon as he mentioned he was going to make these I contacted him and placed an order for four units.
These are fiddly to make, all hand made to perfection.
A week or two later and they're here.
He packs them in very carefully and ships them very securely, all individually wrapped so as not to get scratched.
The finish on these are amazing, they practically shine all on their own.
One of the units will be for a gift to a good friend of mine here on LPF, Pete (GSS).
He just needs to let me know which diode he wants in it. :beer:
As for the other three units, well I'm planning on putting some relatively high powered diodes in them since they are solid copper.
Any suggestions?
Please feel free to suggest, you guys are way more experienced than me.
I'll try and finish my Genesis RGB unit first though before I get stuck into these.
So without further ado here are the pics.....
They arrived via DHL very well packaged:

Unwrapping them I was greeted by this sight:
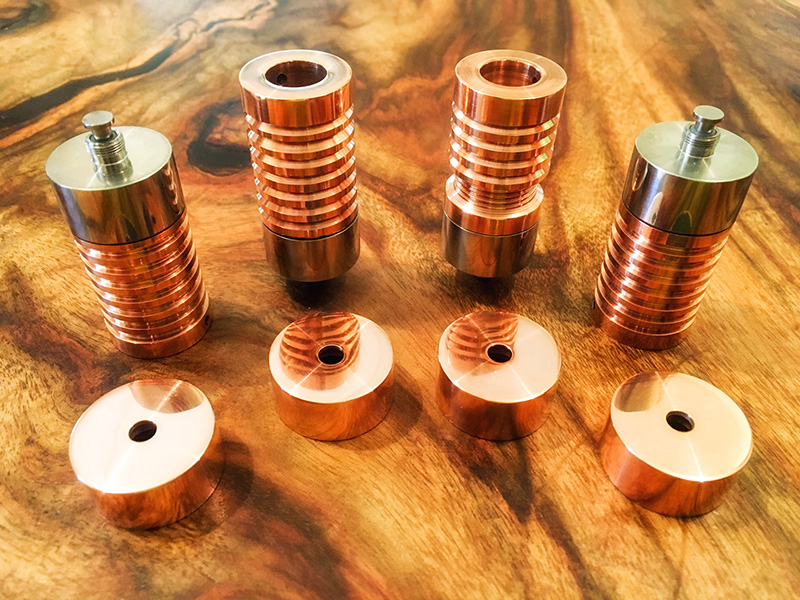
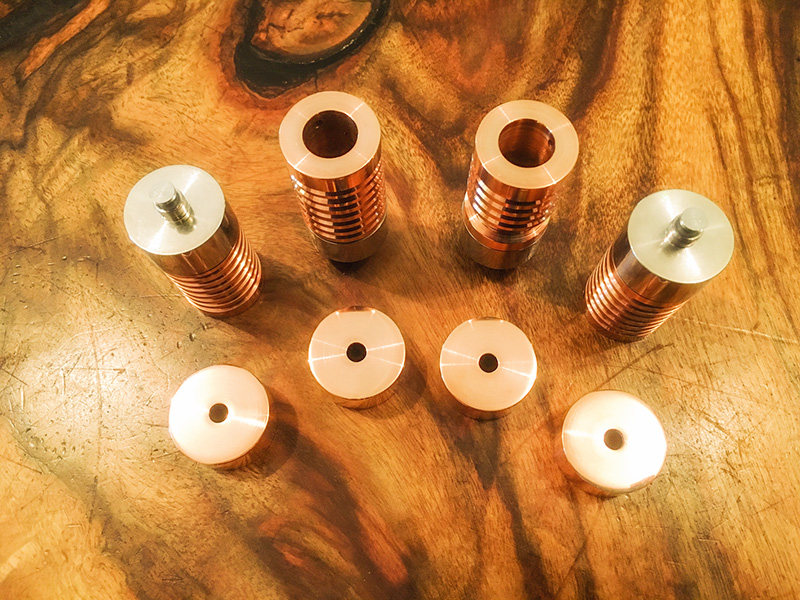
Wow Rich, these are truly a work of art.
Thank you my friend.
Cheers everyone.
RB
:beer:
My four copper 510 units arrived from Lifetime17 (Rich) and they look fantastic.
Check out Rich's thread in case you missed it:
http://laserpointerforums.com/f44/510-12mm-modules-99965.html
Well, what can I say about Rich and his handy work?
'Exquisite' comes to mind.
As soon as he mentioned he was going to make these I contacted him and placed an order for four units.
These are fiddly to make, all hand made to perfection.
A week or two later and they're here.
He packs them in very carefully and ships them very securely, all individually wrapped so as not to get scratched.
The finish on these are amazing, they practically shine all on their own.
One of the units will be for a gift to a good friend of mine here on LPF, Pete (GSS).
He just needs to let me know which diode he wants in it. :beer:
As for the other three units, well I'm planning on putting some relatively high powered diodes in them since they are solid copper.
Any suggestions?
Please feel free to suggest, you guys are way more experienced than me.
I'll try and finish my Genesis RGB unit first though before I get stuck into these.
So without further ado here are the pics.....
They arrived via DHL very well packaged:
Unwrapping them I was greeted by this sight:
Wow Rich, these are truly a work of art.
Thank you my friend.
Cheers everyone.
RB
:beer:


