Welcome to Laser Pointer Forums - discuss green laser pointers, blue laser pointers, and all types of lasers

LPF Donation via Stripe | LPF Donation - Other Methods

Links below open in new window

ArcticMyst Security by Avery

Violet Pen Laser Mod?


Pman

0
Joined
Nov 28, 2012
Messages
4,447
Points
113
K, I don't know basically anything about Kipkay but looking him up he appears to be a scam artist from what I can tell.

I used my own ingenuity in the units above and don't know anything about what other people have done.

I will lay out the process as simply as possible. Nice to have some canned air to blow out any debris with all of this. Do everything without touching the plastic lens!
Remove cap with decent thickness leather strap around it squeezing hard with a tilting and outward pull in multiple spots around cap and it will come loose/off. You are not twisting it as if you were trying to unscrew something. It is just glued in. Your pliers must grip really well and it takes quite a bit of force to prevent the pliers squeezed down on the leather to cap for the strap to not slip off the cap. Take your time working your way around the cap and it will slowly start to work its way out. If you don't have the leather on correctly or it's not thick enough and you're not squeezing hard enough, you can slip and scratch the cap with the pliers so think about what you are doing.
Next, take small (but long tipped) needle nose pliers, put in the 2 holes around the lens and unscrew counterclockwise. If you want, you can first remove the small dab of red glue with something thin. Pay attention to what you are doing with all of this or you will slip and nick the lens! Save the tensioning spring that is under the lens for reuse.
Prepare top of lens for epoxy by scratching the top side to create more surface area and a better bonding.
Do the same thing with whatever you want to use to bridge the gap between the cap and the lens scratching it slightly up the outside also. An easy thing would be a pen top. It needs to be able to be glued on top of the lens so that it does not cover any part of the lens and also isn't wider than the threads because you will likely need to screw the lens back in to slightly below the threads.
The length of this piece that glues to the lens and the cap should be enough so that you can screw down the lens enough that it is slightly past infinity focus ( to make sure you can still focus to infinity). All you need to do is screw the lens in til it just starts to focus past infinity (dot gets larger at long distance) and then put the bridging piece between the lens and cap so it touches both. It will look nicer if it focuses to infinity when the cap is basically in as far as it will go.
Forgot that once you get the front cap off, all you have to do is get a knife and scrape out the glue as far in as the cap presses and then a bit more until the cap will easily turn inside the pen smoothly.
First glue the bridging piece to the cap (I use professional strength 5 minute epoxy mixed VERY well and as close to even 50/50 glue/activator. CAREFULLY put SMALL amount of glue on the lens plastic so it will not go into the lens or out to the threads and put a very small amount on the bridge piece. Stick them together CAREFULLY so as not to move the glue around and make sure it is centered (helps to wear those cheapo magnifying glasses). With fast acting epoxy, it should stick pretty hard in about 15 minutes (enough to easily hold the lens as you thread it back into the host.
Mix more glue and add some to the cap and the bridge piece that you scratched making sure the glue won't go to the inside and block the hole at all and put it on.
Let it glue for at least 15 minutes (all depends upon your epoxy, how well you mixed it etc...
Once it is pretty secure you can unscrew the whole thing and put the spring back in. You will know whether you waited long enough if you can screw it down to infinity focus against the spring tension without having anything come apart.
Everyone of the ones in the picture above has been done this way but with different bridges between cap and lens. On some of them, I make the cap hole bigger so the bridge can protrude. A few were made with the cap hole big enough so that I don't use the cap but the bridge to turn the lens.

I will post a pic of some of the things I use to perform the surgery in a few minutes.

This process gets easier and easier the more you do.

Suggest you don't do a 532nm unless it has low IR (most cheapo pens have very high IR). You can see how the green one looks different. The lens is at the top of a long barrel to threaded end.

p1010243hs.jpg


p1010254g.jpg


p1010250js.jpg


p1010251xn.jpg


p1010253j.jpg


p1010252t.jpg


Would never have posted like this but was offended by a few of the comments. Had intended to do a full tutorial. This isn't some scam and I'm not after anyones money. This is for anyone to do with as they please. Anyone can make a million of them and sell them and take all the credit for all I care. I am not resposible for anyone messing up their pens.
My oatmeal was lumpy this morning

YOU are responsible for your eyes. Sunglasses are NOT safety glasses!

Peace,

Pete
 
Last edited:
Joined
Apr 19, 2013
Messages
2,246
Points
63
You are nothing like KipKay Pman :) 
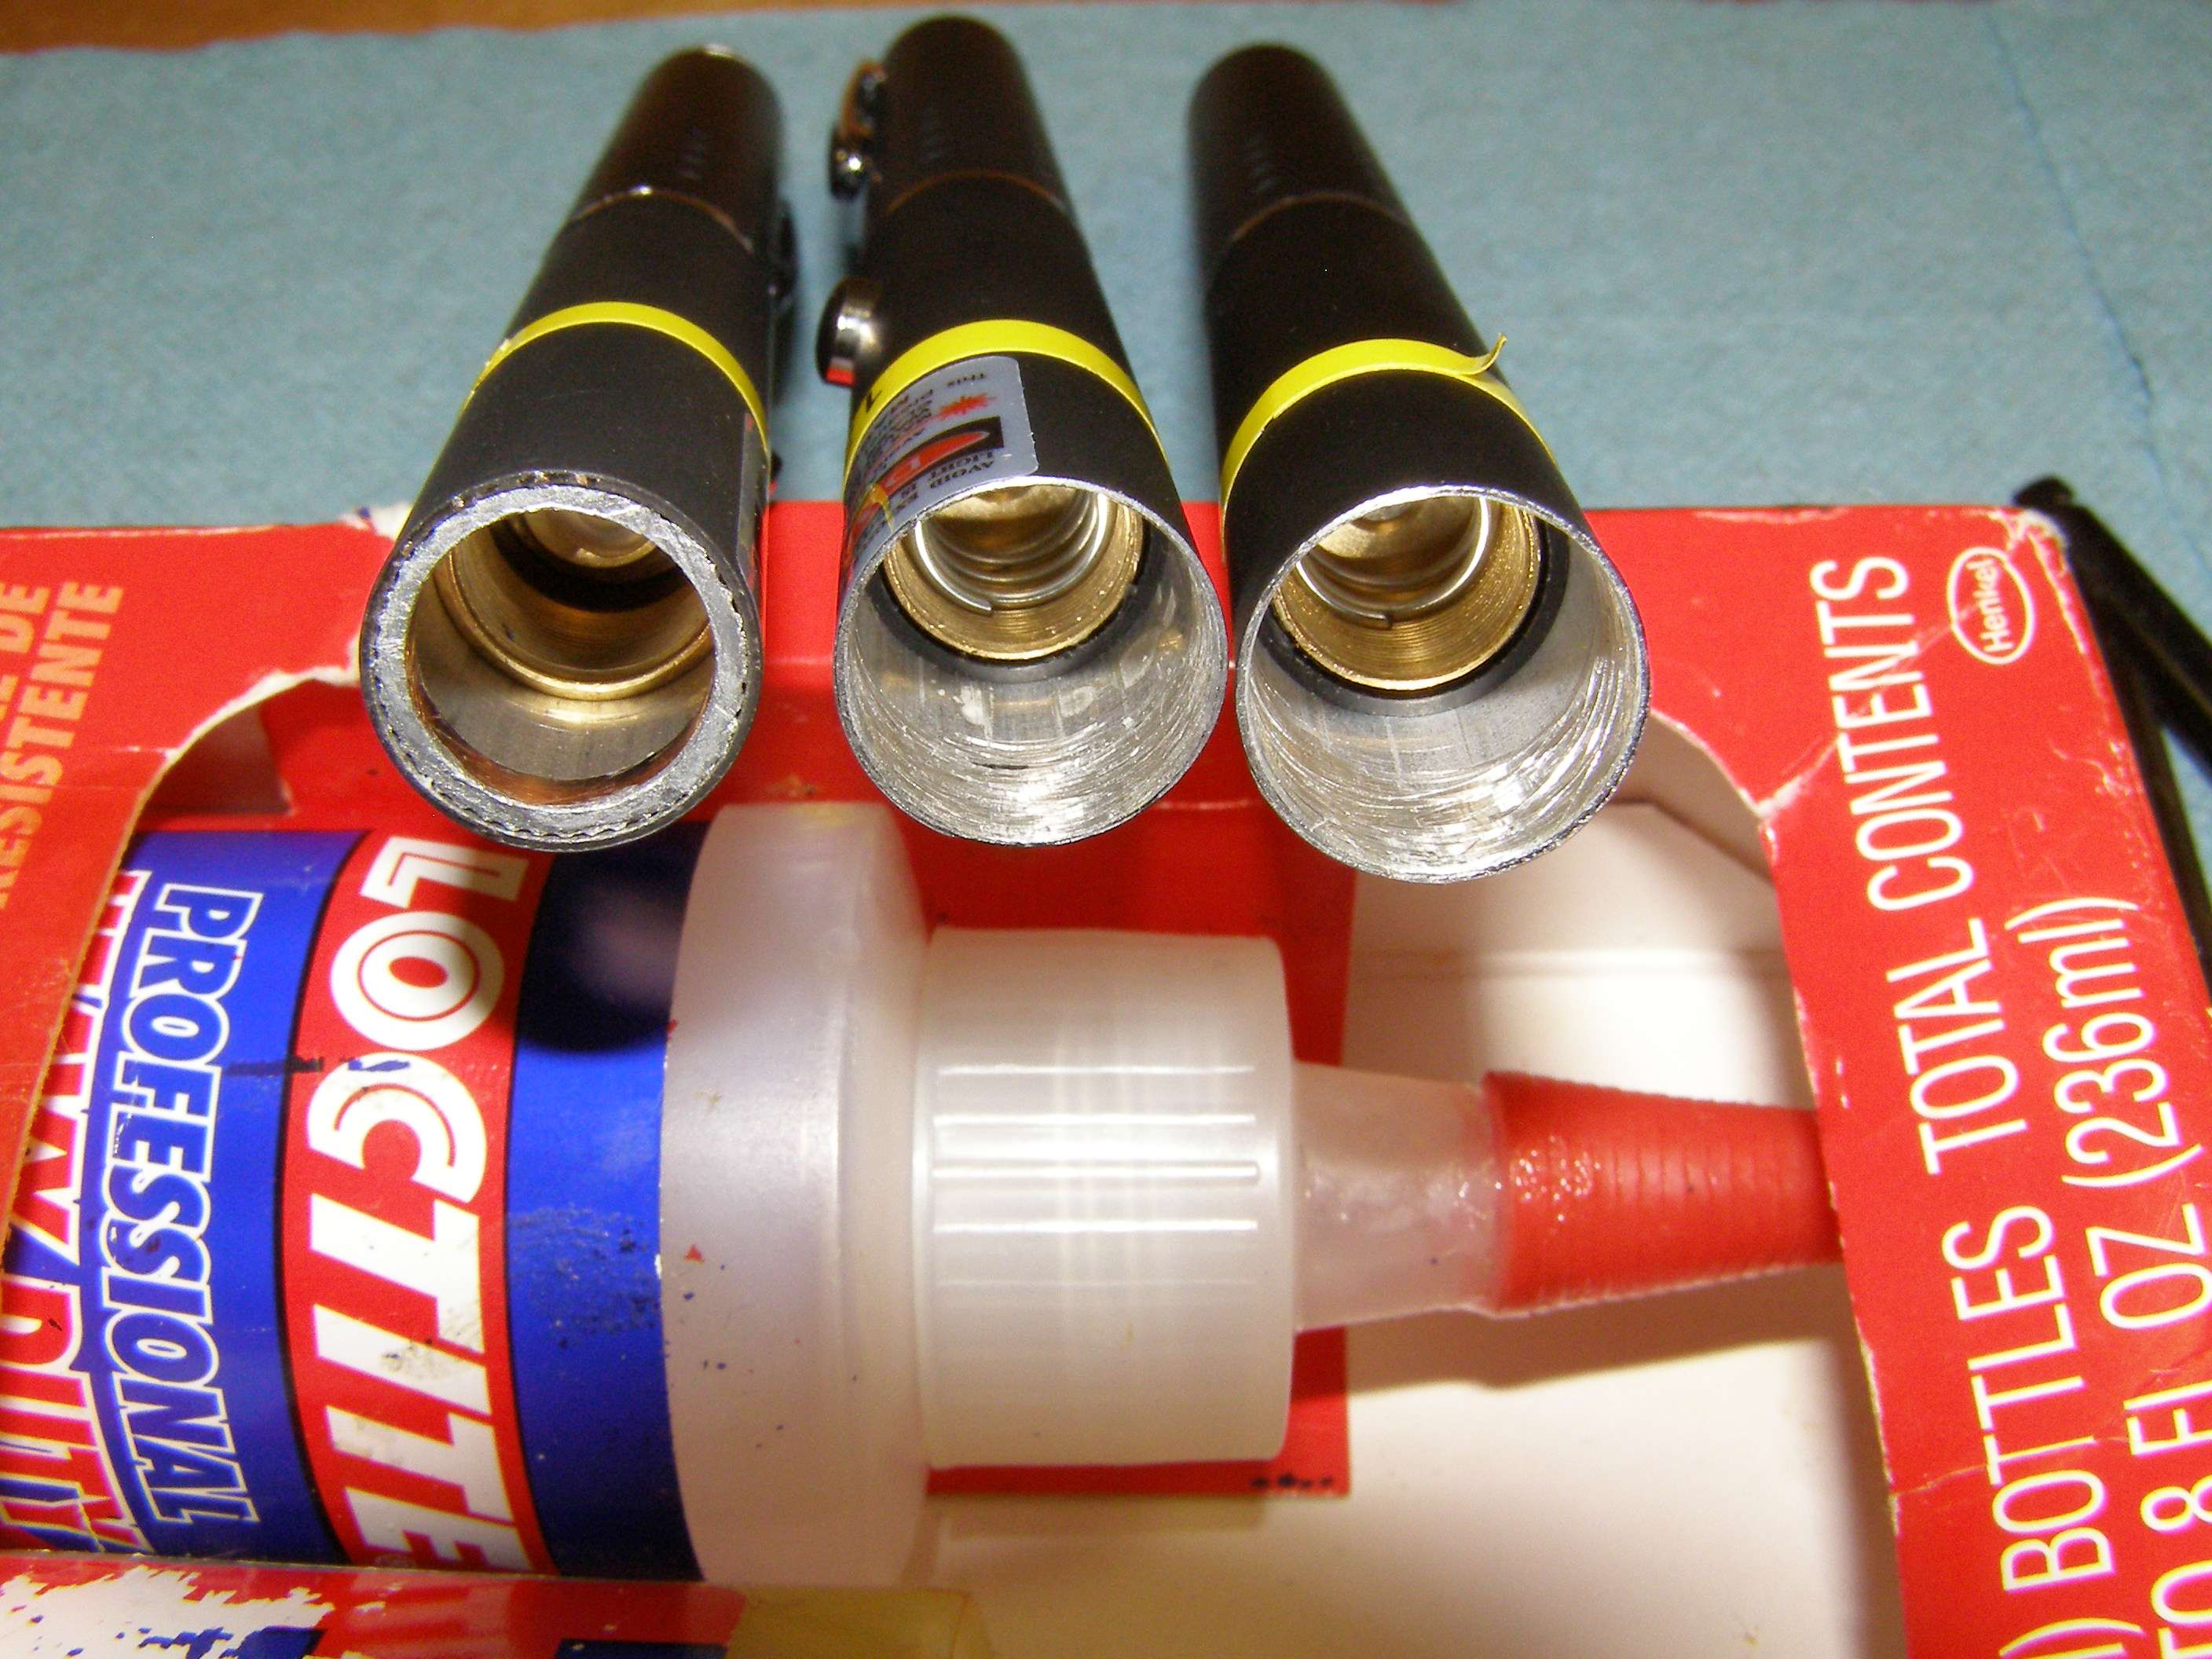
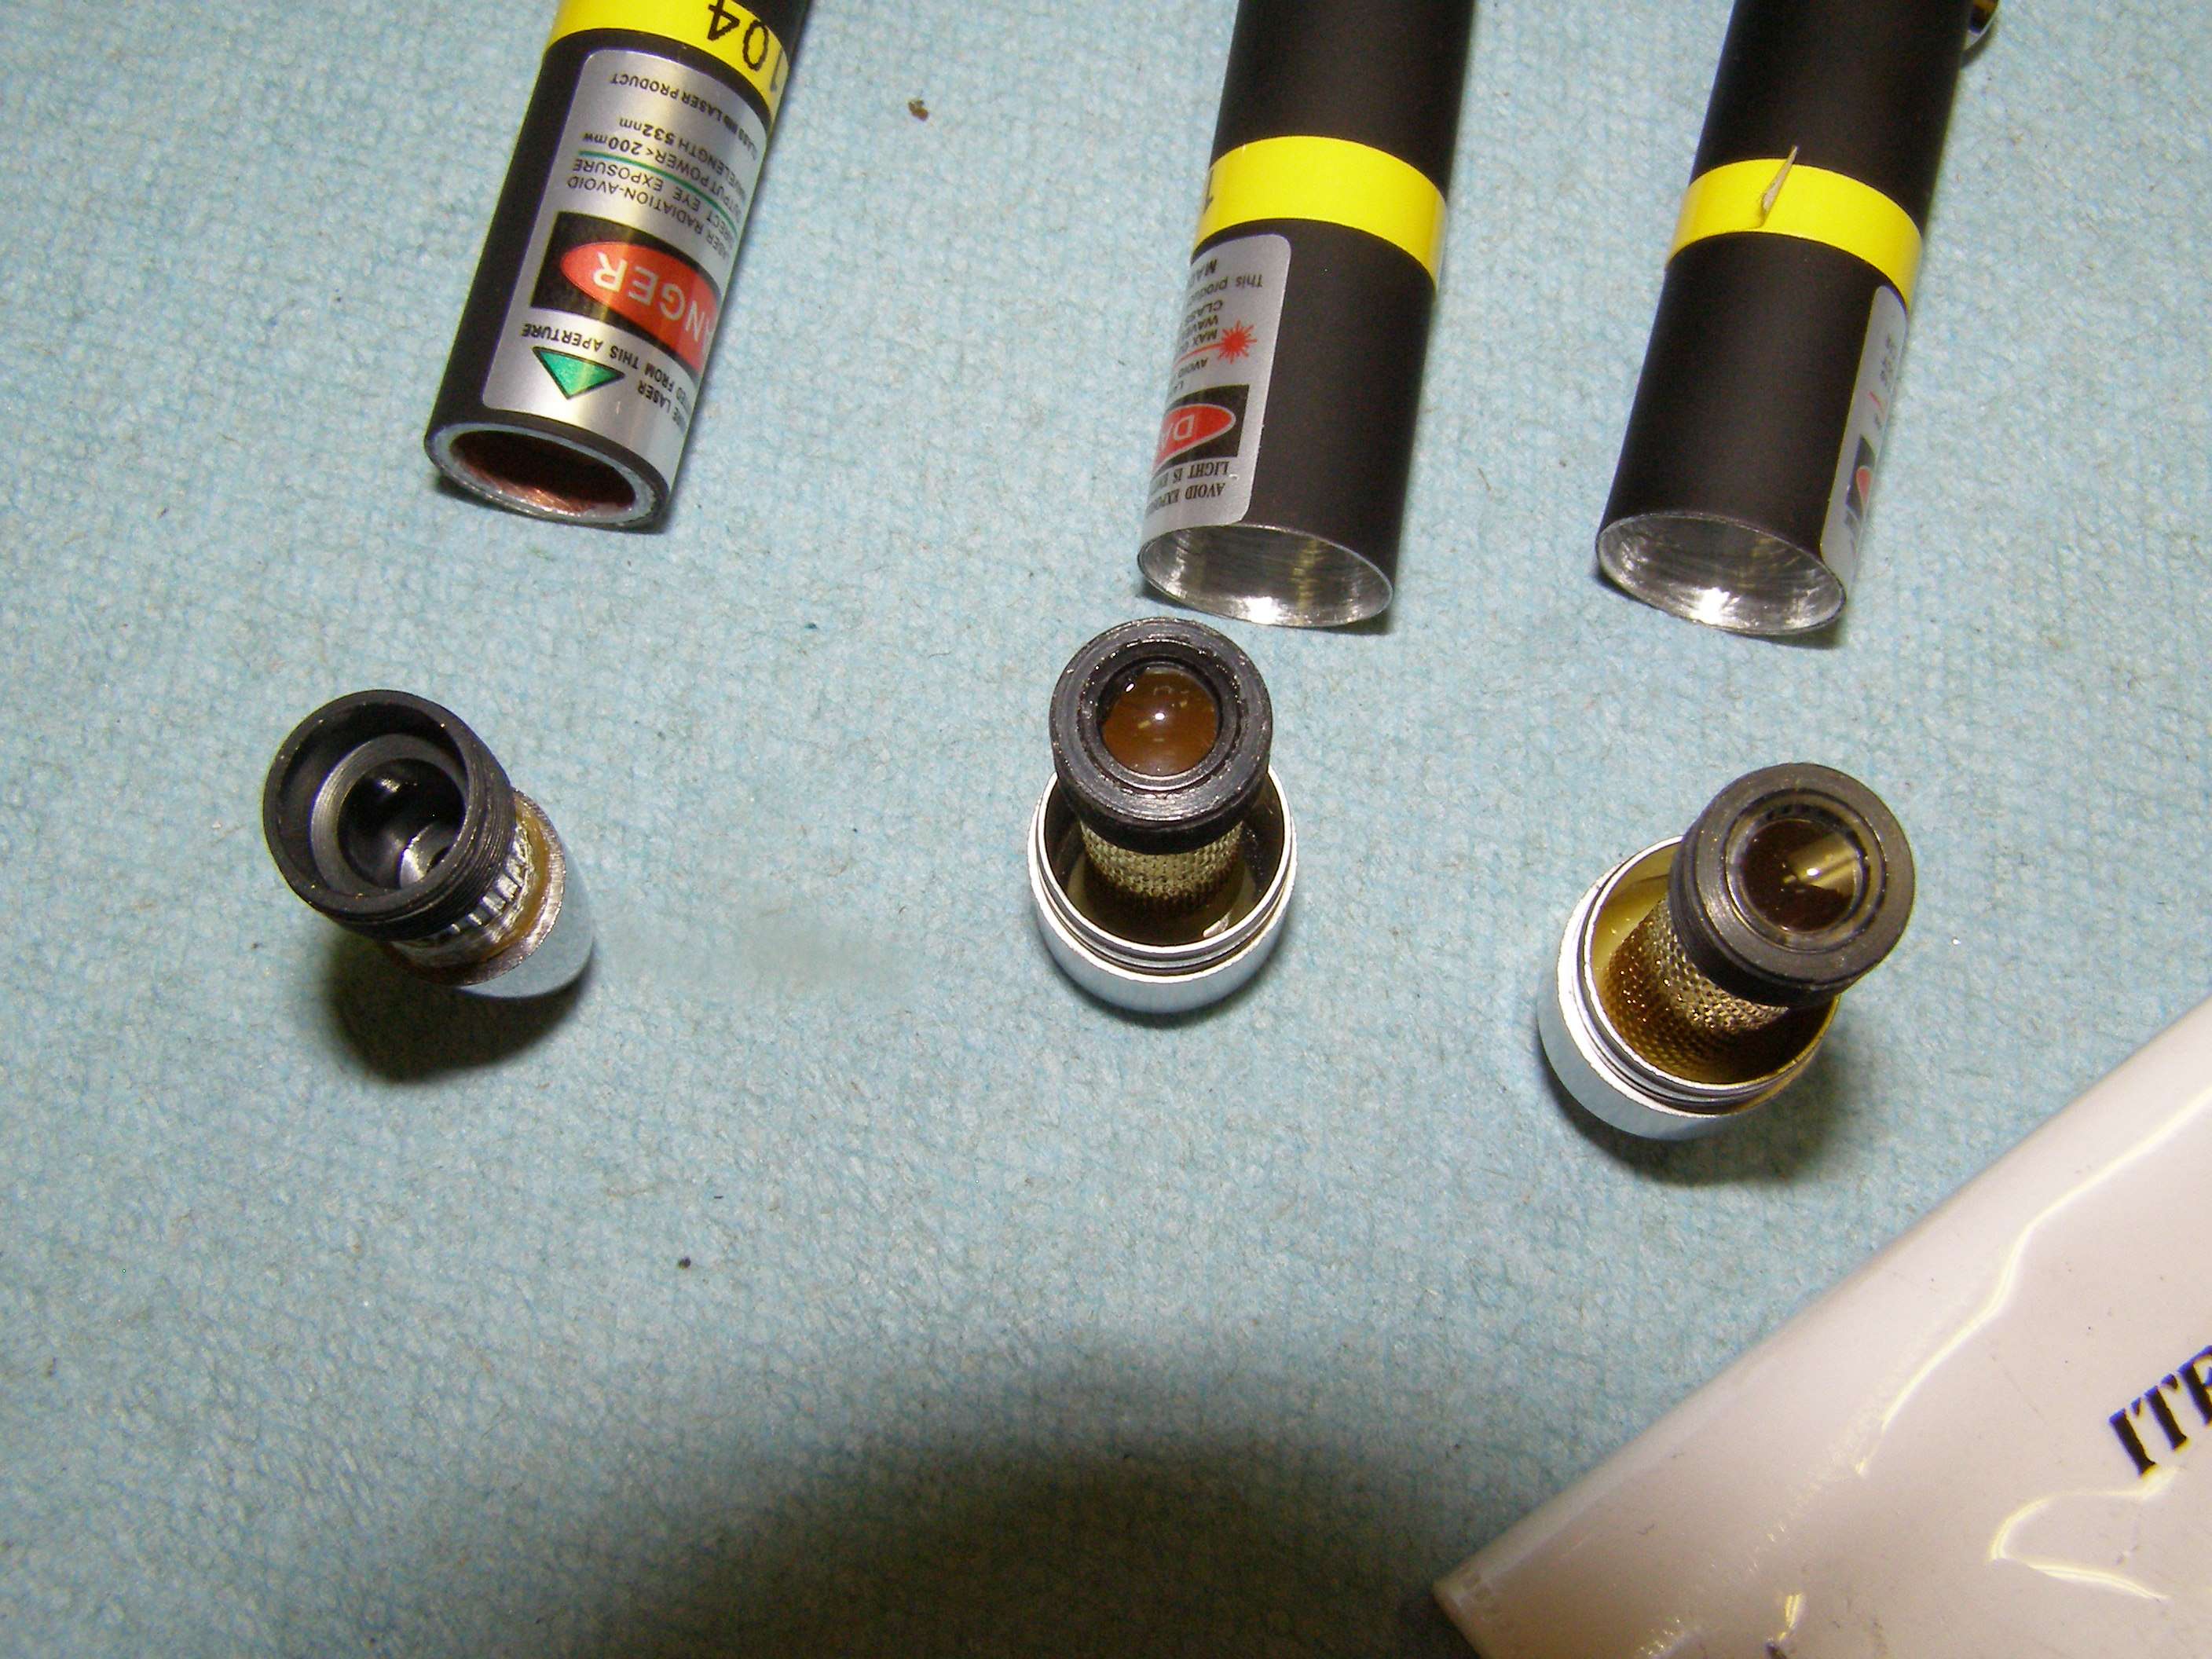
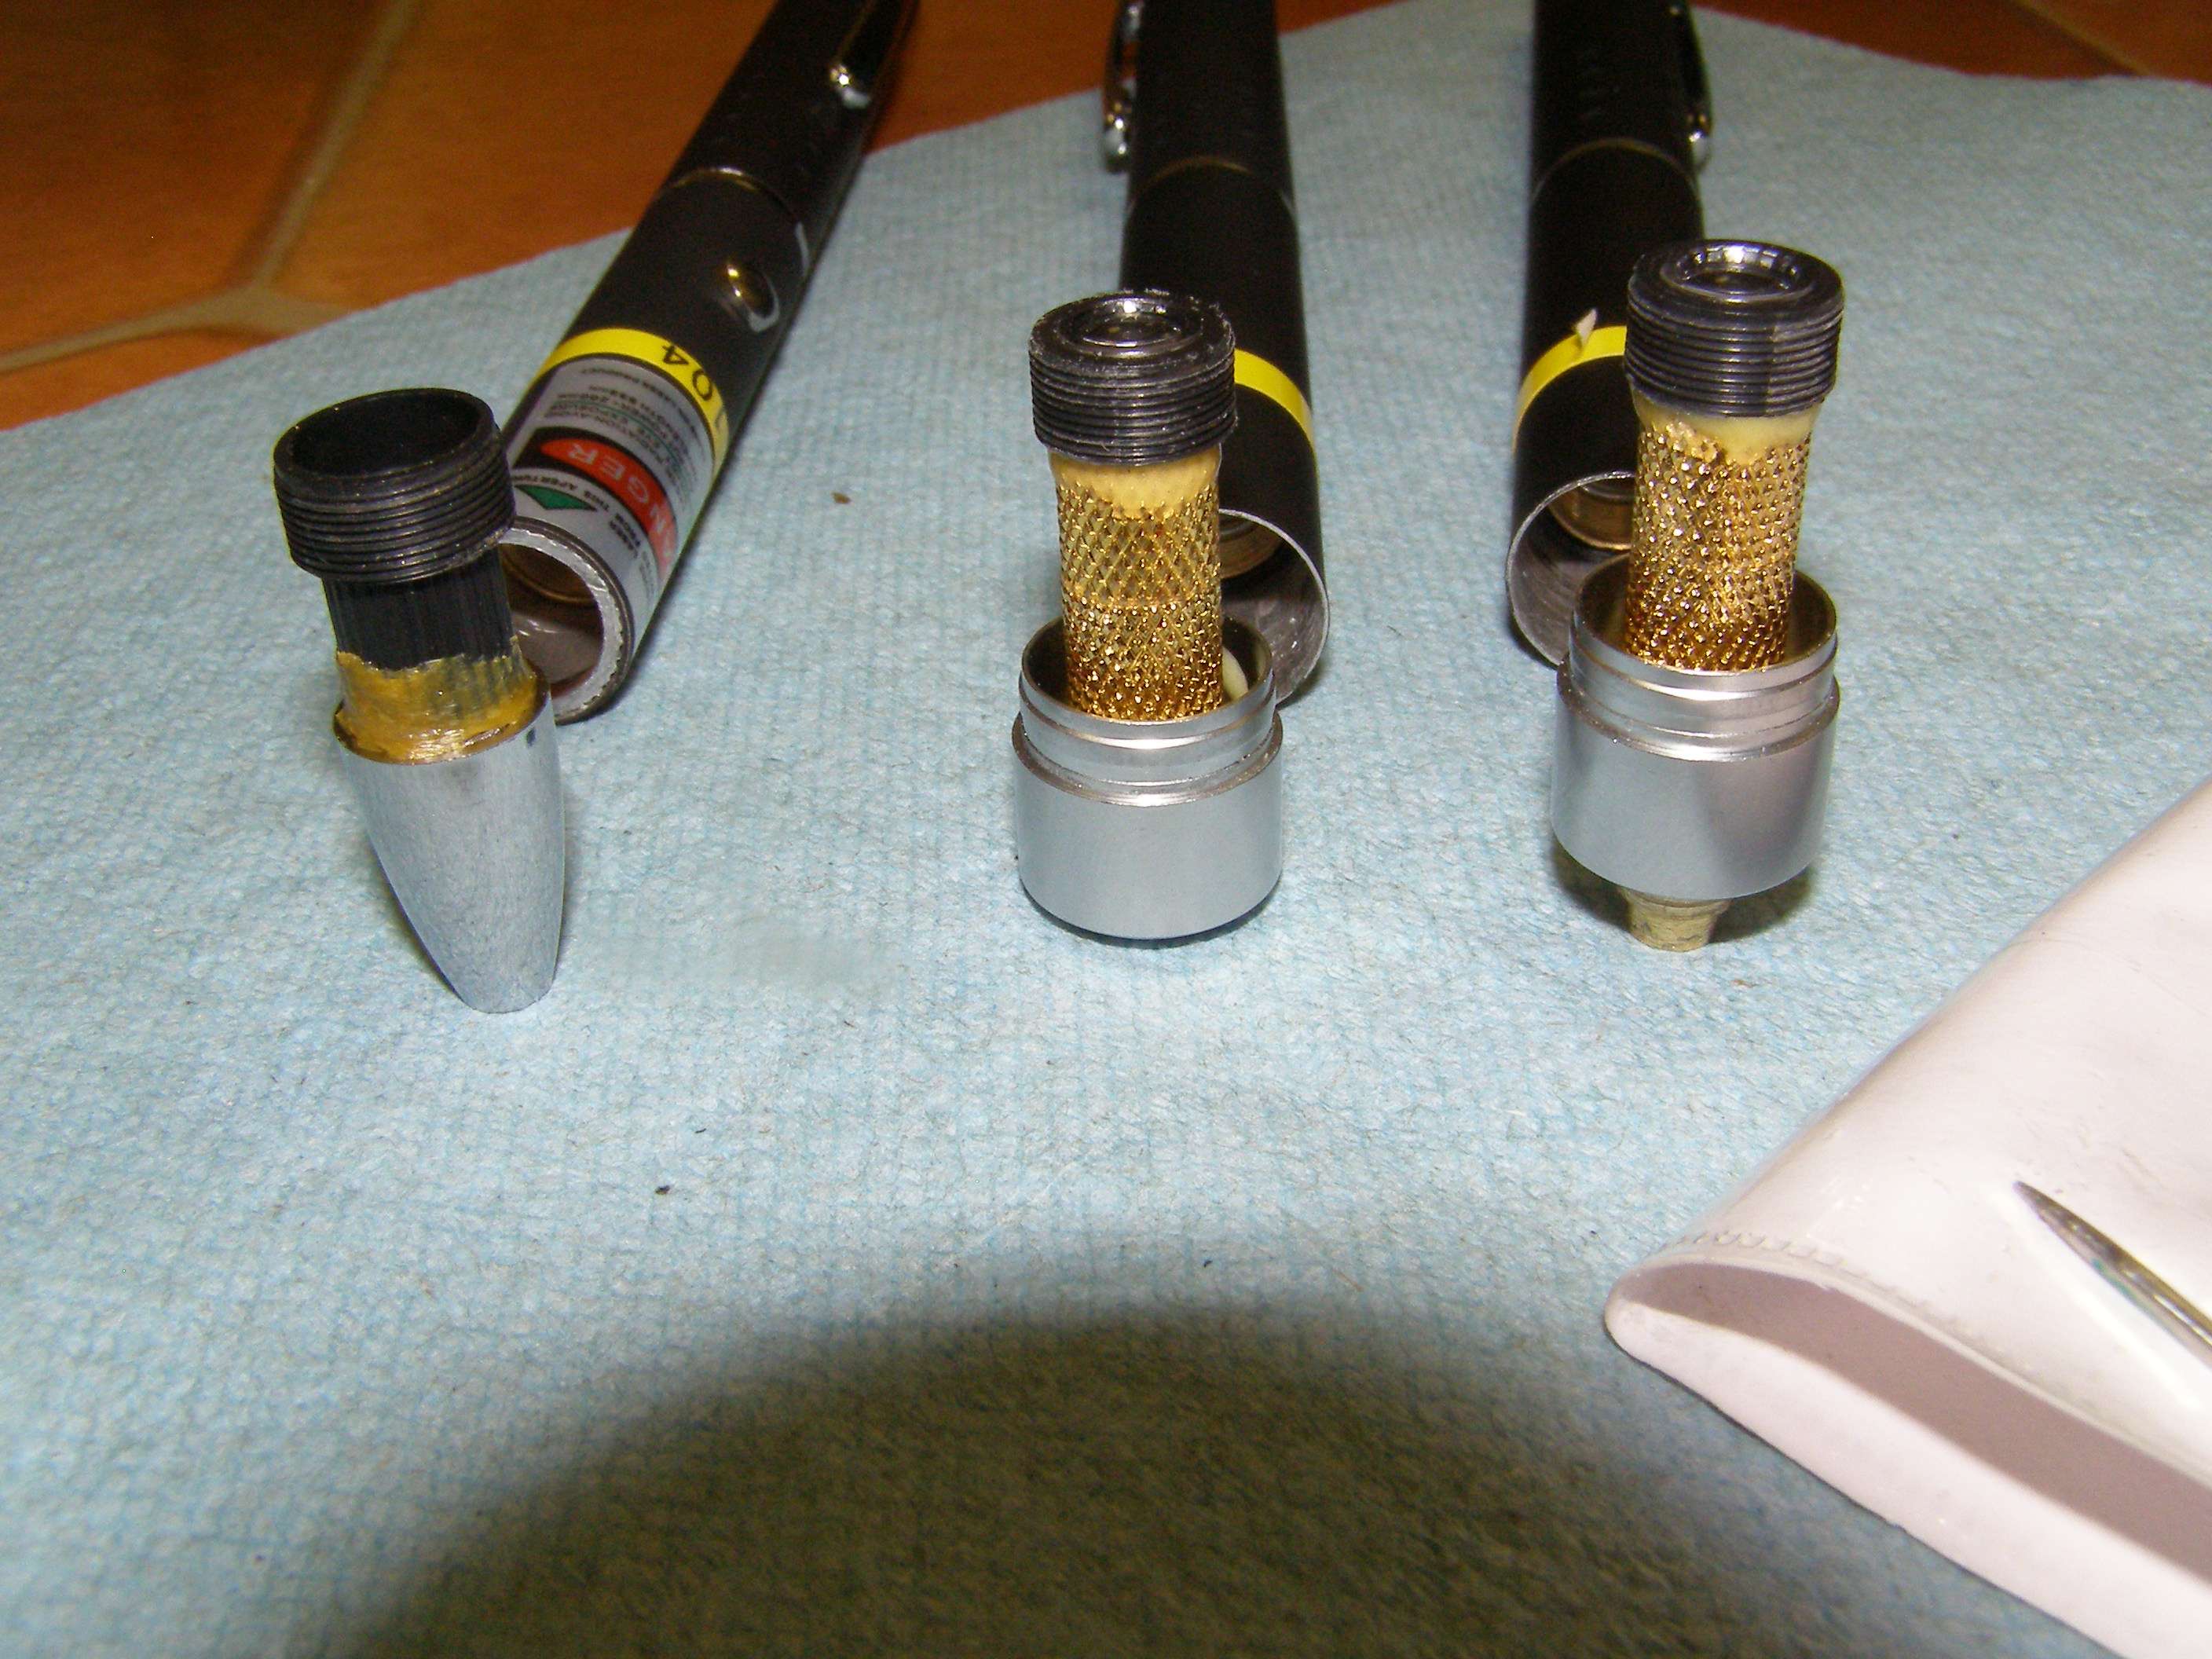
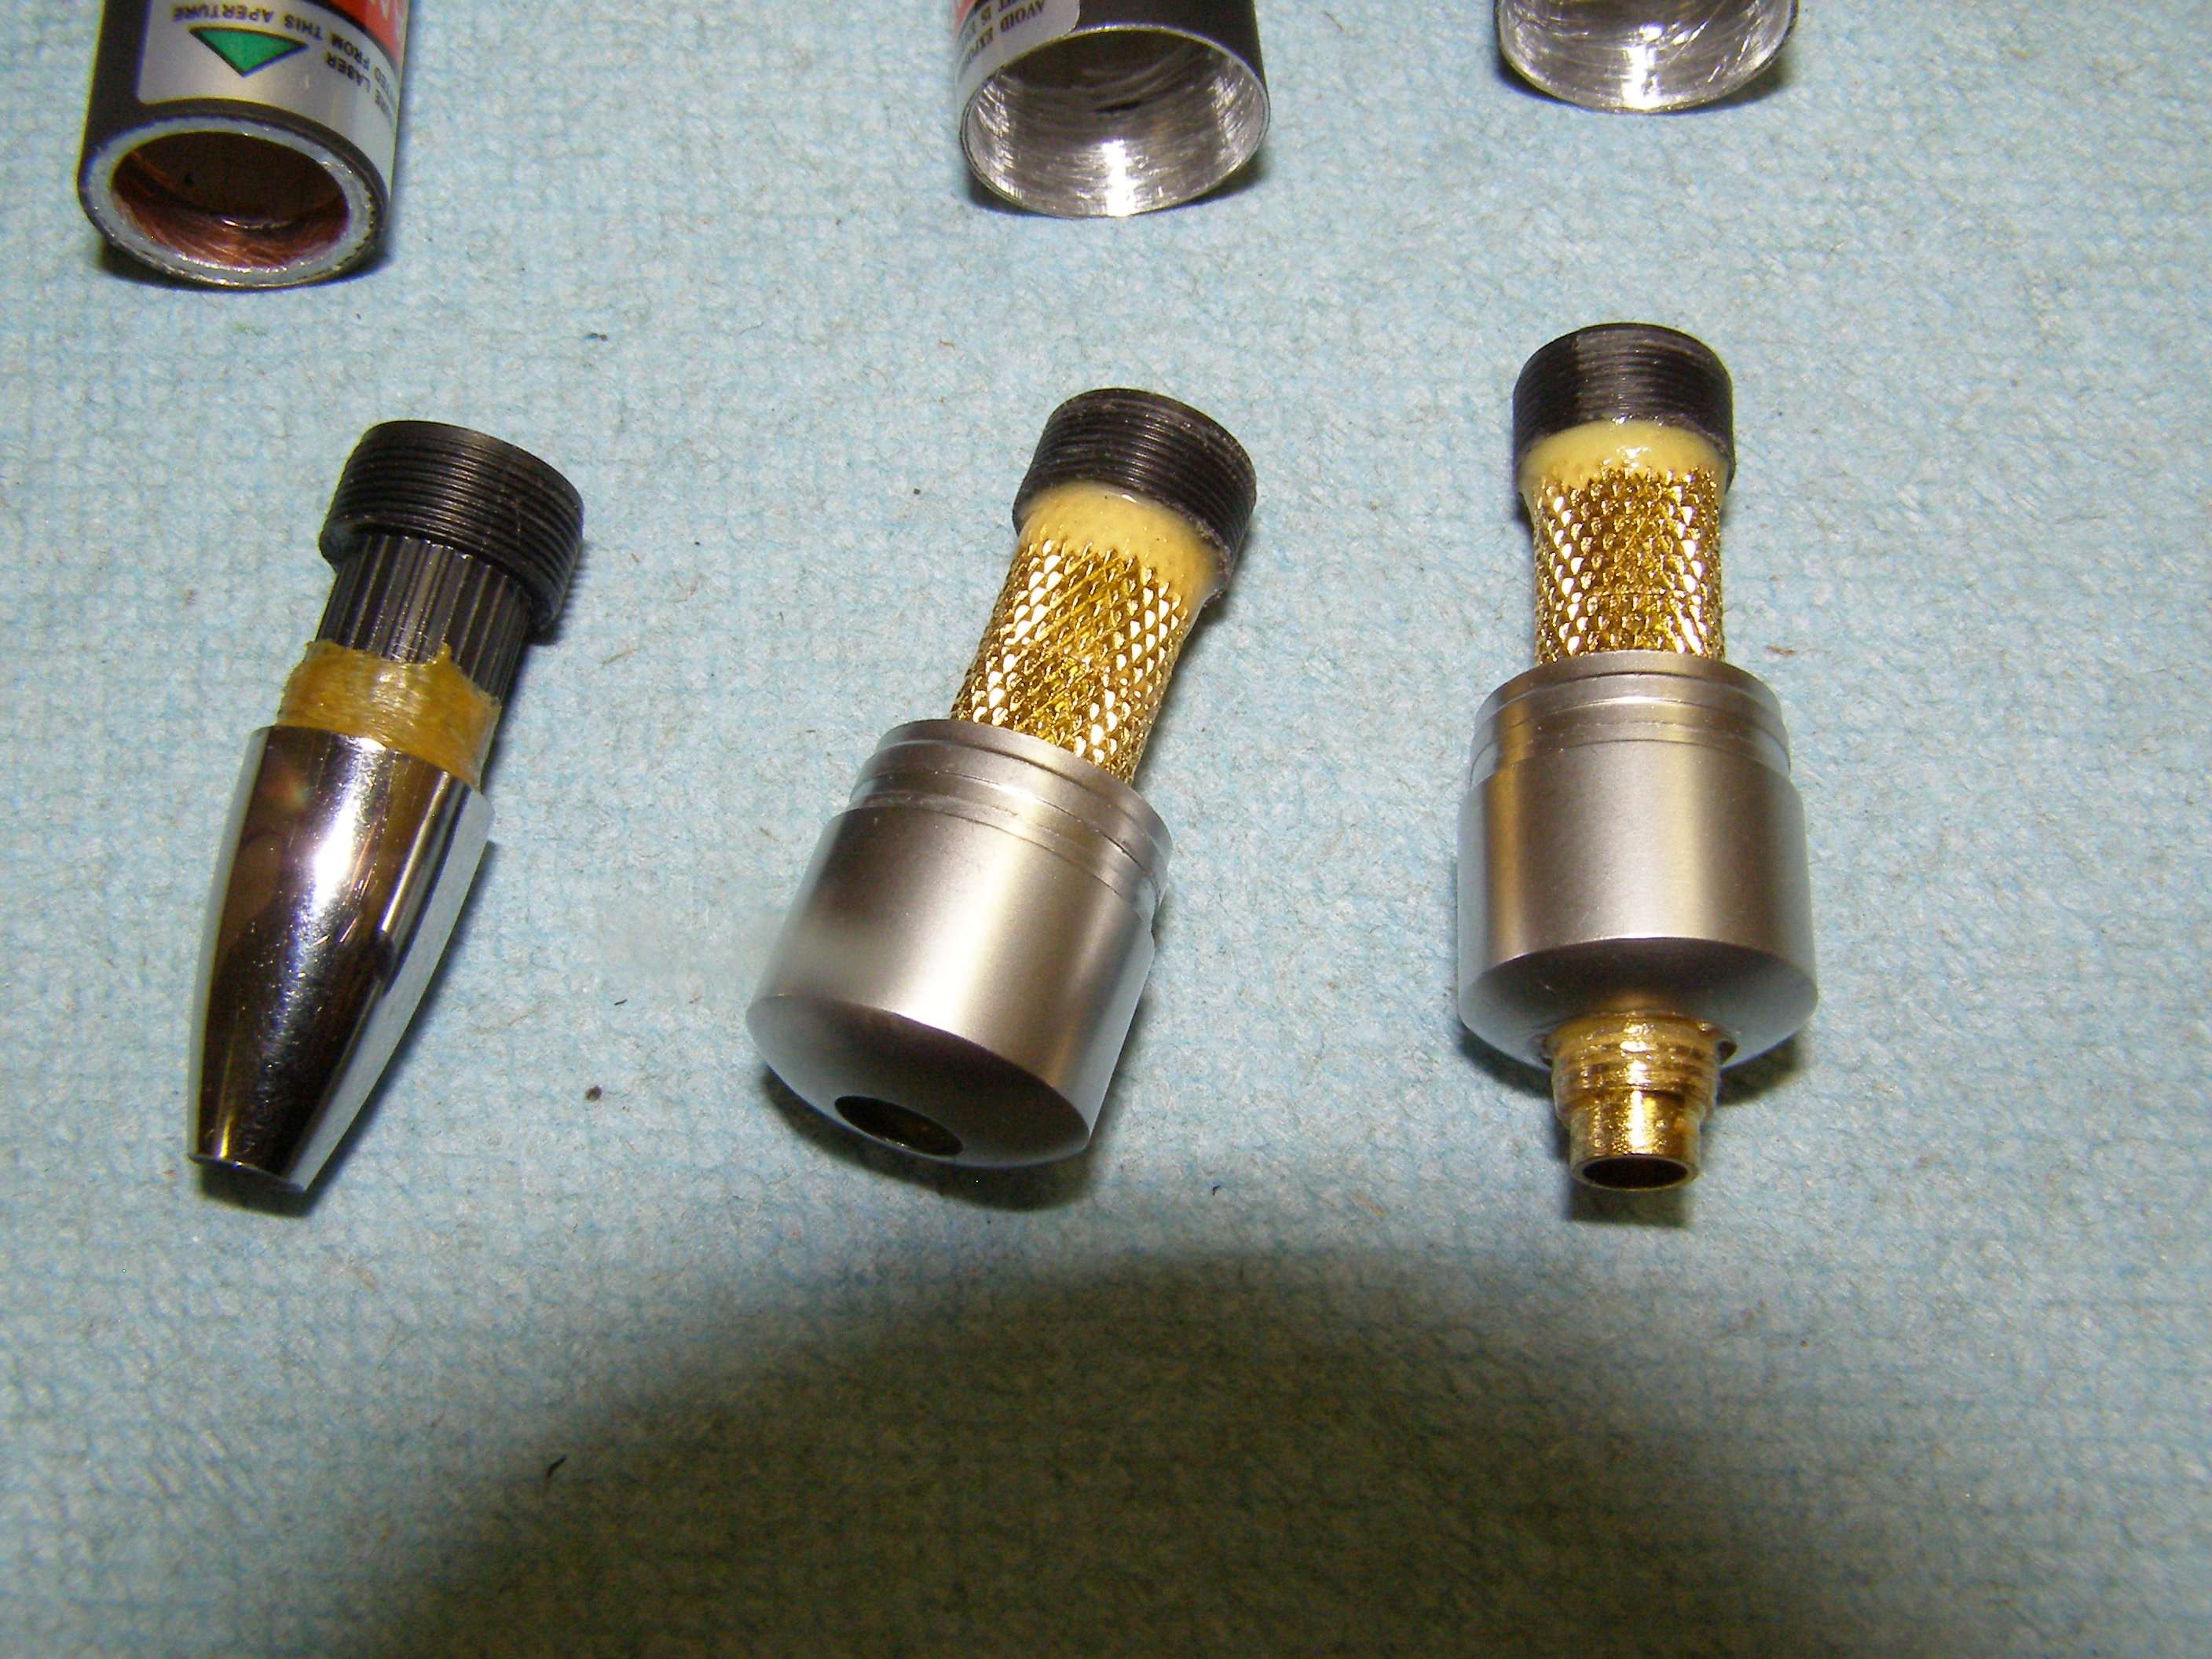
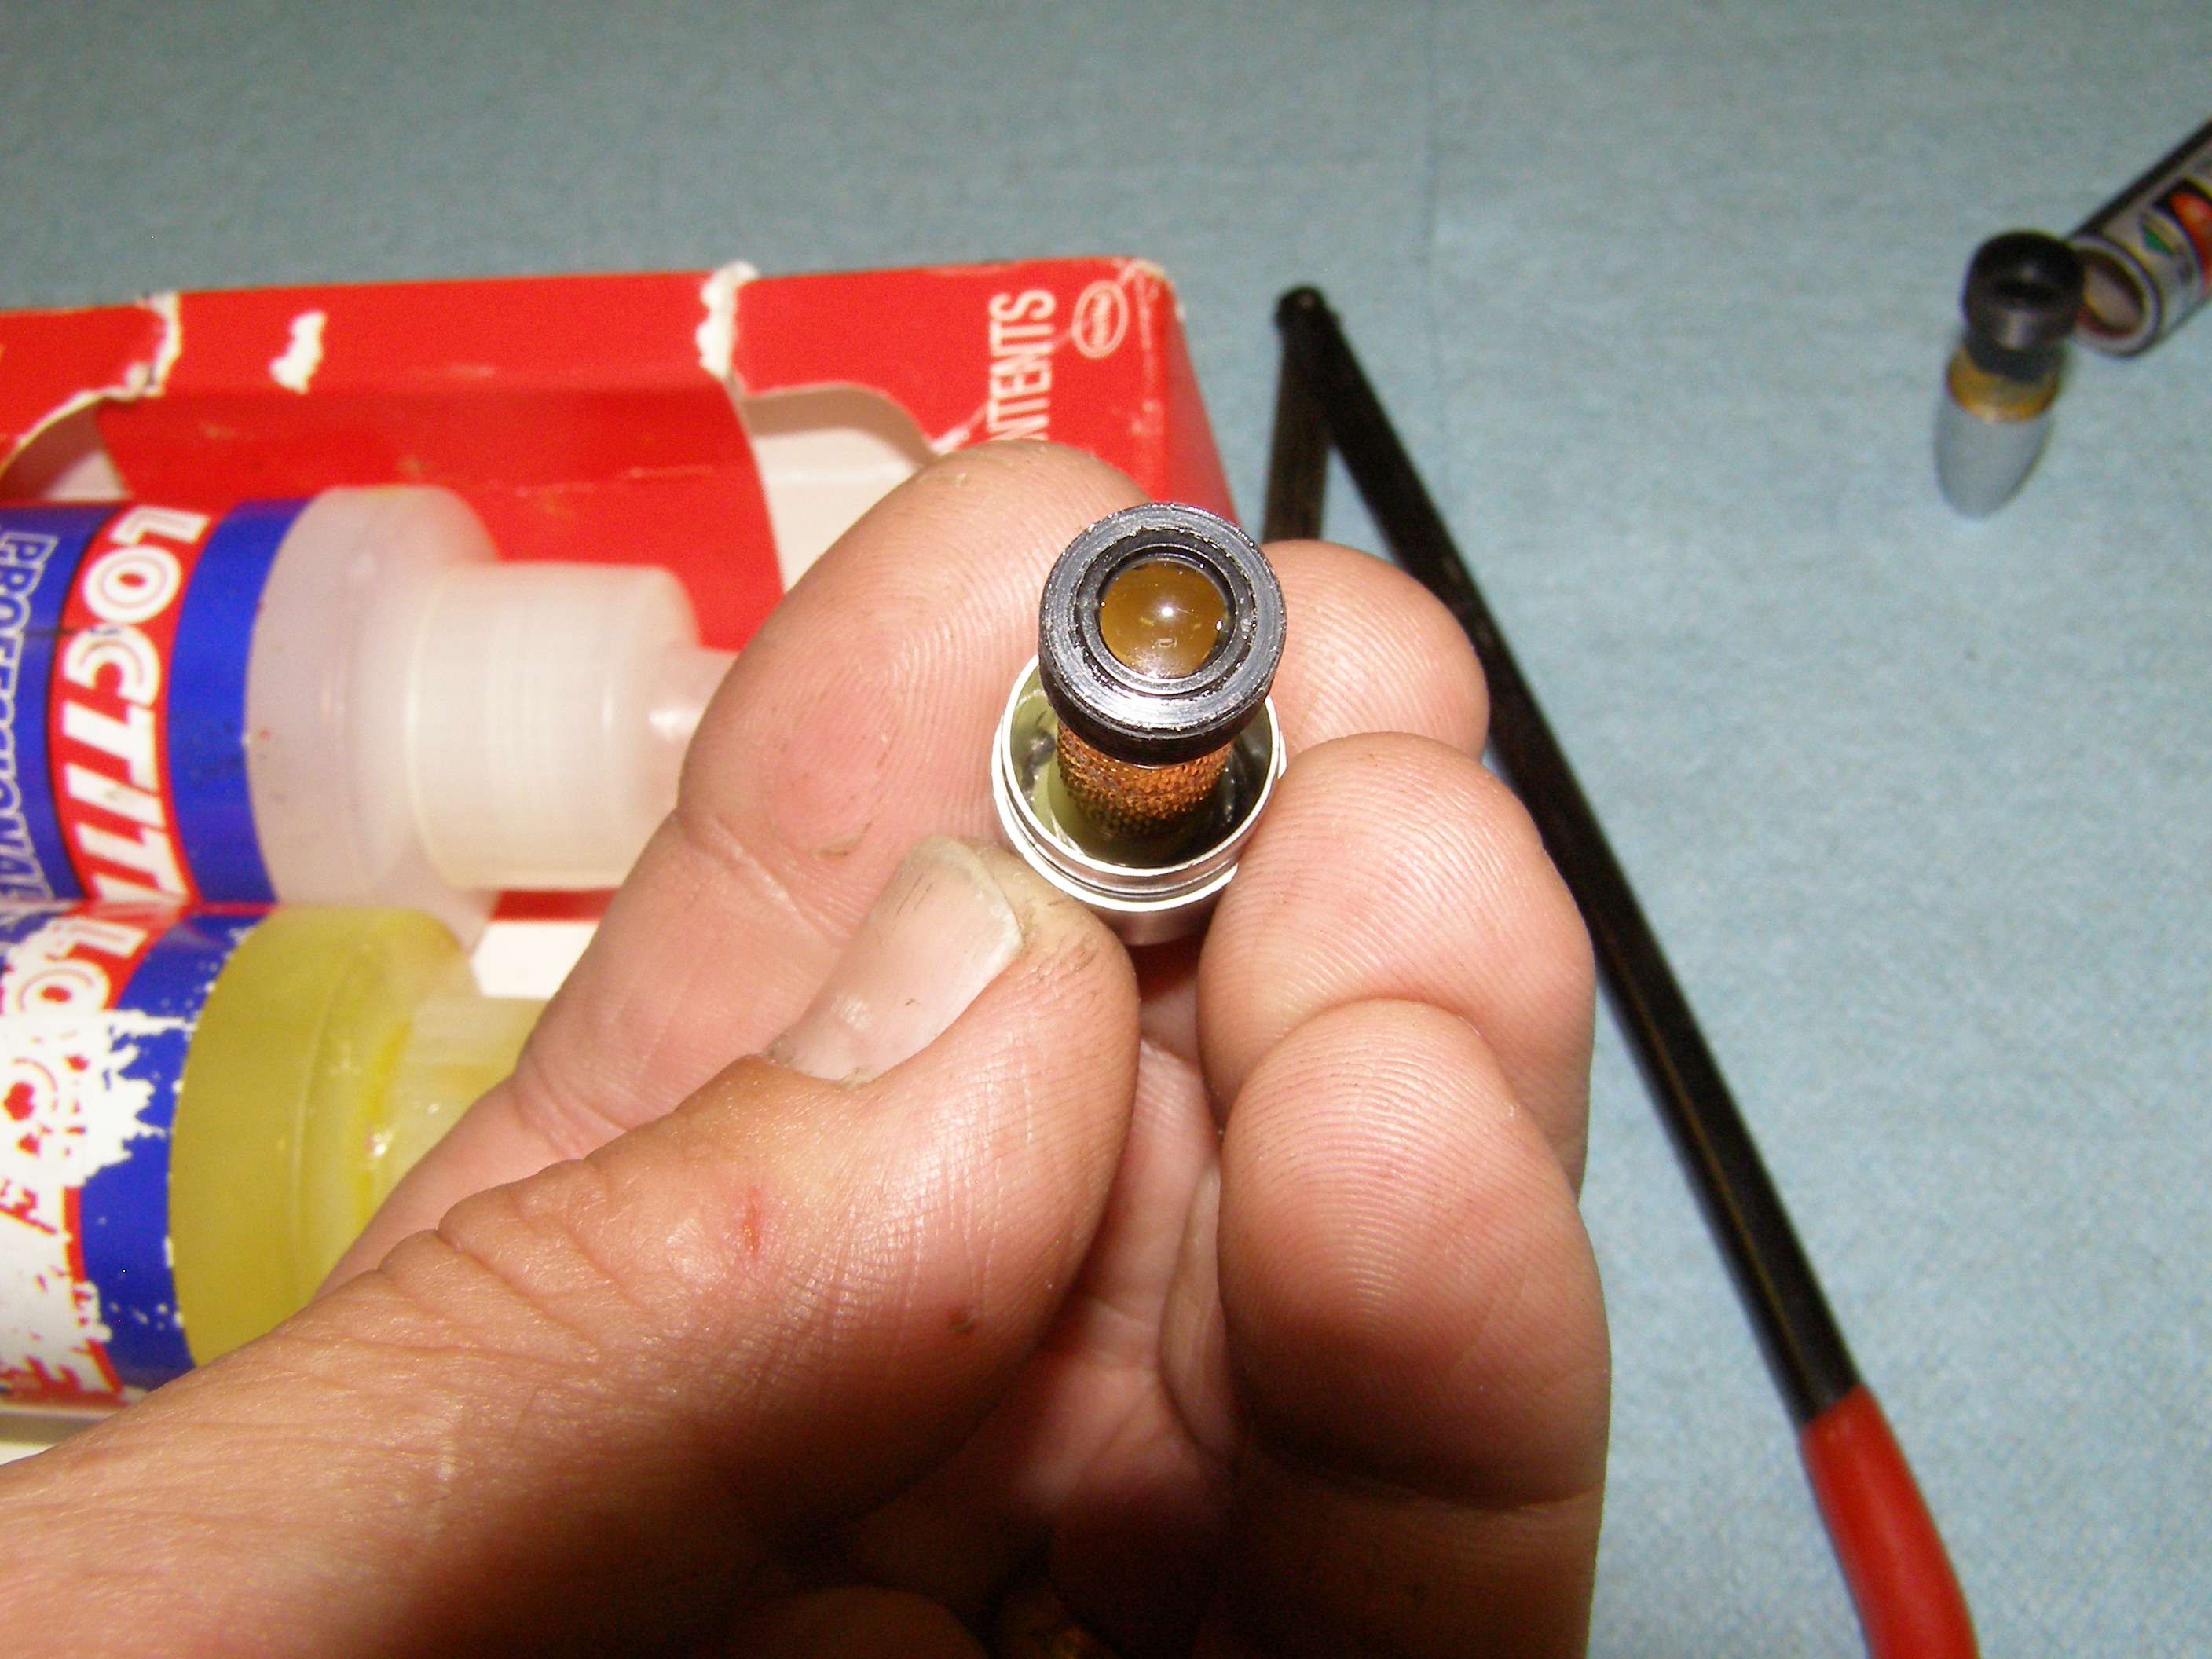
A formal tutorial for this would be awesome. This is a great Mod, thank you so much for sharing. I'm actually quite impressed as I pretty much destroyed my Radio Shack pointer trying to take it apart
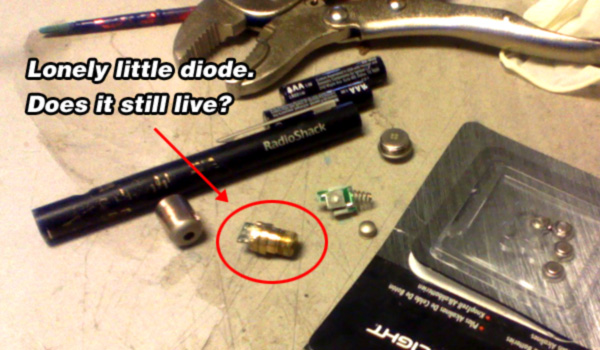
 :whistle:
5mw_by_stonekaiju-d64jo5x.jpg


:gj: I'm going to have to get in on some of those 405s that everyones talking about ;)

~ LB

It took me a bit but I see what your doing now :D Very cool.
 
Last edited:

Pman

0
Joined
Nov 28, 2012
Messages
4,447
Points
113
I've added a couple things to the post above.

Ebay 3 pack (red/green/purple) "21buyinhere" Waste of $ to buy the sellers individual ones as they are the same pens. You can likely get them for around $12 with an offer. Buy multiple sets as you will get the bug to keep messing with them and trying different things. Have had them take from 7 days to 2 weeks to show up in the mail. They come from China and then hit N.Y. and I live in upstate (central) N.Y. so they don't take long. The 405nm are usually around 80-90mw and every 650 I've received has been over a 100mw. The 532nm are anywhere from 35-80 but that's including the IR which can be pretty high.

The shorties in the pen pics are just cut down pens with a single 10440. All I am doing is removing the clip and popping out the cap and then carefully cutting back from the cap end for the proper length and pressing the cap back on. Those also have the focus mod (which of course you don't have to do if you just want a shorty).
There's lots of tips for all of this stuff such as what if you don't have good conductivity from your tail cap or can you also remove the small threaded brass piece from the pen or how to make a pen with parts to run off 3 eneloops (Just ends up looking like a longer pen).
This kind of stuff allows you to have fun messing with inexpensive way overspec pens when the funds are low and you're itching for projects to do. It's also why you don't throw away pieces/parts from non-working units or flashlights. Never know what you may think of to combine.

Notice how there are no marks on the pen caps from removing them. The piece of leather used was just cut from a very olf Fluke multimeter case that I removed as it was annoying me. Can always just go buy oor cut strips from an old belt. Haven't found anything yet that works as good as leather. Everything else I've tried gives too much from the plier teeth pressure and scratches the caps. Would use regular pliers with good teeth and not locking pliers.

This really isn't complicated at all. I just found that the 405nm and 650nm pens are rather "boring" unless you do something like this to make them interesting.

I will not post any of this information anywhere but on this site and I would ask that others don't copy and paste. Thanks
 
Last edited:
Joined
Apr 19, 2013
Messages
2,246
Points
63
Good idea to buy multiples, plenty of modding fun :) Yes... I noticed how nice and clean your host are. :(
I'll have to try the leather strap. Apparently a vise and visegrips are not very good :)

Great info Pman!

~ LB
 

Pman

0
Joined
Nov 28, 2012
Messages
4,447
Points
113
You could probably get 4 sets for under $50 which is a steel. That's 12 WAY overspec pens to experiment with. I have yet to get a dud. Seems like everytime I order a couple sets I wish I had gotten more:) Kind of ridiculous how many pens I have at this point. Way more than that pic shows. Maybe a bit embarrassed to show all the units. It's why I don't add the 100mw + units to my sig.
I have so many because I like to experiment and try new things with them with low out of pocket expense. Wouldn't be much fun if they cost $20 a piece.
 
Last edited:

Laik

0
Joined
Jan 22, 2013
Messages
946
Points
28
I always had to take apart pens when i got them (i still do :D). I would break them, but i would gain some knowledge. Now its a curse, i keep taking them apart and they are the press fit ones, so you have to destroy the pen to get the module. I must resist... :tinfoil:
 

Pman

0
Joined
Nov 28, 2012
Messages
4,447
Points
113
Last edited:


Top