kiyoukan
0
- Joined
- Oct 24, 2009
- Messages
- 2,555
- Points
- 48
so did you use the heatup method or just found a better drill bit?
or did you just need to work it up in steps?
or did you just need to work it up in steps?


 Copper makes me want to punch a baby.
I work my way up to 15/32, once i get that hole drilled, they are usualy still tight enough they'd have to be pressed in with a vice, so while the bit is inside the sink I press down on it with my hand and start backing it out. this makes it shave a little extra and help the module fit better.
Copper makes me want to punch a baby.
standard sizes are so dumb, i like metric much better....unfortunately i live in the united states where everything is ass backwards.
As with anything in engineering drill bits are also made to tolerance. +/-0.1mm is not unusual at all. That's why they are so cheap and even two drills from the same manufacturer can therefore differ in diameter by up to 0.2mm from each other. I would also not recommend turning down a drill bit and go the Reamer route. Reamers, are more expensive and work in the same way as a drill but with more flutes at a shallower angle and are precision ground so a 12mm reamer will give you a hole from 12.00 - 12.02mm. Cutting and feed speeds are generally slower than drilling though so you'd have to look that up. They should only really be used to remove a small amount of material so you have to drill pretty close to the size you want and not start chewing huge 2mm cuts with one! That'll ruin your reamer real quick!
A far easier way to get the correct fit is to have on hand a selection of modules to match to your hole. The Aixiz modules I have fitted to turned heatsinks themselves have quite a large tolerance range, (+/-0.2mm IIRC), so you will generally have one that fits better than another.
Personally I always bore the hole myself to the smallest module I have and never drill for the final fit. This way, if I over cook it, I know I've got another module slightly larger that'll fit, (hopefully!). I also don't like the press fit style either as the different materials expand and contract at different rates and this could eventually mean the module becomes loose, or binds up to prevent easy repair or replacement but that's just personal preferences I guess.
To gaurantee a hole size to 0.02mm? Ream it! Simple as...
M
P.S. What sort of lathe is that in the pic?
I got this reamer in the mail today
12mm Metric Chucking Reamer Ream cutter Tool 12 mm - eBay (item 360315955736 end time Dec-02-10 06:59:19 PST)
it works great. Seems to cut the holes perfectly. I don't even know the size bit i work up to before i use the reamer (it's not labeled) but its like .445" in diameter
the reamer comes really long so i chopped it in half to save some space.
I'm hoping this will work just as well when i make these copper heat sinks....last time was a nightmare trying to get that aixiz hole just right.
.445! I like it!
Generally, the closest drilled hole you can get before being over sized is good but there are charts for reamers. Overkill in our use probably, but they are there.
You chopped it in half Mo? Which half? Did you chop off the cutting end or chuck end? Either way, be sure that if you chopped the cutting end that your new tool is running true with no burrs on the cutting flutes because they are precision don't forget. Not getting a good start in the hole due to uneven flutes will somewhat negate the purpose of the tool, (not lecturing but I wouldn't have done that). The important thing to remember is a slow cutting speed, slow feed rate and dwell at the end of your hole, (dwell means let it sit and turn for a while), and slowly retract. If you've got no definite speeds to choose from, (my lathe has fast, medium and slow!), it's an art so take your time. I've been doing a fair bit of 12mm reaming this week and it took a while to get it sorted! Cutting fluid is your friend!!! Just some fine oil will do if you have nothing else and this will much improve the finish.
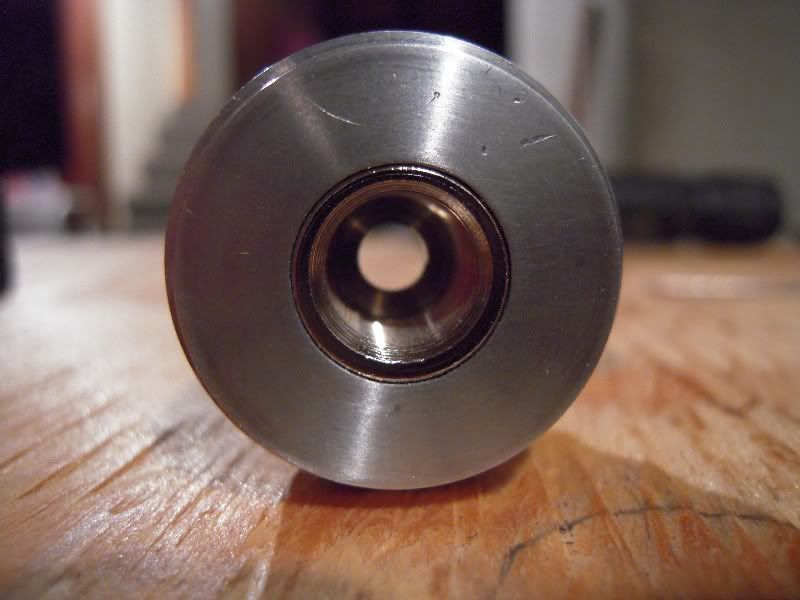
^ Nice finish inside that thru-hole Kevlar!
M
.445! I like it!
Generally, the closest drilled hole you can get before being over sized is good but there are charts for reamers. Overkill in our use probably, but they are there.
You chopped it in half Mo? Which half? Did you chop off the cutting end or chuck end? Either way, be sure that if you chopped the cutting end that your new tool is running true with no burrs on the cutting flutes because they are precision don't forget. Not getting a good start in the hole due to uneven flutes will somewhat negate the purpose of the tool, (not lecturing but I wouldn't have done that). The important thing to remember is a slow cutting speed, slow feed rate and dwell at the end of your hole, (dwell means let it sit and turn for a while), and slowly retract. If you've got no definite speeds to choose from, (my lathe has fast, medium and slow!), it's an art so take your time. I've been doing a fair bit of 12mm reaming this week and it took a while to get it sorted! Cutting fluid is your friend!!! Just some fine oil will do if you have nothing else and this will much improve the finish.
^ Nice finish inside that thru-hole Kevlar!
M

