

- Joined
- Feb 5, 2008
- Messages
- 6,252
- Points
- 83
Hiya all LPF folks!
I finally got around to working on my idea of MY OWN boost converters, since the idea of having a bluray in 1 x 18650 host sound very tempting.
I found the name of my own drivers , SPARK. It is not an acrynim or anything. It just sounded nice ... it is not copyrighted already , is it?
So, let's start from the beggining. I managed to obtain free samples from:
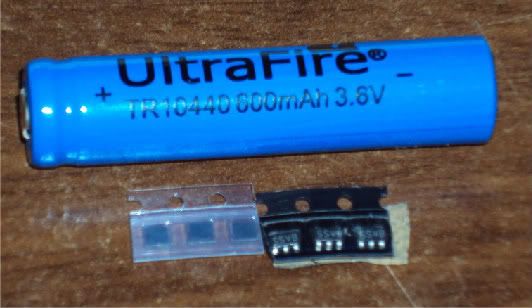
National: LM3410X 1.6MHz driver 5pin IC in SOT223 package.
Coilcraft: well... coils
Here are the coild and LM3410s in comparison to one 10440 battery.
When I first saw them , I was kinda... :wtf: I was expecting them to be the same size as those LM1117.
Then I realised it is very good that they are smaller... smaller PCB needed and maybe, just maybe it will provide some sort of challenge soldering... I was wrong about the last part
Coils are 10 uH, rated I think, 500 mA (I though it would be enough, however I was wrong, that is why this is part I)
They are here compared to LM3410 and 10440 battery for size:
So... today I started designing my PCB according to the schematic in the first page of LM3410 datasheet, with 4 external components + LD.
I figured that actually, if I leave the chip be, schematic will be simplified if you make the ground in the upper wire, and positive on below the chip, rewiring the pins and components accordingly.
That is what my PCB design is based on.
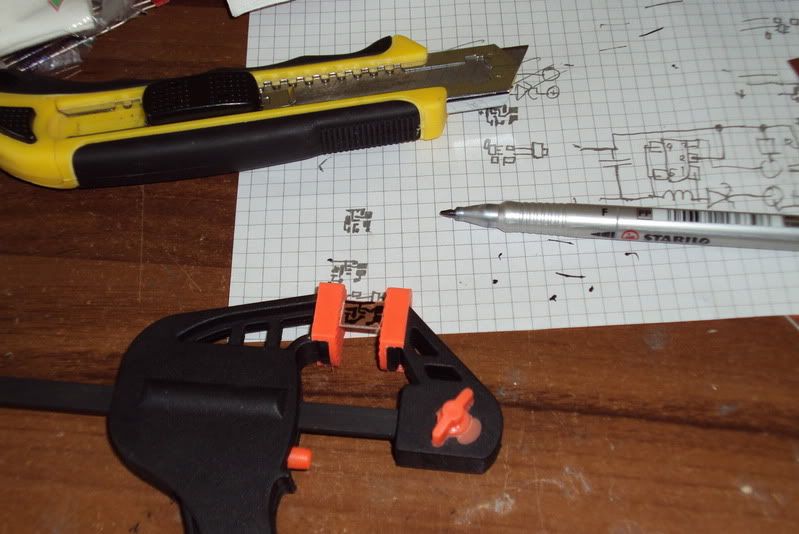
Here are first design attempts of PCB: (Just though I took a pic at that paper )

So, my design got finally completed with simply components layout and it was small enough to fin inside aixiz housing. (before the time of writing I already got planned a revised PCB in my head... jsut need to draw it somewhere)
I sharpied my PCB accordingly. PCB size is aprox 11 x 7 milimeter (+-0.5 mm I measured the thing with normal ruler)
So... after it got eched I needed to solder the components on it. Following complex rules of simple common sense, the IC was the first.
*TIP FOR THE GUYS NEW TO SMD SOLDERING*
How to solder multi-pin IC on a small PCB without hot air:
First you gotta do is melt some solder on your soldering tip, and gently touch each pad where IC is gonny go.
Once touched, drag your soldering iron along the line, flowing the solder along with it.
Then, use a desolder pump on every pad, except one (preferably the middle one). Then using your tweezers, place the IC over it's pads.
Then, while holding IC, use the soldering iron to melt the pad that was not sucked so it is a bit fatter then the others, and the IC will sink into the solder and stay there.
When melting the pad, touch with soldering iron about 1 or 2 milimeter along the line of it, so you can place the IC without moving the iron away. That is why we dragged a bit of solder along the lines.
Use same method on rest of pads once the IC is secured, touch the pad a bit up it's line and then melt some solder in the pad. BUT only a little bit, and only if neccesary, usually the remains of solder will do the job good!
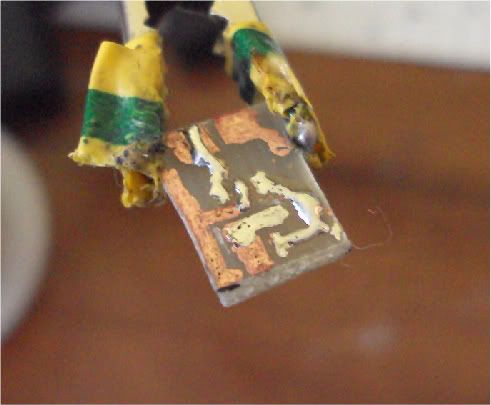
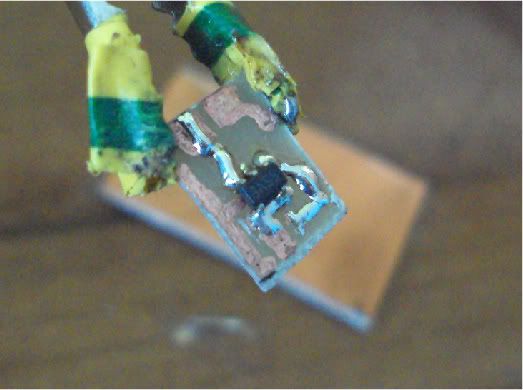
So, here are my pads:
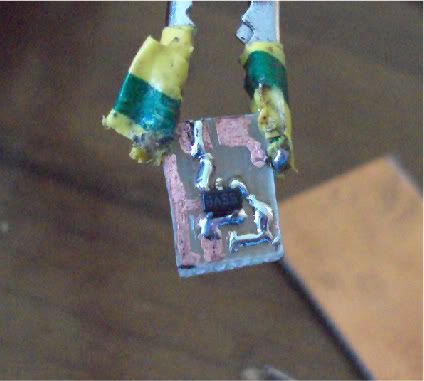
And here is IC soldered on it. No you do not need no expensive soldering stations or hot air reworks. I have 4$ soldering iron (with regulator done-myself)
*END OF TIP*
Anyhow.
The entire thing got nicely assembled. It looked very nice and professional until last two components. I only had DO41 epoxy case schottky, and for output cap, a ceramic disk cap was used. So it ruined all-SMD looks, but function is the same. I will get some SMD schottkys and revision will make me able to use SMD caps also.
So, once the thing was assembled, I used a 3.5Vdrop dummy load, with 1 ohm resistor. SPARK was set to 100 mA using 2.0 ohm resistor on feedback line.
Hooked up one 10440 battery. Grabbed DMM and measured 96 mV of drop on 1ohm resistor. AWSOME!
So nothing is shorted and everything working. Or so I though.
I instantly grabbed one SCC red diode I had a spare. Hooked it up...
Bright red light, YES! PCB of driver only got warm, not hot.
If you do not like sad stories, stop reading now.
Well after consulting with mr. Common Sense (SOB, gonna get back at him for this), next thing I did was hook up a PHR diode, that this driver was mentioned for.
Soldering went quickly like any other so I am sure it was not the problem.
10440 batt steps on stage.
Quick flash and faint glow. Connect again, no flash only glow. :undecided:
My PHR was LEDed (made sure by connecting it to old driver and retrying several times).
I got very angry then... Why would my driver failed me on the very last step to success?
Grabbed two more rectifier diodes and upgraded my dummy load from 3.5 Vdrop to bluray (5 V drop) and 5.7 V drop.
Measuring current across one ohm resistor was frustrating.
I watched the current barely reaching 20 mA with 5 V drop, constantly fluctating and presumably huge on-spikes.
DAMN!
Okay, I chilled out and replaced 2.0 ohm with 0.47 ohm resistor, trying to get 400 mA current with 3 V drop.
Amazing results. It started at 150 mA barely, and slowly over 5-10 seconds climbed to 190-200 mA and would not move on.
Retrying of everything was done several times and I concluded that the coil is not capable of meeting my requests.
I lost a PHR diode because of not properly testing with test loads. :twak:
I have only one more PHR sled, sent by Bill himself.
Once I have the proper coils, the first 1x 18650 PHR laser I make will be sent to Bill: 1) proof of concept (if that is the expression). Also thorough testing of drivers potentials and flaws, current and voltage ripple and that things.
2) personal gift from me, and a big 'thanks' for all his help, without which this project would not get started. THANKS BILL
Bottom line, replacing the coil with higher current one will get the thing to where it needs to be: a 1x 18650 host, powering some bluray diode.
Part 2 to be expected next weekend!
P.S. If you want smaller images, I will resize them, however I like to show is much as possible with my photos so...
I finally got around to working on my idea of MY OWN boost converters, since the idea of having a bluray in 1 x 18650 host sound very tempting.
I found the name of my own drivers , SPARK. It is not an acrynim or anything. It just sounded nice ... it is not copyrighted already , is it?
So, let's start from the beggining. I managed to obtain free samples from:
National: LM3410X 1.6MHz driver 5pin IC in SOT223 package.
Coilcraft: well... coils
Here are the coild and LM3410s in comparison to one 10440 battery.
When I first saw them , I was kinda... :wtf: I was expecting them to be the same size as those LM1117.
Then I realised it is very good that they are smaller... smaller PCB needed and maybe, just maybe it will provide some sort of challenge soldering... I was wrong about the last part
Coils are 10 uH, rated I think, 500 mA (I though it would be enough, however I was wrong, that is why this is part I)
They are here compared to LM3410 and 10440 battery for size:
So... today I started designing my PCB according to the schematic in the first page of LM3410 datasheet, with 4 external components + LD.
I figured that actually, if I leave the chip be, schematic will be simplified if you make the ground in the upper wire, and positive on below the chip, rewiring the pins and components accordingly.
That is what my PCB design is based on.
Here are first design attempts of PCB: (Just though I took a pic at that paper
)
So, my design got finally completed with simply components layout and it was small enough to fin inside aixiz housing. (before the time of writing I already got planned a revised PCB in my head... jsut need to draw it somewhere
)I sharpied my PCB accordingly. PCB size is aprox 11 x 7 milimeter (+-0.5 mm I measured the thing with normal ruler)
So... after it got eched I needed to solder the components on it. Following complex rules of simple common sense, the IC was the first.
*TIP FOR THE GUYS NEW TO SMD SOLDERING*
How to solder multi-pin IC on a small PCB without hot air:
First you gotta do is melt some solder on your soldering tip, and gently touch each pad where IC is gonny go.
Once touched, drag your soldering iron along the line, flowing the solder along with it.
Then, use a desolder pump on every pad, except one (preferably the middle one). Then using your tweezers, place the IC over it's pads.
Then, while holding IC, use the soldering iron to melt the pad that was not sucked so it is a bit fatter then the others, and the IC will sink into the solder and stay there.
When melting the pad, touch with soldering iron about 1 or 2 milimeter along the line of it, so you can place the IC without moving the iron away. That is why we dragged a bit of solder along the lines.
Use same method on rest of pads once the IC is secured, touch the pad a bit up it's line and then melt some solder in the pad. BUT only a little bit, and only if neccesary, usually the remains of solder will do the job good!
So, here are my pads:
And here is IC soldered on it. No you do not need no expensive soldering stations or hot air reworks. I have 4$ soldering iron (with regulator done-myself)
*END OF TIP*
Anyhow.
The entire thing got nicely assembled. It looked very nice and professional until last two components. I only had DO41 epoxy case schottky, and for output cap, a ceramic disk cap was used. So it ruined all-SMD looks, but function is the same. I will get some SMD schottkys and revision will make me able to use SMD caps also.
So, once the thing was assembled, I used a 3.5Vdrop dummy load, with 1 ohm resistor. SPARK was set to 100 mA using 2.0 ohm resistor on feedback line.
Hooked up one 10440 battery. Grabbed DMM and measured 96 mV of drop on 1ohm resistor. AWSOME!
So nothing is shorted and everything working. Or so I though.
I instantly grabbed one SCC red diode I had a spare. Hooked it up...
Bright red light, YES! PCB of driver only got warm, not hot.
If you do not like sad stories, stop reading now.
Well after consulting with mr. Common Sense (SOB, gonna get back at him for this), next thing I did was hook up a PHR diode, that this driver was mentioned for.
Soldering went quickly like any other so I am sure it was not the problem.
10440 batt steps on stage.
Quick flash and faint glow. Connect again, no flash only glow.
:undecided:My PHR was LEDed (made sure by connecting it to old driver and retrying several times).
I got very angry then... Why would my driver failed me on the very last step to success?
Grabbed two more rectifier diodes and upgraded my dummy load from 3.5 Vdrop to bluray (5 V drop) and 5.7 V drop.
Measuring current across one ohm resistor was frustrating.
I watched the current barely reaching 20 mA with 5 V drop, constantly fluctating and presumably huge on-spikes.
DAMN!
Okay, I chilled out and replaced 2.0 ohm with 0.47 ohm resistor, trying to get 400 mA current with 3 V drop.
Amazing results. It started at 150 mA barely, and slowly over 5-10 seconds climbed to 190-200 mA and would not move on.
Retrying of everything was done several times and I concluded that the coil is not capable of meeting my requests.
I lost a PHR diode because of not properly testing with test loads. :twak:
I have only one more PHR sled, sent by Bill himself.
Once I have the proper coils, the first 1x 18650 PHR laser I make will be sent to Bill: 1) proof of concept (if that is the expression). Also thorough testing of drivers potentials and flaws, current and voltage ripple and that things.
2) personal gift from me, and a big 'thanks' for all his help, without which this project would not get started. THANKS BILL
Bottom line, replacing the coil with higher current one will get the thing to where it needs to be: a 1x 18650 host, powering some bluray diode.
Part 2 to be expected next weekend!
P.S. If you want smaller images, I will resize them, however I like to show is much as possible with my photos so...
Last edited:


