D
Deleted member 8178
Guest
All right here it is, the "LED/photodiode laser power meter", the cheap way to check your lasers health.
By that I mean you can't see how many mW your laser has, but if it's still going strong. I haven't done this with a photodiode/resistor, but I don't see why that wouldn't work.
You will need:
DMM
Orange high brightness 3-10mm led, or a photo diode, Non coloured casing for either. Or maybe a photoresistor.
White paper
Plastic tube, around 10mm in diameter, and 10mm long
Some building materials for the jig. I use Lego's
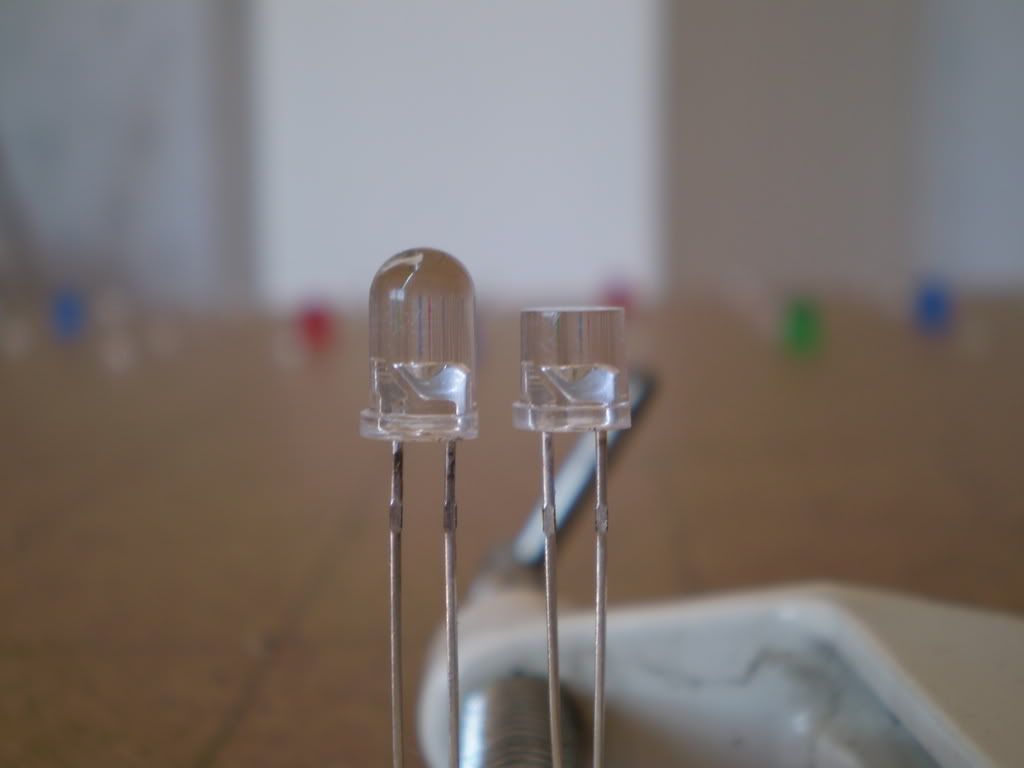
The diode need to have a flat lens for better accuracy. You can just file them down.
The paper will diffuse the laser light and lower the brightness.
With the LED you will be able to check blu-rays blue and green lasers. With a photodiode you should be able to check any colour, including IR.
The jig will hold the laser on the same spot every time you check your laser, which is important. You may have to custom build your own jig.
Here are some pictures:
If your diode has a lens, then file it down so it looks like the one to the right.
Here's the unit. I use this one to check my blu-ray. Note the ring I've draw, that's the spot where I lase. It's just big enough to have room for the dot inside it. It's important that you always lase on the same spot between readings.
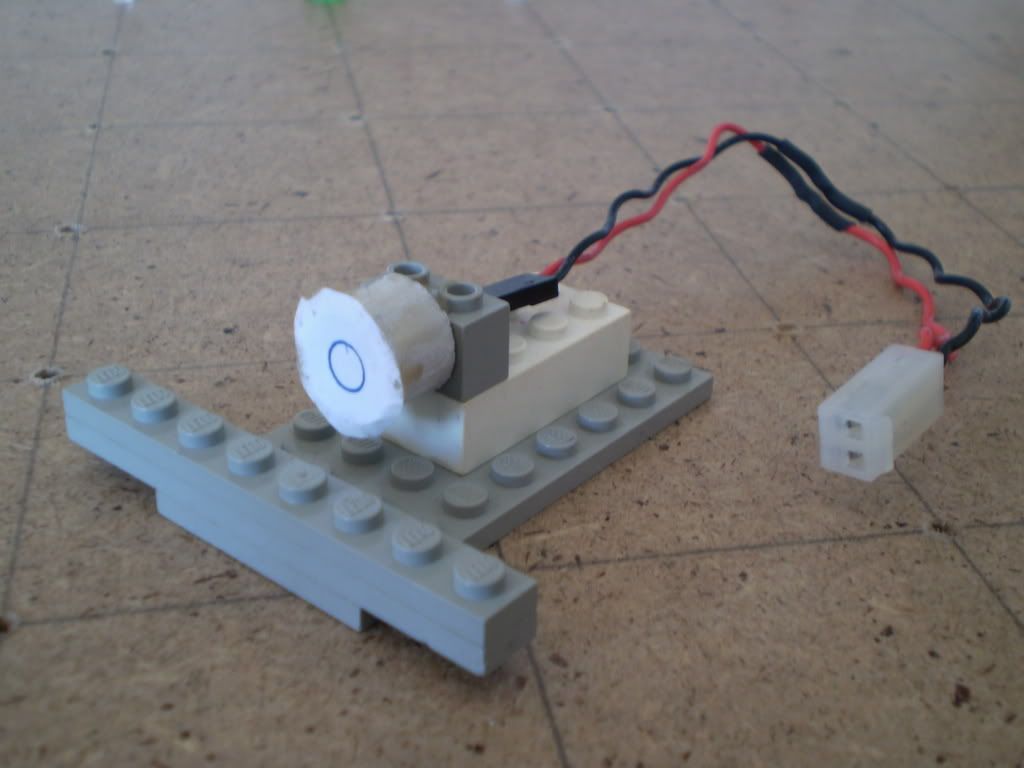
Seen from the side. You can see where the diode is located.

the whole set up.
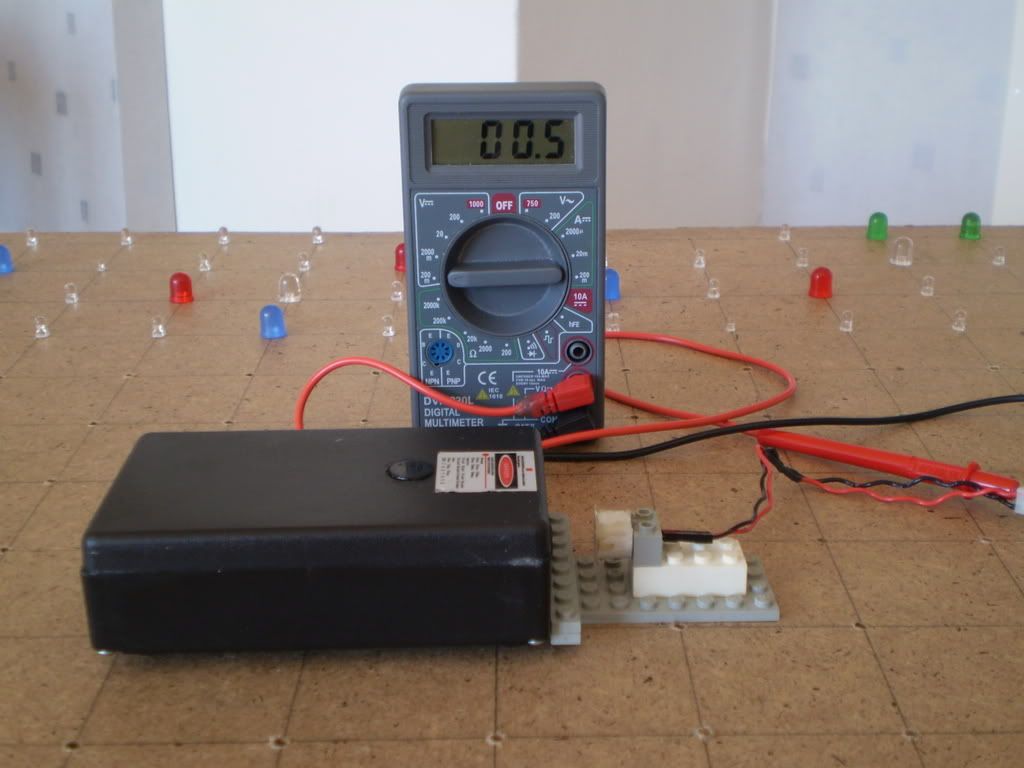
Now testing. I get 19.6mV. My battery is low, I always get 22-23mV when the driver has 1.25V in references voltage.
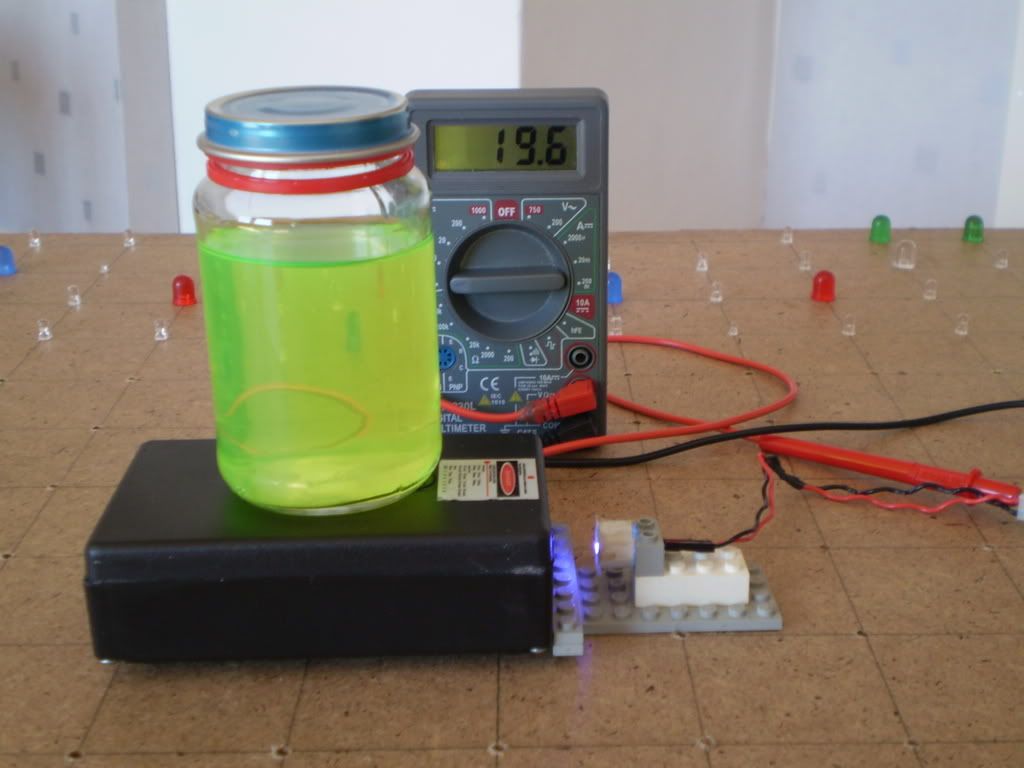
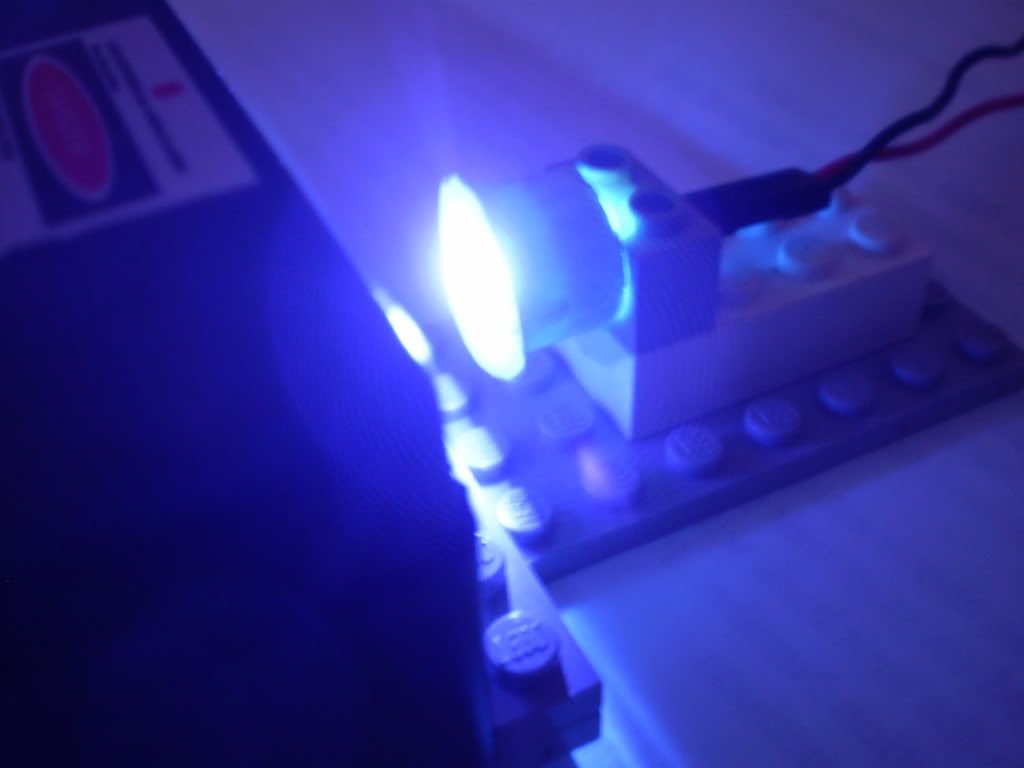
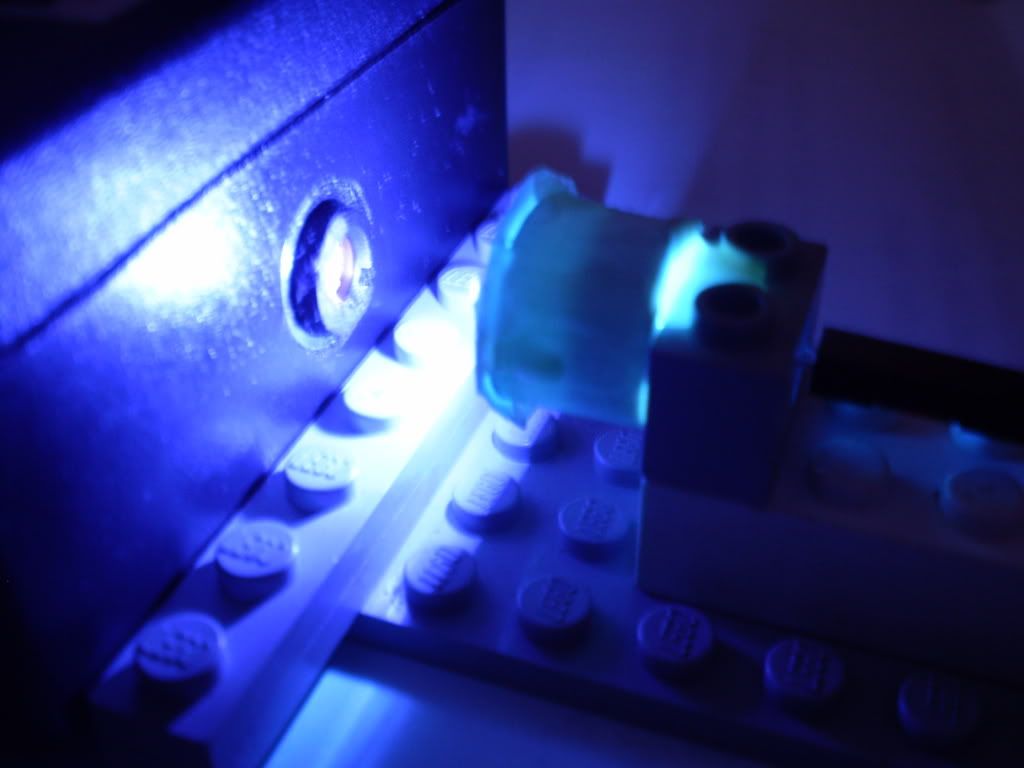
Some shots in the dark. You can see how the white paper makes the light blue, with makes it possible for the LED to get a better reading.
If your laser is very bright, then the meter might reach ins full reading. To find out it's limit, take it out in the sun and use a magnifying glass and take a reading. Be careful now, don't start a fire. ;D
You might get just over 1V with a LED, I get 1.23V. That is the max possible reading. I don't know how many ohms you get with the photo diode/resistor, but whatever.
Now test with your laser, if it gets to the max or close, then you will need to add one or several diffusers with a few mm between them. It will be trial and error till you get it right.
Ok now you're done, just one last test. Take a reading and remember it. Then move the laser around and put it back and take a new reading. It should be the same, if so > Congrats, you got it right!
You can also check you meter so it won't give you a false reading by take a green LED and connecting it up to its own DDL driver.
Do it like this:

The blue thing is just ESD protection, shorting out the leads when not in use.
Snap the green LED in front of the meter and feed it with the same current every time. The LED current must be selected with a pot on the DDL driver so it won't over load the meter with to much light (blu-ray meter). Do not ever touch the pot when it's done!
Now, before you test you laser, you can also test the meter.
LEDs are very reliable in light out put which is ideal for control. You can only use the LED you have chosen, so take care of it (hence the ESD protection) or make a one complete unit, which is even better.
A good tip when checking you laser, do it in the dark so no other light will mess with the readings.
And lastly, this is not a real power meter! It will only give you an idea how your laser will perform. If it's getting better or worse.
There is no guarantee that this will work well, but it does the job for me anyway. It's worth a shot IMO.
Have fun building your own!
By that I mean you can't see how many mW your laser has, but if it's still going strong. I haven't done this with a photodiode/resistor, but I don't see why that wouldn't work.
You will need:
DMM
Orange high brightness 3-10mm led, or a photo diode, Non coloured casing for either. Or maybe a photoresistor.
White paper
Plastic tube, around 10mm in diameter, and 10mm long
Some building materials for the jig. I use Lego's
The diode need to have a flat lens for better accuracy. You can just file them down.
The paper will diffuse the laser light and lower the brightness.
With the LED you will be able to check blu-rays blue and green lasers. With a photodiode you should be able to check any colour, including IR.
The jig will hold the laser on the same spot every time you check your laser, which is important. You may have to custom build your own jig.
Here are some pictures:
If your diode has a lens, then file it down so it looks like the one to the right.

Here's the unit. I use this one to check my blu-ray. Note the ring I've draw, that's the spot where I lase. It's just big enough to have room for the dot inside it. It's important that you always lase on the same spot between readings.

Seen from the side. You can see where the diode is located.

the whole set up.

Now testing. I get 19.6mV. My battery is low, I always get 22-23mV when the driver has 1.25V in references voltage.

Some shots in the dark. You can see how the white paper makes the light blue, with makes it possible for the LED to get a better reading.


If your laser is very bright, then the meter might reach ins full reading. To find out it's limit, take it out in the sun and use a magnifying glass and take a reading. Be careful now, don't start a fire. ;D
You might get just over 1V with a LED, I get 1.23V. That is the max possible reading. I don't know how many ohms you get with the photo diode/resistor, but whatever.
Now test with your laser, if it gets to the max or close, then you will need to add one or several diffusers with a few mm between them. It will be trial and error till you get it right.
Ok now you're done, just one last test. Take a reading and remember it. Then move the laser around and put it back and take a new reading. It should be the same, if so > Congrats, you got it right!
You can also check you meter so it won't give you a false reading by take a green LED and connecting it up to its own DDL driver.
Do it like this:

The blue thing is just ESD protection, shorting out the leads when not in use.
Snap the green LED in front of the meter and feed it with the same current every time. The LED current must be selected with a pot on the DDL driver so it won't over load the meter with to much light (blu-ray meter). Do not ever touch the pot when it's done!
Now, before you test you laser, you can also test the meter.
LEDs are very reliable in light out put which is ideal for control. You can only use the LED you have chosen, so take care of it (hence the ESD protection) or make a one complete unit, which is even better.
A good tip when checking you laser, do it in the dark so no other light will mess with the readings.
And lastly, this is not a real power meter! It will only give you an idea how your laser will perform. If it's getting better or worse.
There is no guarantee that this will work well, but it does the job for me anyway. It's worth a shot IMO.
Have fun building your own!


