Welcome to Laser Pointer Forums - discuss green laser pointers, blue laser pointers, and all types of lasers

LPF Donation via Stripe | LPF Donation - Other Methods

Links below open in new window

ArcticMyst Security by Avery

Lazerer Classic 150 Divergence Cut in HALF!!!

Joined
Aug 18, 2009
Messages
202
Points
28
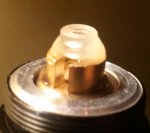
I added a second expanding lens from a broken laser and the beam is now twice as wide and diverges half as much! The only other difference is that the point at which the beam is focused to infinity is now when the focusing knob is about halfway out instead of all the way in. I like that better anyway. I hated it before when it stopped at infinity because there was no way to know that I was REALLY at infinity. Anyway... I digress. Now the dot at 37 feet is 11mm. The WHOLE dot - not just the brightest part. With a beam diameter around 1.5 mm, that's 0.84 mRad! I don't have an LPM to test the power loss of using an extra lens, but it isn't noticeable to my eyes. Pic attached!
 

Attachments

  • dualexpanders.jpg
    dualexpanders.jpg
    202.7 KB · Views: 303
Last edited:


Joined
Aug 18, 2009
Messages
202
Points
28
Thanks! It honestly blows my mind how simple and inexpensive this was to do. There is no reason all green lasers shouldn't have great divergence out of the box. I think most of us REALLY REALLY care about having a tight beam. When are the companies going to realize this?
 

jimdt7

0
Joined
Feb 5, 2011
Messages
1,893
Points
48
Nice work :gj: +1 :beer:
You should make a detailed tutorial on how to do it !

JIm
 
Joined
Aug 18, 2009
Messages
202
Points
28
Nice work :gj: +1 :beer:
You should make a detailed tutorial on how to do it !

JIm

Thanks! There's not really that much to explain. Just unscrew the laser head and place a second expanding lens on top of the existing one. Then gently add tiny amounts of Loctite brand 5 minute epoxy on two sides of the lens until it is joined to the first lens and the brass. I cut a Q-Tip stick at 45 degrees and used the very tip to build up the epoxy. Quickly make small adjustments with a pin until the beam comes out straight.The tiniest adjustment has a huge impact on the angle of the beam. Practice first without the epoxy if you have never tried to align one before. I checked mine after about a minute and made one more tiny adjustment just as the epoxy was starting to harden. Then let the epoxy dry, and screw the head back on, and you're done.
 
Last edited:


Top