IgorT
0
- Joined
- Oct 24, 2007
- Messages
- 4,177
- Points
- 0
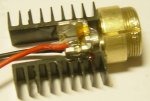
Benm said:For the aixiz module, i'd say the focal point is roughly 1 cm (100d), and the diameter of the lens is 6 mm or so. Most laser diodes have a beam less than a radian wide (usually more like 30 degrees or so), so it works out okay.
Thanks for the info!
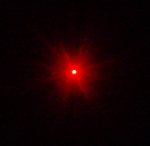
From my experimenting it seems my lens is good enough as it is.. The only problem is positioning it perfectly for max output..
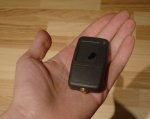
I'm nearing completion of my Phaser.. I glued two IC heatsinks to the LDs chunk of metal. Now i'll glue the lens assembly (brass) to the heatsinks (for even more heat dissipation).
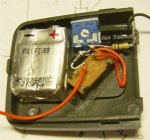
The housing is complete, and so is the driver.. I'll be using a 260mAh hobby grade LiPo as a power source..
I'll post the pics as the work progresses...


")