

- Joined
- Jan 19, 2010
- Messages
- 12
- Points
- 0
Let me know your opinions (or insight) on this little project. I replaced the diode in this laser with a 20x open can Sony diode. It works great but I have no LPM to measure its output. Let me know what you think, or if you have any questions about this particular unit I can probably answer them. There is a review of this unit in the Reviews section I think.
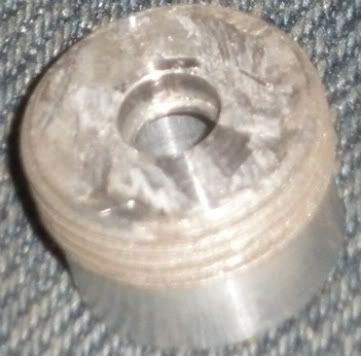
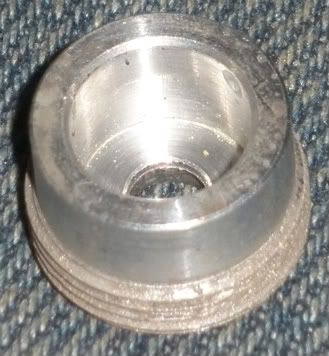
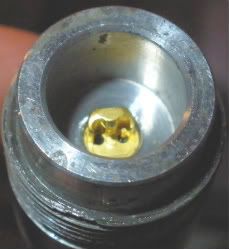
After unscrewing the focusable head from the laser, a small open can diode is visible inside (sorry, no pic). Without measuring, i would say the 'can' part is about 3mm wide. With the batteries removed, I just knocked it right out. This left me with the following heatsink, which screws up out of the base. I like the fact that the diode presses right into the sink.
The driver that originally came installed in this laser serves as the driver for the new diode as well. It is adjustable via a pot, and I have it set at 400mA short circuit current. This allows about 380-400mA to the diode until the batteries weaken signicantly from 20 or 30 minutes of use. The case and heatsink disperse the heat fairly adequately, and the case (or handle, whatever you call it) heats up as fast as the internal heatsink. This is probably a result of liberally applying arctic silver to both the male and female threads and tightening.
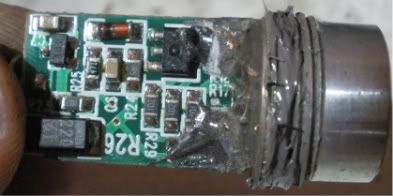
Here is a view from either side of the diode/heatsink/driver after the new diode was pressed in and soldered to the driver. Note that the goo on the threads is arctic silver (too much of it), . This makes a great thermal connection with the aluminum case of the laser, and seems to be nearly as effective as the internal heatsink. The gray stuff on the PCB is a hardened glue -looks like arctic silver- which held the board rigidly in place prior to disassembling, which had to be scraped off to remove the diode and driver.

Next I replaced the glue with some one minute epoxy. this works great as long as no epoxy gets on a spot where it can cause trouble. Allow 5 minutes at least, so the epoxy will further cure. It is still a bit soft for another 20 minutes or so but strong enough to get back to work.
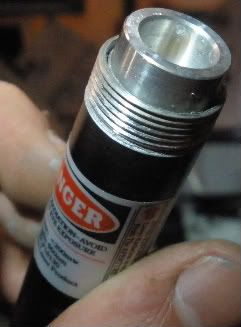
After the epoxy cured for a few minutes, I screwed the heatsink/diode/driver back into the case tightly.
Finished:
After unscrewing the focusable head from the laser, a small open can diode is visible inside (sorry, no pic). Without measuring, i would say the 'can' part is about 3mm wide. With the batteries removed, I just knocked it right out. This left me with the following heatsink, which screws up out of the base. I like the fact that the diode presses right into the sink.
The driver that originally came installed in this laser serves as the driver for the new diode as well. It is adjustable via a pot, and I have it set at 400mA short circuit current. This allows about 380-400mA to the diode until the batteries weaken signicantly from 20 or 30 minutes of use. The case and heatsink disperse the heat fairly adequately, and the case (or handle, whatever you call it) heats up as fast as the internal heatsink. This is probably a result of liberally applying arctic silver to both the male and female threads and tightening.
Here is a view from either side of the diode/heatsink/driver after the new diode was pressed in and soldered to the driver. Note that the goo on the threads is arctic silver (too much of it), . This makes a great thermal connection with the aluminum case of the laser, and seems to be nearly as effective as the internal heatsink. The gray stuff on the PCB is a hardened glue -looks like arctic silver- which held the board rigidly in place prior to disassembling, which had to be scraped off to remove the diode and driver.
Next I replaced the glue with some one minute epoxy. this works great as long as no epoxy gets on a spot where it can cause trouble. Allow 5 minutes at least, so the epoxy will further cure. It is still a bit soft for another 20 minutes or so but strong enough to get back to work.
After the epoxy cured for a few minutes, I screwed the heatsink/diode/driver back into the case tightly.
Finished:
Last edited:


