

- Joined
- Aug 25, 2010
- Messages
- 533
- Points
- 63
This was a suffering and painful birth, but after 9 months of development full of mistakes and mishaps
I'm very proud to introduce You the best 465nm build ever!
A lot of guys have contributed to the realization of this project.
First of all, 80% of the work was done by the great laser alchemist, CDBEAM 777!
Here it is and introduction directly from the wizard:
--------------------------------------------------------------------------------------
"The Blue Balista" ~ a commissioned build featuring the NUBM07E LD CD "Geppetto" Beam.
In the final days of 2015, I was commissioned to build a handheld/optically corrected unit
which utilized the NUBM07E diode.
It was agreed upon to use an existing host, the Maglite 2D cell (ST2D096 Silver).
Maglite makes an outstanding product and the 2D was the best choice for this project.
The battery compartment and side switch were perfect for the ergonomics, balance and power requirements
of this build. Two 26650 LiPo cells were selected to power the build.
The NUBM07E LD in a CU module with a SXD driver from Lazereer. Current was set at 4.5A
Any custom build has a great many choices between form and function.
It was then decided that the Blue Ballista should be a streamlined minimal design, maximizing optical
properties, thermal management capacity and it's readiness to accept the Linos beam expander (*)
No temperature monitors, Lipo cell power level indicators or lock security measures were utilized for
this build.
Again, a clean, tight, beautiful Royale Blue beam was the goal with good thermal management and the use
of a Linos Beam Expander (*)
We decided that the Balista build should also employee a clear Acrylic shroud/canopy to display the
internal functions.
This is called "Skeletal Display " ... why build something which is beautiful and not display same.
A custom Copper LD mount was designed and machined to contain the standard 12mm x 27mm CU LD Module.
This custom mount was used to maximize thermal transfer while maintaining ease of radial, yaw and pitch
adjustabillity. Such adjustment attributes are demanded by the down beam Cylindrical lens optics.
The prior Zacop adaptation build employed an adjustable Cylindrical lens mount called the RBT.
A scaled down version of the RBT, Cylindrical lens mount was incorporated on the Blue Balista.
A pair of 6X Cylindrical lenses were used to accomplish optical correction.
The standard G2 lens was used for initial beam collimation.
This adjustable Aluminum RBT mount secures the Plano Convex and Plano Concave cylindrical lens set,
and positions the Cylindrical lens set in the beam path to expand the astigmatic beam of the NUBM07E.
The Cylindrical optics correct the output to a near equal aspect ratio between the beam X and Y axis
(We take a bar and make it close to a circle).
An Aluminum 6061 Cylindrical was custom machined to deliver a platform to mount the optics and the CU
module mount on.
As was seen on the Zacop build, a flat saddle section was machined into the solid Aluminum cylinder.
This saddle section, positioned between the full perimeter end walls served as the physical platform for
the LD mount and Cylindrical optics set.
This unit is called the H-BE component.
Either end of the H-BE unit were also machined to function as socket recess ports.
One side accepts the Maglite host body and the other side allows a friction fit between
the Linos Beam Expander (*) and the beam expander.
A major challenge of this type of build is very, very accurate beam alignment.
The Linos Beam Expander (*) is an optical work of art by itself!
The beam input into the Linos (*) unit must be almost perfect!
Perfect beam pitch, yaw, vertical and horizontal alignments are demanded for the Linos Beam Expander (*)
to perform to it's maximum potential.
The Blue Balista delivers the beam alignment demanded to perfectly center the beam to the optical center
of the Linos (*) unit.
Any off-axis alignment would cause expanded beam aberration (power loss and a bad looking, off center beam).
All sub components were CAD generated and integrated in the virtual environment to assure proper fit
and alignment.
The good fortune is that this unit is not only pumping out over 4.5W, the beam is a real beauty
and the final build aesthetics turned out nothing short of excellent.
I would speculate that the final divergence is below .3 mRad when using the Linos Beam Expander (*)
In conclusion I have learned a very valuable lesson with this build.
ALWAYS built two units, so as not to suffer the pain of loss when the day of shipment finally arrives !!!
As we evolve with our builds, we can now concentrate more on form vs. strict functionality.
The Blue Balista has a perfect balance, a smooth form and shows off it's optical command with crystal clarity.
The final output will be further hammered into a Beam Expanded beauty by the Linos unit (*)!
I am very proud of the final outcome and sincerely thank Richard for being the author of this project.
CD "Geppetto" Beam.
--------------------------------------------------------------------------------------
(*) The 355nm lenses coating of the Variable magnification Linos Beam Expander originally chosen was not
suitable for that build, so they burned almost instantly when I turned the laser ON for the first time!
The output aluminum aperture was afterwards enlarged to accept the big Dioptika Beam Expander, but also this
choice was wrong for many reasons, so the final choice was for the awesome Thorlabs BE 3x.
Well, let's start to describe You how we realized the Blue Balista handheld laser step-by-step.
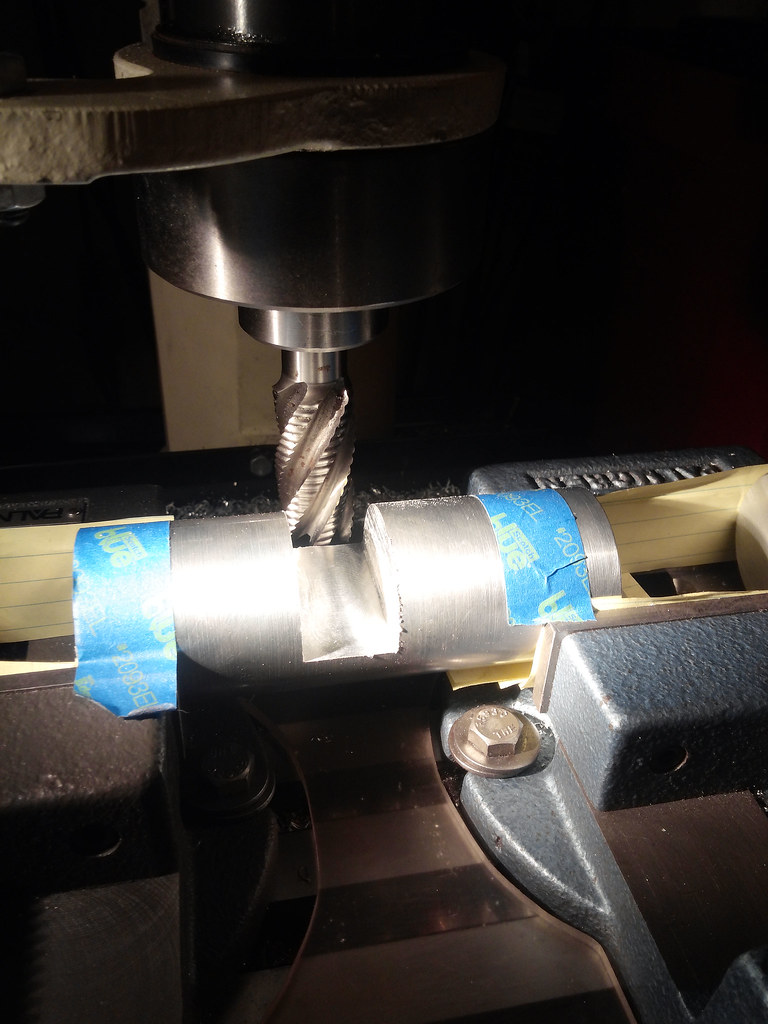
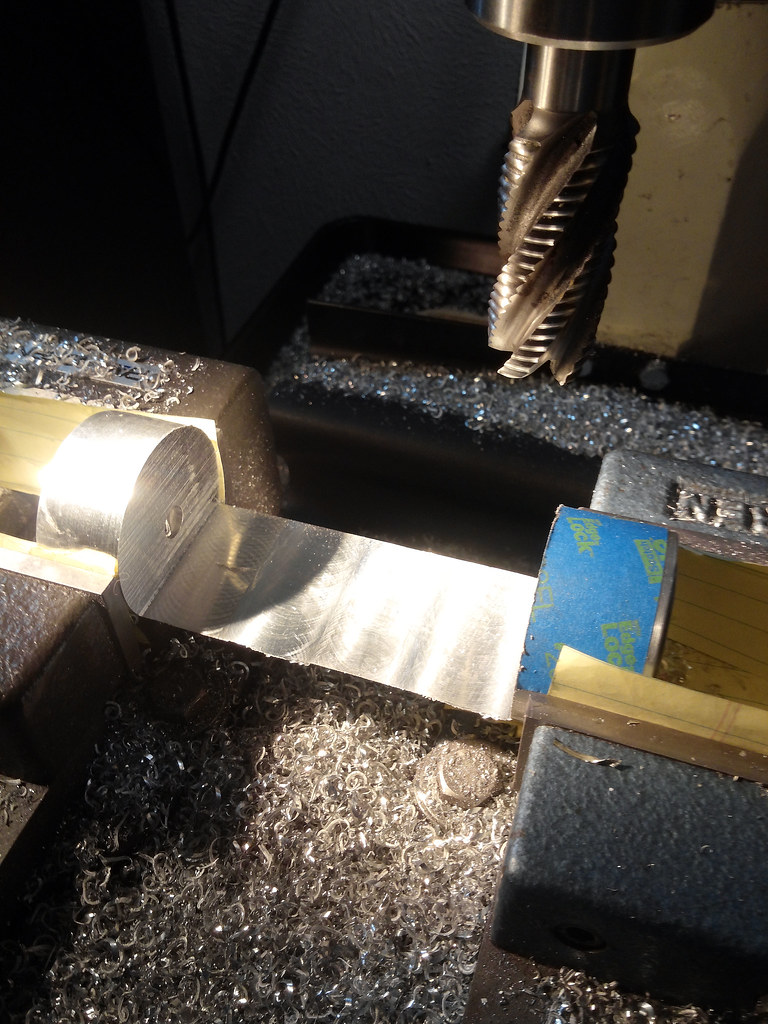
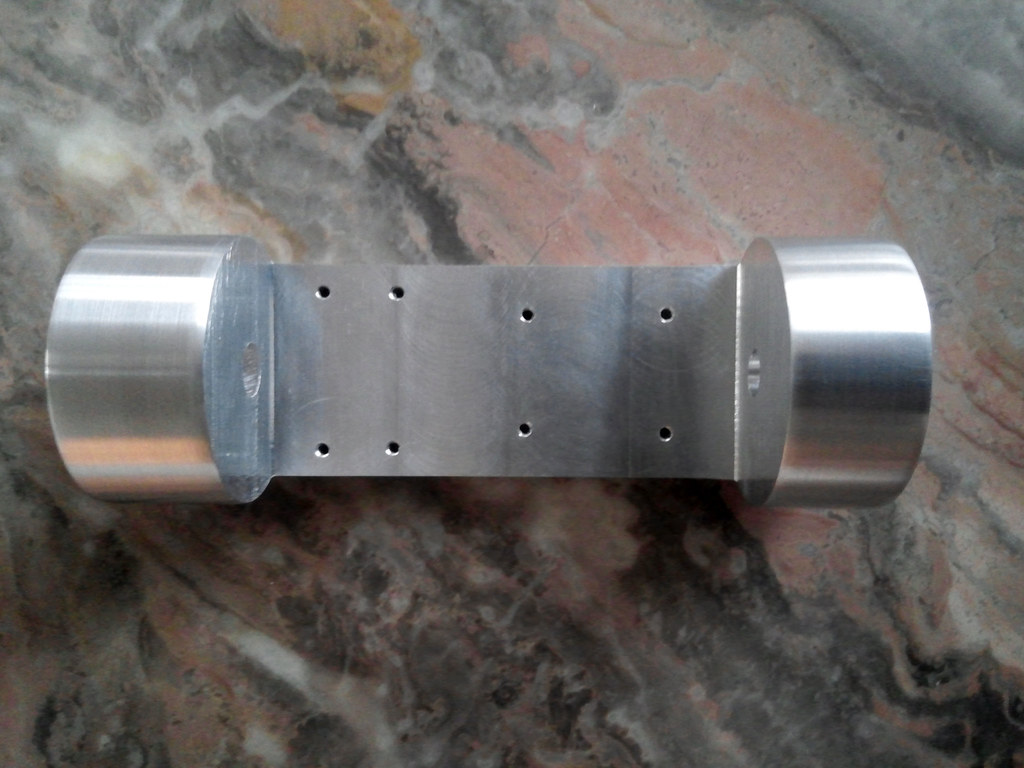
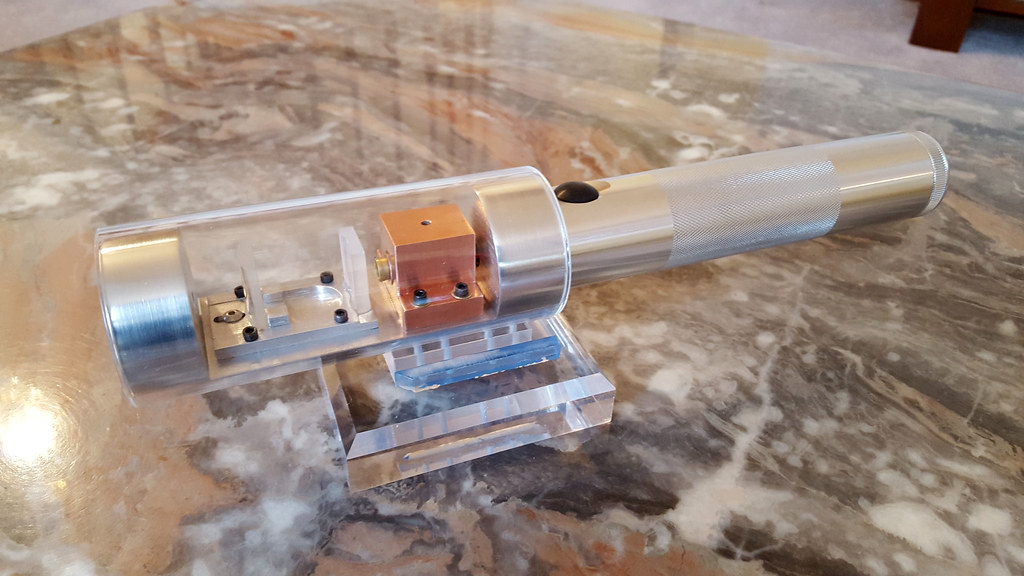
The beginning - machining the main body:


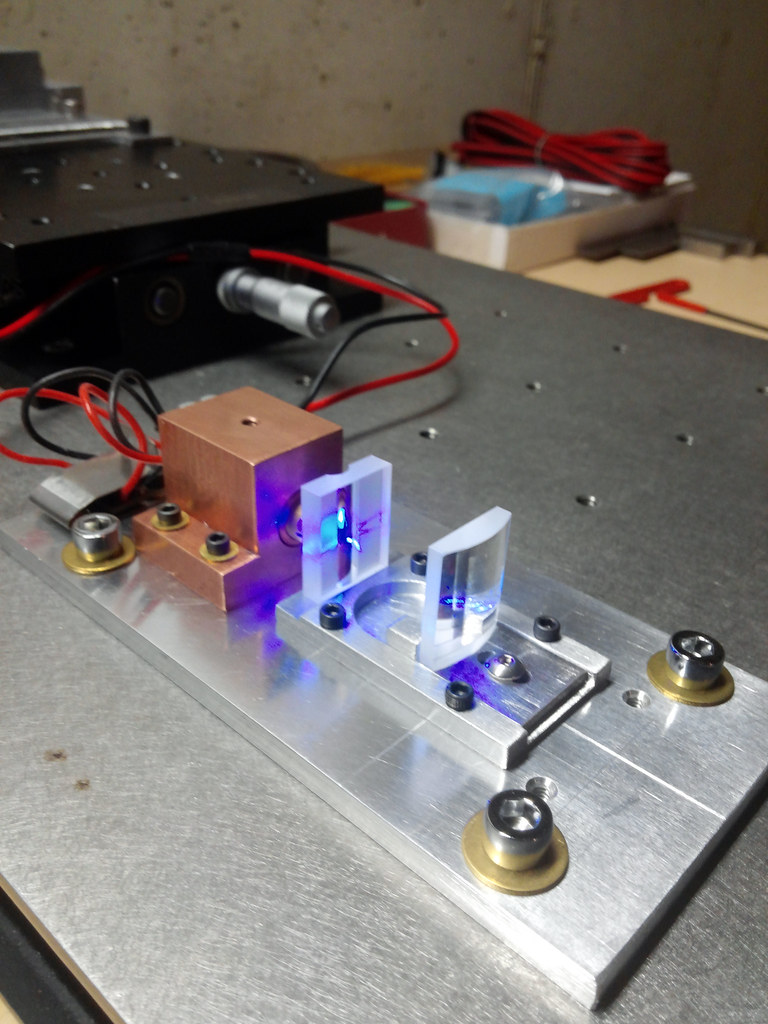
The main body is ready. On the right the "trombone" system created by CDBEAM for the two optical corrective lenses and the NUBM07E diode
mounted into the copper heatsink also created by CDBEAM:
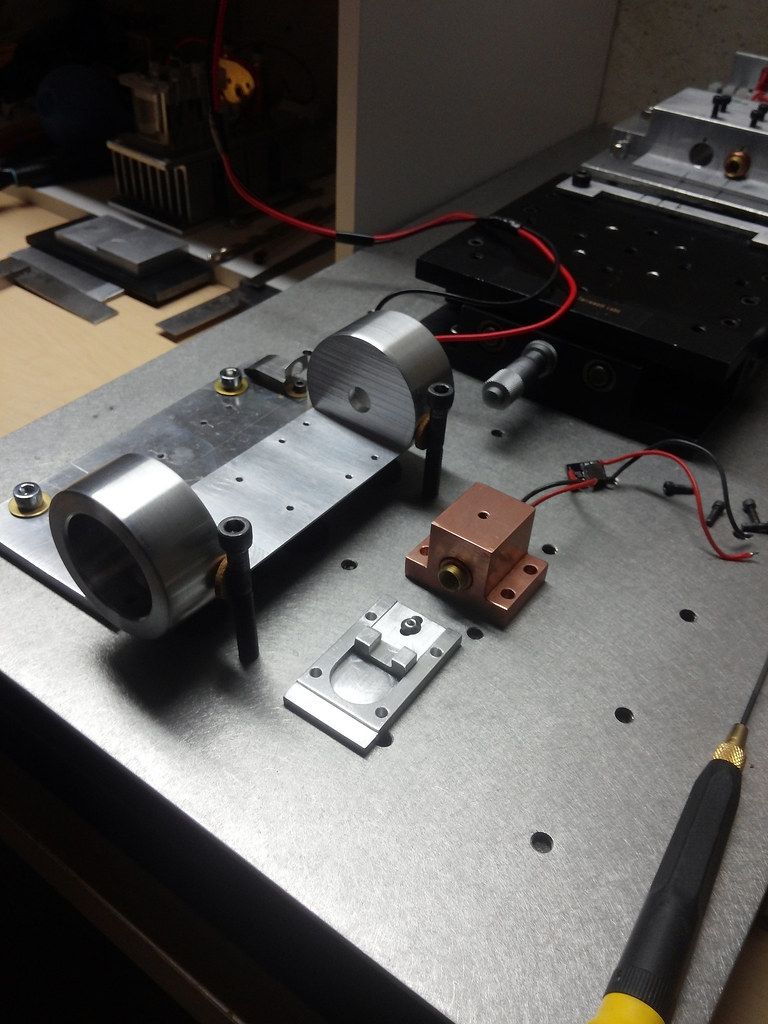
The optical corrective lenses mounted on "trombone" system surface ready to be glued and aligned:
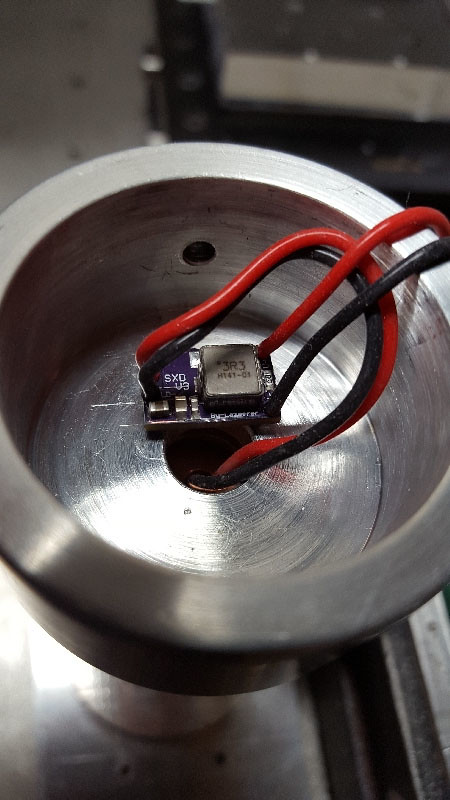
The diode driver thermally glued into the main body:
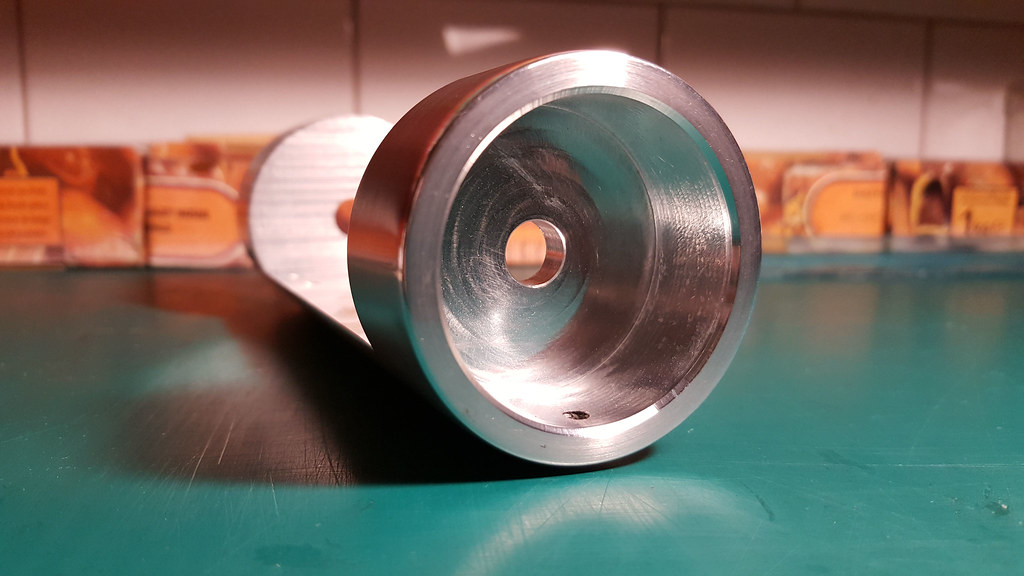
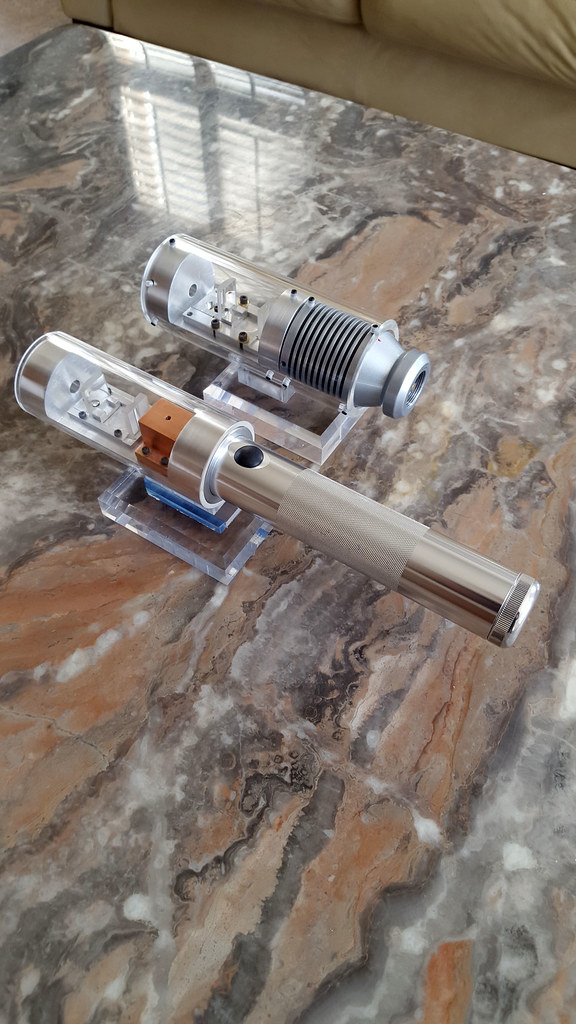
The original hole created for the Linos variable magnification beam expander was enlarged to accept the Dioptika beam expander:
Since the Dioptika beam expander was not suitable for this build, my CNC friend Daniele from FillUp company created for me a very special adapter
for Thorlabs BE 3x. This adapter is built to permit both a rotation and a tilt in X,Y axis to obtain a perfect beam centering to the input lens of
the beam expander:
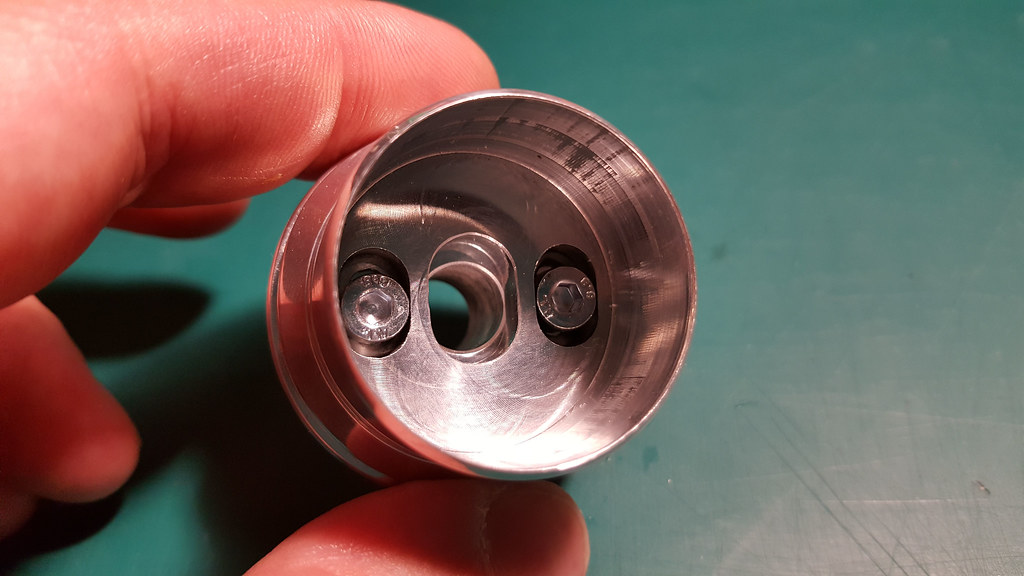
Adapter inserted and locked into the big hole. The BE hole was made so precise that there is no need to use any kind of screw to lock the
beam expander: it is enough to apply a medium pressure to the beam expander into the adapter until it reach the end of the hole.
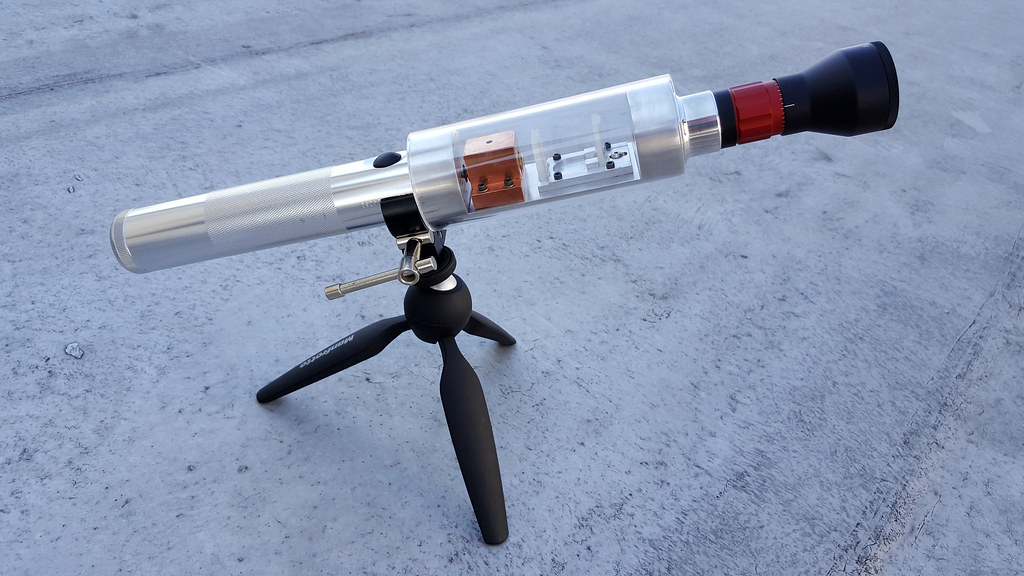
Very clean build:

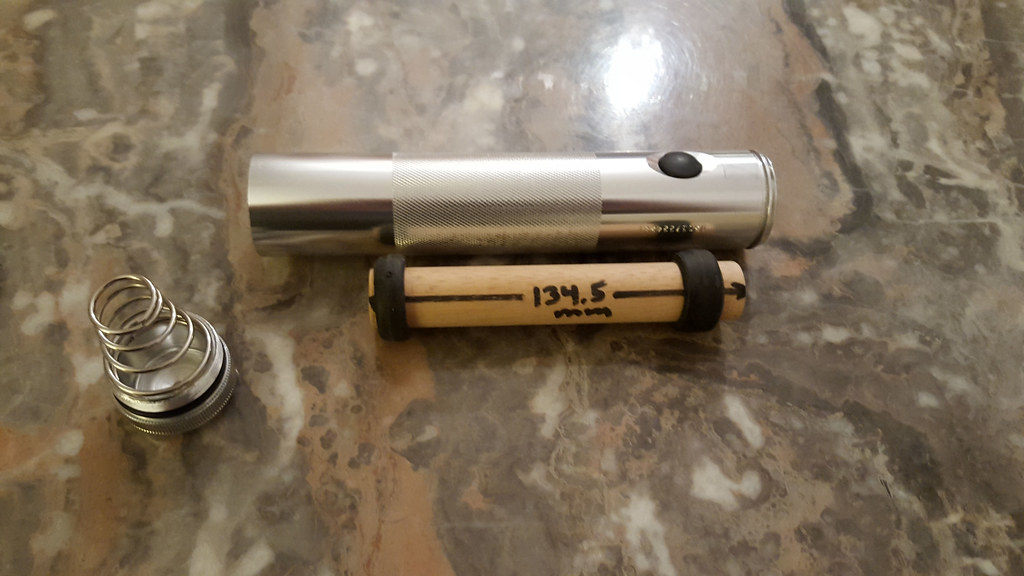
Modified Maglite 2D cell holder to accept 2x26650 cells:
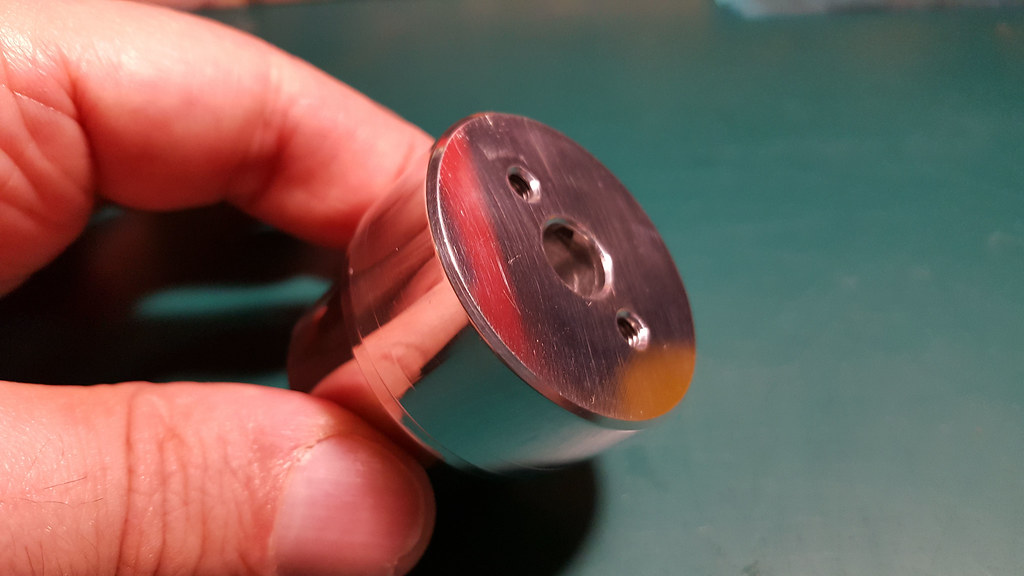
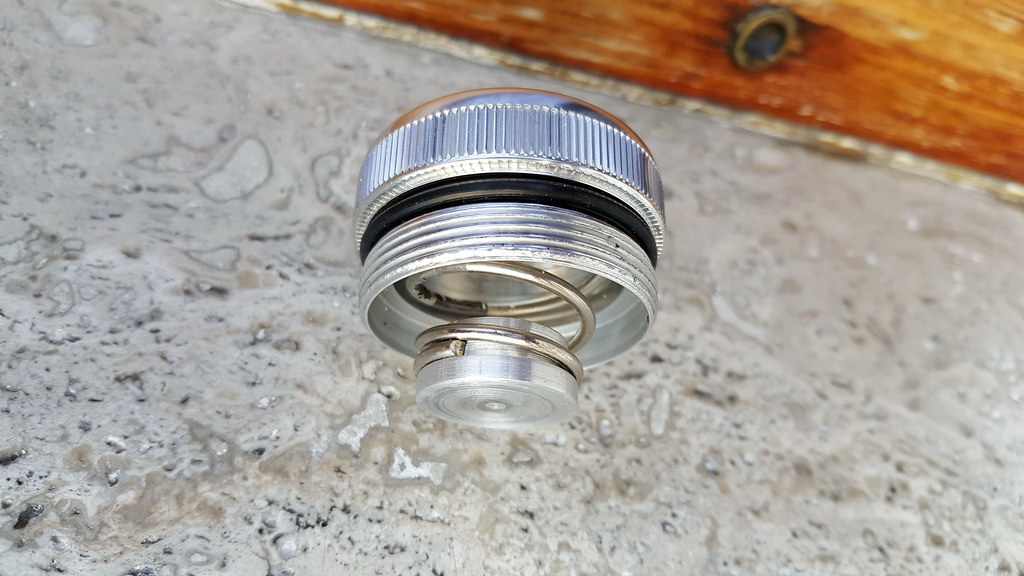
Nicely modded Maglite tail cap (from an idea of Mr. Jayrob):
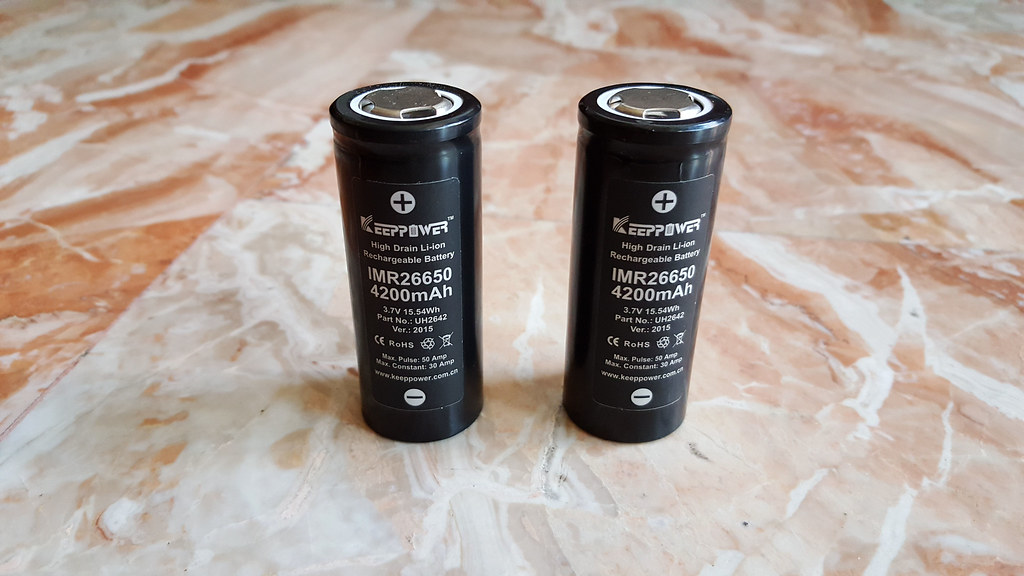
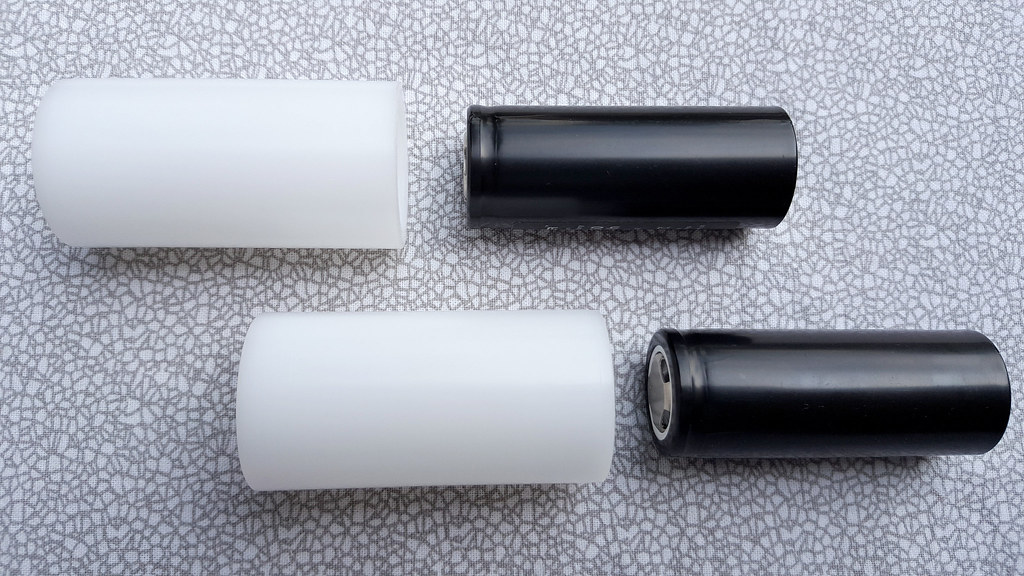
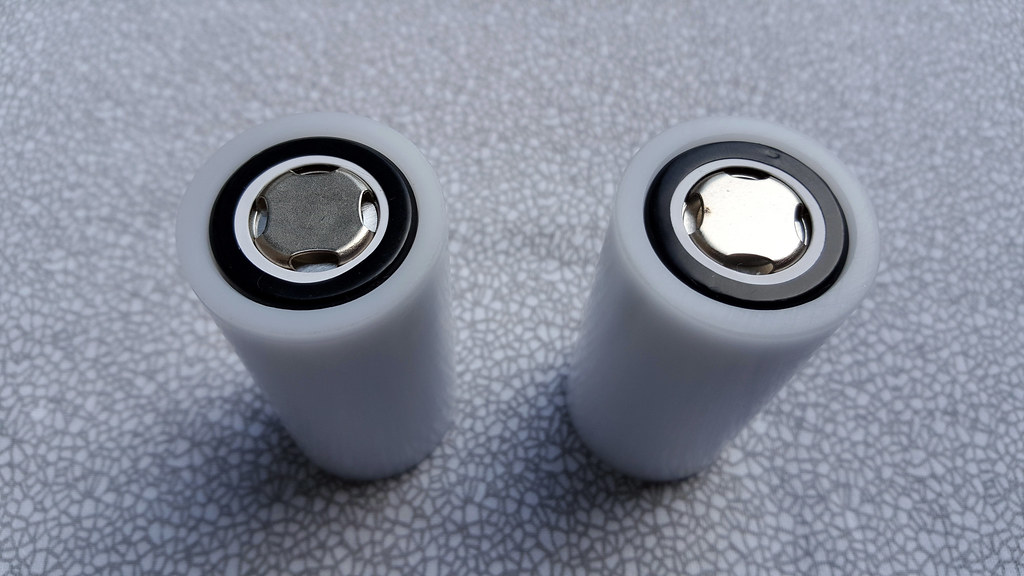
A pair of high-performance 26650 cells:
My CNC friend Daniele from FillUp strikes again with a pair of excellent teflon adapters for 26650 cells.
These adapters dress the cells as a suit made in tailoring and fit inside the battery compartment like a piston inside a cylinder:
The magnificent Blue Balista is finally ready:
The Blue Balista together the modded Zaser 520nm also called Zacop laser:

The awesome top-notch quality Thorlabs 3x beam expander. This is a four-lenses system BE.
The lenses are sliding and not rotating, so the overall lenght of the expander rest always the same and the focused dot absolutely not moving
during the focusing procedure:
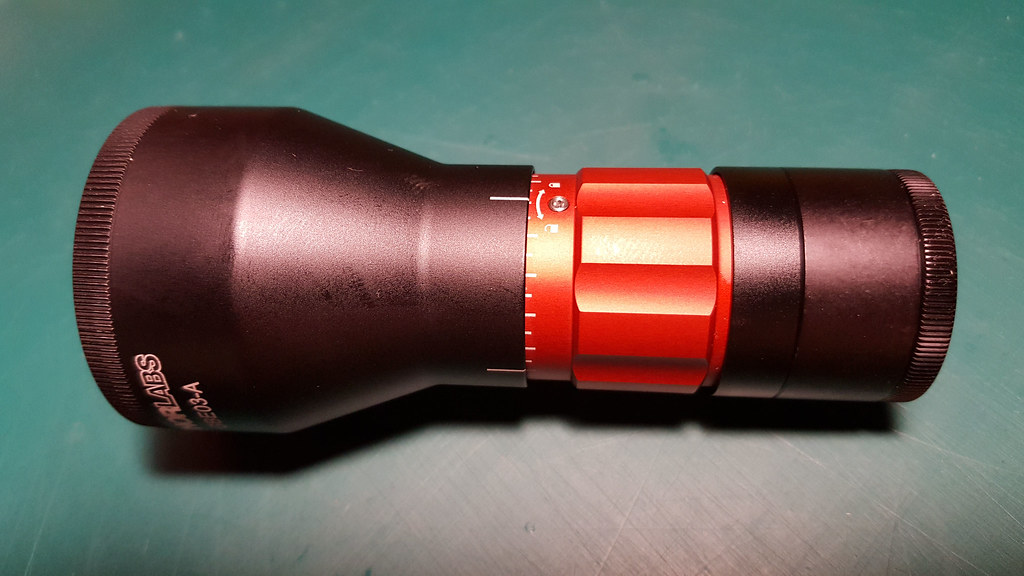
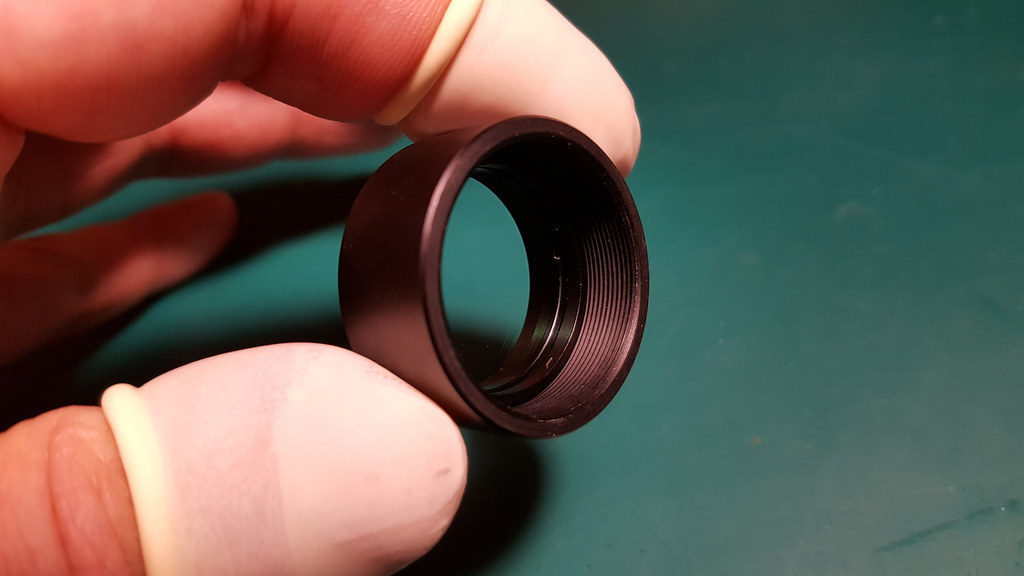
After consulting the kind technician Nicola of Thorlabs, I added a specific lens into a small tube extension at the beginning of the BE to bring the
minimum focused spot from 3 meters to about 1.5 meters from the output aperture of the BE.
Thorlabs beam expanders are expandables and modulars, so it is possible to add extra lenses with extreme simplicity:
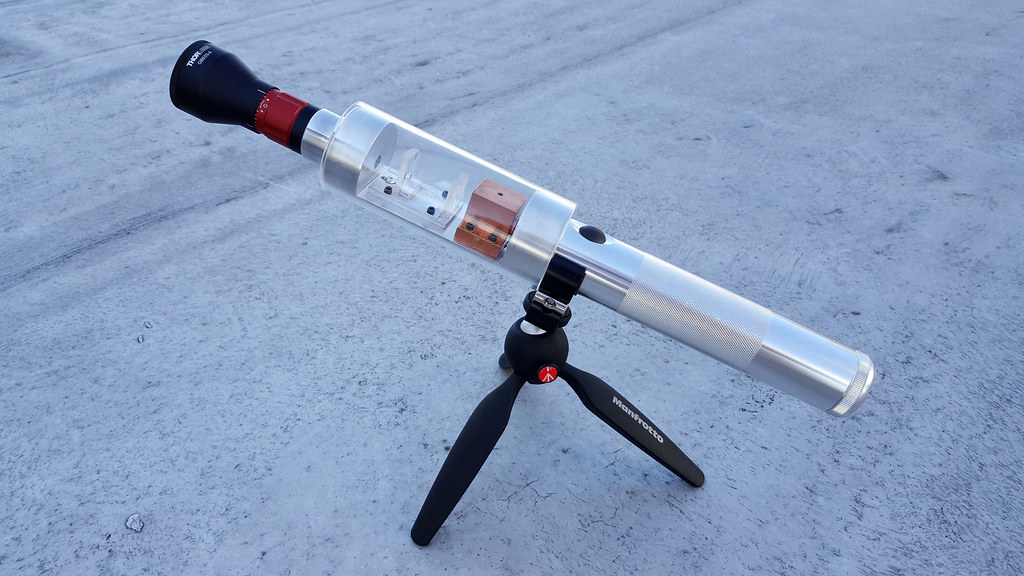
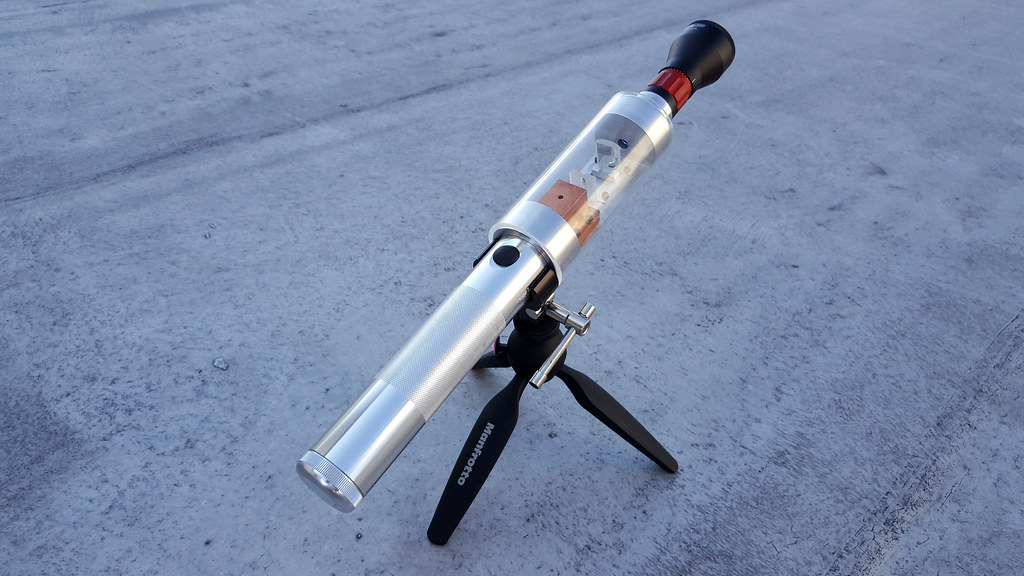
Elegant, magnificent, awesome. In few words, the Blue Balista handheld laser:
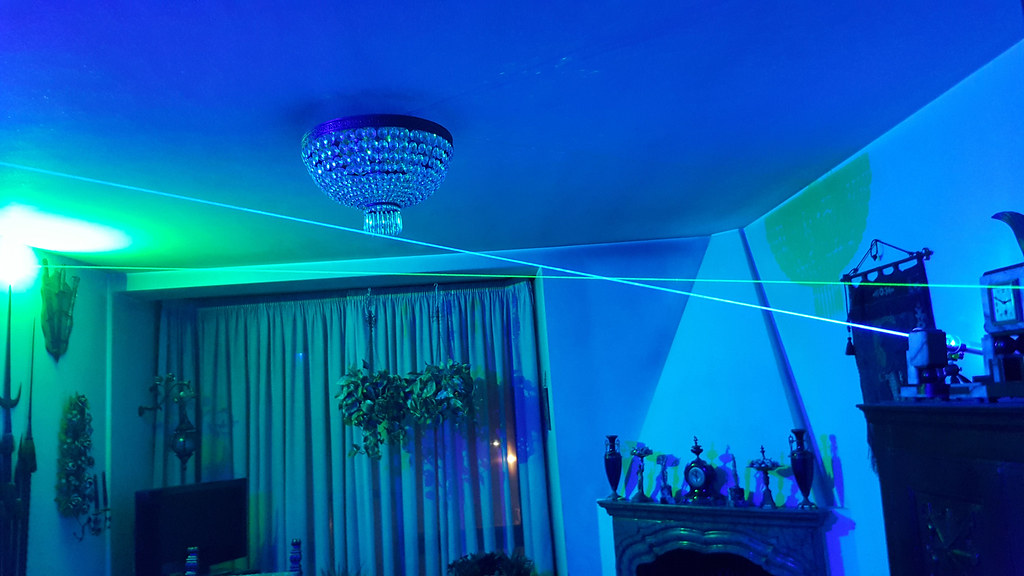
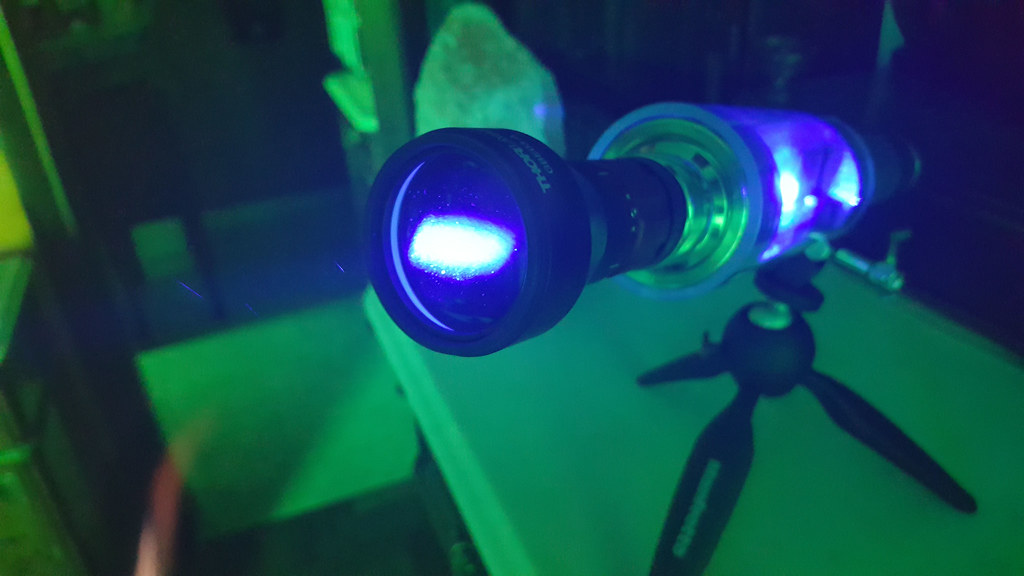
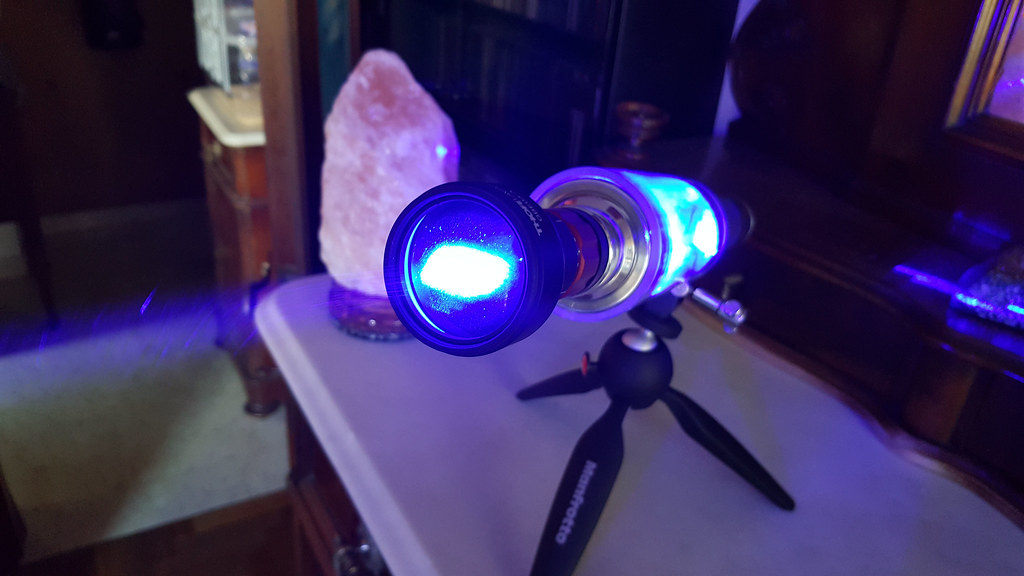
Blue Balista and Zacop laser inside my lounge:
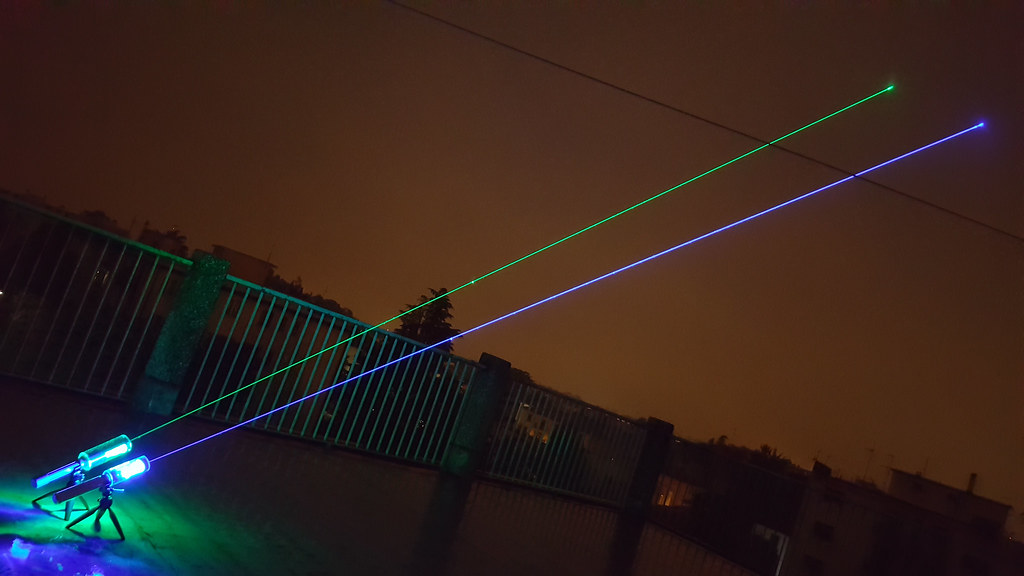
Blue Balista and Zacop laser hitting the clouds:
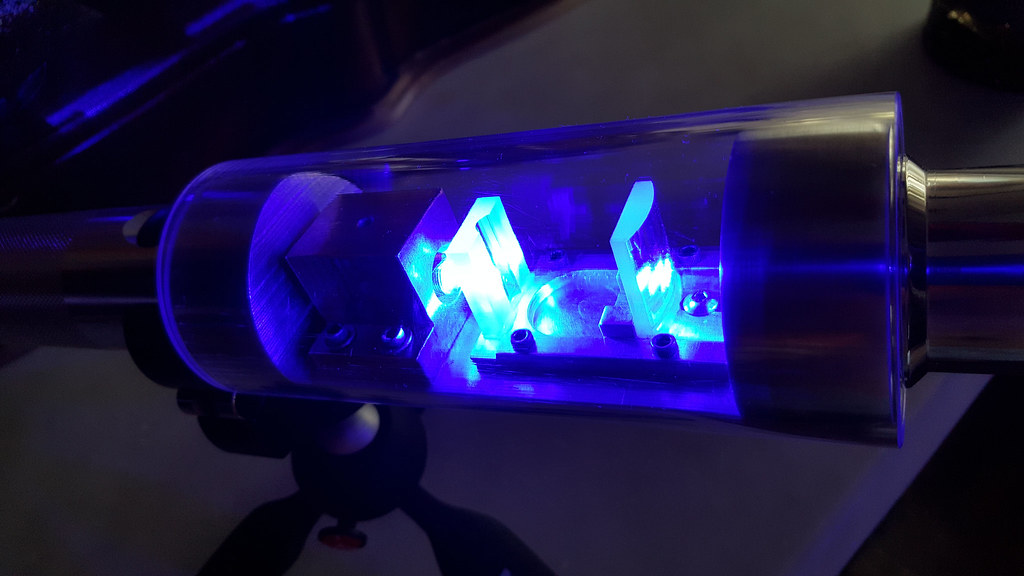
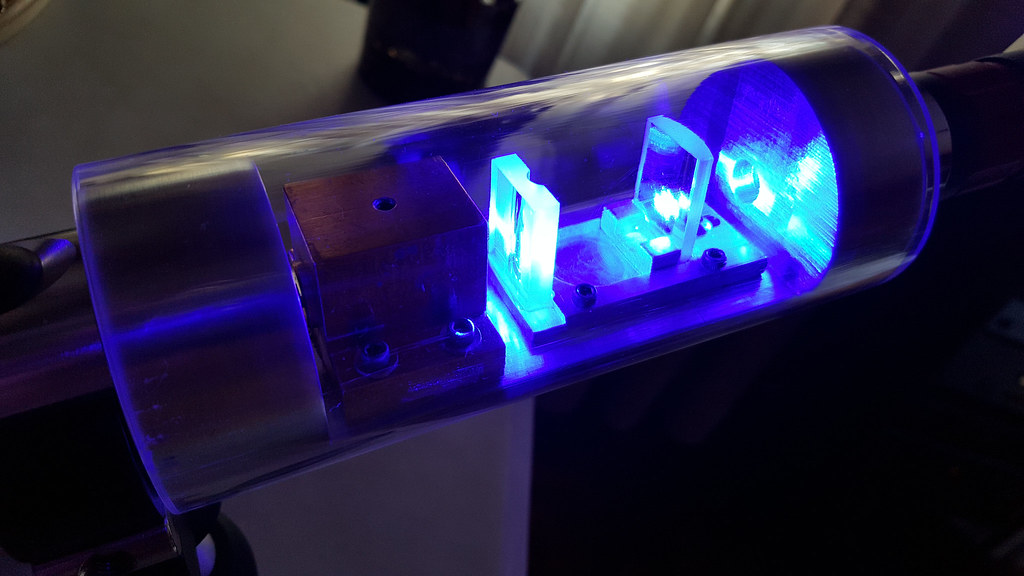
Inside the acrilyc canopy:
The beam shape with and without goggles:
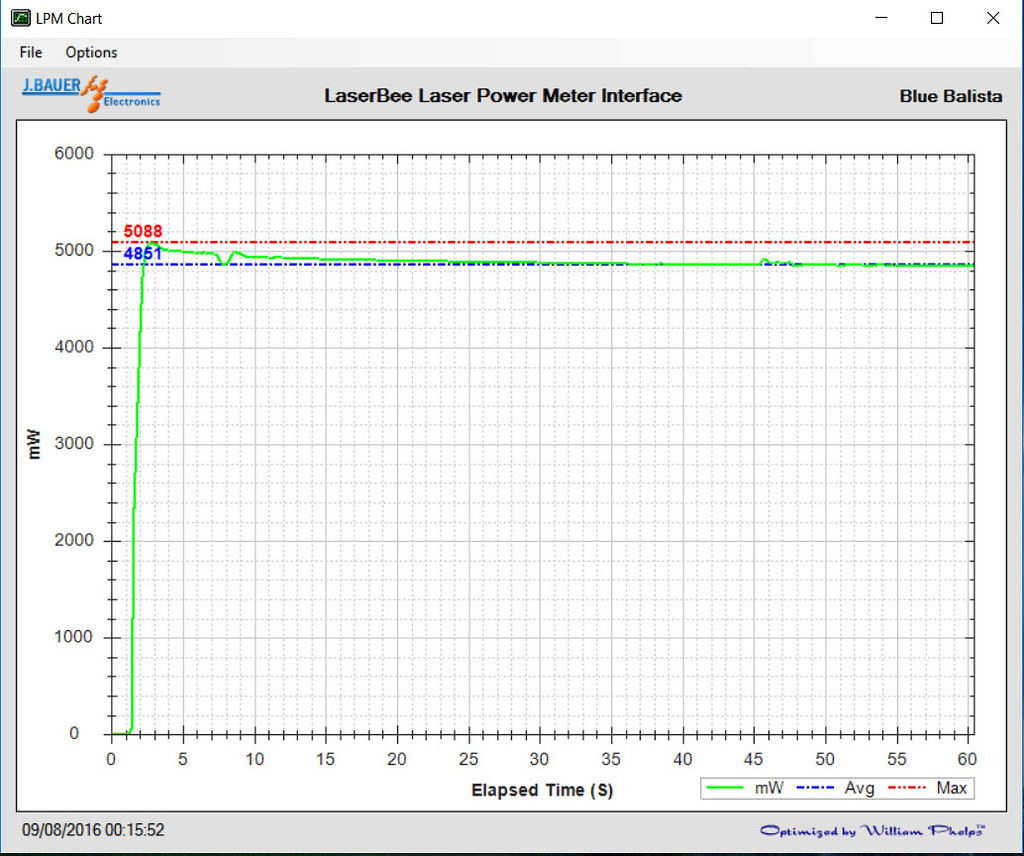
The performance chart. Considering a driver set @4.5A and the eight lenses present in the Blue Balista project (405-G2 lens, a pair of corrective optics,
an extra focusing lens and a four lenses system beam expander), I can say without any doubt that 5+ watts output power is really a miracle:
The tremendous power of a corrected and super-collimated beam at 10 meters from the aperture:
What I can say else?
It is beautiful, it is powerful, it is .. PERFECT!
This is THE laser!
9 months of developing really well spent! :beer:
My eternal gratitude goes to:
- CDBEAM777 for doing the 80% of the entire work (ideas, CAD design, drilling, machining, polishing and so on ...)
- Daniele Romanello from Fillup company for CAD design and CNC realizations of all the special adapters;
- Nicola from Thorlab staff for his disposability, patience, professionality and confidence;
- Jordan from DTR shop for the high quality diodes, drivers and lenses;
- My old brain")
There are some others awesome projects in my pocket .. stay tuned, as usually. :beer:
Richard.
I'm very proud to introduce You the best 465nm build ever!
A lot of guys have contributed to the realization of this project.
First of all, 80% of the work was done by the great laser alchemist, CDBEAM 777!
Here it is and introduction directly from the wizard:
--------------------------------------------------------------------------------------
"The Blue Balista" ~ a commissioned build featuring the NUBM07E LD CD "Geppetto" Beam.
In the final days of 2015, I was commissioned to build a handheld/optically corrected unit
which utilized the NUBM07E diode.
It was agreed upon to use an existing host, the Maglite 2D cell (ST2D096 Silver).
Maglite makes an outstanding product and the 2D was the best choice for this project.
The battery compartment and side switch were perfect for the ergonomics, balance and power requirements
of this build. Two 26650 LiPo cells were selected to power the build.
The NUBM07E LD in a CU module with a SXD driver from Lazereer. Current was set at 4.5A
Any custom build has a great many choices between form and function.
It was then decided that the Blue Ballista should be a streamlined minimal design, maximizing optical
properties, thermal management capacity and it's readiness to accept the Linos beam expander (*)
No temperature monitors, Lipo cell power level indicators or lock security measures were utilized for
this build.
Again, a clean, tight, beautiful Royale Blue beam was the goal with good thermal management and the use
of a Linos Beam Expander (*)
We decided that the Balista build should also employee a clear Acrylic shroud/canopy to display the
internal functions.
This is called "Skeletal Display " ... why build something which is beautiful and not display same.
A custom Copper LD mount was designed and machined to contain the standard 12mm x 27mm CU LD Module.
This custom mount was used to maximize thermal transfer while maintaining ease of radial, yaw and pitch
adjustabillity. Such adjustment attributes are demanded by the down beam Cylindrical lens optics.
The prior Zacop adaptation build employed an adjustable Cylindrical lens mount called the RBT.
A scaled down version of the RBT, Cylindrical lens mount was incorporated on the Blue Balista.
A pair of 6X Cylindrical lenses were used to accomplish optical correction.
The standard G2 lens was used for initial beam collimation.
This adjustable Aluminum RBT mount secures the Plano Convex and Plano Concave cylindrical lens set,
and positions the Cylindrical lens set in the beam path to expand the astigmatic beam of the NUBM07E.
The Cylindrical optics correct the output to a near equal aspect ratio between the beam X and Y axis
(We take a bar and make it close to a circle).
An Aluminum 6061 Cylindrical was custom machined to deliver a platform to mount the optics and the CU
module mount on.
As was seen on the Zacop build, a flat saddle section was machined into the solid Aluminum cylinder.
This saddle section, positioned between the full perimeter end walls served as the physical platform for
the LD mount and Cylindrical optics set.
This unit is called the H-BE component.
Either end of the H-BE unit were also machined to function as socket recess ports.
One side accepts the Maglite host body and the other side allows a friction fit between
the Linos Beam Expander (*) and the beam expander.
A major challenge of this type of build is very, very accurate beam alignment.
The Linos Beam Expander (*) is an optical work of art by itself!
The beam input into the Linos (*) unit must be almost perfect!
Perfect beam pitch, yaw, vertical and horizontal alignments are demanded for the Linos Beam Expander (*)
to perform to it's maximum potential.
The Blue Balista delivers the beam alignment demanded to perfectly center the beam to the optical center
of the Linos (*) unit.
Any off-axis alignment would cause expanded beam aberration (power loss and a bad looking, off center beam).
All sub components were CAD generated and integrated in the virtual environment to assure proper fit
and alignment.
The good fortune is that this unit is not only pumping out over 4.5W, the beam is a real beauty
and the final build aesthetics turned out nothing short of excellent.
I would speculate that the final divergence is below .3 mRad when using the Linos Beam Expander (*)
In conclusion I have learned a very valuable lesson with this build.
ALWAYS built two units, so as not to suffer the pain of loss when the day of shipment finally arrives !!!
As we evolve with our builds, we can now concentrate more on form vs. strict functionality.
The Blue Balista has a perfect balance, a smooth form and shows off it's optical command with crystal clarity.
The final output will be further hammered into a Beam Expanded beauty by the Linos unit (*)!
I am very proud of the final outcome and sincerely thank Richard for being the author of this project.
CD "Geppetto" Beam.
--------------------------------------------------------------------------------------
(*) The 355nm lenses coating of the Variable magnification Linos Beam Expander originally chosen was not
suitable for that build, so they burned almost instantly when I turned the laser ON for the first time!
The output aluminum aperture was afterwards enlarged to accept the big Dioptika Beam Expander, but also this
choice was wrong for many reasons, so the final choice was for the awesome Thorlabs BE 3x.
Well, let's start to describe You how we realized the Blue Balista handheld laser step-by-step.
The beginning - machining the main body:
The main body is ready. On the right the "trombone" system created by CDBEAM for the two optical corrective lenses and the NUBM07E diode
mounted into the copper heatsink also created by CDBEAM:
The optical corrective lenses mounted on "trombone" system surface ready to be glued and aligned:
The diode driver thermally glued into the main body:
The original hole created for the Linos variable magnification beam expander was enlarged to accept the Dioptika beam expander:
Since the Dioptika beam expander was not suitable for this build, my CNC friend Daniele from FillUp company created for me a very special adapter
for Thorlabs BE 3x. This adapter is built to permit both a rotation and a tilt in X,Y axis to obtain a perfect beam centering to the input lens of
the beam expander:
Adapter inserted and locked into the big hole. The BE hole was made so precise that there is no need to use any kind of screw to lock the
beam expander: it is enough to apply a medium pressure to the beam expander into the adapter until it reach the end of the hole.
Very clean build:
Modified Maglite 2D cell holder to accept 2x26650 cells:
Nicely modded Maglite tail cap (from an idea of Mr. Jayrob):
A pair of high-performance 26650 cells:
My CNC friend Daniele from FillUp strikes again with a pair of excellent teflon adapters for 26650 cells.
These adapters dress the cells as a suit made in tailoring and fit inside the battery compartment like a piston inside a cylinder:
The magnificent Blue Balista is finally ready:
The Blue Balista together the modded Zaser 520nm also called Zacop laser:
The awesome top-notch quality Thorlabs 3x beam expander. This is a four-lenses system BE.
The lenses are sliding and not rotating, so the overall lenght of the expander rest always the same and the focused dot absolutely not moving
during the focusing procedure:
After consulting the kind technician Nicola of Thorlabs, I added a specific lens into a small tube extension at the beginning of the BE to bring the
minimum focused spot from 3 meters to about 1.5 meters from the output aperture of the BE.
Thorlabs beam expanders are expandables and modulars, so it is possible to add extra lenses with extreme simplicity:
Elegant, magnificent, awesome. In few words, the Blue Balista handheld laser:
Blue Balista and Zacop laser inside my lounge:
Blue Balista and Zacop laser hitting the clouds:
Inside the acrilyc canopy:
The beam shape with and without goggles:
The performance chart. Considering a driver set @4.5A and the eight lenses present in the Blue Balista project (405-G2 lens, a pair of corrective optics,
an extra focusing lens and a four lenses system beam expander), I can say without any doubt that 5+ watts output power is really a miracle:
The tremendous power of a corrected and super-collimated beam at 10 meters from the aperture:
What I can say else?
It is beautiful, it is powerful, it is .. PERFECT!
This is THE laser!
9 months of developing really well spent! :beer:
My eternal gratitude goes to:
- CDBEAM777 for doing the 80% of the entire work (ideas, CAD design, drilling, machining, polishing and so on ...)
- Daniele Romanello from Fillup company for CAD design and CNC realizations of all the special adapters;
- Nicola from Thorlab staff for his disposability, patience, professionality and confidence;
- Jordan from DTR shop for the high quality diodes, drivers and lenses;
- My old brain
There are some others awesome projects in my pocket .. stay tuned, as usually. :beer:
Richard.
Last edited:


")