

danefex
0
- Joined
- Aug 30, 2010
- Messages
- 1,595
- Points
- 63
*out of stock* FS: minisabre v2 dark smoke, silver, polished $20-$55 +build tutorial
* * *Minisabre v2 Host/Heatsink Kits for Sale* * *
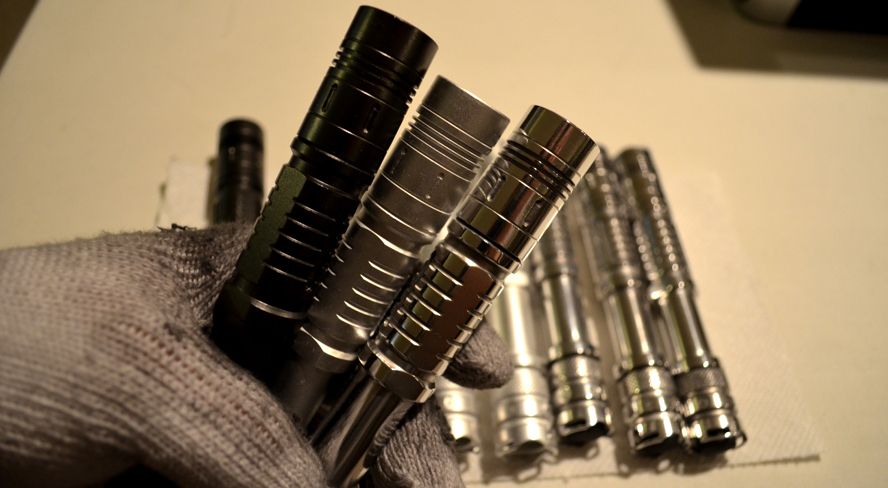
Greetings folks! I am offering these minisabre v2 hosts for you to create your own builds. These hosts are
available with 3 different finishes: dark smoke(L), deanodized silver(C) or polished(R). I also have several
more of these than pictured below, this offer is not limited to just what you see
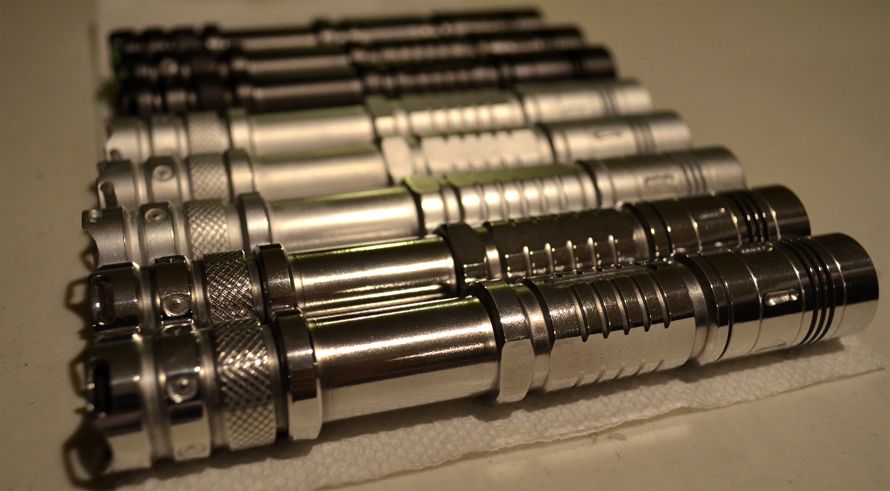
The dark smoke color is the original finish on the v2 pictured above on the left. It's not as dark as black &
has a dull, slightly bronze-grey reflective tint to it. Click here to see its color next to a black minisabre v1.
The silver finish on the v2 pictured below is the result of deanodizing and solvent brush cleaning the host.
This is the midway process when making a polished v2 but because it looks so different I decided to leave
it as an optional finish.
The polished finish shown below comes from extensively polishing a deanodized silver v2. This reflective,
shiny mirror-like finish is probably the most admired and asked for of the 3 options available.
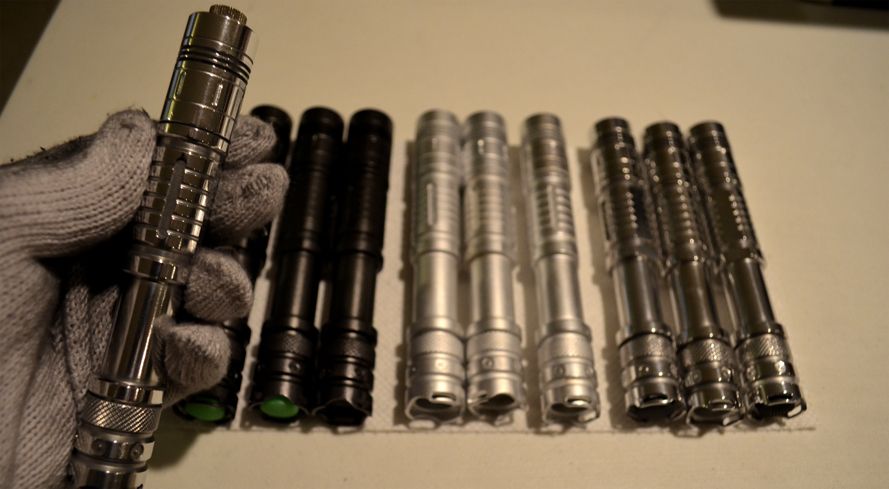
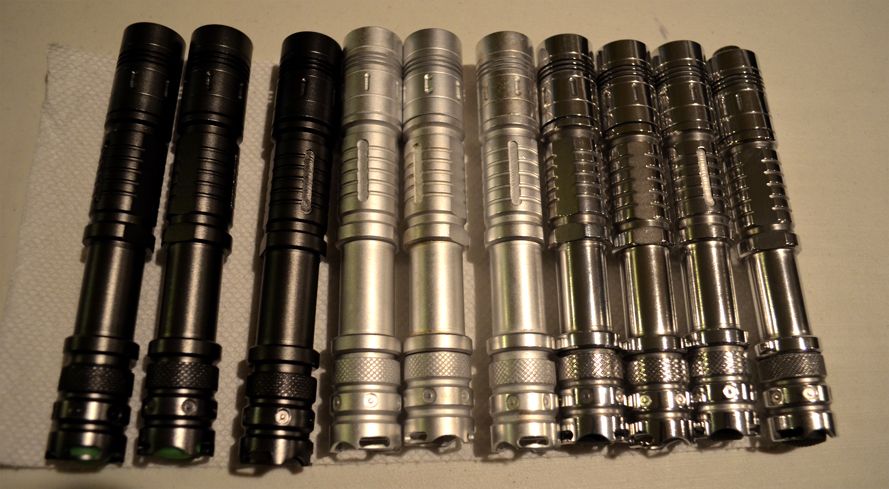
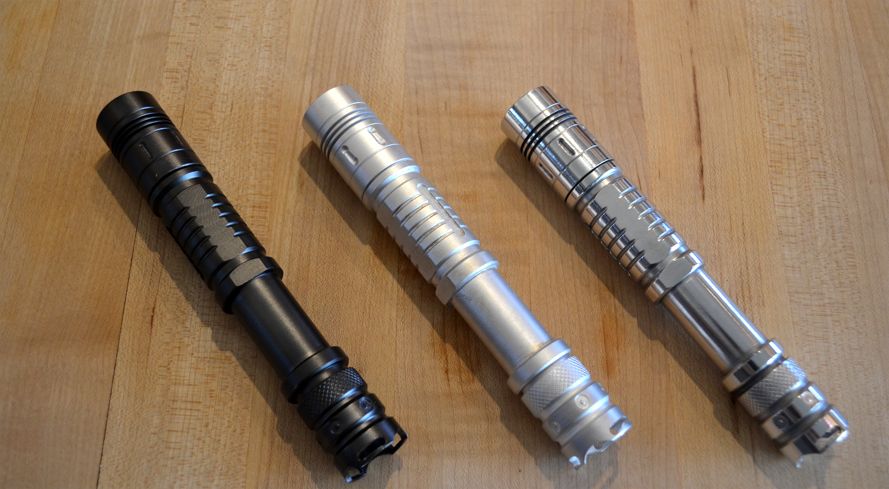
Here they are side by side.
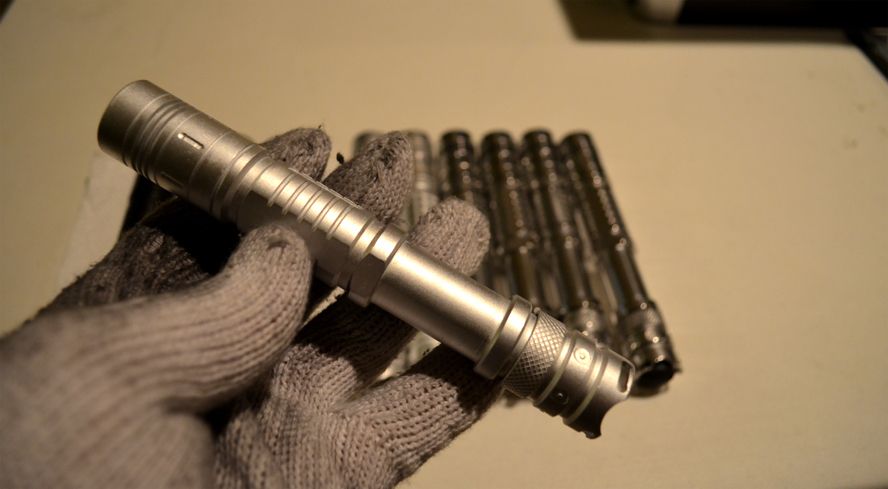
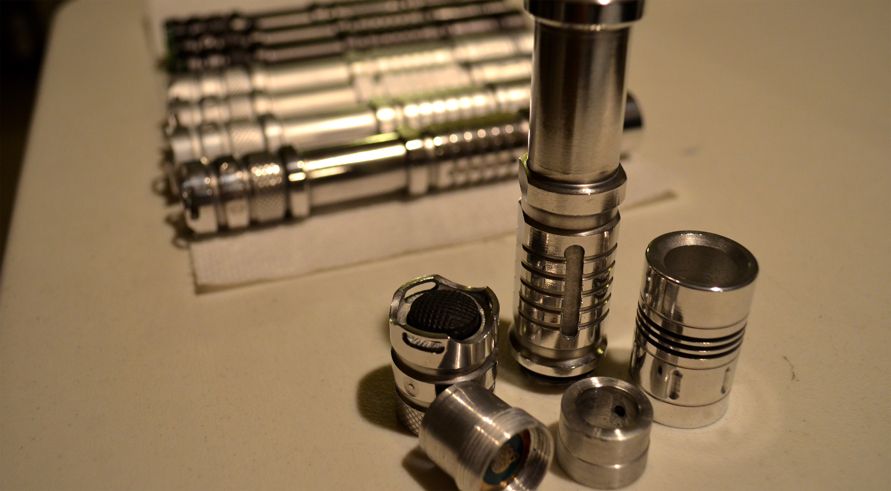
This polished v2 has been taken apart to show what's included. Pictured from left to right is the tailcap with
green or black on/off button, pill with pre-wired battery contact board installed, body, aluminum
heatsink and the head.
This unit uses 2 x 14500 (AA sized) batteries.
Pricing for this host and heatsink:
minisabre v2 'Dark Smoke' w/ heatsink - $40
minisabre v2 'Deanodized Silver' w/ heatsink - $45
minisabre v2 'Polished Chrome' w/ heatsink - $55
Shipping - $5 CONUS, $12 worldwide
*All hosts are also available without heatsink if you want to machine your own, just subtract $20 from the
prices listed above.
Please PM or comment below with any questions or to inquire about ordering. This thread is a work in
progress, thanks for checking!
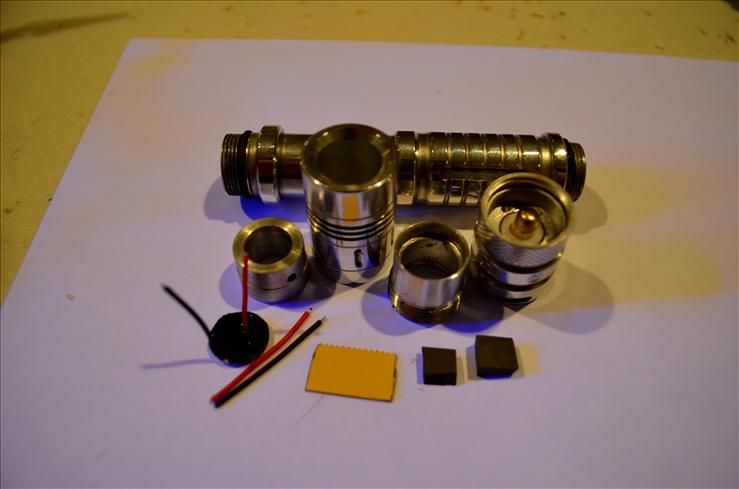
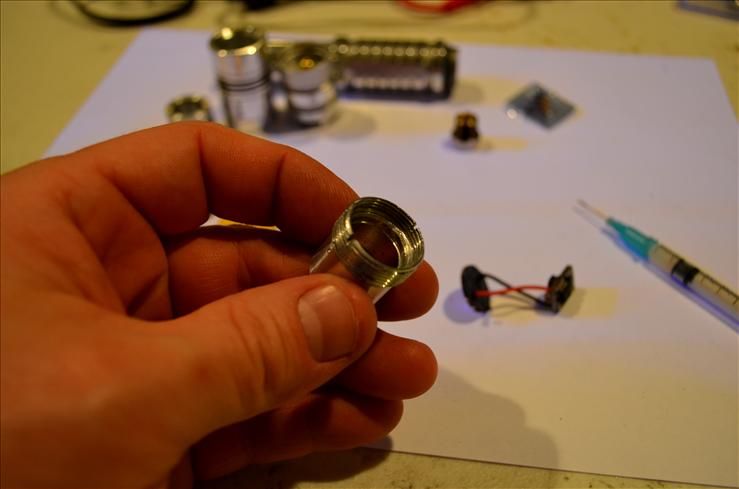
Here's what you will receive with this kit. The body of the host is lying on its side above the aluminum heatsink on the left, the bezel (head), aluminum pill and the tailcap on the right. Below those parts is the prewired battery contact board (with pryowire, only the best) + extra wiring and shrinktubing, pill mounting tool (yellow) and 2 thermally conductive heat transfer pads. You will need to provide your own diode and driver to complete this unit.
The tools I am using to build this include needlenose pliers, wire strippers, tweezers, solder/soldering iron & flux, 'helping hands' metal grips, a diode press kit and most importantly patience.
This build isn't a simple process to finish, it will require precision and fine detail to avoid any flaws or shorts within the circuit. The pill in this host is significantly smaller than an 18650 or 'average sized' host so detail is extremely important here in order to complete this correctly.
First we'll start off with the driver. I'm going to be using a 2.1A Lazereer X-drive for this process because it is one of the largest drivers that will fit into the pill of this v2 host. If you use a microboost driver or anything smaller than the X-drive kudos to you, that will be easier than using the driver I've chose.
The first thing I need to do with this X-drive is eliminate any teeth from the edges of the driver. To do this you simply need to grind them down with a file. Here's what they look like before being ground off.
Here is how the edge should look after grinding. The reason you're doing this is to gain those few extra millimeters of space that you'll need when mounting this driver in the pill.
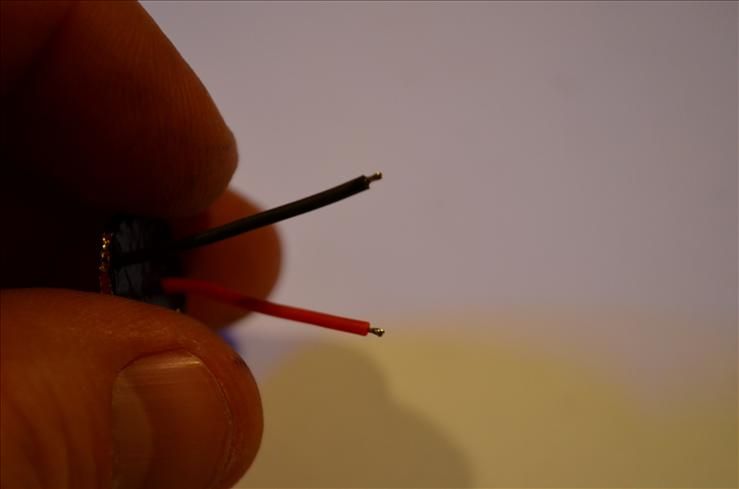
Next I'm going to solder the leads from the battery contact board to the driver. These wires are about an inch long and they're this short for a reason. There is no space in the pill for any extra wiring so I'm using slightly more than the bare minimum to allow the wire to bend a little when it's all compressed inside the pill.
The soldering - this needs to be done without leaving any solder blobs on on the contact points of the driver. You'll only need to solder 4 wires but it's important to do this without leaving excess solder on the driver. Dont worry I will show you how to do this.
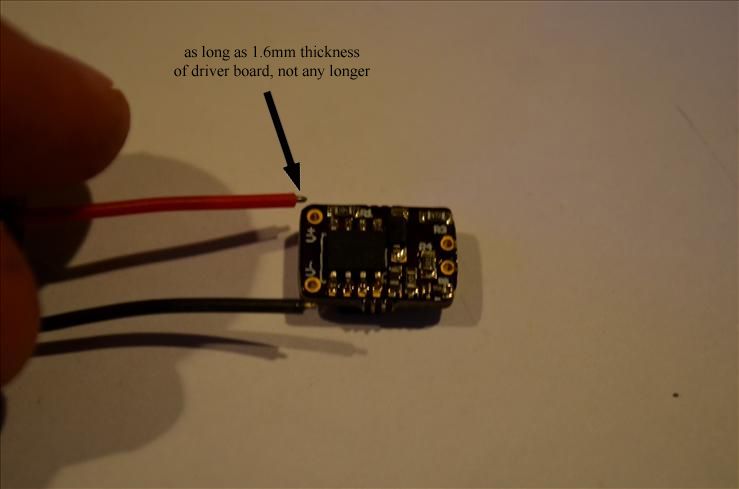
The X-drive I'm using is 1.62mm thick. I'm going to splice 1.6mm off the soldering end of each wire from the contact board, they should look about this long short!
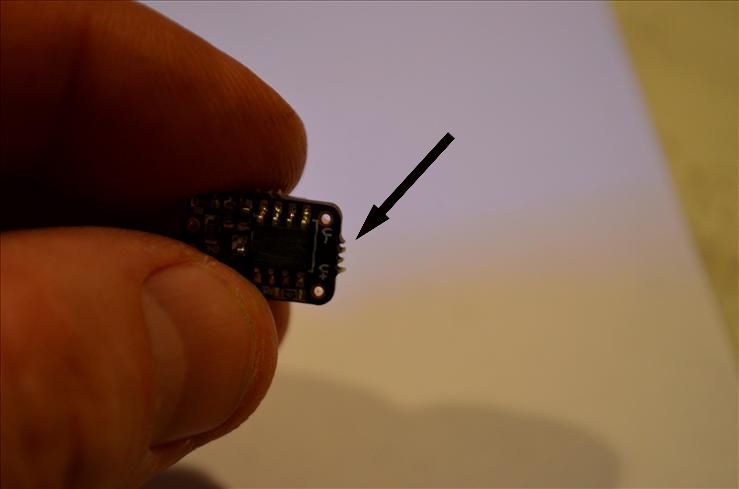
I'm going to solder the Vin wires from the top side of the driver, this is to protect the cap between the wires from shorting inside the pill AND it's easier to solder the leads on the other side of the driver.
Im also going to tin and flux these tiny leads. I'll need all the solder I can get to suck into the hole of the driver when the wire is in there, otherwise the connection will be weak & will break under pressure.
Positive lead carefully soldered.
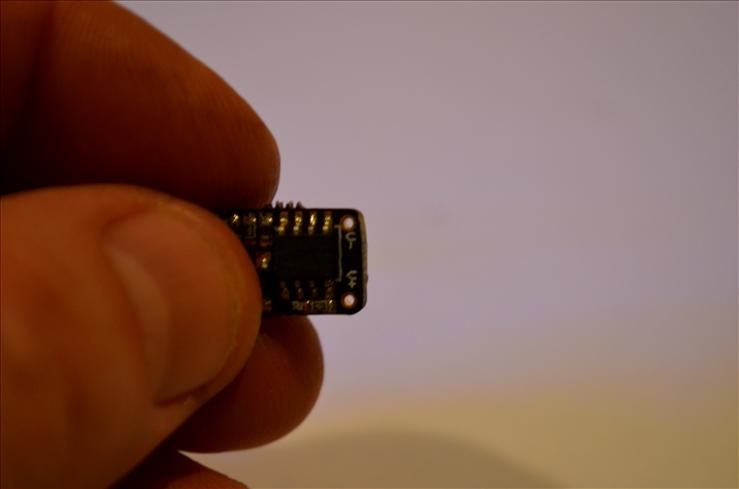
Both leads soldered now, from this angle it's easy to see I've completely filled the hole in the driver & covered the contact area with solder.
But from a side view you can see there is no solder blob or any solder that's dried above the surface of the driver. This is important to do when it comes to stuffing this driver in the pill, there cannot be any solder stuck above flush on the ends of these drivers.
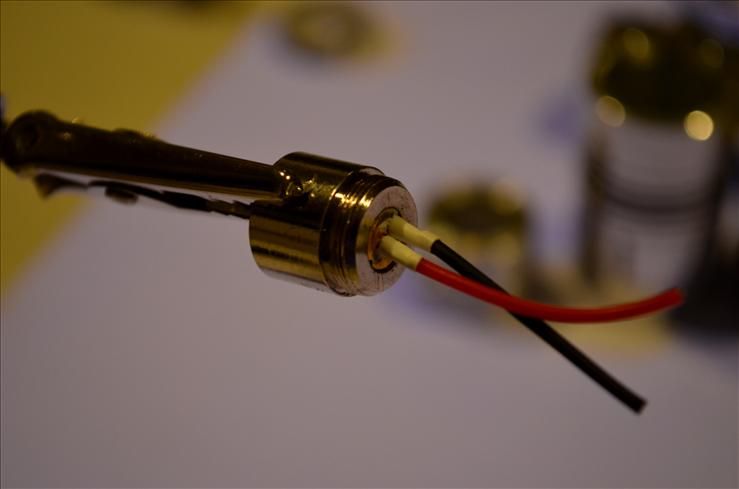
This is what it looks like when you're done, both 1" leads connected from the battery contact board to the driver with no visible solder from a side view.
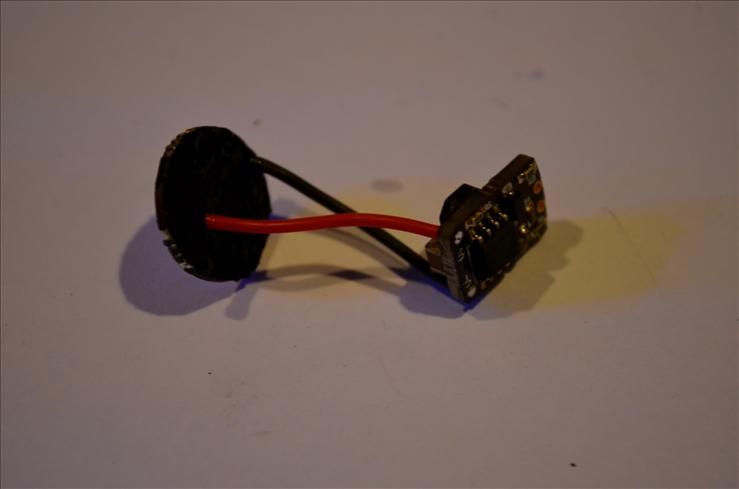
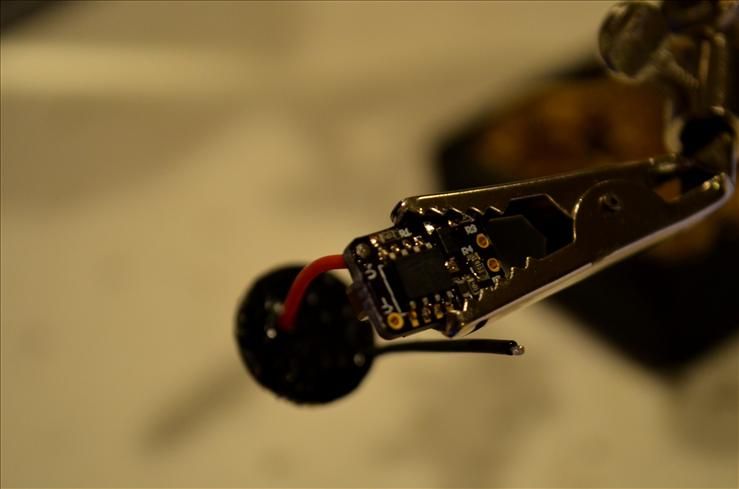
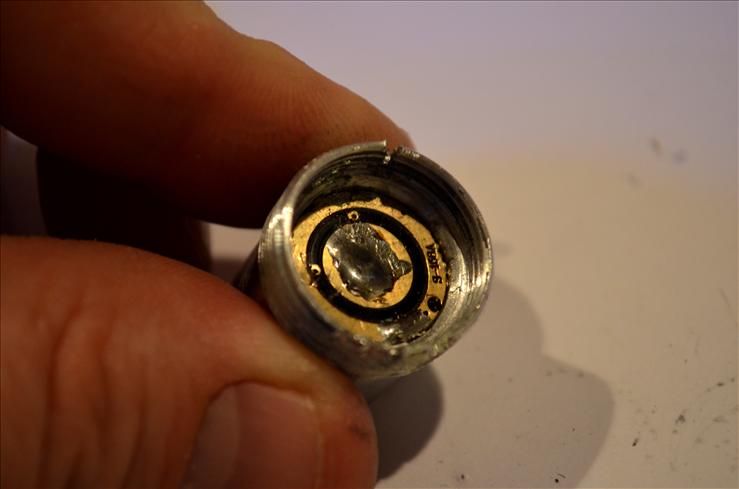
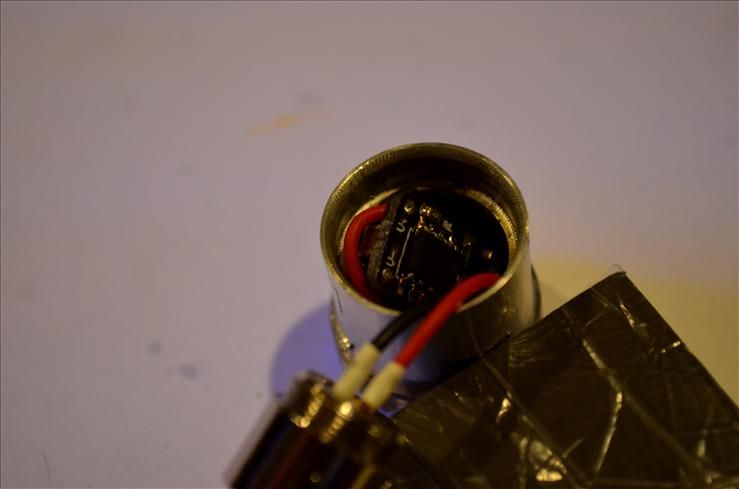
At this point I'm ready to press the battery contact board into the pill. You dont have to do this right now, you can solder the diode leads in the steps ahead and then mount this board in the pill after you've soldered. In this case I'm going to do it now. This is the pill pictured below, you can see 2 slits on the edge of the bottom. That's not important, we'll get to that later.
Pushing the driver up through the pill from the bottom....
...and I've mounted the contact board inside the driver. Take notice on how deep the contact board has sunk into the pill, this is how deep it is supposed to sink in order to allow enough room for the batteries.
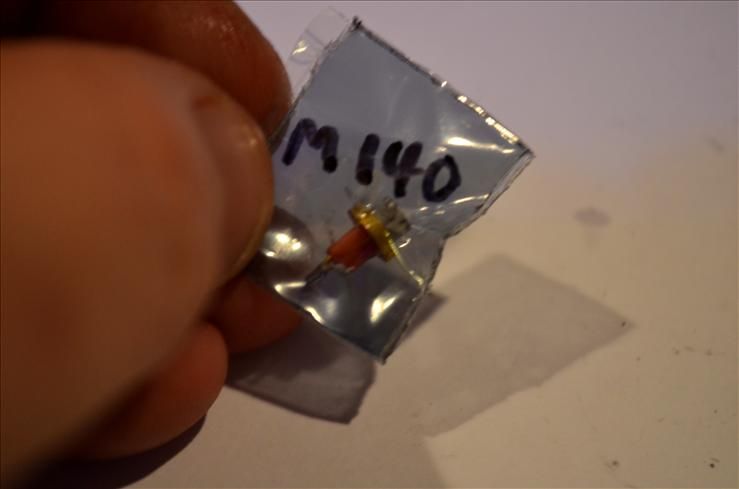
Now onto the diode. This does not come with the v2 kit but once you acquire your own you can follow this process on mounting and using it. I'll be using this 445nm M140 pictured below.
Before I press it into a module I need to remove the plastic pin protector and cut the pins down to less that 1/2 their original length.
The pin protector is off but these pins are too long, they will stick down too far into the pill & make contact with the driver. We can't have that so they need to be 1/2 their length.
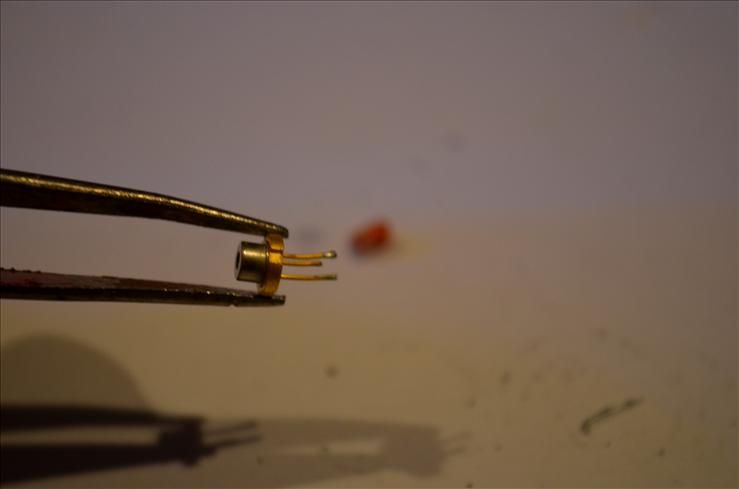
The shorter the better, I've cut these down to about 3.5mm.
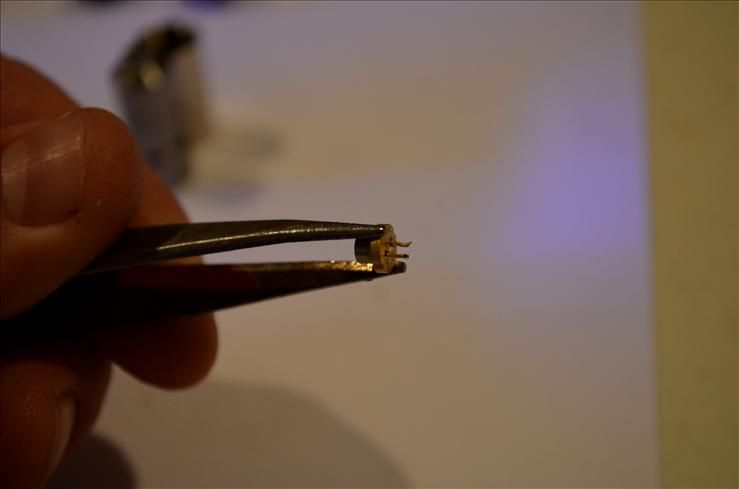
Now to the diode press kit & pressing this diode into the module.
I'm using a C clamp to do this.

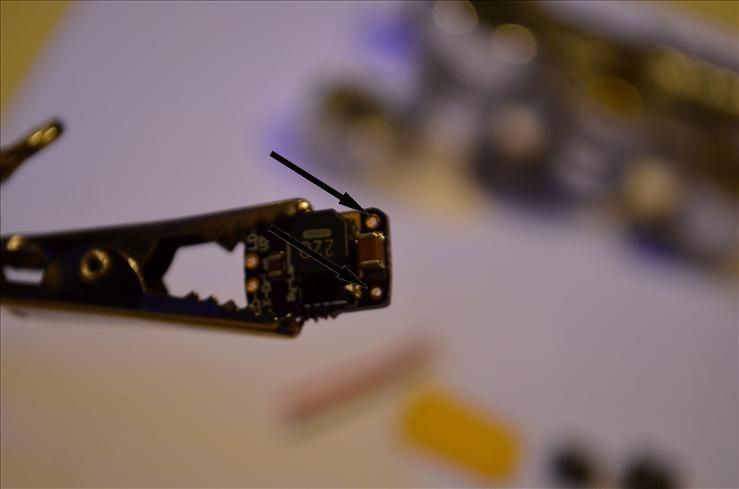
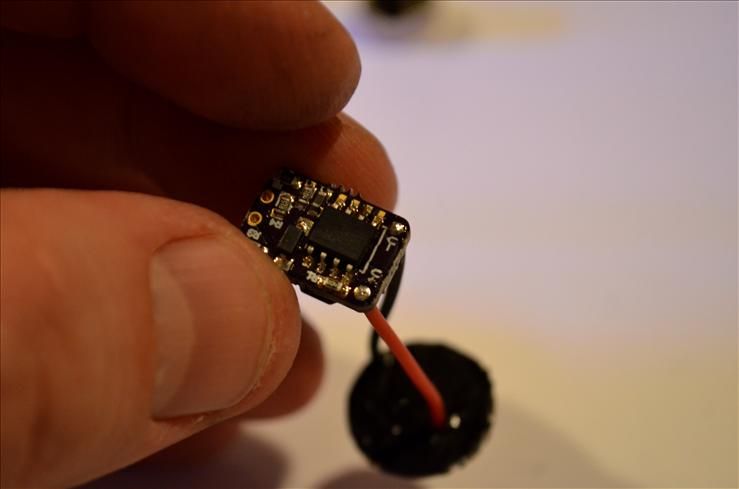
Here's the diode pressed just past flush in the module, now I'm ready for the wiring.
The wires I'm going to use to connect the diode to the driver are also short, just slightly shorter than the wiring between the battery contact board & the driver. These wires are 3/4" long, this length is ideal to leave enough room in the pill to fit.
Both leads soldered, I'm going to shrinktube the joints to protect them from making any contact with the driver inside the pill
Both leads shrinktubed.
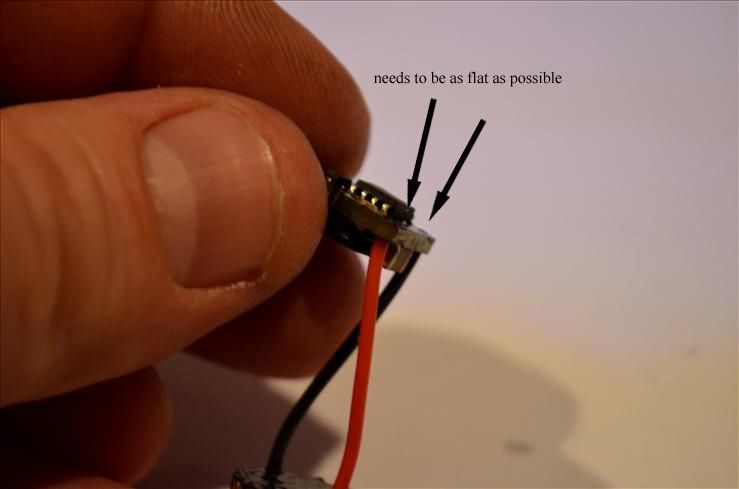
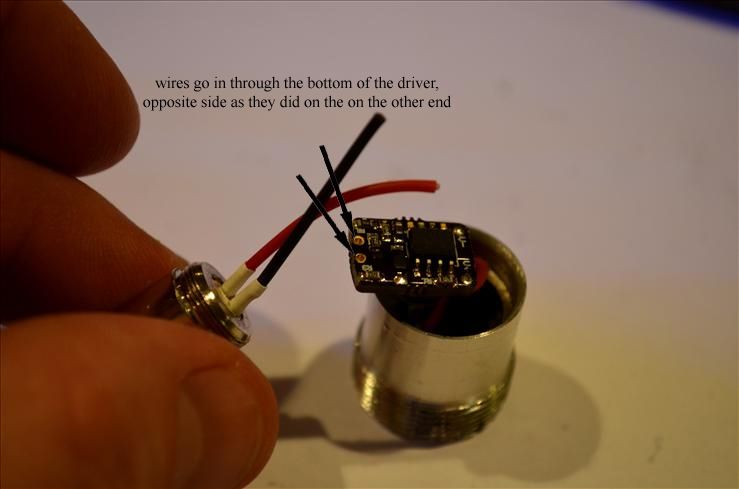
Now I'm going to solder these leads to the opposite side of the driver that the other leads were soldered. Doing it like this will allow the driver to correctly fit into the pill, it has taken me several attempts to figure this out so trust me when it comes to doing it this way. Once again I'll need to solder in the same manner as before without leaving any solder blobs or visible solder sticking above the surface of the driver.
Both leads soldered and no solder is sticking up above the hole on the driver.
Now the driver is ready to get stuffed in the pill. Here's where you will need those 2 thermal pads that came with everything else. Basically these are meant to go in between both sides of the driver and the inside of the pill and between the diode and the driver. They also act as extra heatsinking by passing heat from the driver to the head of the laser.
Also the driver is going to be pushed in with the leads from the diode going into the pill first. You'll need to work around the driver & the thermal pad a bit to eventually get them into place, but here is the correct way to get the driver in the pill.
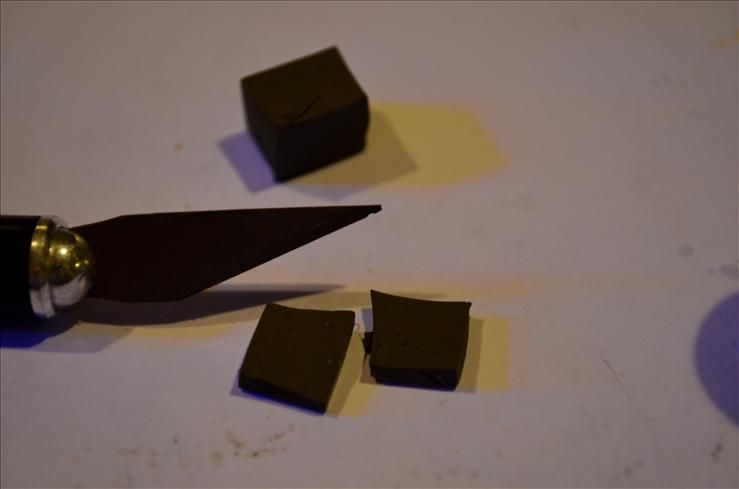
Before I push the driver in there, I've sliced one of the cubes into 2 thinner pieces & stuffed one of them inside the pill to keep the driver from touching the inside edges.
Stuffed inside the pill, this is what it should look like.
From this view you can see that this driver needs to go in as deep as possible, but also make sure not to use too much pressure otherwise you'll push the battery contact board out through the bottom of the pill.
Now I'm going to cut the other slice of thermal padding into yet 2 thinner halves of the padding.
I'm going to push this down in the open space between the driver & the inside of the pill to keep them from touching each other, but also over the chip on the driver to keep it from pressing on the diode pins. After holding it down for a few minutes I have it compressed and stuck in place like this.
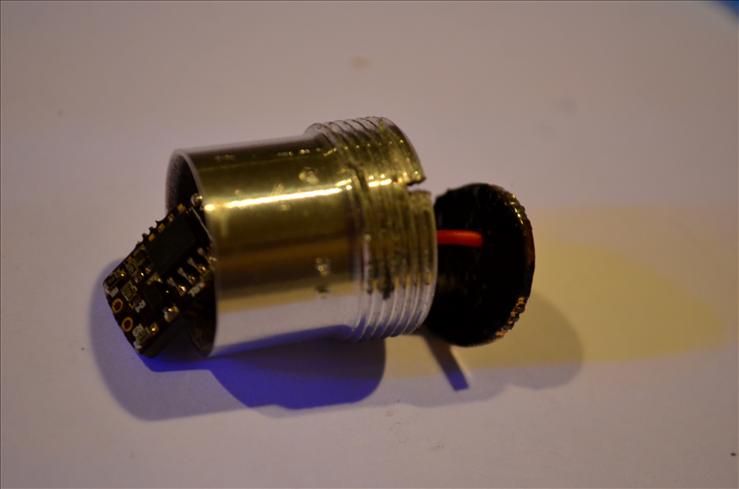
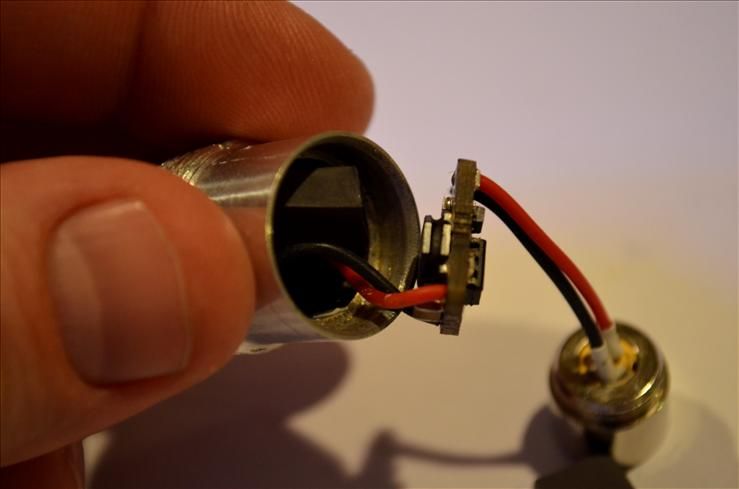
Now the module can go in the heatsink.
Make sure that the larger side of the heatsink in diameter is facing inwards towards the host, it's easy to put this sink on backwards where it doesn't fit.
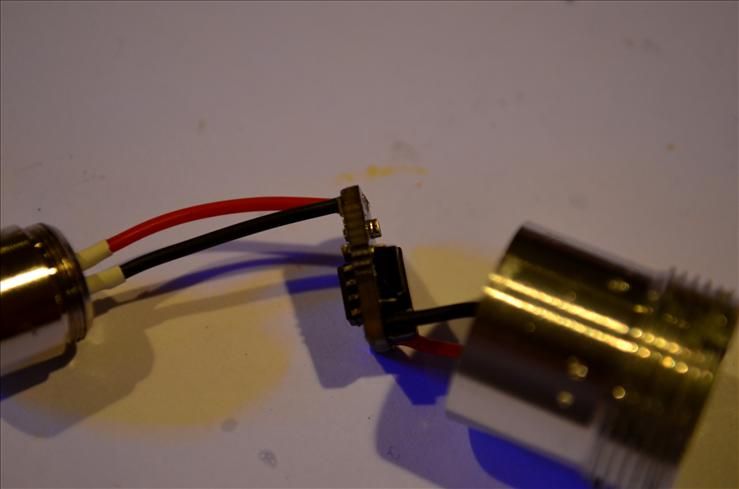
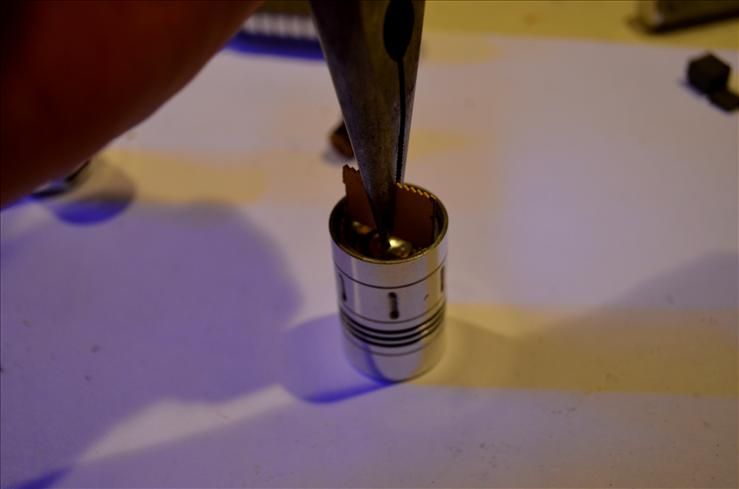
Once the heatsink is screwed down & the driver is still packed down on an angle in the pill with thermal padding between both sides of the driver - you can carefully twist down the short wiring from the diode into the pill and eventually press both parts together without crushing everything inside look like this.
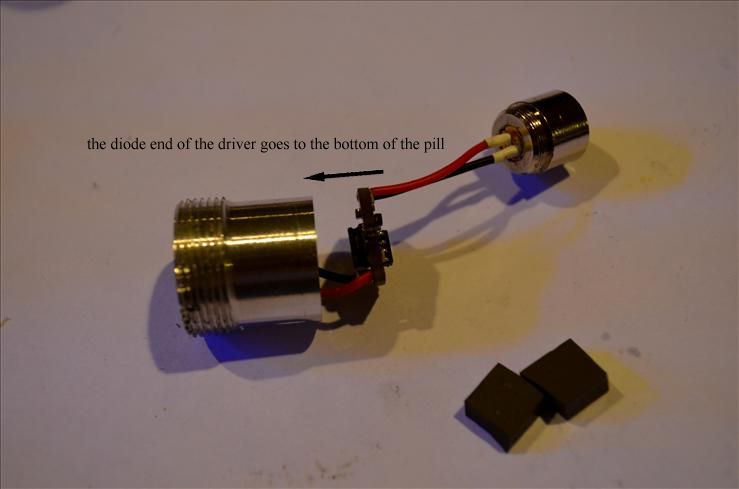
If that wasn't tricky enough, the next step is to screw both parts like this inside the head. You can either screw the pill on the host & try holding the heatsink down in place against the host while screwing the head over the pill without allowing the heatsink & pill to separate. This may take a few shots, it's not simple but eventually you'll get it - just be patient and careful!
Once you get the pill threading inside of the head you can press your finger against the contact board and start screwing it in. Make sure the heatsink is also turning with the pill, there's no tension on these parts yet but you dont have any excess wiring to allow twisting.
Once you get the pill and heatsink twisted deep enough into the head where you can't twist it anymore with your finger, you will need the twisting tool - which is the little yellow piece of hacksaw blade I've included.
This piece of metal has been cut to fit the 2 slits in the bottom of the pill.
Use your fingers or needlenose pliers to tighten the pill inside the head. Make sure can you also rotate the heatsink as much as possible in the same direction when doing this. If there's going to be any twisting on the inside wiring at all here's where it will be, keeping it at a minimum should be ok.
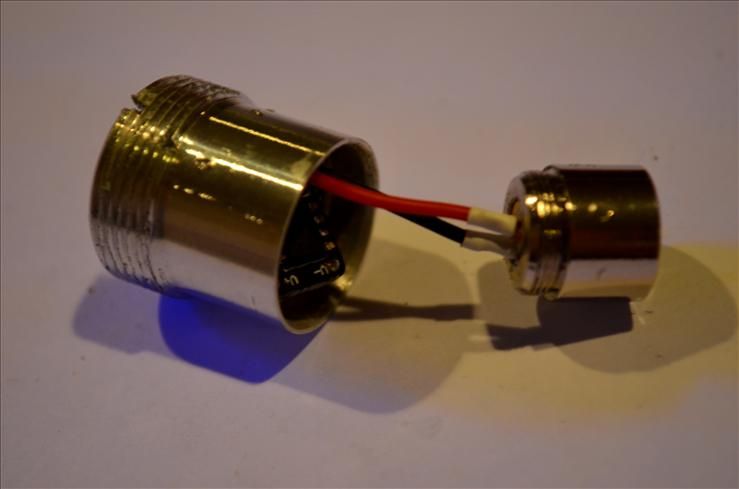
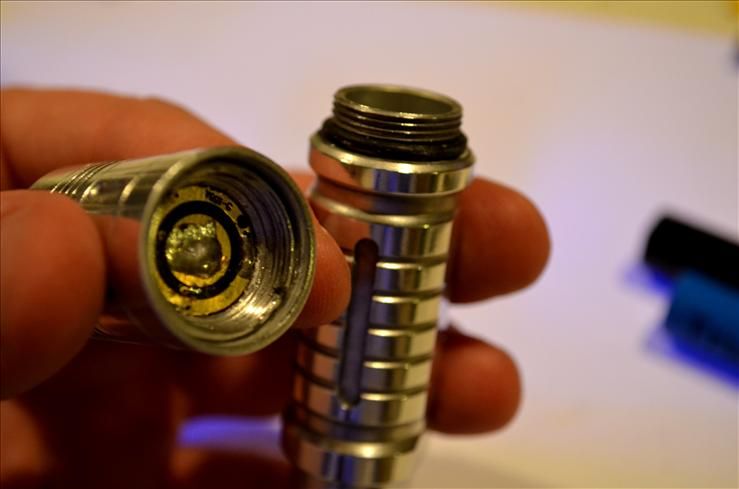
Now you're done, finally! The pill should be tightly pressed against the heatsink which pressed tightly against the top of the head. Time to screw this onto the body & throw a pair of 14500 batteries inside.
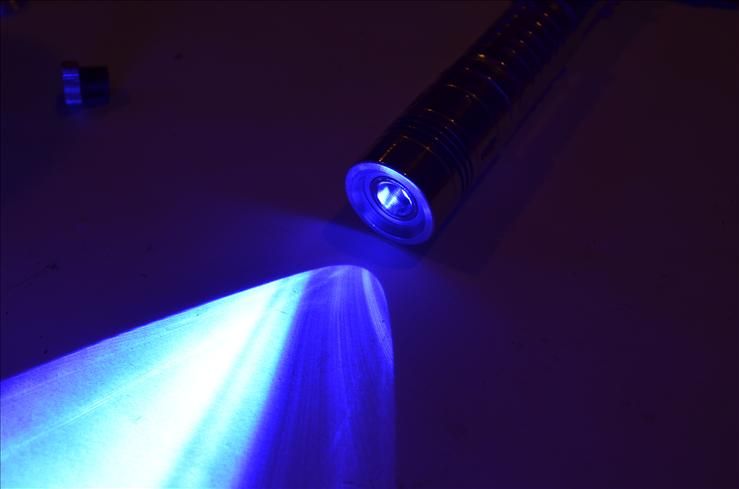
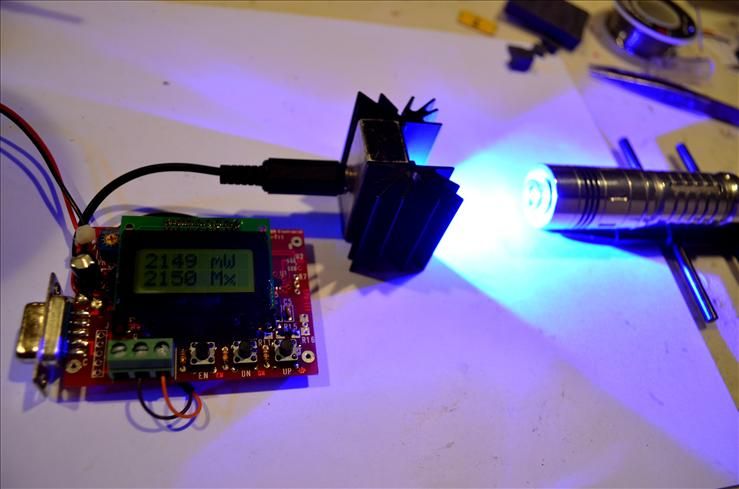
Firing it up for testing and its a success, now to add a focus lens and see what 2.1A on a M140 does using a 405-G lens on my LPM
2.1 watts, not the most efficient diode but this tutorial is about the assembly, not the diode used in this example")
And here it is all done, a 2.1W polished minisabre ready to go!
Thank you for reading and my apologies it was so damn long! Please feel free to contact me with any questions or if you need any help with one of your builds, you can comment on this thread or send me a private message. Also please let me know if I need to add anything or if I left something important out, I will continue to update this tutorial as needed. Good luck
:beer:
temporarily out of stock - check back later
* * *Minisabre v2 Host/Heatsink Kits for Sale* * *
Greetings folks! I am offering these minisabre v2 hosts for you to create your own builds. These hosts are
available with 3 different finishes: dark smoke(L), deanodized silver(C) or polished(R). I also have several
more of these than pictured below, this offer is not limited to just what you see
The dark smoke color is the original finish on the v2 pictured above on the left. It's not as dark as black &
has a dull, slightly bronze-grey reflective tint to it. Click here to see its color next to a black minisabre v1.
The silver finish on the v2 pictured below is the result of deanodizing and solvent brush cleaning the host.
This is the midway process when making a polished v2 but because it looks so different I decided to leave
it as an optional finish.
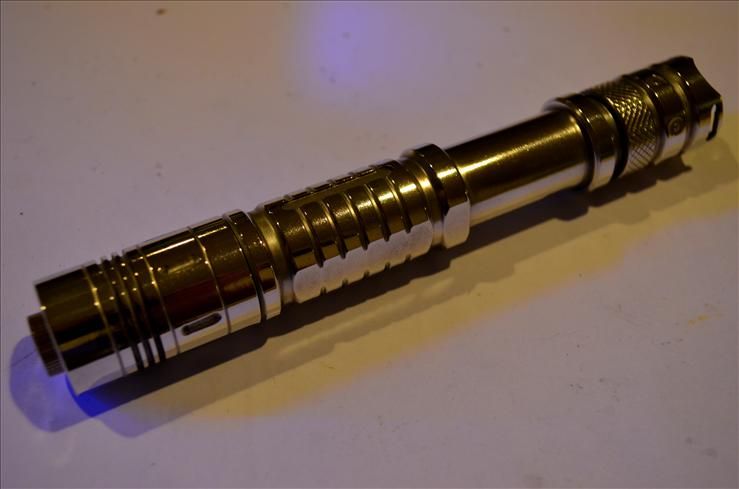
The polished finish shown below comes from extensively polishing a deanodized silver v2. This reflective,
shiny mirror-like finish is probably the most admired and asked for of the 3 options available.
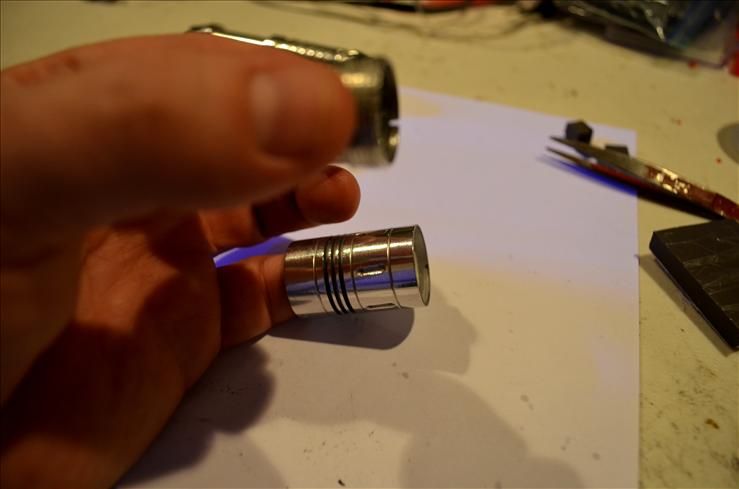
Here they are side by side.
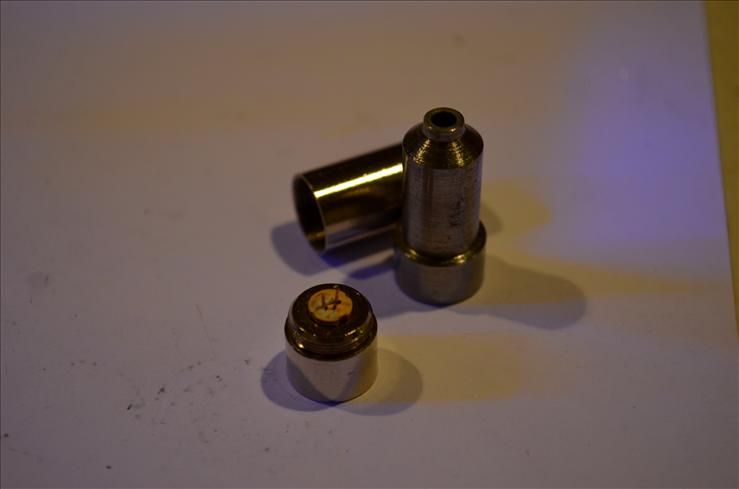
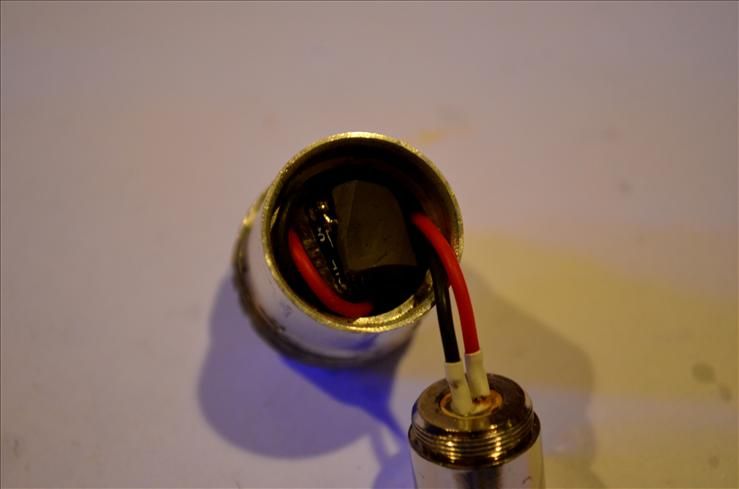
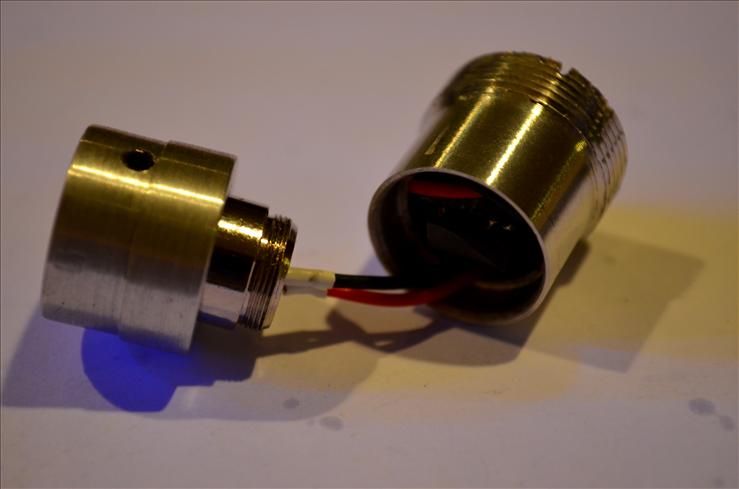
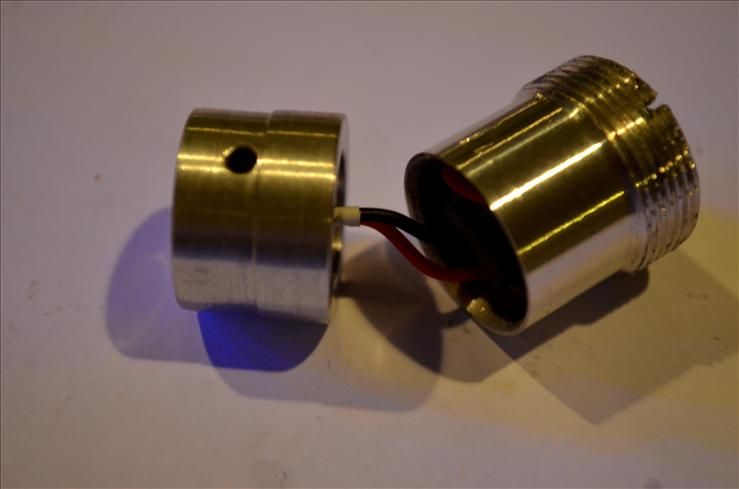
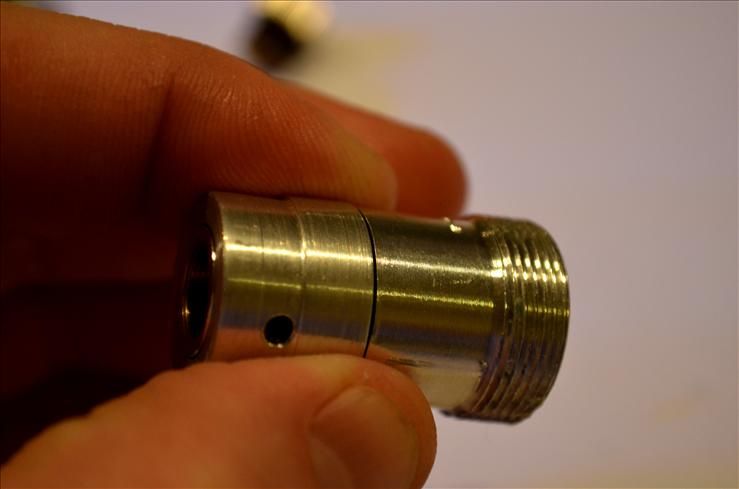
This polished v2 has been taken apart to show what's included. Pictured from left to right is the tailcap with
green or black on/off button, pill with pre-wired battery contact board installed, body, aluminum
heatsink and the head.
This unit uses 2 x 14500 (AA sized) batteries.
Pricing for this host and heatsink:
minisabre v2 'Dark Smoke' w/ heatsink - $40
minisabre v2 'Deanodized Silver' w/ heatsink - $45
minisabre v2 'Polished Chrome' w/ heatsink - $55
Shipping - $5 CONUS, $12 worldwide
*All hosts are also available without heatsink if you want to machine your own, just subtract $20 from the
prices listed above.
Please PM or comment below with any questions or to inquire about ordering. This thread is a work in
progress, thanks for checking!
* * * tutorial * * *
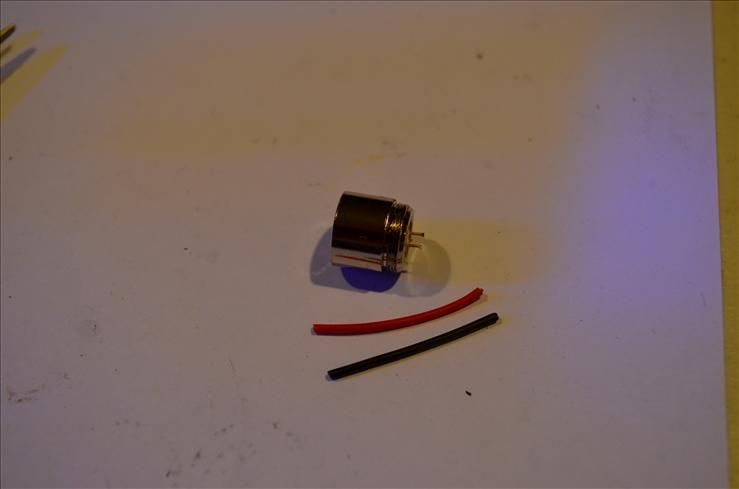
Here's what you will receive with this kit. The body of the host is lying on its side above the aluminum heatsink on the left, the bezel (head), aluminum pill and the tailcap on the right. Below those parts is the prewired battery contact board (with pryowire, only the best) + extra wiring and shrinktubing, pill mounting tool (yellow) and 2 thermally conductive heat transfer pads. You will need to provide your own diode and driver to complete this unit.
The tools I am using to build this include needlenose pliers, wire strippers, tweezers, solder/soldering iron & flux, 'helping hands' metal grips, a diode press kit and most importantly patience.
This build isn't a simple process to finish, it will require precision and fine detail to avoid any flaws or shorts within the circuit. The pill in this host is significantly smaller than an 18650 or 'average sized' host so detail is extremely important here in order to complete this correctly.
First we'll start off with the driver. I'm going to be using a 2.1A Lazereer X-drive for this process because it is one of the largest drivers that will fit into the pill of this v2 host. If you use a microboost driver or anything smaller than the X-drive kudos to you, that will be easier than using the driver I've chose.
The first thing I need to do with this X-drive is eliminate any teeth from the edges of the driver. To do this you simply need to grind them down with a file. Here's what they look like before being ground off.
Here is how the edge should look after grinding. The reason you're doing this is to gain those few extra millimeters of space that you'll need when mounting this driver in the pill.
Next I'm going to solder the leads from the battery contact board to the driver. These wires are about an inch long and they're this short for a reason. There is no space in the pill for any extra wiring so I'm using slightly more than the bare minimum to allow the wire to bend a little when it's all compressed inside the pill.
The soldering - this needs to be done without leaving any solder blobs on on the contact points of the driver. You'll only need to solder 4 wires but it's important to do this without leaving excess solder on the driver. Dont worry I will show you how to do this.
The X-drive I'm using is 1.62mm thick. I'm going to splice 1.6mm off the soldering end of each wire from the contact board, they should look about this long short!
I'm going to solder the Vin wires from the top side of the driver, this is to protect the cap between the wires from shorting inside the pill AND it's easier to solder the leads on the other side of the driver.
Im also going to tin and flux these tiny leads. I'll need all the solder I can get to suck into the hole of the driver when the wire is in there, otherwise the connection will be weak & will break under pressure.
Positive lead carefully soldered.
Both leads soldered now, from this angle it's easy to see I've completely filled the hole in the driver & covered the contact area with solder.
But from a side view you can see there is no solder blob or any solder that's dried above the surface of the driver. This is important to do when it comes to stuffing this driver in the pill, there cannot be any solder stuck above flush on the ends of these drivers.
This is what it looks like when you're done, both 1" leads connected from the battery contact board to the driver with no visible solder from a side view.
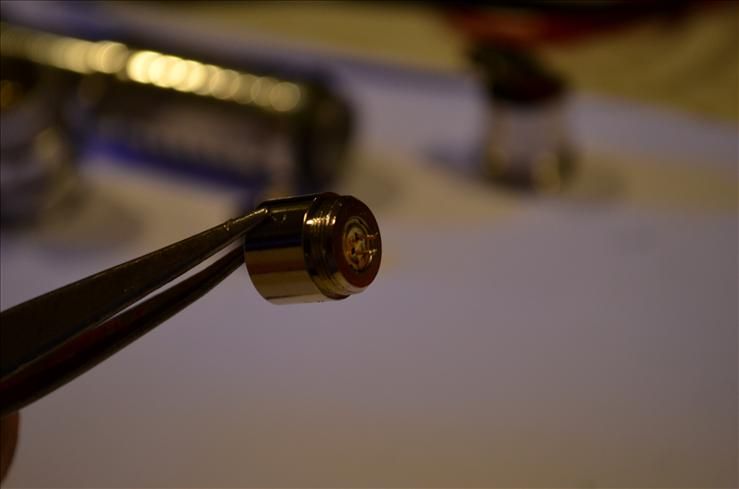
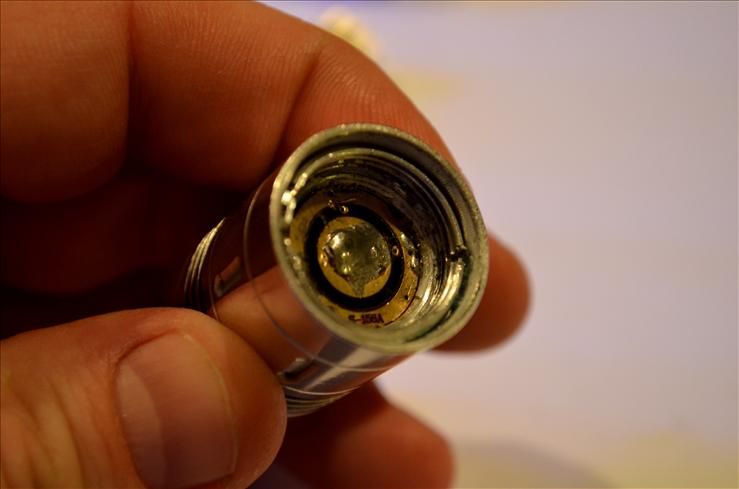
At this point I'm ready to press the battery contact board into the pill. You dont have to do this right now, you can solder the diode leads in the steps ahead and then mount this board in the pill after you've soldered. In this case I'm going to do it now. This is the pill pictured below, you can see 2 slits on the edge of the bottom. That's not important, we'll get to that later.
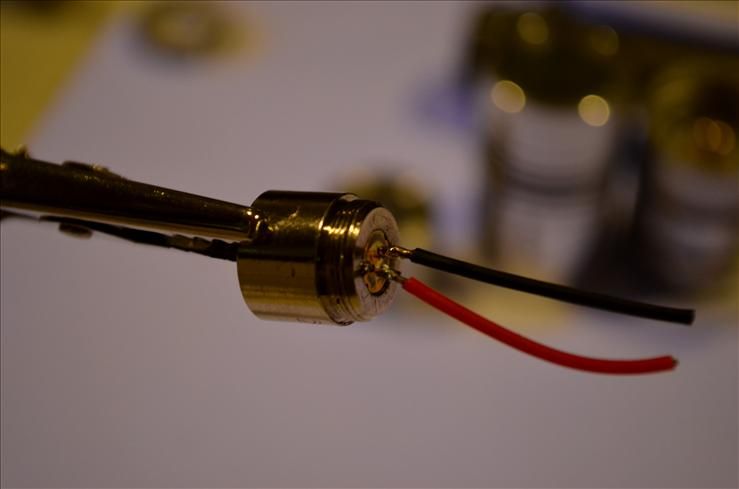
Pushing the driver up through the pill from the bottom....
...and I've mounted the contact board inside the driver. Take notice on how deep the contact board has sunk into the pill, this is how deep it is supposed to sink in order to allow enough room for the batteries.
Now onto the diode. This does not come with the v2 kit but once you acquire your own you can follow this process on mounting and using it. I'll be using this 445nm M140 pictured below.
Before I press it into a module I need to remove the plastic pin protector and cut the pins down to less that 1/2 their original length.
The pin protector is off but these pins are too long, they will stick down too far into the pill & make contact with the driver. We can't have that so they need to be 1/2 their length.
The shorter the better, I've cut these down to about 3.5mm.
Now to the diode press kit & pressing this diode into the module.
I'm using a C clamp to do this.
Here's the diode pressed just past flush in the module, now I'm ready for the wiring.
The wires I'm going to use to connect the diode to the driver are also short, just slightly shorter than the wiring between the battery contact board & the driver. These wires are 3/4" long, this length is ideal to leave enough room in the pill to fit.
Both leads soldered, I'm going to shrinktube the joints to protect them from making any contact with the driver inside the pill
Both leads shrinktubed.
Now I'm going to solder these leads to the opposite side of the driver that the other leads were soldered. Doing it like this will allow the driver to correctly fit into the pill, it has taken me several attempts to figure this out so trust me when it comes to doing it this way. Once again I'll need to solder in the same manner as before without leaving any solder blobs or visible solder sticking above the surface of the driver.
Both leads soldered and no solder is sticking up above the hole on the driver.
Now the driver is ready to get stuffed in the pill. Here's where you will need those 2 thermal pads that came with everything else. Basically these are meant to go in between both sides of the driver and the inside of the pill and between the diode and the driver. They also act as extra heatsinking by passing heat from the driver to the head of the laser.
Also the driver is going to be pushed in with the leads from the diode going into the pill first. You'll need to work around the driver & the thermal pad a bit to eventually get them into place, but here is the correct way to get the driver in the pill.
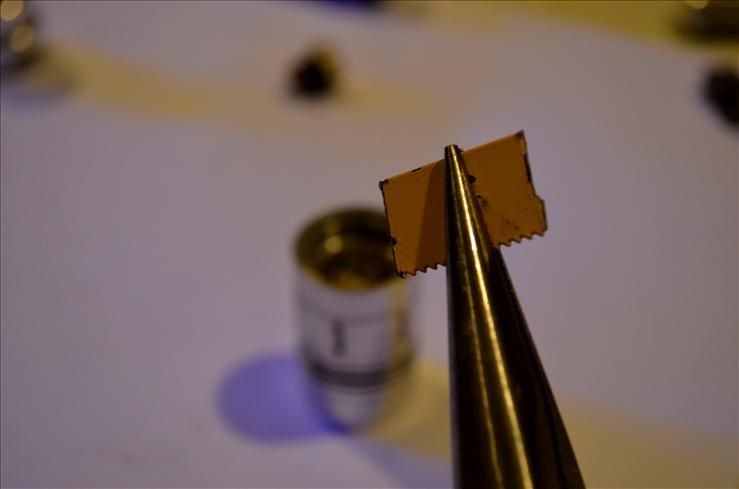
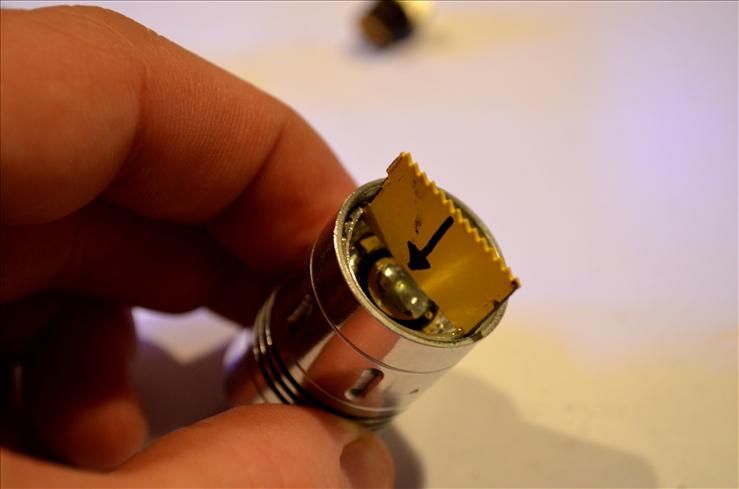
Before I push the driver in there, I've sliced one of the cubes into 2 thinner pieces & stuffed one of them inside the pill to keep the driver from touching the inside edges.
Stuffed inside the pill, this is what it should look like.
From this view you can see that this driver needs to go in as deep as possible, but also make sure not to use too much pressure otherwise you'll push the battery contact board out through the bottom of the pill.
Now I'm going to cut the other slice of thermal padding into yet 2 thinner halves of the padding.
I'm going to push this down in the open space between the driver & the inside of the pill to keep them from touching each other, but also over the chip on the driver to keep it from pressing on the diode pins. After holding it down for a few minutes I have it compressed and stuck in place like this.
Now the module can go in the heatsink.
Make sure that the larger side of the heatsink in diameter is facing inwards towards the host, it's easy to put this sink on backwards where it doesn't fit.
Once the heatsink is screwed down & the driver is still packed down on an angle in the pill with thermal padding between both sides of the driver - you can carefully twist down the short wiring from the diode into the pill and eventually press both parts together without crushing everything inside look like this.
If that wasn't tricky enough, the next step is to screw both parts like this inside the head. You can either screw the pill on the host & try holding the heatsink down in place against the host while screwing the head over the pill without allowing the heatsink & pill to separate. This may take a few shots, it's not simple but eventually you'll get it - just be patient and careful!
Once you get the pill threading inside of the head you can press your finger against the contact board and start screwing it in. Make sure the heatsink is also turning with the pill, there's no tension on these parts yet but you dont have any excess wiring to allow twisting.
Once you get the pill and heatsink twisted deep enough into the head where you can't twist it anymore with your finger, you will need the twisting tool - which is the little yellow piece of hacksaw blade I've included.
This piece of metal has been cut to fit the 2 slits in the bottom of the pill.
Use your fingers or needlenose pliers to tighten the pill inside the head. Make sure can you also rotate the heatsink as much as possible in the same direction when doing this. If there's going to be any twisting on the inside wiring at all here's where it will be, keeping it at a minimum should be ok.
Now you're done, finally! The pill should be tightly pressed against the heatsink which pressed tightly against the top of the head. Time to screw this onto the body & throw a pair of 14500 batteries inside.
Firing it up for testing and its a success, now to add a focus lens and see what 2.1A on a M140 does using a 405-G lens on my LPM
2.1 watts, not the most efficient diode but this tutorial is about the assembly, not the diode used in this example
And here it is all done, a 2.1W polished minisabre ready to go!
Thank you for reading and my apologies it was so damn long! Please feel free to contact me with any questions or if you need any help with one of your builds, you can comment on this thread or send me a private message. Also please let me know if I need to add anything or if I left something important out, I will continue to update this tutorial as needed. Good luck
:beer:
Last edited:


")
